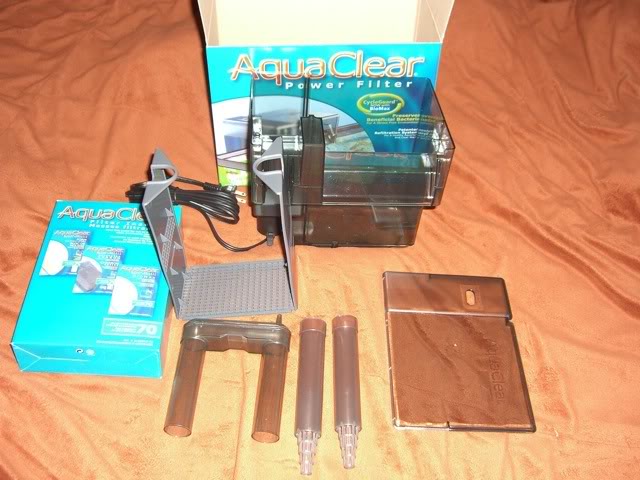
So far we've established the importance of stability in a pico tank be it temperature, salinity or overall water quality. Adding a large sump to a pico can be bulky and impractical so most pico owners use an AquaClear filter to use as a fuge instead. AquaClear filters are commonly used due to their large capacity and simple design, which makes modifying them fairly easy.
The two most popular models for this mod are the AquaClear 50 and 70, the latter being the largest model that can be used for picos in the 2.5 to 4-gallon range. While the basic plan is the same for all, some minor tweaks can be done to adjust the layout and reduce the flow depending on your preference and needs. In this tutorial we'll use an AC70 filter although the same process can be done to any of the other AquaClear models. This guide will also attempt to be as resourceful and efficient as possible by utilizing all the parts that come with the filter.
1. Inspect the package and make sure that all items are present and check for any cracks or damages.
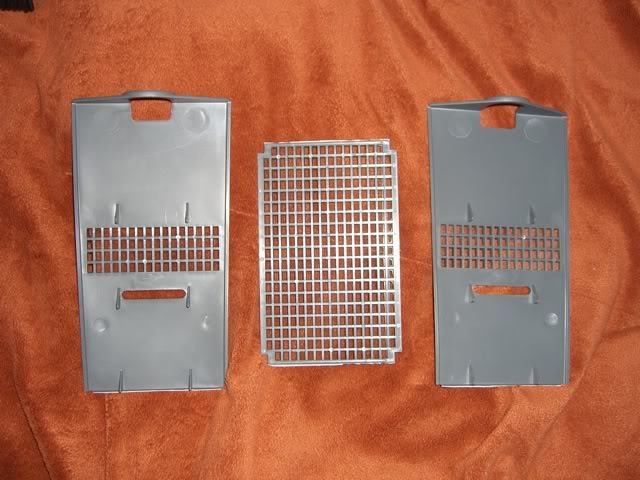
2. Cut the media basket into three pieces. The media basket is designed to hold the filer media and has three distinct parts. You will need scissors to cut them into three different pieces at the seams.
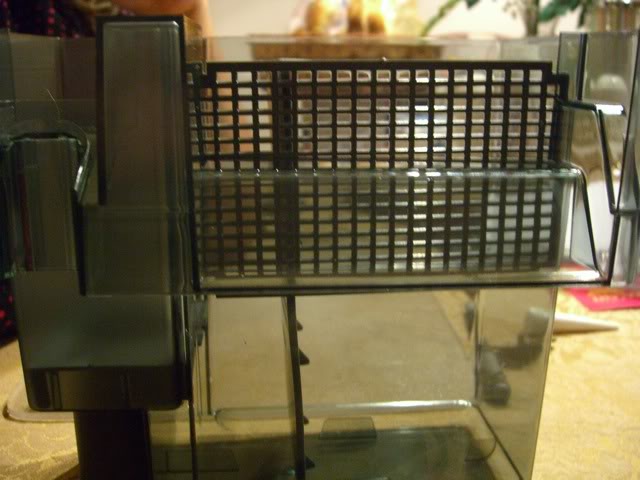
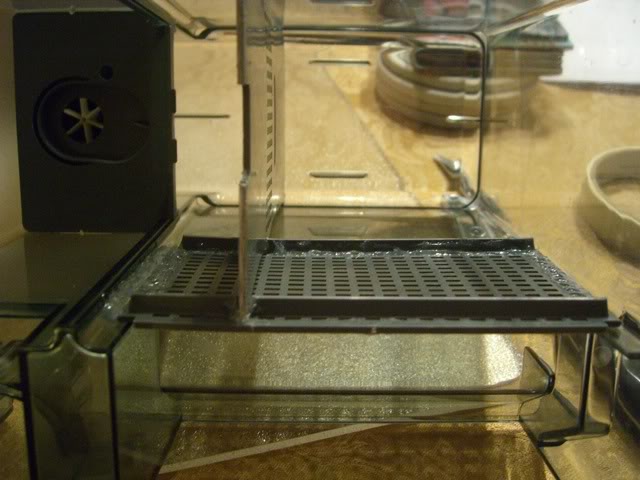
3. Take the bottom part of the media basket and place it over the overflow to assess placement. The bottom part of the media basket will serve as an overflow screen and will help contain everything in the filter. Decide how much room you want for the refugium but leave enough room for other materials and equipment.
4. Cut a notch on the bottom ridge of the screen using an X-Acto knife.
Repeat on the opposite side and make sure the two notches are parallel.
These notches will help support the divider perpendicularly.
5. Put in the overflow screen and the divider to see how they fit.
Assess how high you want the screen to rise above the overflow. Keep in mind that if you set it too low, chaeto and other materials will be able to spill over the display tank so it's best to keep it fairly high but not too high that it impedes the flow.
6. Insert the divider so that it is perpendicular to the overflow screen by sliding it through the notches. You should be able to put these two pieces in without glue.
If you notice a lot of bowing on the backside of the filter then the notches aren't big enough and you will need to adjust them. Observe the setup from all angles before gluing everything down and make sure you're happy with the size of the chambers.
7. Apply aquarium sealant on the sides and the bottom portion of the front part of the overflow screen. Position and press firmly into place.
8. Once the overflow screen is in place, add more sealant on the sides and the bottom portion to seal the piece in.
Use a toothpick to push the sealant into the grid work.
Give the piece some time to dry.
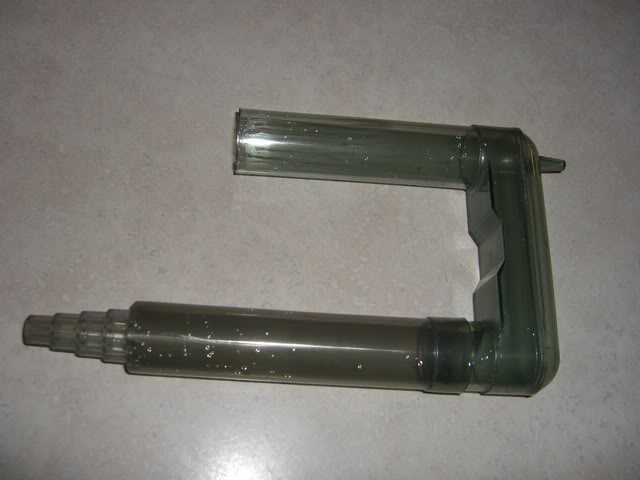
9. In the meantime you can modify the intake tube. The intake tube is way too long for most pico setups so you will need to trim down the part of the "U" tube that goes in the tank. Use masking tape and tape off about an inch to an inch and half area from the top corner of the tube. Use a serrated knife or a small saw to trim off the piece following the edge of the tape.
BE SURE NOT TO TRIM THE PART THAT GOES INSIDE THE FILTER!
10. Take off the tape and rinse everything off. Snap the intake tube into the modified "U" tube.
11. Make additional adjustments including optional steps that help reduce the flow of the filter. A quick and simple one is to cut off the tab on the impeller cover. This will allow the intake tube to turn all the way to the right to decrease the flow even more.
Another common technique to decrease the flow is to clip the impeller blades or to use an impeller from a smaller model. While certainly effective, this requires the additional purchase of an impeller.
12. Take the divider piece and cut off the top. Slide the piece through the notches on the overflow screen with the smooth surface facing the fuge chamber. This will help prevent chaeto from getting tangled and snagging into the tabs.
13. Glue the joints with aquarium sealant. Make sure the overflow screen is completely dry before doing this step.
14. Do a water test once the sealant is completely dry. Check for leaks and make sure everything runs smoothly.
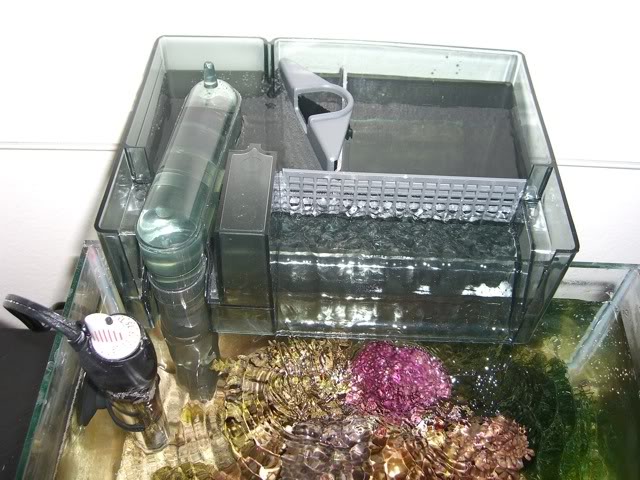
You have the option of using the second divider depending on what you plan to put into your chambers. It can be placed diagonally with a spot to hold the heater creating a sub-compartment for filter floss or whatever mechanical filter media you want to use.
You can place the chemical filter right along the intake tube or in the first chamber. It all depends on your personal preference and how much room you have to work with.
15. Install lighting. You will need to provide the fuge with lighting for chaeto to grow. If you're starting with a pico kit, the stock light that comes with the kit will make an excellent light for the fuge or you can use any small PC lamp. Position the fixture carefully so that the light doesn't bleed into the display tank. Maintaining the fuge on a reverse photoperiod helps prevent pH swings and keeps the light from competing with the display tank during the day.
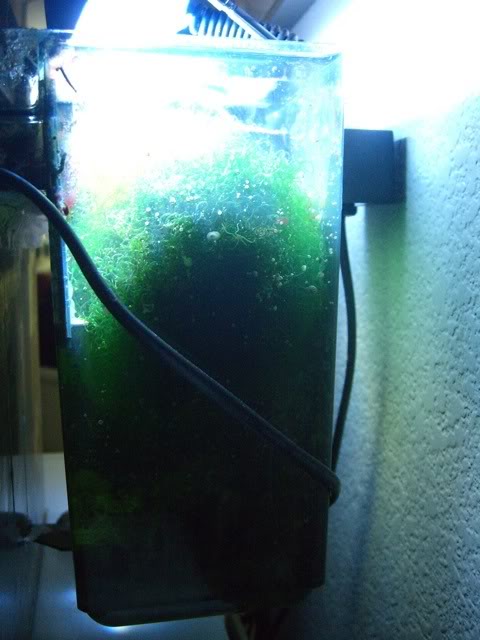
One of the first things people notice is the increased flow the fuge adds to their setup; so much so that it's one of the most common complaints people have. Keep in mind that over time the flow will decrease as it becomes bogged down with organic materials and debris so it's important to keep it clean on a regular basis.
As the fuge matures it literally becomes a fully functioning refugium harboring a variety of microfauna of its own. Pods, worms, lost corals and other filter feeders can be found in the fuge over time. Various types of algae begin to grow especially on the overflow screen and can work like a mini algae turf scrubber by absorbing nutrients and providing food to the tank.
")