10g Paludarium build

The friendliest place on the web for anyone with an interest in aquariums or fish keeping!
If you have answers, please help by responding to the unanswered posts.

Morgie

Aquarium Advice FINatic
Joined
Feb 22, 2011
Messages
781
Location
North Carolina
I'm going to try my hand at a paludarium. Starting with a 10g to get my feet wet (I also had a spare 10g haha)
It's going to eventually house a pair of firebelly toads, shrimp, snails, and possibly some fish depending on how the frogs react to them.
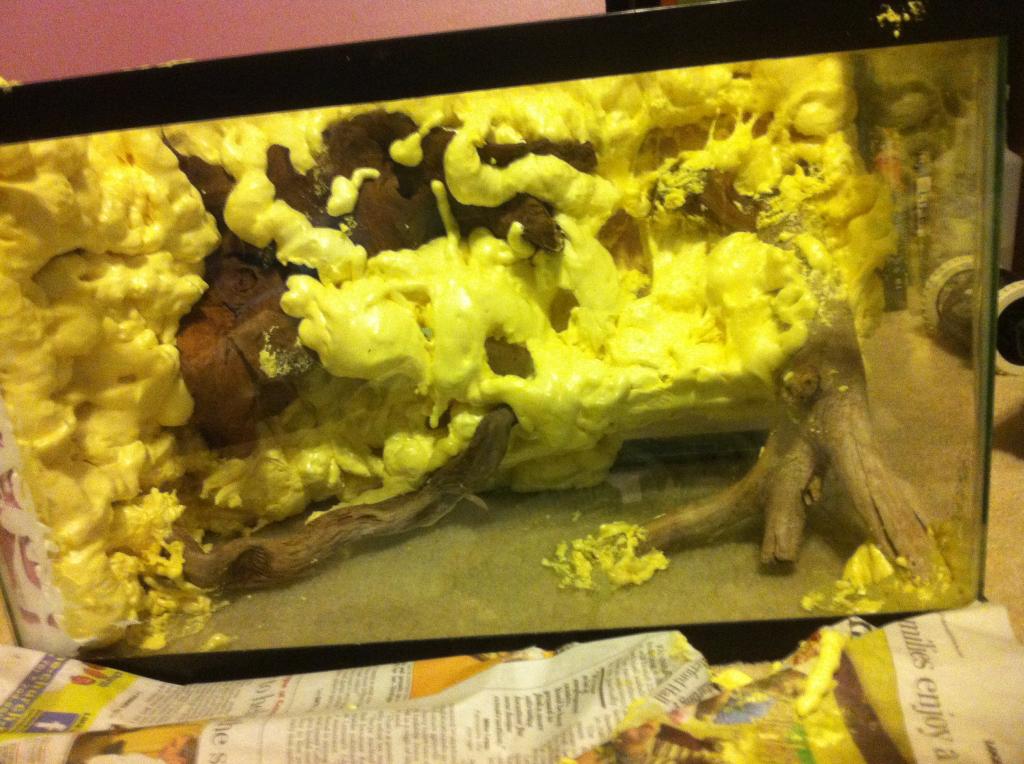
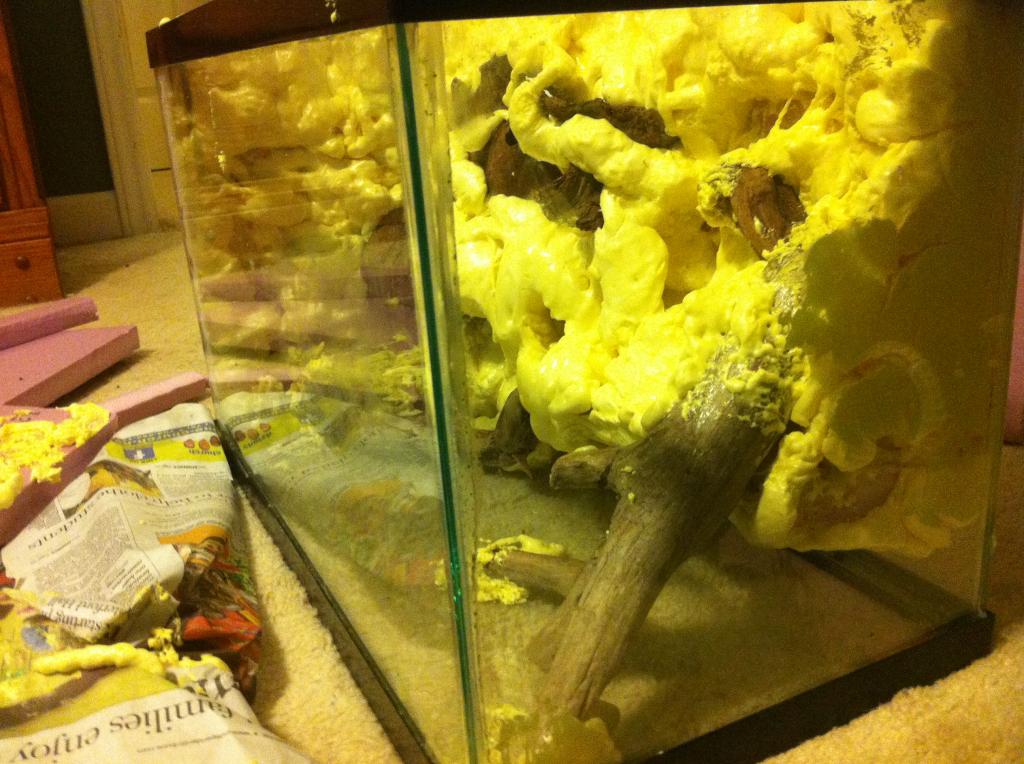
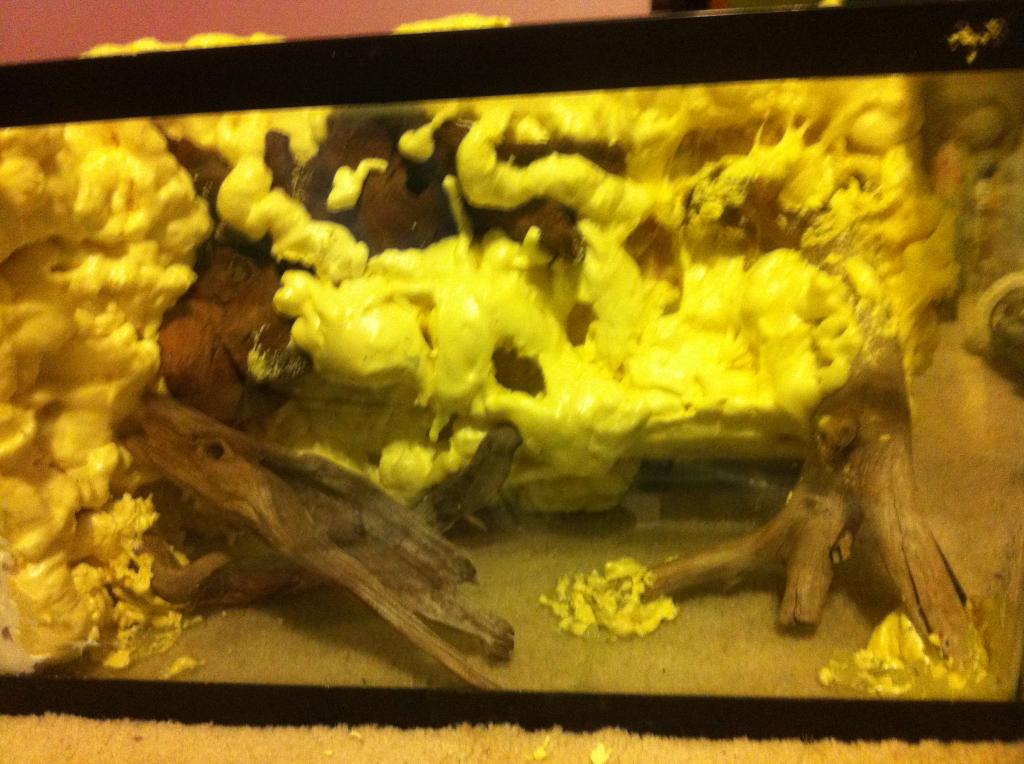
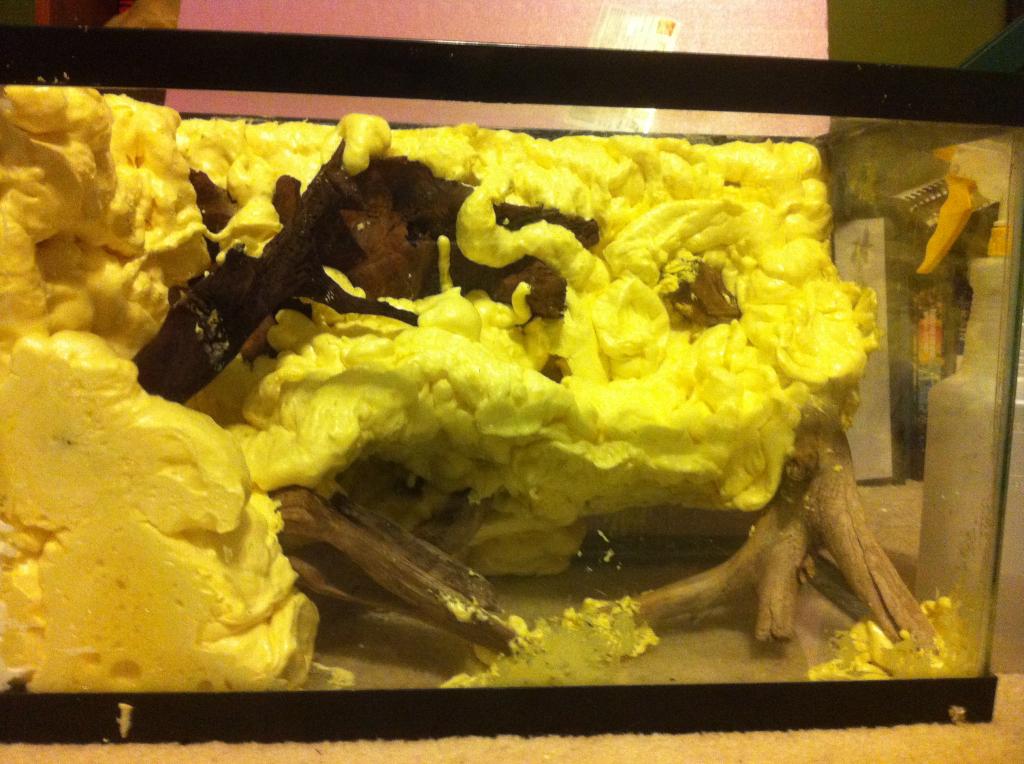
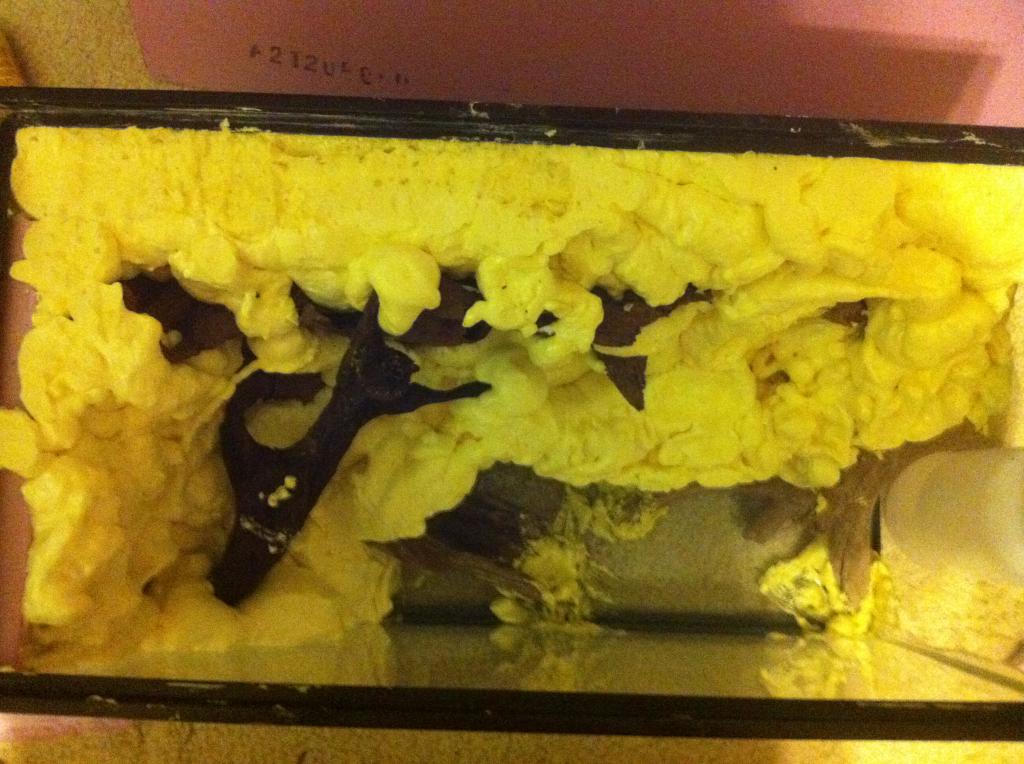
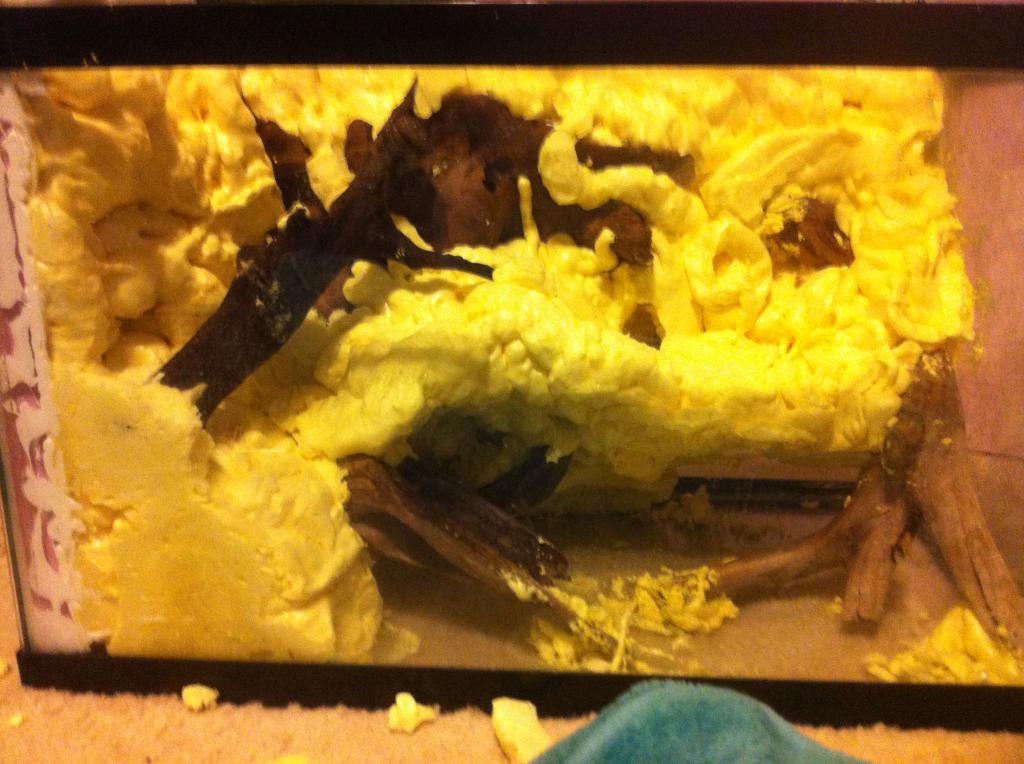
So far I've got my basic styro siliconed to the walls I'll be covering. I also have all the driftwood I'll be using. Today I will be foaming and carving with Great Stuff expanding foam. I still need to get some concrete mix to waterproof it. I'll be adding cocofiber, sphagum moss, and "tropical soil" to stick to the final layer of concrete.
Here are some pics of the progress so far:
img_2232415_0_bd10193a78cd839f9213aef20e066d73.jpg

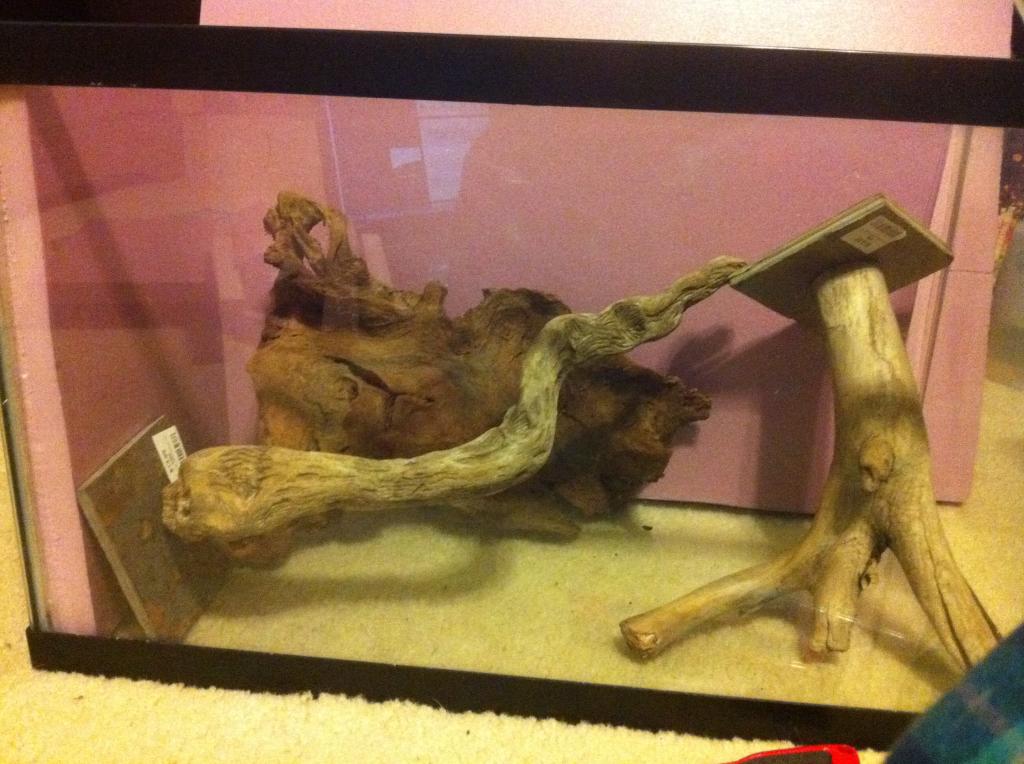
Basic placement of the drift wood. The big piece in the back is going to be attached to the top level of the styro
\
img_2232415_1_b44a88eec994a1d315c90ed0d74447ac.jpg

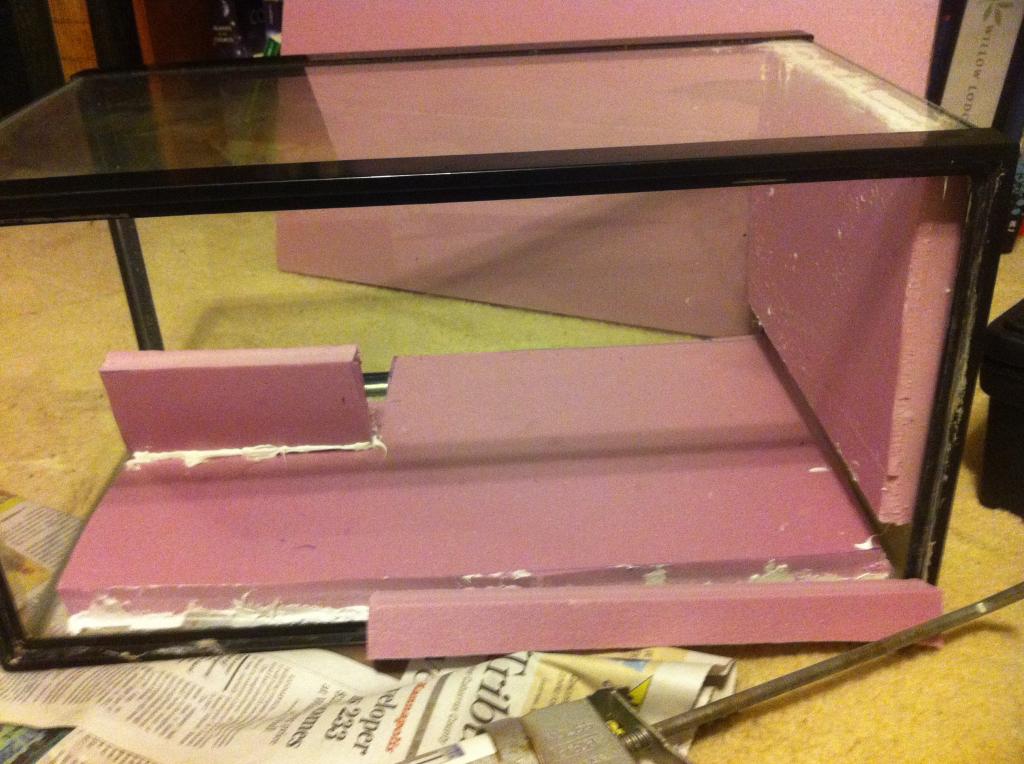
And here it is after silicone. I cut out the hole for the filter and added a base for the land feature. The rest of the land is going to be made of great stuff.
Hopefully today I'll be able to do the foaming and attach the driftwood, if not my next update will be Wednesday! :rolleyes:

If anyone has some good vivarium plants that won't outgrow my tank too quickly I'd love to here it! There's a reptile show coming up in January so I'll be able to get good plants there from the dart frog dealers. I need to know what to look for, though!
 
Got my first layer of foam down and I'm pretty pleased with the results seeing as it was the first time I've worked with great stuff. When I get off work tomorrow I'm going to go in and carve more details and cut off some of the foam that got into the spot for the filter.
I'm going to go out and get another can of great stuff and hopefully some quickcrete
Anyway~ pictures.
img_2232692_0_b54cc7f8488c29dabbc697652f940109.jpg


img_2232692_1_859d4b471e84010a6cdf8ef0deb47ebb.jpg


side view

img_2232692_2_425967f14b931f7de6f2a89864775244.jpg


And a /really/ quality pic of another piece of driftwood I found. Do you guys think that looks good? I think it will be a nice ramp up to the land feature, which will be built later today.
 
Thanks! This is definitely going to be a "trial and error" project. Hopefully I'll learn something from it and be able to make bigger and better palus eventually!
 
Cool,
Mumma.of.two had me hook, line and sinker with her build. Luv the way it turned out by the way mumma!!!
I'm taggin along with this one as well. Looks good so far. I was seriously considering building one with a 40g breeder for my garter snake and newts.....
 
Pretty cool. IMO, since it's only a 10 gallon and you may not have much water room. I'd leave out the fish.Weather the toads accept them or not. But if you decide to upgrade in the future, fish could work out.
 
Just watched a video the other day, the guy heated up screwdrivers on the stove to carve the foam. Just a lil note incase that helps. Good luck with this, I'll be following! :)
 
Thanks! I'll have to check Mumma's out, I haven't seen it yet!
Last updates for today. I finished foaming and added two more pieces of wood. The land feature is looking nice and solid. Tomorrow after the foam's cured I'm going to add details and smooth out the "ramp" area.
More updates tomorrow! ;)
img_2233151_0_65ba645afd7f65e39cdf8e48298bef90.jpg


img_2233151_1_01b5296ccb5a68f8eb8fa0c4befbe181.jpg
\\
And a top view so you can see the dimension a bit better.
Also PRO TIP: don't get great stuff on your skin. It burns like crazy and you basically have to peel a layer of skin off to remove it. :nono:
 
Pretty cool. IMO, since it's only a 10 gallon and you may not have much water room. I'd leave out the fish.Weather the toads accept them or not. But if you decide to upgrade in the future, fish could work out.

It's going to be at least four gallons, and there are a lot of fish that can live in that if the toads don't eat them. I'll throw a few feeder guppies and see what happens - but that's going to be pretty far in the future.
 
Just watched a video the other day, the guy heated up screwdrivers on the stove to carve the foam. Just a lil note incase that helps. Good luck with this, I'll be following! :)

I might try that out to see how it works!
I used a razor blade to level off the top of the foam and it was relatively easy to carve.
 
Also PRO TIP: don't get great stuff on your skin. It burns like crazy and you basically have to peel a layer of skin off to remove it. :nono:

Gasoline or Acetate will take most of it off as well, if you get it quickly before it completely dries. Of course, they can also burn or dry the skin. Personally I always try and wear latex gloves when I use the stuff, it just makes life easier.

I might try that out to see how it works!
I used a razor blade to level off the top of the foam and it was relatively easy to carve.

Some people us a soldering iron with the tip replaced with a longer wire. You also might want to try a longer utility knife rather than the razor blade, it will give you more depth.
 
Gasoline or Acetate will take most of it off as well, if you get it quickly before it completely dries. Of course, they can also burn or dry the skin. Personally I always try and wear latex gloves when I use the stuff, it just makes life easier.

Some people us a soldering iron with the tip replaced with a longer wire. You also might want to try a longer utility knife rather than the razor blade, it will give you more depth.

I have a soldering iron, I'll try it out if I can't work well with my razors, box cutters, and exacto knives. I wore latex gloves but apparently I'm a total spazz and I got some on my wrists and upper arm. I've gotten most of it off with some denatured alcohol, but some of it is such a thin layer I'm probably going to have to wait for it to come off on it's own. :rolleyes:
 
Woo late night posting~
I carved the foam a lot tonight. An exacto knife along with a razor and pliers worked fairly well. You probably can't tell but I took quite a lot out. Smoothed out the land, cut out a channel to run wires, and defined some of the more interesting shapes the foam had produced. I also pulled some of the foam off of the driftwood and cut a few holes to place anubias so the rhyzome is in the water but the leaves are on the land section.
If I were to do this again, I would skip adding the styro base and just do great stuff.
img_2234808_0_77346b7319818ac059332d6e4a16d332.jpg


Tomorrow I will apply the first few layers of quikrete.
Nearly forgot- I calculated the volume of water and it will be ~3.7 gallons
 
Looks like you are making progress. Couple things to keep in mind. One, your GS is not going to be water proof, so it will provide a place for stagnant accumulation of water. Two, If you do eliminate the styro, from what I've seen/read you need to provide something for the foam to adhere to. Most people use a base of silicon.

Are You planning to use different shades of grout on top of the quickcrete? Do you plan to seal the quickcrete or are you going to allow the tank to run for awhile without inhabitants in order to let it cure?
 
Looks like you are making progress. Couple things to keep in mind. One, your GS is not going to be water proof, so it will provide a place for stagnant accumulation of water. Two, If you do eliminate the styro, from what I've seen/read you need to provide something for the foam to adhere to. Most people use a base of silicon.

Yes. I've seen silicone used before in vivariums, etc. The reason I used the styro was to use it as a base for the drift wood. The only problem I have with it is that its an inch thick. I really want half inch styro, but it was all the store had and I was impatient. Now I know for next time!

Are You planning to use different shades of grout on top of the quickcrete? Do you plan to seal the quickcrete or are you going to allow the tank to run for awhile without inhabitants in order to let it cure?
I have some cement pigments, but I'm actually going to be pressing a mix of sphagnum moss, "forest moss" and "tropical soil" into the final layer. I've followed several threads were people have done this successfully in a palu so I'm hoping it will work and look more natural. It will also be great for humidity and attaching mosses to the walls. And I'm planning on filling it up with saltwater, throwing in a powerhead, and letting it run until the pH stabilizes.
 
Yes. I've seen silicone used before in vivariums, etc. The reason I used the styro was to use it as a base for the drift wood. The only problem I have with it is that its an inch thick. I really want half inch styro, but it was all the store had and I was impatient. Now I know for next time!

I have some cement pigments, but I'm actually going to be pressing a mix of sphagnum moss, "forest moss" and "tropical soil" into the final layer. I've followed several threads were people have done this successfully in a palu so I'm hoping it will work and look more natural. It will also be great for humidity and attaching mosses to the walls. And I'm planning on filling it up with saltwater, throwing in a powerhead, and letting it run until the pH stabilizes.

Right on - life is a learning experience. Have you considered the titebond method rather than the cement?
 
I've never heard of titebond, if you could explain it or link me to a website I'd appreciate it!
I'm going to use cement on this one, but I could always use new methods for future tanks.
 
Back
Top Bottom