Tank build - newbie again... need thoughts

The friendliest place on the web for anyone with an interest in aquariums or fish keeping!
If you have answers, please help by responding to the unanswered posts.
Thanks Aquarium1.
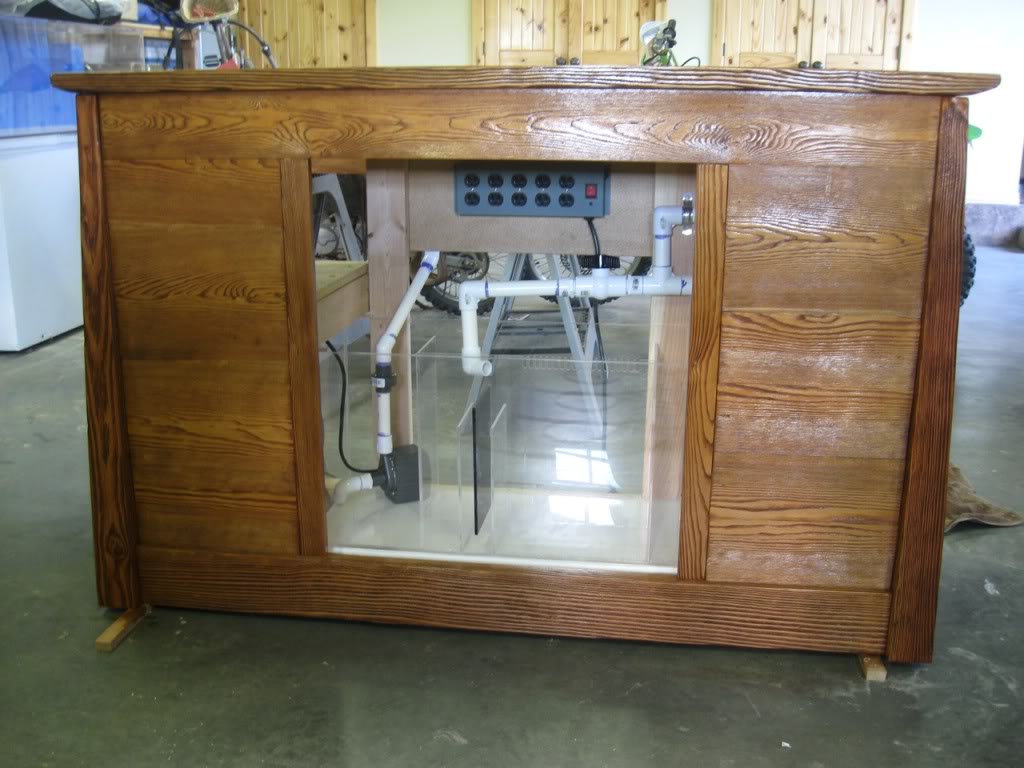
Jimbo, yes everything will go through a GFI.

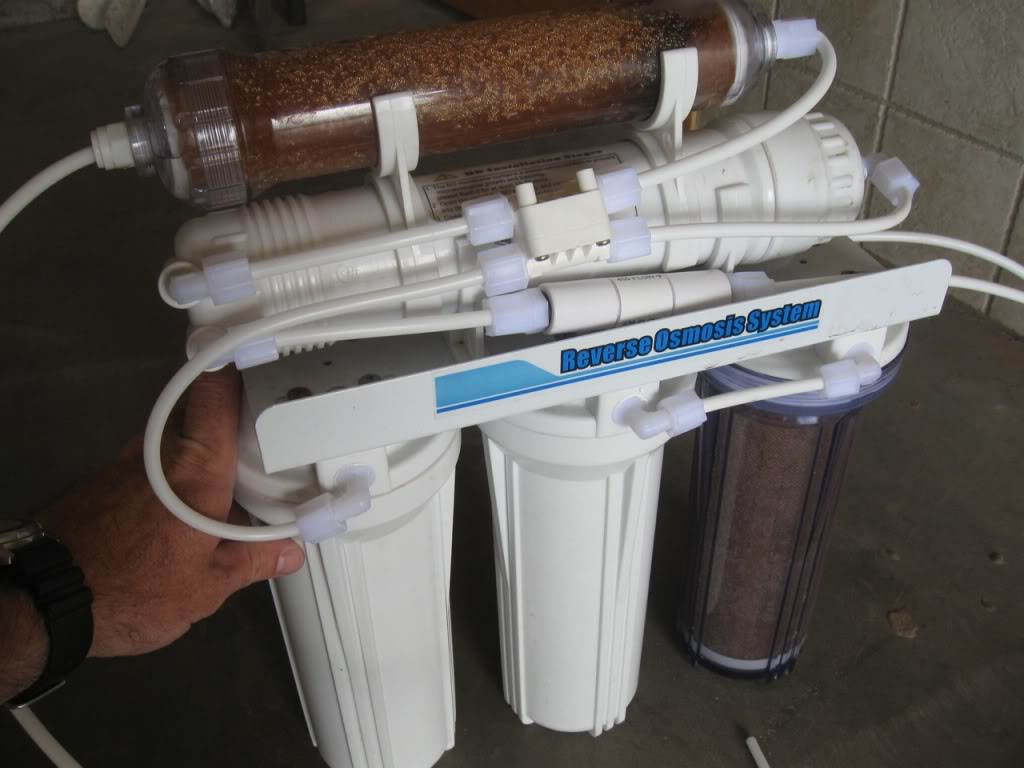
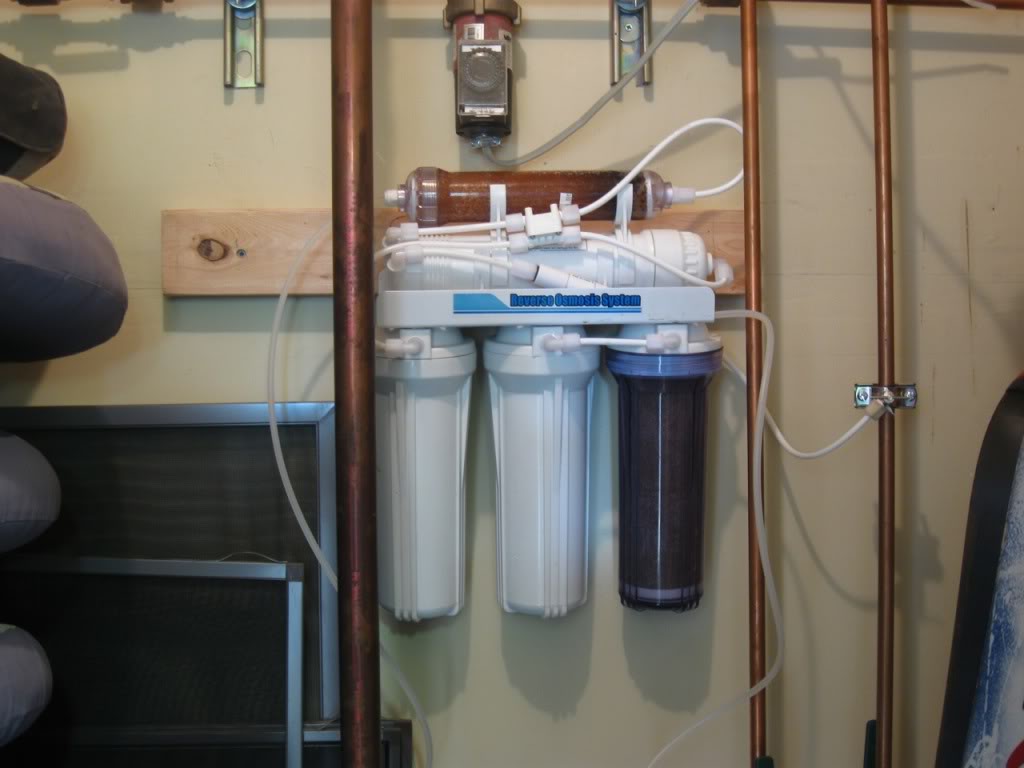
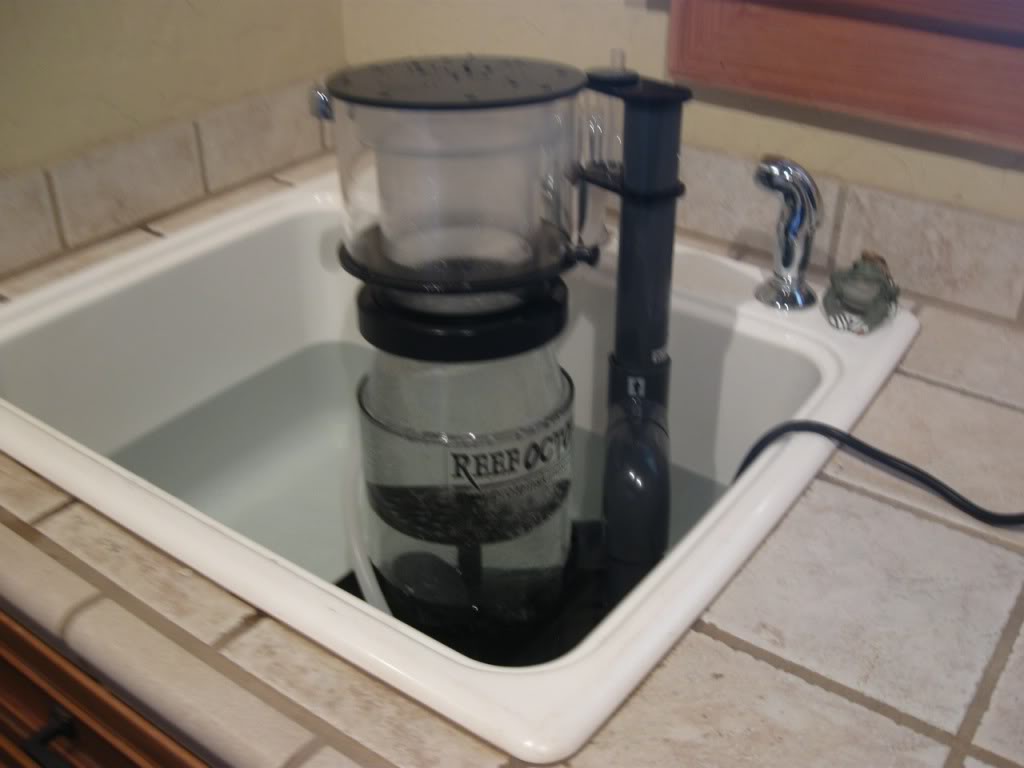
Got about 8 hours in last night and get to work about half of the day today and tomorrow. I plan on having this thing finished by Sunday evening. I got lucky and found a great deal on an almost new RO/DI system locally so I hope to start making water later today.

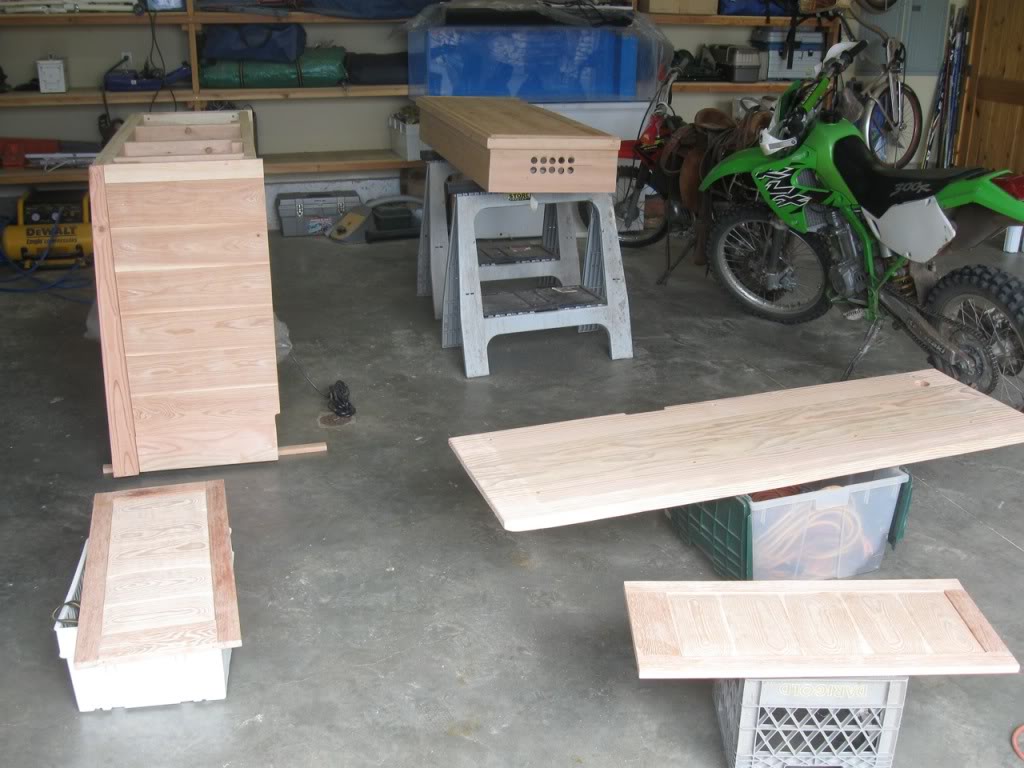
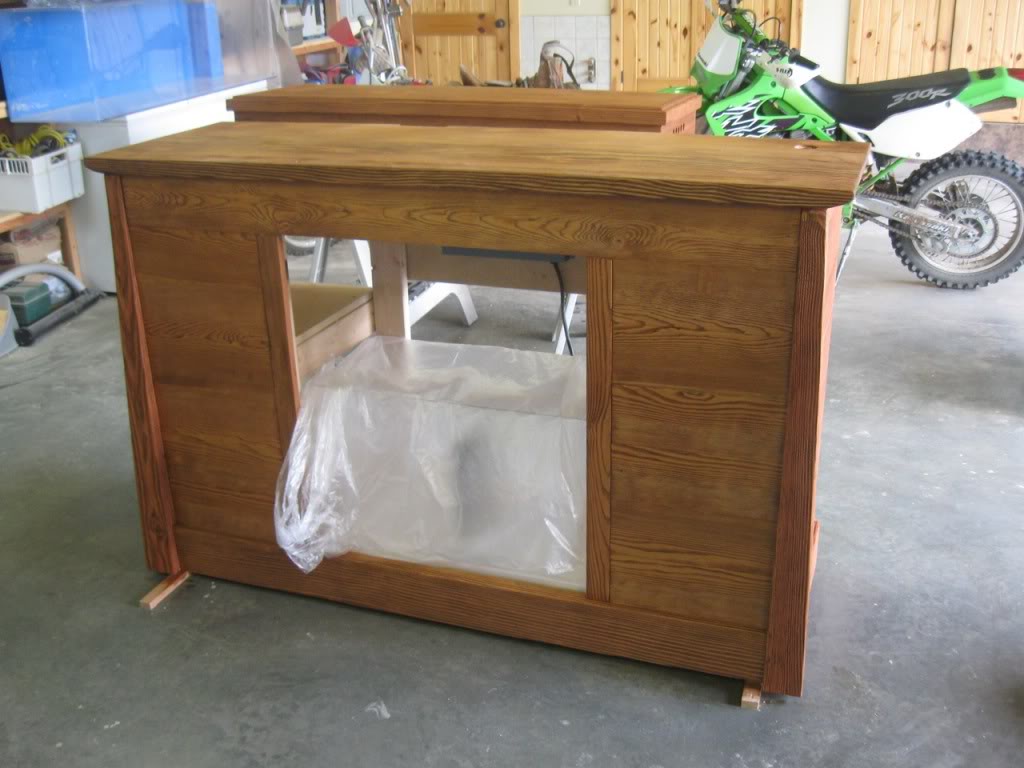
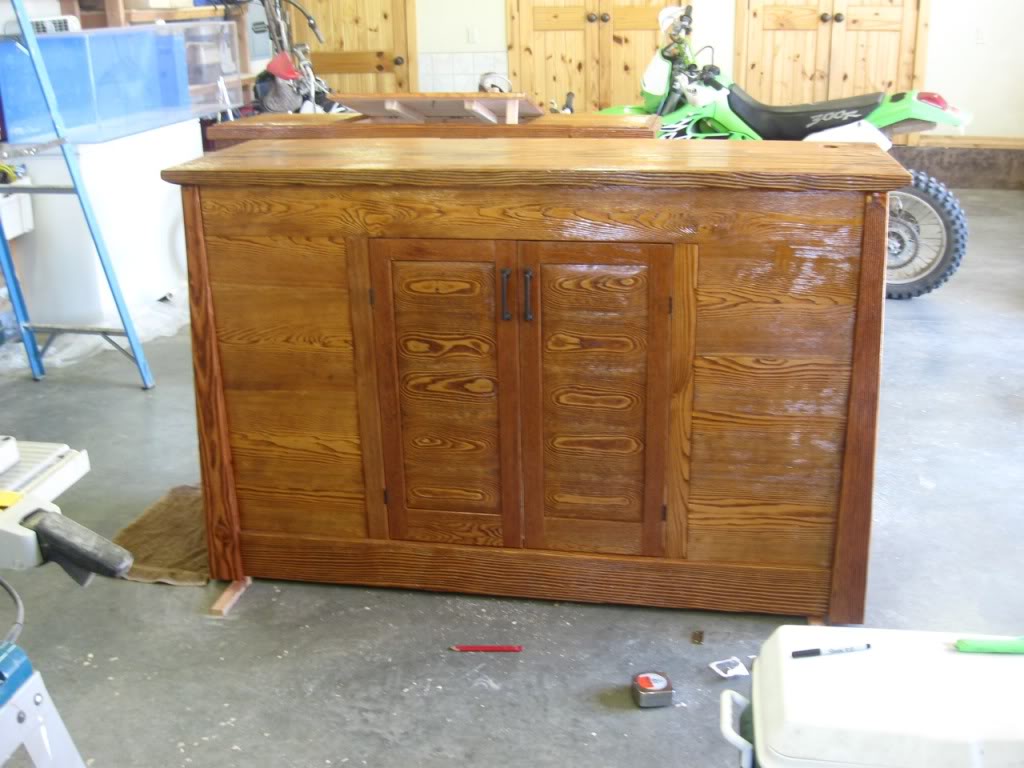
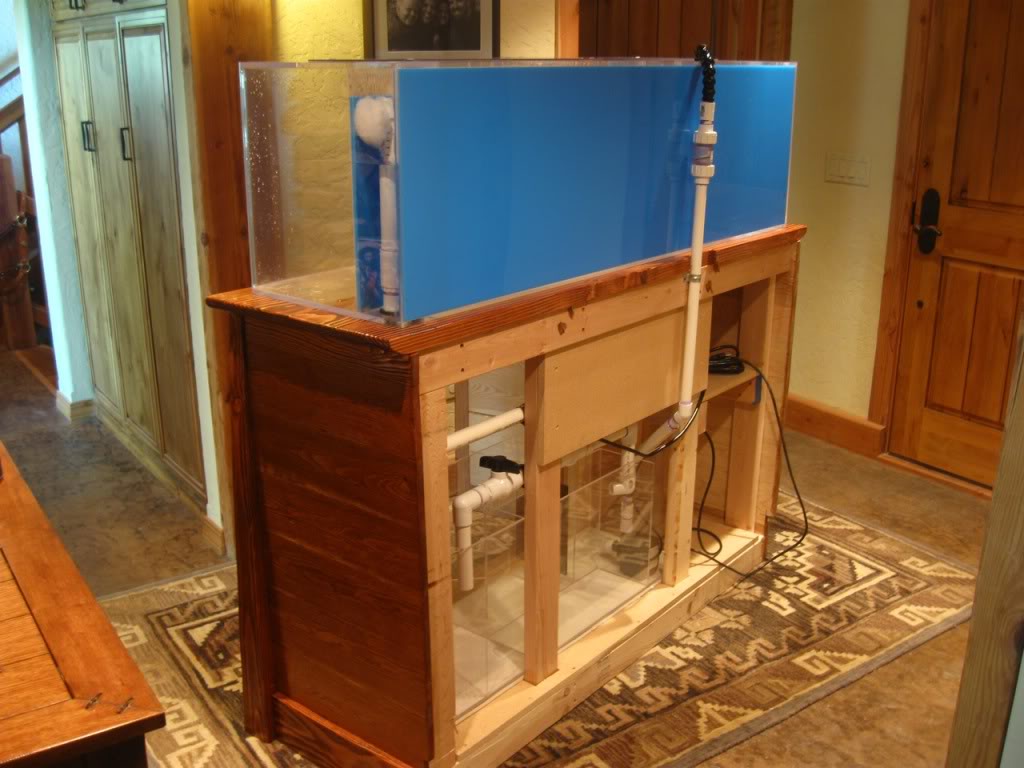
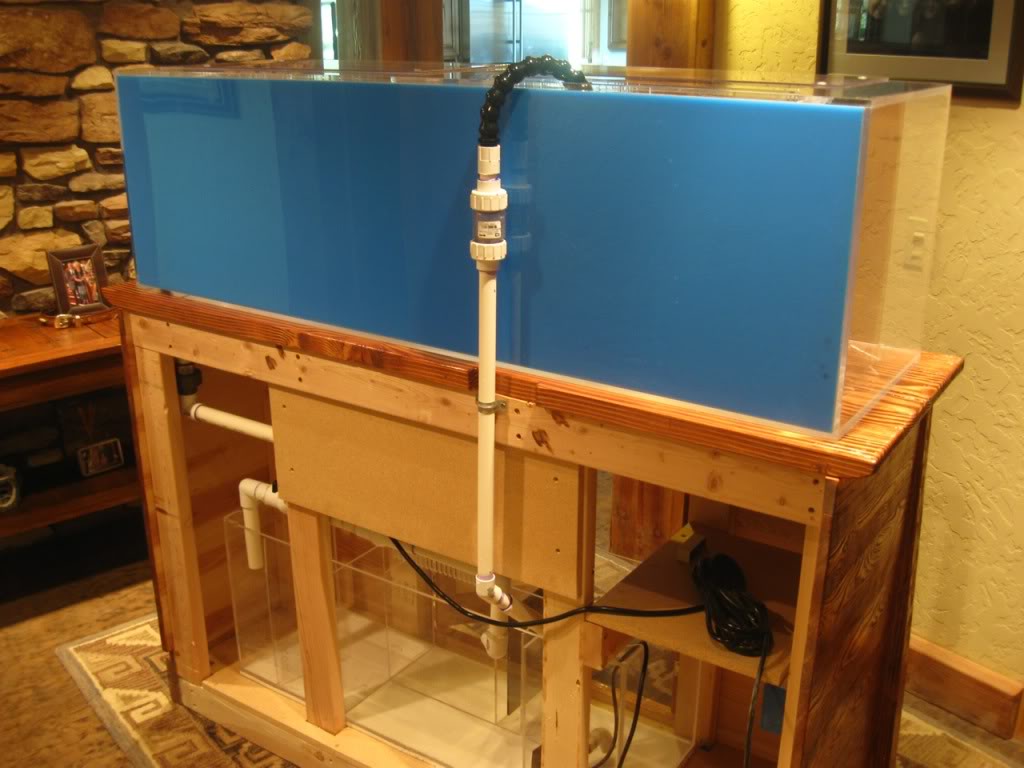
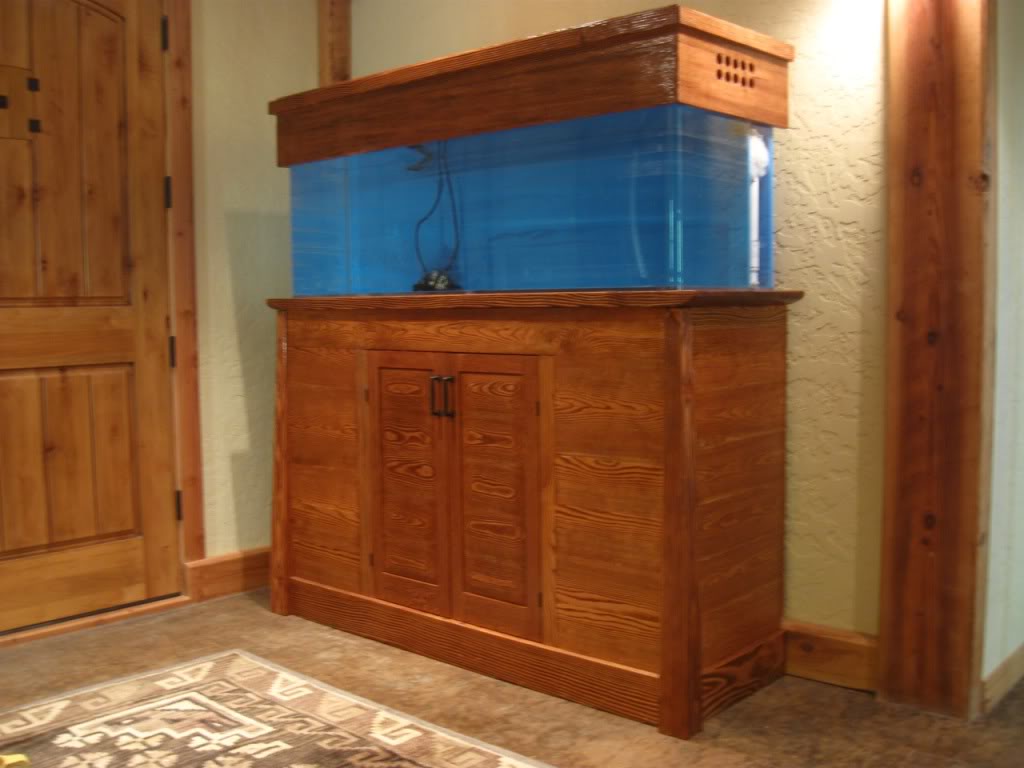
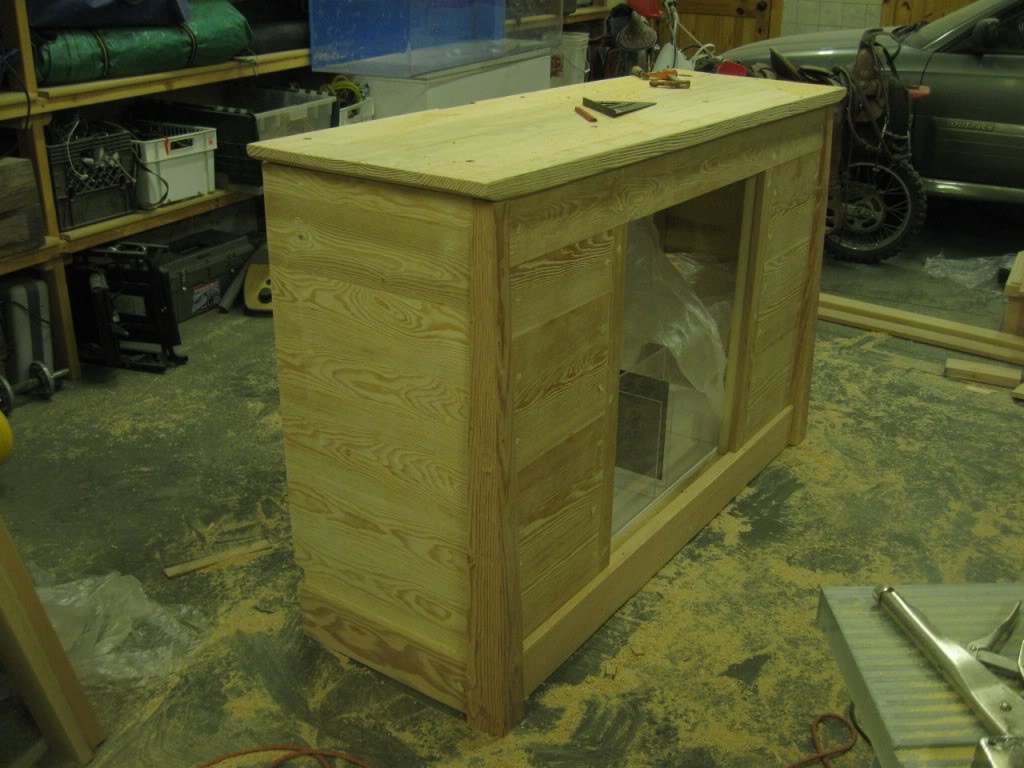
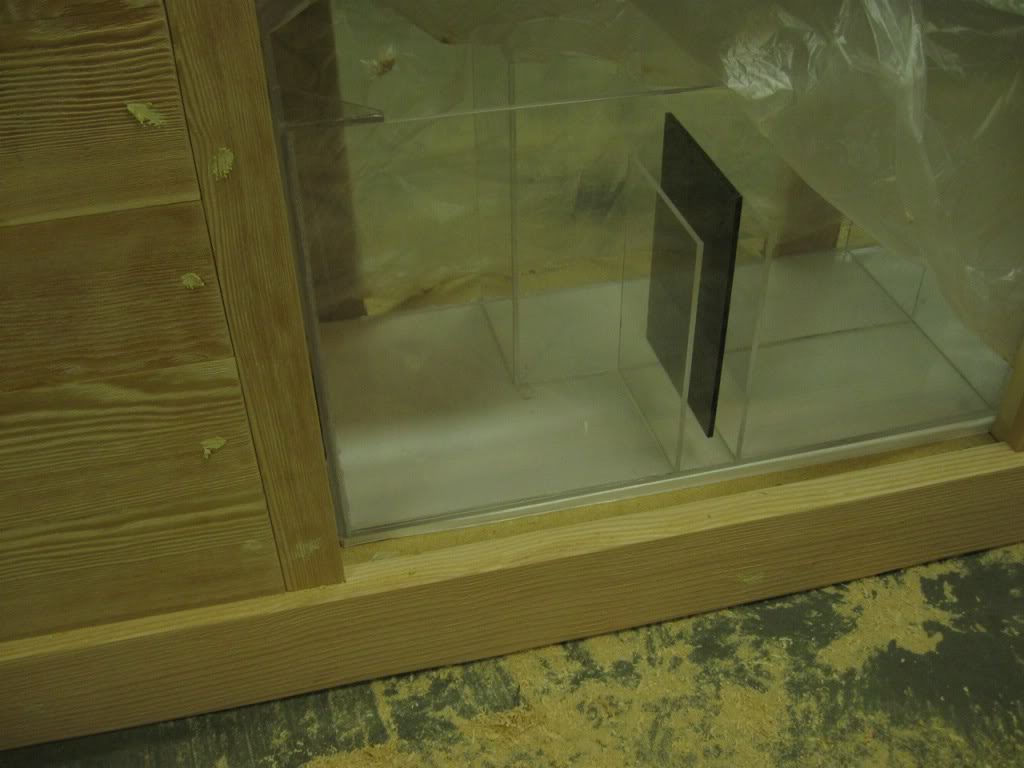
Photos from yesterday. Basically everything is put together - just need to do a final sanding and start applying polyurethane... then I can mount the doors, anchor down the top etc... after that I can move into the house! Thing has to weigh close to 200 pounds or more! lol.

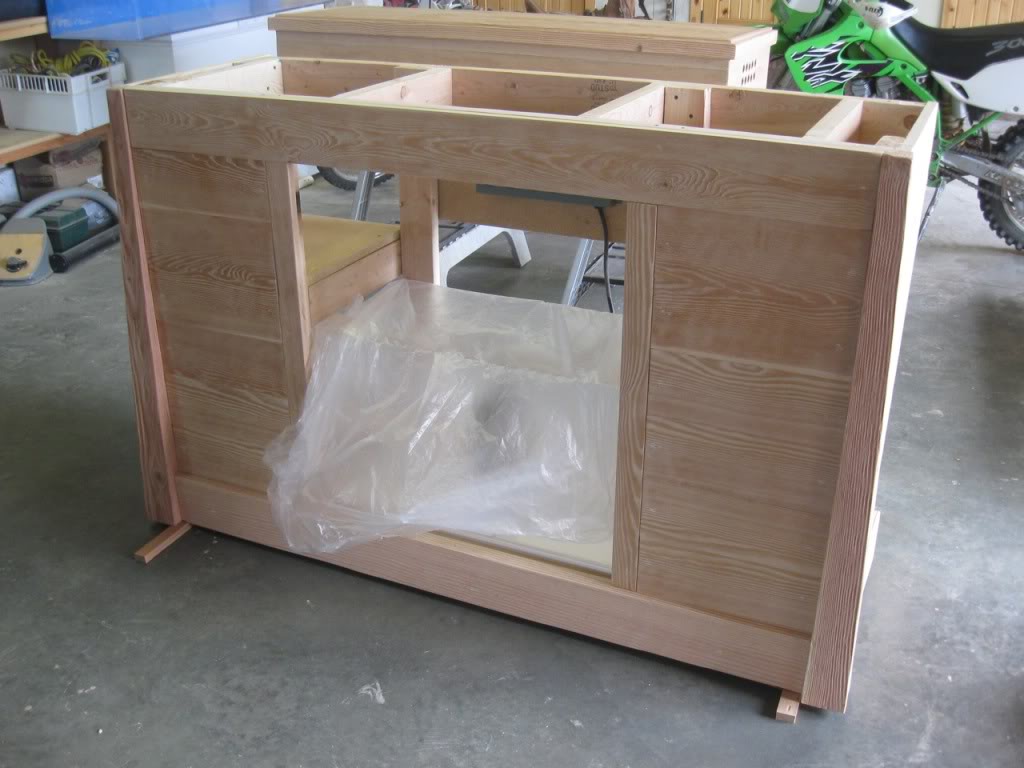
Sitting without doors on.
img_1140909_0_dd4400050c48b0a54f6a3ac56f523e6e.jpg


img_1140909_1_12796968d898e2be543df5b414f06190.jpg


Top is drilled but not fastened down yet.
img_1140909_2_927d8231b75bc884df0df93ee17d7fd5.jpg


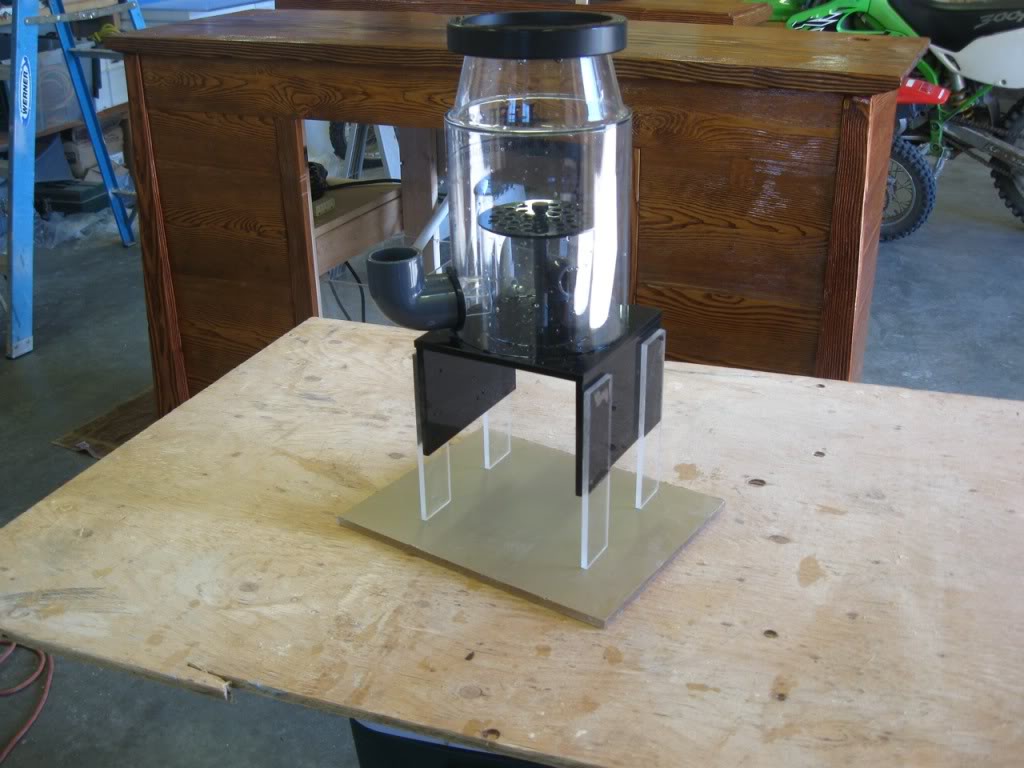
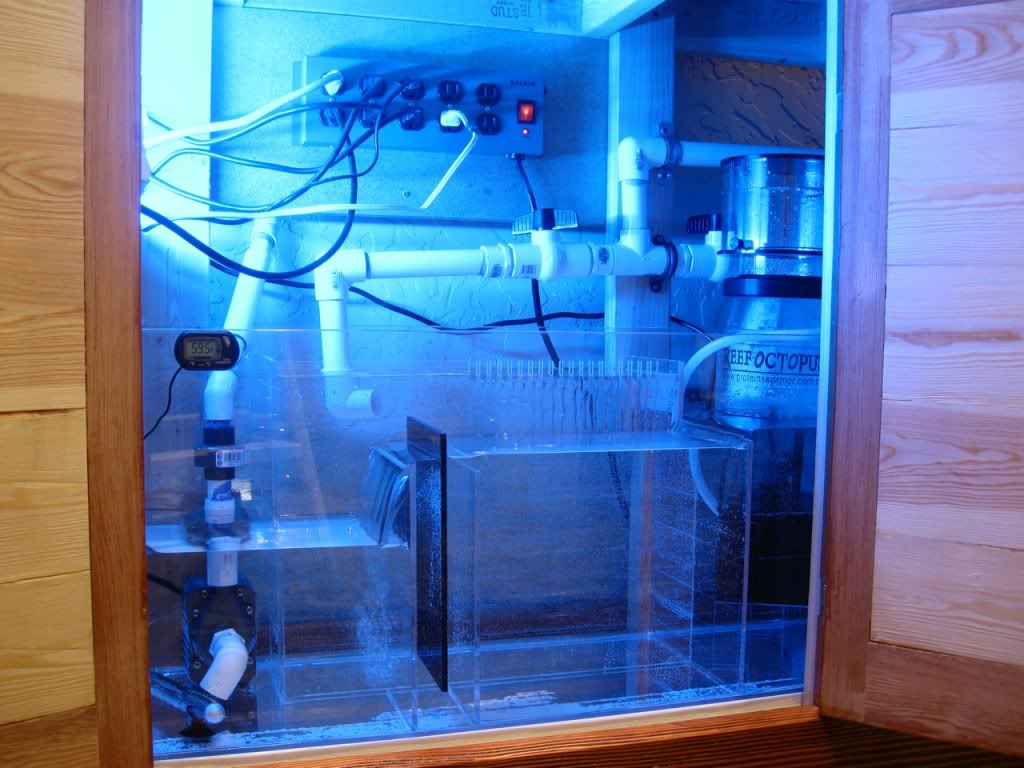
I forgot to show the sump sitting on a piece of low density foam I bought. This was recommended by melevsreef.com so I thought I should do it.
img_1140909_3_1f06ac869cf291ef2ba03c0dd9657d5c.jpg
 
Not sure if you knew this or not, but whenever you get a new filter for it your supposed to discard the first 10g of water from it. Just makin sure :)
 
Not sure if you knew this or not, but whenever you get a new filter for it your supposed to discard the first 10g of water from it. Just makin sure :)

Hey, thanks for sharing that tid-bit...just in case the instructions (like how it works) come like the skimmer's did...oh, wait...it didn't have any!!!


LOVE the stand! I guess you do know what you're doing...my bad for even suggesting you needed bracing to prevent swaying :rolleyes:
 
Thanks for the comments.... I am exhausted after a long weekend of working on this project.....

Here is the nice RO/DI system I bought... Is like new - used just a couple times. I am not sure what each chamber does.. need to learn a little more about what I bought.
img_1141648_0_1d6c9f281fc209d5f83f38673eeec9c1.jpg


I mounted the system in my mechanical room which has a floor drain and an easy location to tie into a water line. I started making RO water right away. Slow process I found out.
img_1141648_1_c7c3aca7c5468805448f06f56134b7e7.jpg


Back to the stand... Finally everything is about done and ready for stain!!!!
img_1141648_2_8c40dfc14d092e90f6f29db4bfa2e198.jpg

img_1141648_3_affa6c40f1f905e2d46d1f66e0a51ea9.jpg


After a coat of stain.
img_1141648_4_9678305fbac9b808961a04aef96e63a9.jpg


And after 3 coats of polyurethane.
img_1141648_5_813d320930364a99b66458f470894a0a.jpg


Time to install the doors.
img_1141648_6_72a3ca24559733f3e8b151324235e96c.jpg
 
I put together the Skimmer. This skimmer (Octopus extreme 160) is supposed to run best between 8 &10 inches of water so I added 3" legs because my skimmer chamber is about 11.5" deep. I used some of my acrylic scraps.
img_1141652_0_7d9e4b16367ce8e83b81fbd78aed2449.jpg


Then I put it together and cleaned and ran it in a utility sink. This is my first experience with this type of skimmer... I am not sure how to adjust anything beyond the water flow... There are not a lot of bubbles put out by this thing so perhaps I am doing something wrong? It came with no instructions/operation manual.... So I don't really know.
img_1141652_1_e06cd21ae29ad5d84ac79db550c06691.jpg


Again there was no paperwork at all with the skimmer... What are these parts?

Some sort of plastic mesh
img_1141652_2_678501a813228a953387aee2955c85b0.jpg


Some sort of plastic piece...
img_1141652_3_e66f2c1874aa7b7532b5ad3ee7827a45.jpg
 
Once the stand was completely dry I moved it into the house along with the tank... Finished all the plumbing.
img_1141659_0_d2dfe9f72cfeeb2cabec2e9d481c4398.jpg


You can see the check valve I got here, mounted towards the top of the supply line.
img_1141659_1_412418ee4e4bfc2d61cce2867e27dd82.jpg

img_1141659_2_3d016229fc268c7f101fe110b27ad07f.jpg


Finally moved into place!!!! And even filled with water (only fresh water at this point.. I don't have any salt yet). I put the tank in my entry area... its actually a fairly dark area of the house usually and we had a spot for it here so it seemed to work well.

img_1141659_3_4c6381668fb5763e03bbf3828d58c5c9.jpg


With the lights on
img_1141659_4_2e42098b445f370793a3c633a2ad34e2.jpg


Sump so far. Still need to zip tie or organize the coords somehow and mount the lights.
img_1141659_5_704da144c7fdb6e61480f6ddfc48ccd9.jpg


The only thing I don't like so far is the noise coming from the sump... the plumbing lines I believe. Will need to try to find ways to make it more quiet.
 
Looks awesome man! Glad you got a good deal on an RO/DI. You should put a cheap pressure gauge on there to see what you are getting, you might be able to speed it up with a booster like we talked about.

I always spend the first several days adjusting and fiddling with the plumbing to get it as quiet as possible. Is it mechanical noise or is it like a gurgling?
 
^Its a combination of sounds... but the majority of noise is coming from the drain line - the "gurgling" sound.
 
^Its a combination of sounds... but the majority of noise is coming from the drain line - the "gurgling" sound.

If it periodicly gurgles almost like the sound a toilet makes then it is most likly that your stand pipe is creating to much of a partial siphon and draining faster then the pump is putting water in. The stand pipe then lowers the water down until it sucks in a bunch of air and makes the gurgle and that slows the siphon and lets the water level rise back up a bit. It just cycles like that.
 
if everything is solid PVC the entire drain line, then it is sucking air in from the drain and that is what is most likely making the noise. I usually take a small drill bit and punch a hole in the top of the the 90 degree bend down to the sump, it will allow air to be sucked in from a different point.
 
If it periodicly gurgles almost like the sound a toilet makes then it is most likly that your stand pipe is creating to much of a partial siphon and draining faster then the pump is putting water in. The stand pipe then lowers the water down until it sucks in a bunch of air and makes the gurgle and that slows the siphon and lets the water level rise back up a bit. It just cycles like that.

That makes sense.. I wasn't able to fit a Duraso type of standpipe in my tiny overflow area. The stand pipe area actually makes very little noise... most if not all the noise is coming from the sump area. I will try to adjust the cap on the overflow etc... and see if I can't quite things down.


if everything is solid PVC the entire drain line, then it is sucking air in from the drain and that is what is most likely making the noise. I usually take a small drill bit and punch a hole in the top of the the 90 degree bend down to the sump, it will allow air to be sucked in from a different point.

Thats exactly what I was thinking of trying... Drill a hole lower down in the one of the 90s. Drill a hole in the top of the bend, install a nipple and a length of tubing to prevent water from coming out....
 
If you drill about a 1/4" hole in the side of the cap through the pipe as well it work out well. That way you can twist the cap and it works as a simple type of air valve. Makes it easy to adjust the air without drilling to many holes.
 
Hmm. thats an awesome idea. why didn't you tell me about that, lol.

I would take the 90 out that goes down and install a T, that way you can have a small section of tube going up and cap that for adjustment. probably easier then installing a nipple and some extra tube. It's a good idea though, every once and awhile when I put a large part of my arm or something in the tank, the drain can't keep up and it backs up a little and shoots a small amount of water out that little hole in the 90. Nothing too serious, but if you can prevent it, might as well.
 
If you drill about a 1/4" hole in the side of the cap through the pipe as well it work out well. That way you can twist the cap and it works as a simple type of air valve. Makes it easy to adjust the air without drilling to many holes.

Yeah, I know what you are talking about. I actually drilled a hole in the top of the cap on the stand pipe... I would put my finger on it partially covering it up, fully covering it etc... didn't change the sound at all.... I was thinking of drilling a hole from further down inside the sump at one of the bends where it seems like most of the noise is coming from.

Thats a good idea Jimbo... Wish you would have thought of it sooner.. lol. Would be like the vent pipe used on sinks in islands. I need to figure out if I can fit a "T" into the system.. All my valves & fittings are so close to each other that there is little actual pipe left to cut into.
 
Haha, I always just smack them together and water test it for a couple days, then go back and glue it. Probably another thing you didn't really want to know at this stage :p sorry lol.
 
Haha, I always just smack them together and water test it for a couple days, then go back and glue it. Probably another thing you didn't really want to know at this stage :p sorry lol.

For a couple days? :confused: With no leaks? How did you manage that? I did test the system out (dry fitted) in my garage but I bypassed the overflow.. didn't notice the sound then. How do you "smack them together" then go back and glue everything? In my set up, It had to be glued before being filled with water, there is no getting behind the tank once filled with water...
 
Back
Top Bottom