HAH! Get the best of both, AquaClears with Bio-Wheels!
.......................................................................................
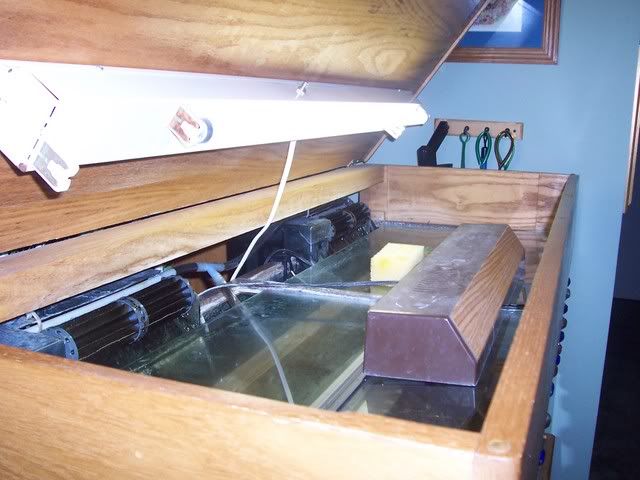
I modified my AC500's with the Bio-Wheels and added powerhead driven spraybars to help drive'em and keep'em alive if the filter(s) quit.
Materials for each AC500, two bio wheel assemblies 160/170, one set of bio-wheel bearings (the round blue ones), rubberbands, small plastic pins/dowels(made from the support pieces that keep your pants from sliding to the end of the plastic clothes hanger), aquarium silicon, ruler, level, drill and bits, dremel and alot of patience and a DIY engineering degree.
I measured across the filter outflow, evenly trimmed each bio-wheel so together they would fit together as one unit in the outflow with approx.25" on either side of the wheel hubs.
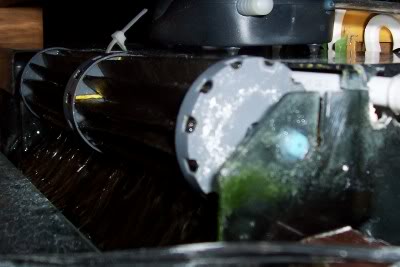
(See pics)
I trimmed the actual filter material not the axle rods.
I then re-assembled the bio-wheels so that the axle only stuck out on one side.
I then removed the end cap from the protusionless side, matched them up,drilled 5-6 holes just smaller than the plastic pins, applied silicon to each end cap, put'em end to end, inserted the pins, took a rubber band and threaded it thru the holes and filter material holders/spokes, alternating around each end cap to hold'em firmly together.
The pins/silicon keep the wheels from sagging inthe middle when wet/heavy, the rubberband holds'em tightly together while the silicon cures.
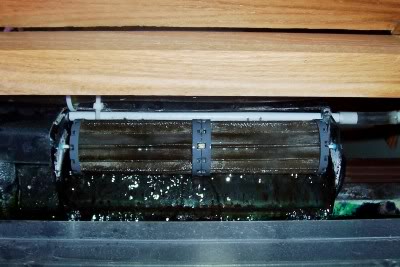
OK, now you have two bio-wheel assemblies joined together with alot of extra axle sticking out each side.
I then figured where the bio-wheels needed to sit in the outflow, they need to sit near the top of the outflow, where the flow starts down the sluice, they need to have no more than 2/16" clearance, take the filter lid off and you'll see the support structure that separates the outflow area from the media chamber area, aprox 1" out from there and high enough for desired clearance.
Hold up a end cap against the plastic and carefully mark for drilling, same for the other side, double check, use the level, check again...
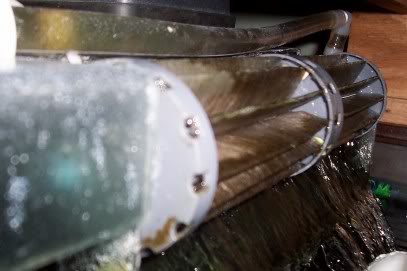
OK, look at your bearings, select a drill bit just a tad smaller, now center punch your marked spots (can't have the bit slipping and screwing up the alinement), carefully drill your holes, seat the bearings in the holes.
Now hold your fully assembled bio-wheels up and figure just how much axle you have to trim from each side to fit in the bearings, they need to extend aprox 1/8" into the bearing without touching the end of the interior.
Cut the axles, fit'em into the bearings, now secure the bearings in place with silicon, I just put a big dab on and smeared it around the bearing end, let it cure, your ready to roll....
The filters covers were cut to closely fit around the bio-wheels.
For the spraybar I used a small powerhead (170gph (max) which provides just under the rated GPH flow for a in-line Coralife Turbotwist 9watt UVS), hard plastic tubing, soft plastic tubing, barbed tee & 90' fittings and plastic zipties.
I measured the hard tubing long enough to give me a inch extra past the wheel towards the uptake and two inches on the other side (poking out the side of the filter), I drilled four small holes in the tube where each section of the bio-wheel filter material would be (small hole = high pressure) and capped the end.
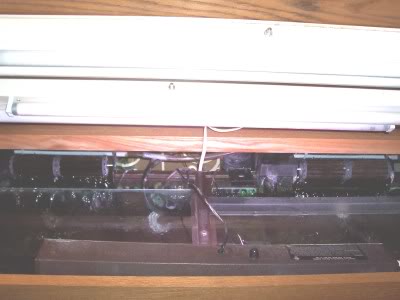
I then drilled and used my dremmel to make a hole thru the side of the filterbox right behind the wheel at the lip of the box and into the bottom edge of the filter cover
(this is on the side away from the uptake and just behind the brace which separates the out flow from the media chamber)
so the spraybar would enter and sit almost flush with the cover
(you will want to end up with a slight angle into the filter for water drip),
a small hole drilled thru the cover towards the end of the spraybar will let you thread a plastic ziptie thru to hold the end of the spraybar in place (leave it loose so as to ease filter maintenance, slip on/slipoff).
I attached soft tubing from the powerhead to the UVS then on to the spraybars, inserted the spraybars, powered up and enjoyed my new Bio-Wheels with Spraybars.
Mine have been running trouble free for over a decade now and are still turning well, I couldn't be happier with my modifications.
Goodluck!