55 Gallon Tank Stand - Advice needed!

The friendliest place on the web for anyone with an interest in aquariums or fish keeping!
If you have answers, please help by responding to the unanswered posts.

UDan

Aquarium Advice Apprentice
Joined
Oct 4, 2011
Messages
33
Location
Australia, Brisbane
Hey guys,

New to the forum but have been reading and seems alot of you know your stuff!

Finally I can set up a fish tank and have been working on a stand for it, some poeple have advised me that I should have made a rack rather then the design i just came up with (with no research:(). As i can see from previous posts this is what most of you have done.

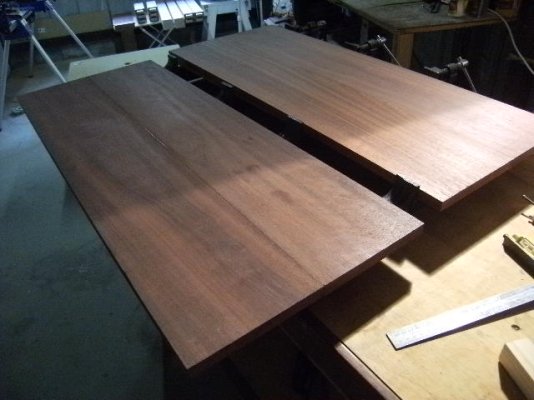
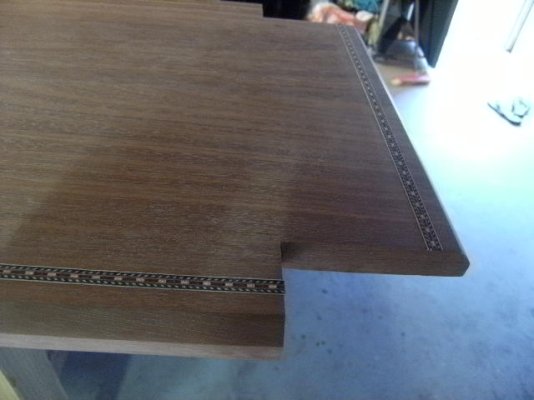
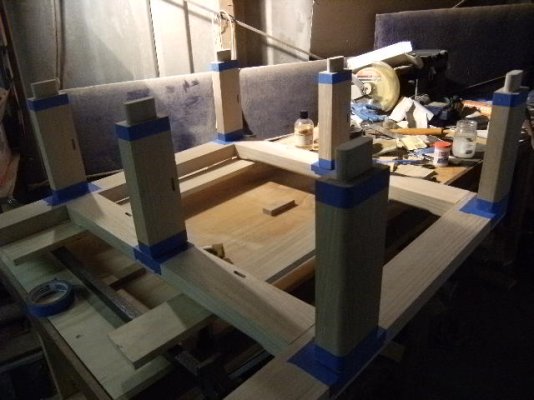
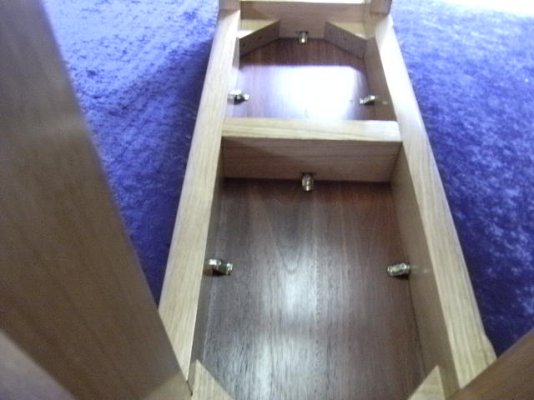
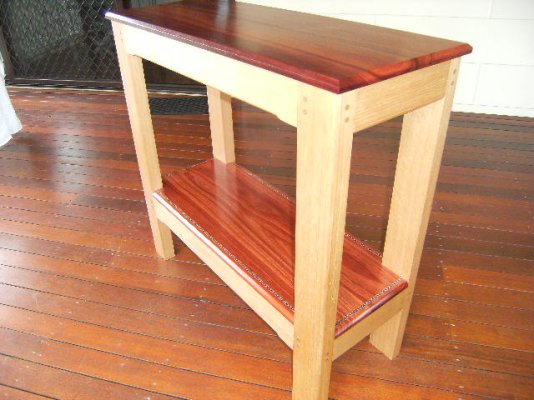
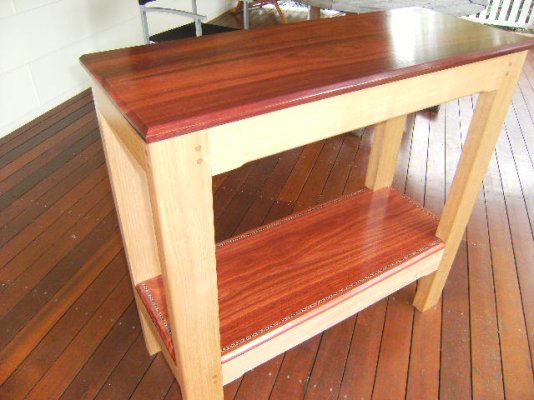
Ill attach a pic so you guys can get an idea of the frame. Its all joined with deep mortice and tenons, very strong. Was wondering if this frame will be strong enough for a 55 gallon tank? It'll have a 20mm(3/4inch) thick Jarrah top.

The dimensions of the tanks are 36"x 14"x 19" i think thats about 55 gallon:ermm:

Thanks :)
 

Attachments

  • Dry fit frame.JPG
    Dry fit frame.JPG
    56 KB · Views: 308
  • Jarrah Boards.JPG
    Jarrah Boards.JPG
    54 KB · Views: 290
Sounds like a 40 gallon tank to me (give or take a gallon).

As far as the stand is concerned- looks pretty good to me!
 
I think it looks great so far! I personally prefer a stand to a rack. IMO a rack is more suited to a setup with multiple tanks. A stand is nicer for a main display tank. The craftsmanship looks good, I would suggest using mechanical fasteners in addition to the mortise and tenons just as a backup.
 
Thanks for the reply's!

I spoke the an aquarium shop today and showed him some pics, he also thinks that the frame will strong enough to provide enough support for a 55gallon (ish) fish tank.

Seems the racks would be better suited for larger tanks or multiple tank setups.

noob2100 will definately have to strengthen up the tenons. Instead of mechanical fasteners i was thinking of doweling them in after the glue up :)

Will continue on and start sanding...and sanding...and maybe some more sanding after that:p Will post some more pics soon:)

Cheers
 
Gday again:)
Well have done a bit more work on the tank stand.

Dry fitted the bottom shelf, all looks tidy but will be tight fit to get in on, once the frame is glued up.

Will also be adding some inlays to the bottom shelf, the top will be mostly covered by the tank, so not sure if i'll inlay the top yet :ermm:

Once the inlays are set in, ill start some more sanding.......

Really cant wait to get some fish in! :fish2: This tank will be dedicated to Australian Natives:D

Cheers
 

Attachments

  • Bottom Shelf Dry Fit.JPG
    Bottom Shelf Dry Fit.JPG
    46.5 KB · Views: 190
  • Shelf Inlays.JPG
    Shelf Inlays.JPG
    44.8 KB · Views: 197
The workmanship is fabulous! (y)
I wish I had that much skill....

The dimensions of the tank calculate to just over 40 gallons, meaning it will have to hold about 120 pounds less than you thought, but it will still weigh upwards of 355 pounds. I think strengthening is a good idea (better safe than sorry).

Looking forward to more pics!
 
Thanks for the kind comments everyone :)

I agree, the frame is going to need some extra support. A good mortice and tenon joint in theory should be strong enough but like Retired_AF said - better safe then sorry!

Ill be doweling the morice and tenon joints into place once its glued up. In addition ill be adding 45 degree blocks into the corners and bolting them into place.

To attach the top im going to use some fasteners which will fit into a routed groove - ill attach a pic :)

Thanks again, ill post some more update pics soon
 

Attachments

  • Table top fasteners.JPG
    Table top fasteners.JPG
    40.8 KB · Views: 200
Gday again :)

Well have done a bit more work on the tank stand :D

Have finally glued up the frame. Due to a lack of clamps I have to do the glue up in 3 sections but it turned out great.

To give some of you and idea of the joinery used, ill attach a pic of the frame prior to the glue up, so you can see the blind tenons. Ive then reinforced the tenon with double dowels. The top 2 dowels in the pic still need to be cut and sanded.

Thanks :)
 

Attachments

  • Frame Glue Up.JPG
    Frame Glue Up.JPG
    59.2 KB · Views: 345
  • Doweled Tenons.JPG
    Doweled Tenons.JPG
    48.5 KB · Views: 131
Finished the tank stand today,

Will have to let the finish cure a little before putting the tank on it but wont be long now. Keen to start cycling the water and getting the tank layout started.

Used some blocks for the corners of the frame. Its pretty sturdy and i dont think ill get any torsion issues.

Thanks for all your input (y)
 

Attachments

  • Table Top Fasteners & Corner blocks.JPG
    Table Top Fasteners & Corner blocks.JPG
    52 KB · Views: 193
  • Fish Tank Stand Finished.JPG
    Fish Tank Stand Finished.JPG
    72 KB · Views: 211
  • Fish Tank Stand Finished 2.JPG
    Fish Tank Stand Finished 2.JPG
    70.1 KB · Views: 232
  • Bottom Shelf Detail.JPG
    Bottom Shelf Detail.JPG
    59.1 KB · Views: 137
Very nice! Should be more than adequate for that 40gal tank. May I ask what you used as a sealer on the stand?
 
Thanks:)

Very nice! Should be more than adequate for that 40gal tank. May I ask what you used as a sealer on the stand?

I use a sanding sealer made by 'UBeaut' which is a shellac based sealer. Its then sanded some more and finished with Danish Oil which is a mix of oils and polyurathaine. End up with a semi gloss protective finish (y)
 
Very nice... If u want to keep the frame nice and strong, modify the tennons in to fox tennons, in that way you will need no bloks or brakets when the glue is off.
Anyway... I'm a joiner/cabinet maker and your job is bang in mate, if you r not a carpenter, you should think about it... :)
 
Hey there rfurlan.2009, thanks for the compliment :rolleyes:. Would love to be a joiner/cabinet maker, love woodworking. Only thing is my current job pays better lol

Your right about the fox tenons! I wish i had thought of that :facepalm:
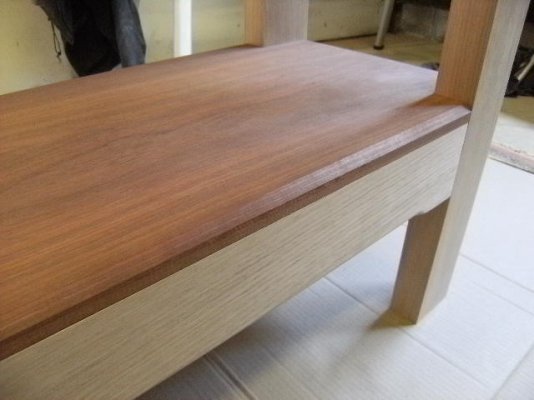
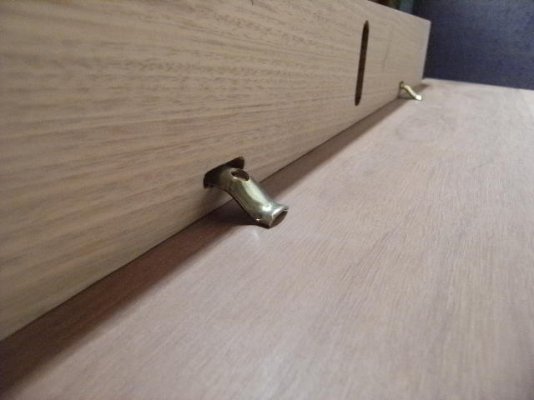
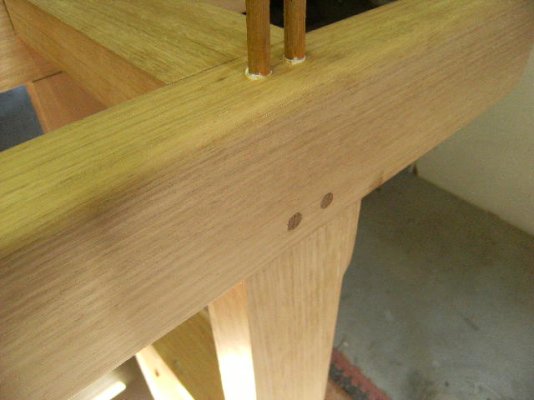
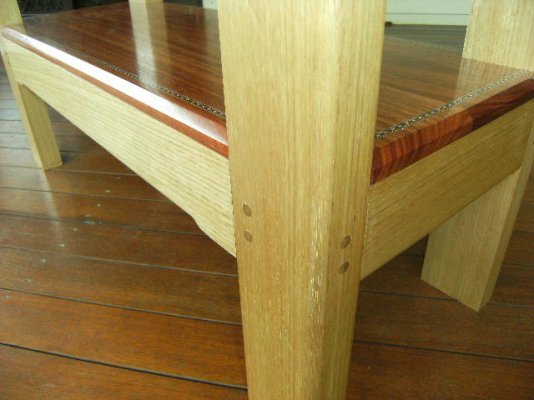
, a much stronger joint indeed. I accually tryed one after reading your post, it was brilliant (y)
 
Back
Top Bottom