75 Gallon Stand Work in Process

The friendliest place on the web for anyone with an interest in aquariums or fish keeping!
If you have answers, please help by responding to the unanswered posts.

tmcgee

Aquarium Advice Activist
Joined
Mar 31, 2004
Messages
198
Location
Peshtigo, WI
I have been wanting to build a stand for quite some time now for my 75 gallon I've had for about three years. I have just inherited a second 75 gallon from a friend of mine for FREE. So before I set it up I figured it was time to make a good stand for it. So far, I only have the skeleton of the stand. I do plan on making a "shell" for it that will fit around this skeleton. It will be made out of maple and will make it look all nice. This thing is super sturdy. It has 2x6's on the top with 2x4's for the legs and bottom. There is an "L" at all four corners with the 2x4's and we just used 1/2" blandex for the bottom shelf and 1/4" for the back to close it in after the shell is on. Enough of me going on and on and I will post some pictures. I will keep my progress going on this post until it is a finished project.

StandFront.jpg

StandSide.jpg

StandTop.jpg

BottomShelf.jpg

Cont....
 
Here is a picture of the empty tank on the top with the filter in it. Also, when the tank is full of water. Enjoy. All comments/suggestions welcome.

TankandFilter.jpg

FullClean.jpg

FullStraight.jpg
 
One more thing I thought of. The dimensions are 48.5" wide x 18.5" deep x 36" tall. I was worried about the height but it is still sturdy. Also, with the shell that is going onto this thing, it will have two "columns" sticking out the front side and make it have dimension but also will keep it from tipping forward.
 
Looks good to me! I built my own stand for my 75 and the structural part of yours is similar to mine. How thick is the back wall? The corner legs in yours (and mine) are strong enough to hold the weight as long as nothing shifts, but its that back piece that keeps everything rigid and straight up and down. I have seen some tanks with a diagonal cross brace to do that job, but I opted for a 1/2 inch thick piece screwed on all edges and covering the whole back, like yours.

I also opted for some extra height. It makes it easier to see the fish while standing up! One suggestion...when you add the "shell", either do it WAY before you add fish (and keep the tank covered and the filter off and a window open nearby) or, if you already have fish, do all the above AND use the least-toxic products possible. Or do the finishing in another room, which would be better. Those fumes and smells WILL get into the water, to the detriment of your fish.

img_1065266_0_597a2be0e4dbbe49d5ba0cf17c8aac01.jpg
 
Thanks for sharing your design. I really like it. I like the wood grain and knots but I think I am going to opt for something a bit smoother looking. I also like the idea of the extra top sticking out for multiple reasons. As for my shell, it will be totally fabricated in the garage and then when it is all stained and sealed, I will bring it in and simply screw it to the frame from the inside. I will be using 3/4" maple plywood so it should provide quite a bit of structural integrity from any movement from the stand itself. I will post rough drawings of what it will look like when I get home. Our proxy server here at work prohibits me from uploading them now. On the back of the stand, I used 1/4" pegboard without the holes. Not sure what it is called. I screwed it with about 20 screws or so but I wasn't really looking at that for structural support. I can't wait for this thing to be done but it might take a while. I am currently searching for some Maple crown molding to use otherwise we will have to glue some boards together and router our own.

Just out of curiosity, what was the justification of the shelf on the side of your stand?
 
Very nice looking stand! I built one for my 30g and 10g. I did the opposite, 2x4s at the top and 2x6s at the bottom. I did this to raise the bottom up so my 10g tank (which goes on the bottom) was a little higher up.

I wrapped my whole stand in 1/4" birch plywood. I picked through their pile of lumber till I found a nice smooth piece with very little knots. I then sanded and painted it gloss black with a Rustoleum (sp) brand paint. I also bought some trim to put along the top and bottom (basically a baseboard). Two+ years later it still looks great!

Here is a picture of mine while I was filling it:
12085-albums108-picture796.jpg
 
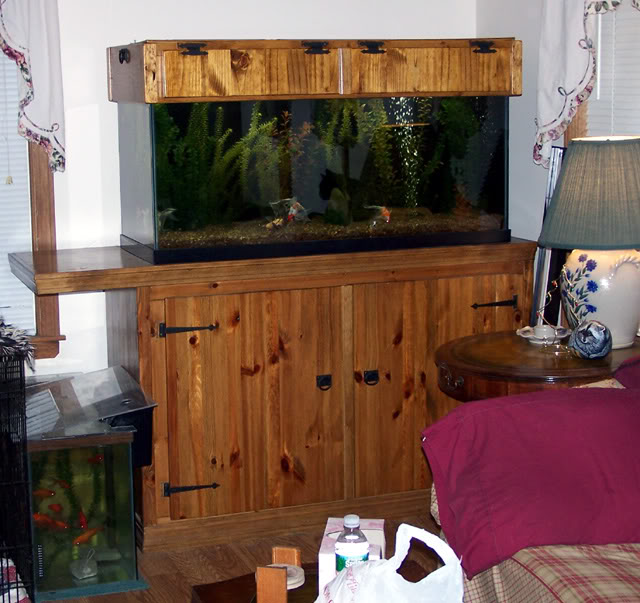
The extra length on the left side of my stand was designed to allow my two cats to have a place where they can sit and look at the fish. But the fish are pretty much old news to them now, so they mostly use that area to look out the nearby window...oh well, I tried! I recently discovered that the extra length is exactly the right dimension to allow me to put a 120 gallon tank on this stand at some point in the future...sort of an unexpected bonus. I will need to add extra support under the shelf...either a pair of heavy legs, or an extension of the cabinet and another door.

I was going for a rustic, old-fashioned look. Hence the knots and grain, and wrought iron hinges and handles. I live in an older house, and have some antiques...so I wanted a stand that would blend. I may have gone too far though...someone told my roommate that it looks like something from an old English pub! Oops. The stand is about 6 years old, and the matching top was made last year. The top opens both from the front (for feeding) and from the top (for cleaning).

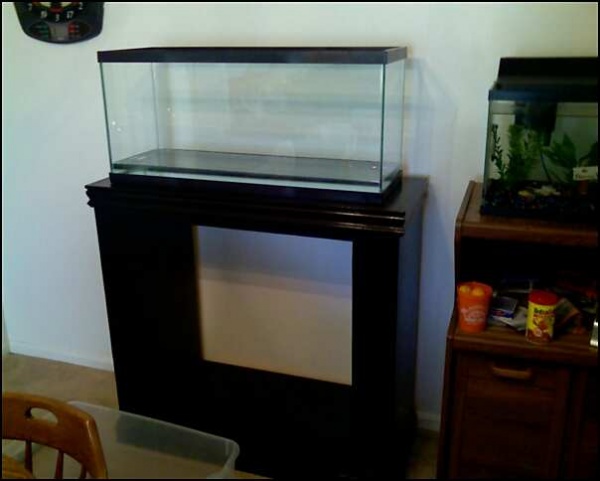
I might suggest that you replace the 1/4 inch material on the back with something else. I know the pegboard material that you are talking about...sort of a compressed fiber product, right? I do not think it will add much at all to the structural stability of the stand. As I said before, the lumber of the structure will support the weight straight up and down, but any side to side movement will be a disaster. A solid piece on the back, or a diagonal brace, will prevent any lateral movement and add a large degree of safety and solidity. You may never need the extra strength, but if you do and don't have it...well, get ready for a mess! Yes, the maple coverings may add some extra stability, but mostly on the sides. Unless you are planning on a solid front? No doors? A solid front would do the same as a solid back, but most people like doors on the front.

I look forward to seeing pics of the final result. (I really need to get a router someday...)
 
I don't think you over did it if that is the look you were going for. I like it just not for my application. So when are you buying that 120 gallon? ;)

I am putting two doors on the front (I forgot to upload the pics last night) so it will not be totally solid. I do plan on just cutting out the holes for the doors though so it will be solid all the way across the top and bottom. I am willing to put the diagonal piece along the back but I'm worried about the placement of the hoses and electrical now. I have holes already cut for these and would hate to have to leave them open and cut more. I know this is being a little AR since no one will ever see them but that's just me. I'll look it over and take some measurements and see what I come up with. What if there were two diagonal pieces that were in the bottom two corners? Or is that relying too much on the screws to hold it up?

Thanks for all of your feedback BTW. Helps a guy think of stuff that may not come up without outside input.
 
When you say you have holes cut for hoses and electrical, you are talking about holes cut in the back, pegboard-like, piece right? Any triangular connection between the sides and the bottom will help, so if you do not want to cut more holes in the peg board piece I would think that two diagonal braces at the corners would do it...one going from the upper horizontal piece to a side vertical, and another brace from a bottom horizontal to the other side vertical seems strongest in my mind. But I am not a structural engineer...it is entirely possible that the same degree of strength might be obtained by putting diagonal braces on just the bottom corners. Either way would be stronger than nothing! However you do it, I would go for a 45 degree angle on the braces, and as far away from the corners as you can go.

I was thinking more about one piece of 2x4, from the upper horizontal diagonally across the back to the bottom horizontal. But if that gets in the way of your holes, then the methods above should be fine.

Glad to help!
 
Last edited:
Yeah, in a perfect world, I would have thought of this prior and put on long diagonal from one corner to the other. That to me would be the most structurally sound. Going this weekend to try and find some maple crown molding so hopefully soon we can start on construction. No point in starting before I have all of the materials.
 
Back
Top Bottom