Aerating Decor

The friendliest place on the web for anyone with an interest in aquariums or fish keeping!
If you have answers, please help by responding to the unanswered posts.

TheGuppyGirl

Aquarium Advice Activist
Joined
Jul 26, 2012
Messages
129
Location
Wisconsin
Aerating Decor: Updated!

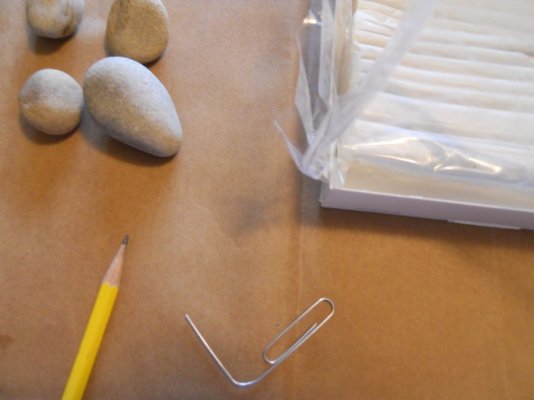
So I have this crazy idea to make my own aerating decor out of scupley and I know people have done it with pvc pipe and regular tubing. It is as simple as poking holes in it and plugging up the end, or is there some secret I don't know about?

Please help before I do a lot of work for nothing.

_________________________________________________________________

Update:
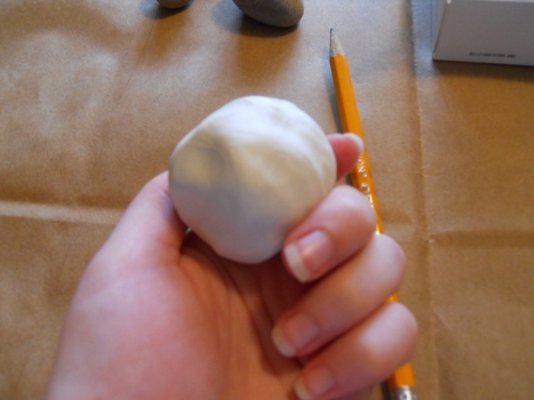
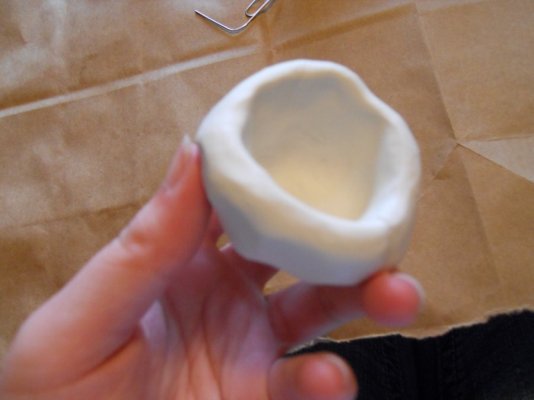
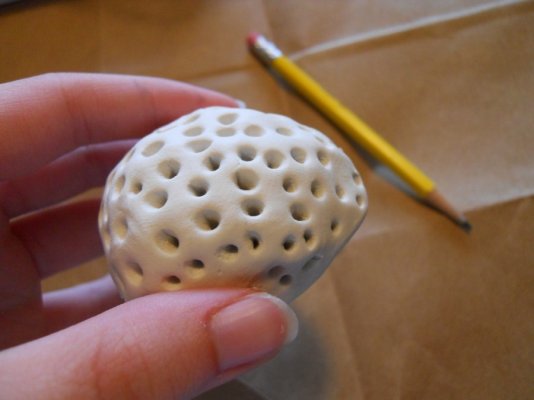
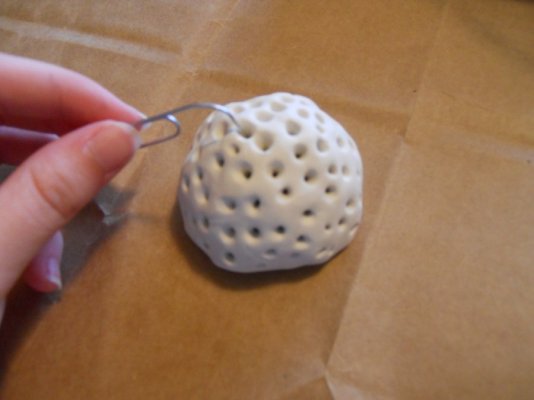
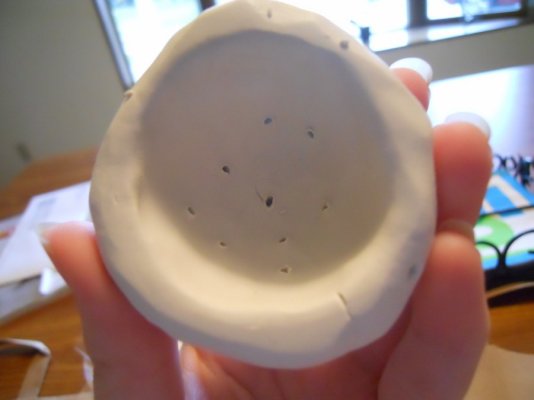
So I went ahead with my idea and I can only hope it's going to turn out okay. I made a somewhat coral-looking bubbler rock. I went with the porous look because I really enjoy it. I will post pics when it's done baking.
 
Thanks. I'm waiting on my substrate to be delivered. n_n"
It's probably gonna be another week before I can throw everything together. I'll be sure to take more pics.
 
How To!

-What you need: Sculpey, pencil, and paperclip (rocks are optional)
-Form a ball with your palms (doesn't have to be perfect) should be about 1 inch in diameter.
-Use the pinch pot technique to form a bowl shape (this is where .you can use the small stones to help shape it) -Don't make it too thick or thin!- 1/4 inch is perfect.
-Using the pencil, make dimples in the sculpey, but don't go all the way through.
-Now use the paperclip to make little holes so the air can escape and make bubbles! (I only put in like 7 holes but it's up to you)
NOTE: Sculpey does shrink when baked but not very much, so that doesn't mean you need to make the holes any bigger.
-After you have made your holes, slap that baby on a base so air won't escape out of the bottom. (seal it good)
-Finally, make a hole for the air tube to connect to. I used that little extra attachment that comes with some other air decor (says "in" and "out" on it). Just gently stick it in and if it doesn't go all the way through use the pencil to make sure you've gotten to the air pocket (I advise giving it a little wiggle just so you don't have to jam it in once it's baked)
-After it's completely sculpted, refer to the baking directions for the sculpey. I had to bake mine for 15-20 minutes on 275 degrees F.
-Let it cool for a good 20 minutes then plop it in some hot water for a while and it should be safe to put in your aquarium. :3
 

Attachments

  • DSCN0064 (900x675).jpg
    DSCN0064 (900x675).jpg
    124.8 KB · Views: 78
  • DSCN0061 (900x675).jpg
    DSCN0061 (900x675).jpg
    121.9 KB · Views: 78
  • DSCN0065 (900x675).jpg
    DSCN0065 (900x675).jpg
    121.5 KB · Views: 73
  • DSCN0067 (900x675).jpg
    DSCN0067 (900x675).jpg
    123.7 KB · Views: 115
Pics continued.
 

Attachments

  • DSCN0071 (900x675).jpg
    DSCN0071 (900x675).jpg
    116.5 KB · Views: 75
  • DSCN0072 (900x675).jpg
    DSCN0072 (900x675).jpg
    106.9 KB · Views: 72
Creative!

Do they float on their own?

If they got covered with algae they'd look even more awesome in my opinion.
 
The idea is for it to sink. Lol. If you ever wanted this to float I would wrap the sculpey around a styrofoam ball and hope for the best, but then you couldn't have bubbles.
 
Back
Top Bottom