OP
OP
Floyd R Turbo
Aquarium Advice Addict
[FONT="]T5HO lamps and Reflectors[/FONT]
[FONT="] [/FONT]
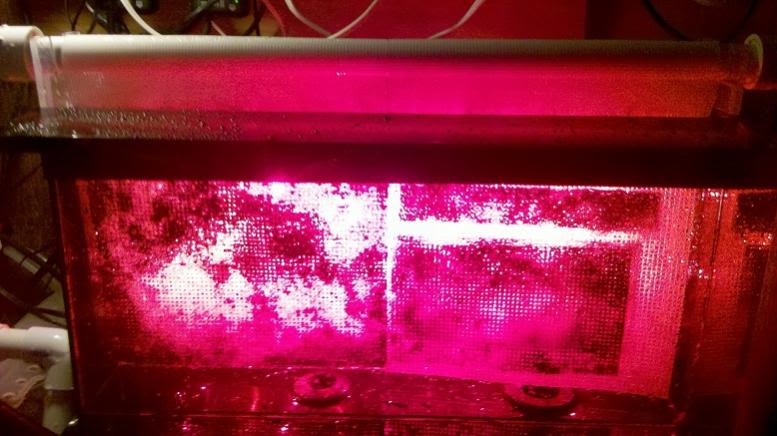
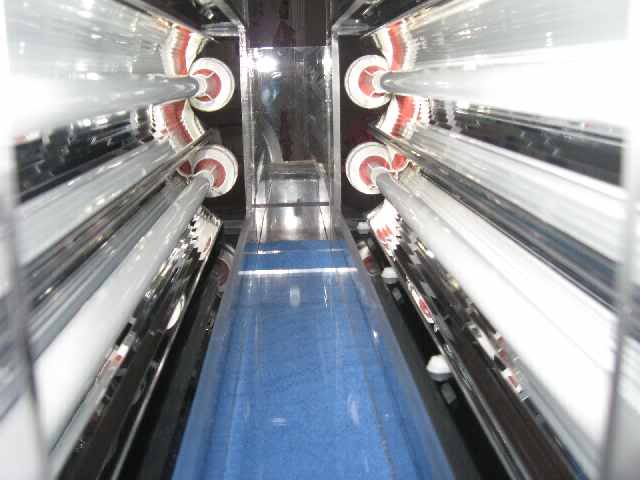
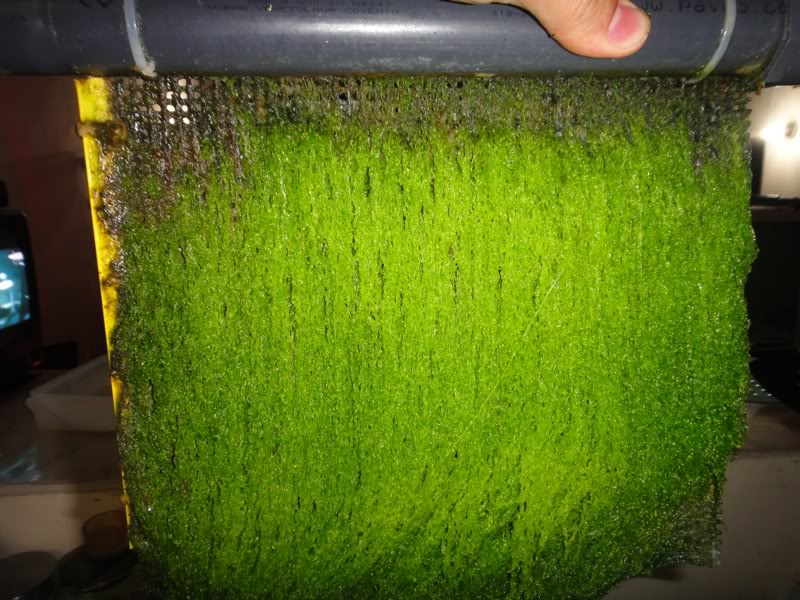
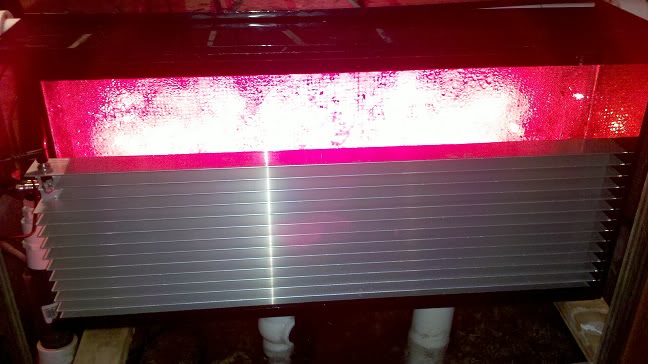
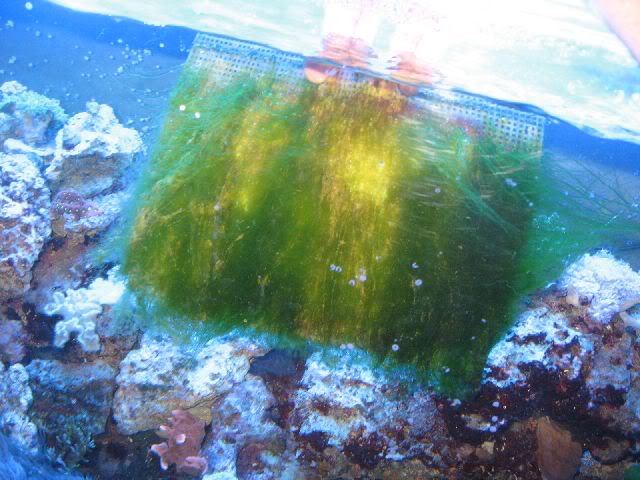
[FONT="]T5HO lamps are inherently superior to CFLs. They spread the light out more evenly than CFLs, and they can be placed closer to the screen without overpowering the algae. Notice in this picture below how use of T5HO can result in almost perfectly even light coverage:[/FONT]
[FONT="] [/FONT]
[FONT="]
 [/FONT]
[FONT="] [/FONT]
[FONT="]With that factor alone, bare T5HO lamps likely fall in between bare CFL and properly reflected CFL as far as scrubbing power is concerned.[/FONT]
[FONT="] [/FONT]
[FONT="]Reflected T5HO is very arguably superior to all other fluorescent lighting. However, it is more difficult to build a T5HO Algae Scrubber. You have basically 2 options. [/FONT]
[FONT="] [/FONT]
[FONT="]The first is to buy and build around a stock fixture, like the Nova Extreme 1126/1127. This fixture was great because it had individual reflectors and only cost about $70 shipped, but not so great because the endcaps were cheap and would bust in shipping. However, this fixture has reportedly been discontinued. You can still find it, but for how much longer, who knows. The only other fixture that is decent that I have found is the Aquatic Life 2x24 T5HO fixture, which runs around $100.[/FONT]
[FONT="] [/FONT]
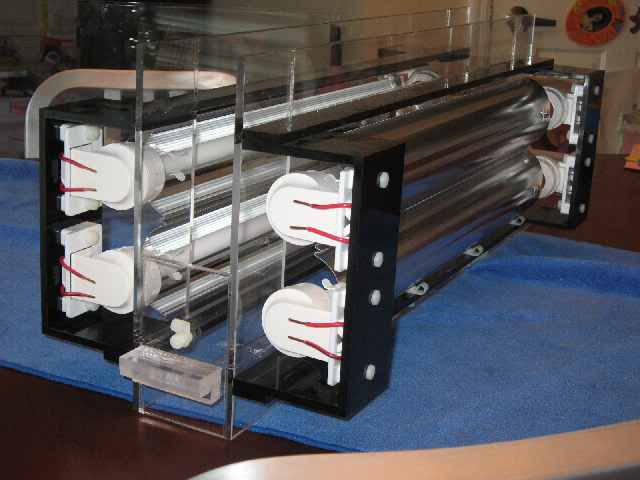
[FONT="]The second is to build something upon which to mount and protect endcaps, then connect to a ballast. Also, since the reflectors are generally one of the more expensive components, enclosing the screen in an acrylic or glass box to protect them is pretty much a given.[/FONT]
[FONT="] [/FONT]
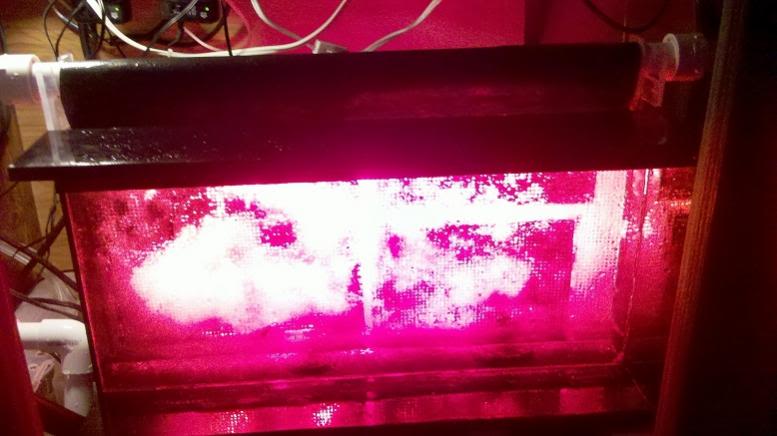
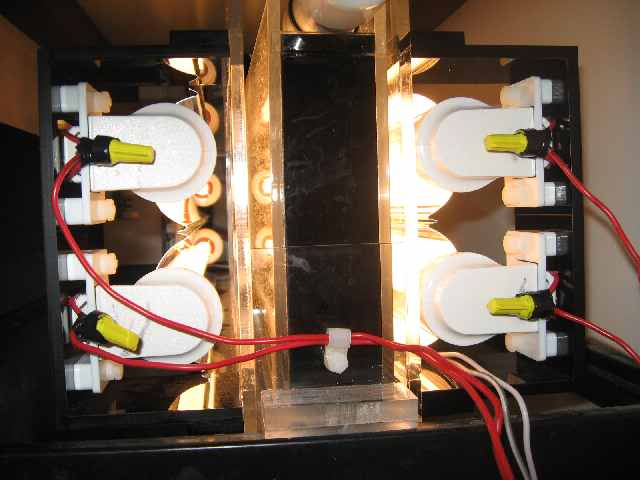
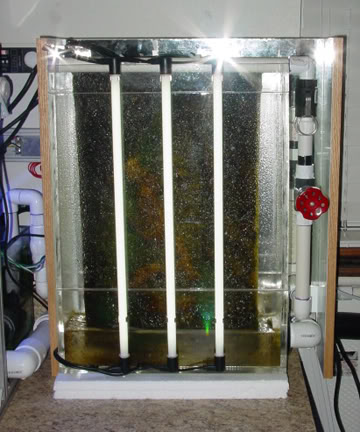
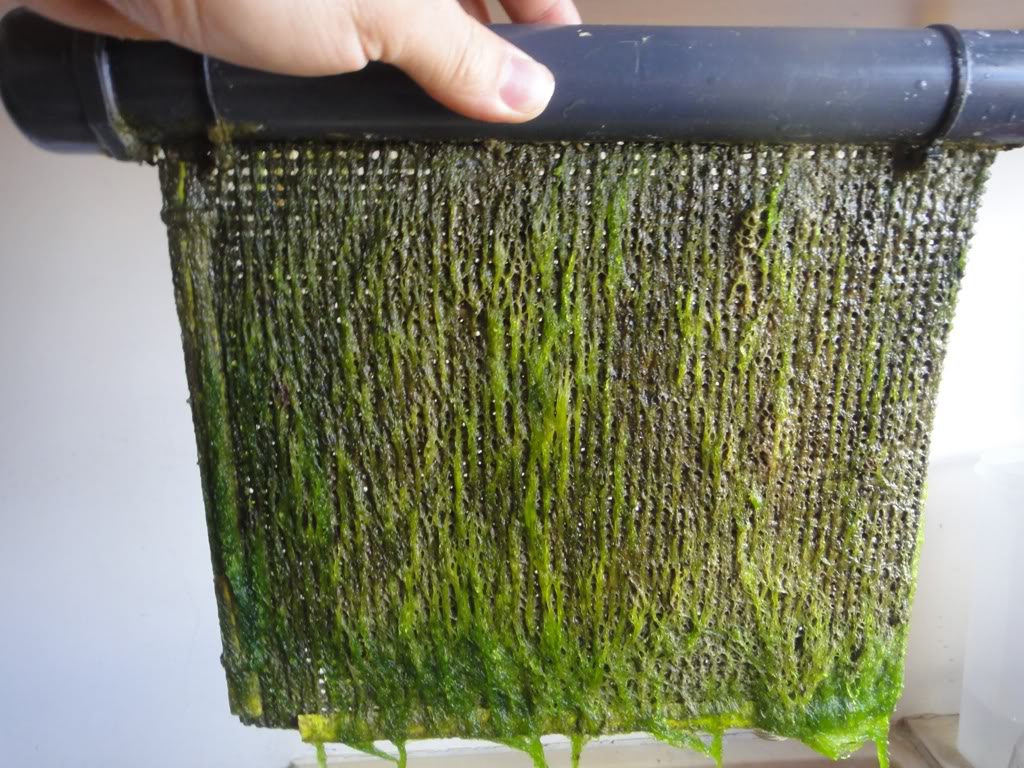
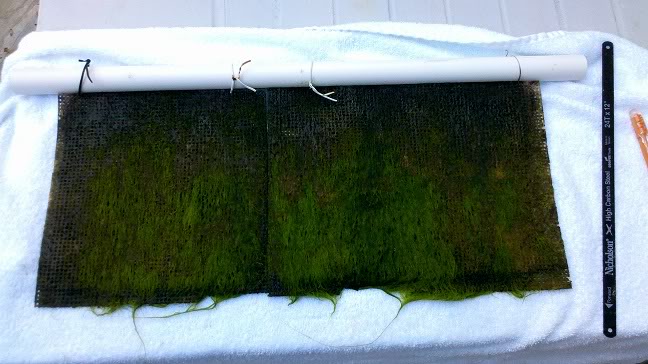
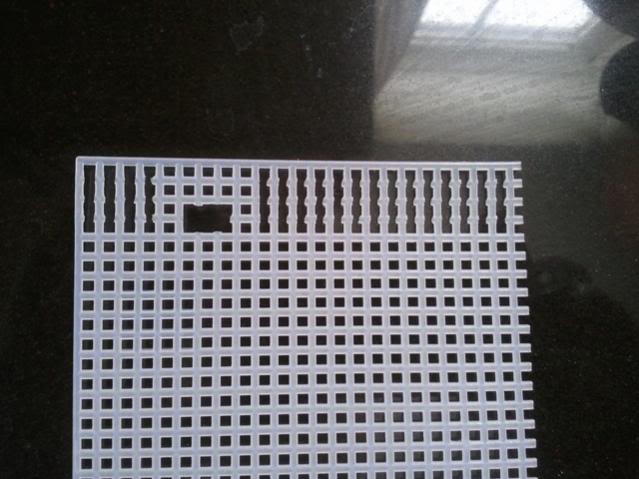
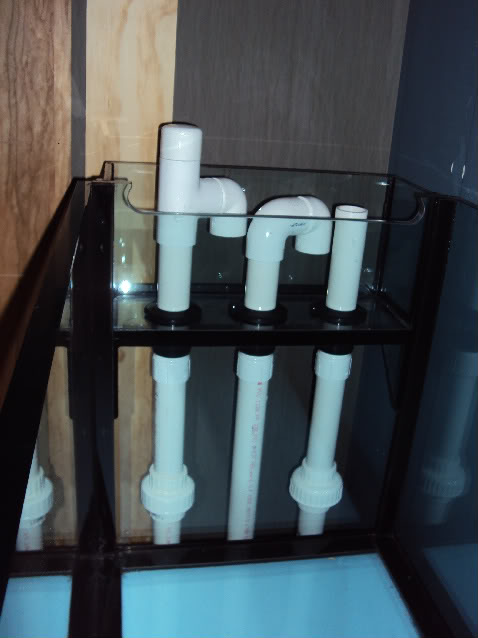
[FONT="]As far as lamps go, the same rules apply. I personally use the PlantMax 3000K Red/Bloom lamp, I can get them for $5 each in packs of 8 (up from $4/ea). Here’s my Algae Scrubber, Revision #2 (which will soon be replaced with and LED Algae Scrubber)[/FONT]
[FONT="] [/FONT]
[FONT="]
 [/FONT]
[FONT="] [/FONT]
[FONT="]
 [/FONT]
[FONT="] [/FONT]
[FONT="]
 [/FONT]
[FONT="] [/FONT]
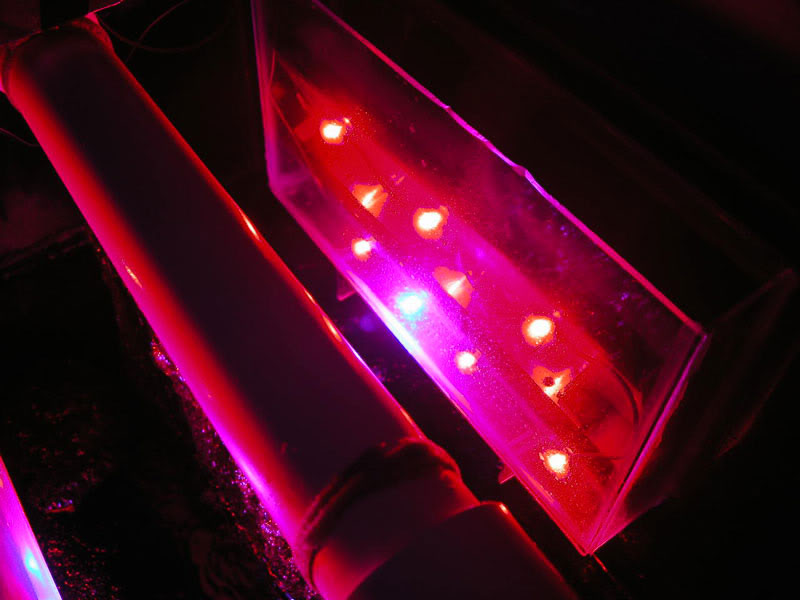
[FONT="]With a custom build, you can really use all the power of a T5HO lamp. The TEK-II reflectors from Sunlight Supply are expensive, but I have had great results. Other individual-lamp reflectors, such as Ice Caps, work very well. Stock fixtures work best when each light has an individual reflector, but just about any reflector will do better than none.[/FONT]
[FONT="] [/FONT]
[FONT="]The ballast you use can also make a big difference. I recently learned that Workhorse ballasts are not that great, and that you can get a lot more out of your lamps by switching to an Ice Cap ballast. Get the right one though, or you can over-drive the lamps and quite literally cause them to explode. Not good for da reef mon.[/FONT]
[FONT="] [/FONT]
[FONT="]Sunlight Supply also makes a T5HO fixture that needs no external ballast, and you can daisy-chain up to 10 of them together. However, the reflector they make for it is just plain aluminum and nowhere near as reflective as the TEK-IIs or Ice Caps, which use Anolux-MIRO IV (which is something like 96% reflective)[/FONT]
[FONT="] [/FONT]
[FONT="]
 [/FONT]
[FONT="] [/FONT]
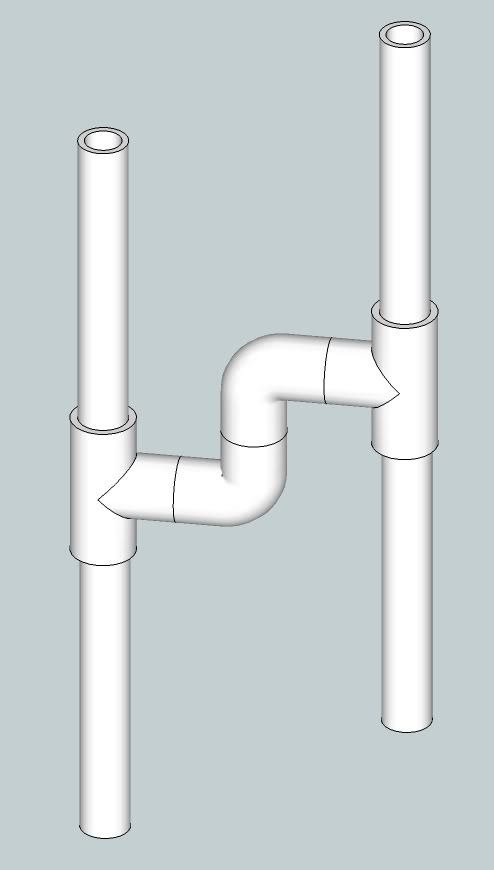
[FONT="]The disadvantage to T5HO is that you’re pretty much locked into a dimension that you have to build around. T5HO lamps come in standard lengths of 24”, 36”, 48”, and 72”. There are shorter lamps, such as 18”, but it’s difficult to find lamps in the right color temperature, and they’re generally much more expensive than 24” or 48” lamps (which are the cheapest T5HO sizes). This means that the dimensions of your Algae Scrubber are locked into about 20-22” in length, which is the illuminated length of the lamp (the fixture is 24”, the lamp right around 21” long). This means your flow to the screen has to be around 700-800 GPH. You can make the screen narrower, but you will end up wasting part of the lamp. The benefits of T5HO over CFL would outweigh this loss to a certain point though.[/FONT]
[FONT="] [/FONT]
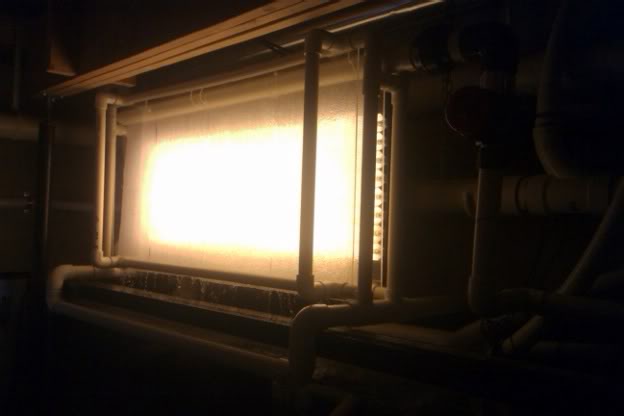
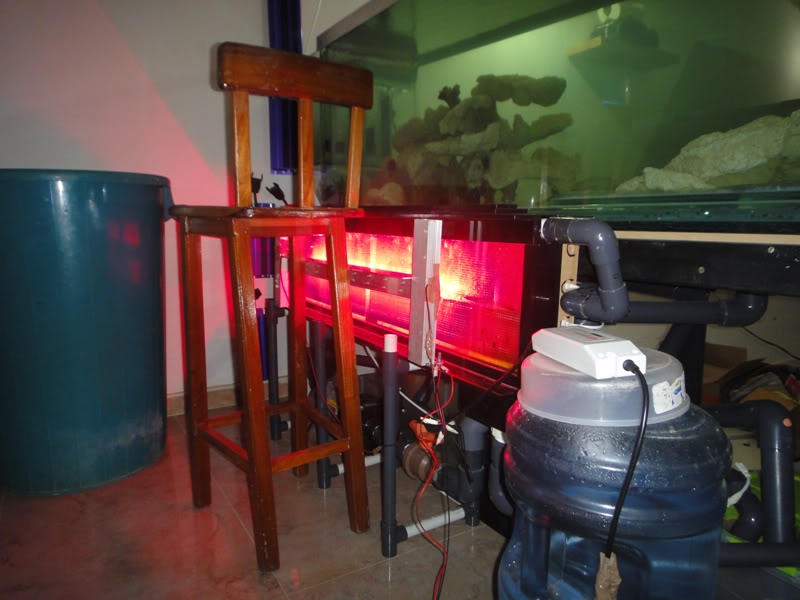
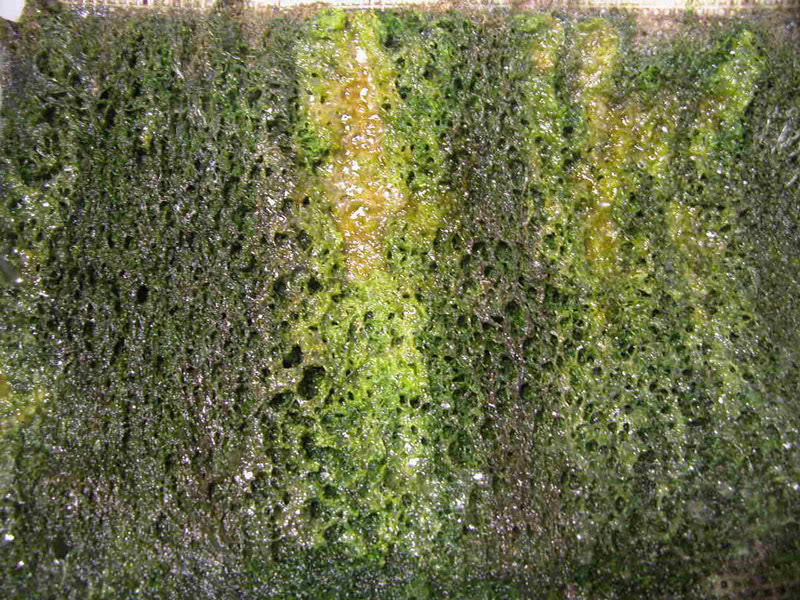
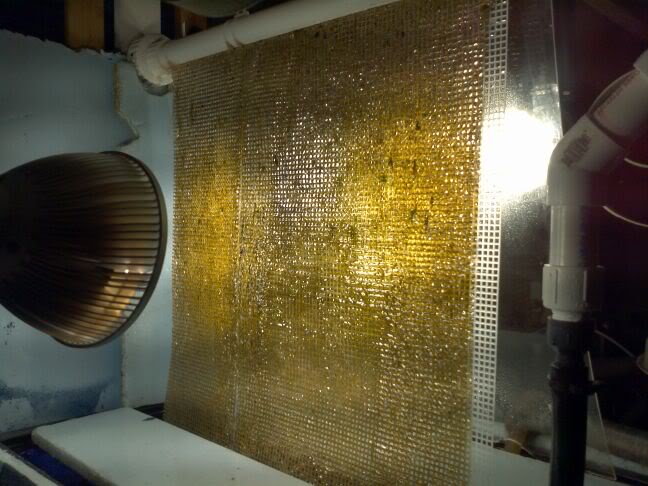
[FONT="]This can be overcome if you have a dedicated fish room, or enough space to make a vertical T5HO Algae Scrubber, like this:[/FONT]
[FONT="] [/FONT]
[FONT="]
 [/FONT]
[FONT="] [/FONT]
[FONT="]And to my knowledge, those endcaps are no longer available. Right now, is seems many companies are shifting away from T5HO and putting all their efforts into LED development. So, it’s time to roll with the punches – and they’re feather punches, as you’re about to see…[/FONT]
[FONT="] [/FONT]
[FONT="]T5HO lamps are inherently superior to CFLs. They spread the light out more evenly than CFLs, and they can be placed closer to the screen without overpowering the algae. Notice in this picture below how use of T5HO can result in almost perfectly even light coverage:[/FONT]
[FONT="] [/FONT]
[FONT="]
[FONT="] [/FONT]
[FONT="]With that factor alone, bare T5HO lamps likely fall in between bare CFL and properly reflected CFL as far as scrubbing power is concerned.[/FONT]
[FONT="] [/FONT]
[FONT="]Reflected T5HO is very arguably superior to all other fluorescent lighting. However, it is more difficult to build a T5HO Algae Scrubber. You have basically 2 options. [/FONT]
[FONT="] [/FONT]
[FONT="]The first is to buy and build around a stock fixture, like the Nova Extreme 1126/1127. This fixture was great because it had individual reflectors and only cost about $70 shipped, but not so great because the endcaps were cheap and would bust in shipping. However, this fixture has reportedly been discontinued. You can still find it, but for how much longer, who knows. The only other fixture that is decent that I have found is the Aquatic Life 2x24 T5HO fixture, which runs around $100.[/FONT]
[FONT="] [/FONT]
[FONT="]The second is to build something upon which to mount and protect endcaps, then connect to a ballast. Also, since the reflectors are generally one of the more expensive components, enclosing the screen in an acrylic or glass box to protect them is pretty much a given.[/FONT]
[FONT="] [/FONT]
[FONT="]As far as lamps go, the same rules apply. I personally use the PlantMax 3000K Red/Bloom lamp, I can get them for $5 each in packs of 8 (up from $4/ea). Here’s my Algae Scrubber, Revision #2 (which will soon be replaced with and LED Algae Scrubber)[/FONT]
[FONT="] [/FONT]
[FONT="]
[FONT="] [/FONT]
[FONT="]
[FONT="] [/FONT]
[FONT="]
[FONT="] [/FONT]
[FONT="]With a custom build, you can really use all the power of a T5HO lamp. The TEK-II reflectors from Sunlight Supply are expensive, but I have had great results. Other individual-lamp reflectors, such as Ice Caps, work very well. Stock fixtures work best when each light has an individual reflector, but just about any reflector will do better than none.[/FONT]
[FONT="] [/FONT]
[FONT="]The ballast you use can also make a big difference. I recently learned that Workhorse ballasts are not that great, and that you can get a lot more out of your lamps by switching to an Ice Cap ballast. Get the right one though, or you can over-drive the lamps and quite literally cause them to explode. Not good for da reef mon.[/FONT]
[FONT="] [/FONT]
[FONT="]Sunlight Supply also makes a T5HO fixture that needs no external ballast, and you can daisy-chain up to 10 of them together. However, the reflector they make for it is just plain aluminum and nowhere near as reflective as the TEK-IIs or Ice Caps, which use Anolux-MIRO IV (which is something like 96% reflective)[/FONT]
[FONT="] [/FONT]
[FONT="]
[FONT="] [/FONT]
[FONT="]The disadvantage to T5HO is that you’re pretty much locked into a dimension that you have to build around. T5HO lamps come in standard lengths of 24”, 36”, 48”, and 72”. There are shorter lamps, such as 18”, but it’s difficult to find lamps in the right color temperature, and they’re generally much more expensive than 24” or 48” lamps (which are the cheapest T5HO sizes). This means that the dimensions of your Algae Scrubber are locked into about 20-22” in length, which is the illuminated length of the lamp (the fixture is 24”, the lamp right around 21” long). This means your flow to the screen has to be around 700-800 GPH. You can make the screen narrower, but you will end up wasting part of the lamp. The benefits of T5HO over CFL would outweigh this loss to a certain point though.[/FONT]
[FONT="] [/FONT]
[FONT="]This can be overcome if you have a dedicated fish room, or enough space to make a vertical T5HO Algae Scrubber, like this:[/FONT]
[FONT="] [/FONT]
[FONT="]
[FONT="] [/FONT]
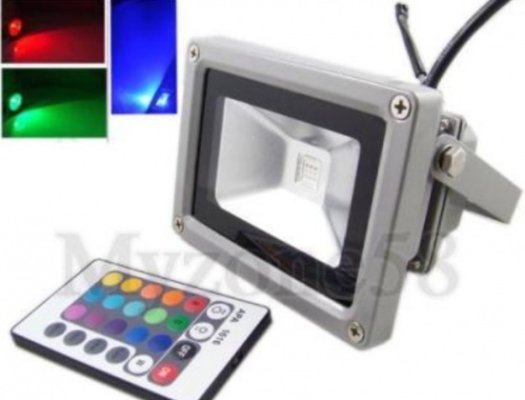
[FONT="]And to my knowledge, those endcaps are no longer available. Right now, is seems many companies are shifting away from T5HO and putting all their efforts into LED development. So, it’s time to roll with the punches – and they’re feather punches, as you’re about to see…[/FONT]

 ...IDK,,i very pleased with my current set-up and it works great...I'm all for new ideas though..