Algae Turf Scrubber (ATS) DIY build

The friendliest place on the web for anyone with an interest in aquariums or fish keeping!
If you have answers, please help by responding to the unanswered posts.
They were pretty awesome to start with, Nitrate was 0 before I removed skimmer, then went up to 0.5 and has been back at zero since about day 3-4. My Phosphate test kit is hosed so I don't know where those sit. What's most important is the stuff you cannot easily test for.
 
This AM:

img_1170573_0_5fccf3e04b33c5a7d2e1b41c8ea4167c.jpg


Finally balanced sump level & Salinity at 35 on the "ideal" line.

img_1170573_1_c7fb03db9ac119bfefb3483d5099c170.jpg


The max is for power outage, min is for 3/4" above pump. Really it should be within 1" of the Ideal line otherwise you could swing the salinity big time, so I might mark that up a little. 2.85 Gal/inch of level in a 40B so 5" = 14 gallons which is a HUGE swing for a tank that has effectively about 110-120 gallons system capacity. I'm going to have to train the Doc.
 
Looks like i am starting to have some growth! Looking a little green!


And this star seems to be concerned about my salinity!


I have seen maybe 2 so far of these little guys.
 
Seems to me there was something about CFLs saying that you couldn't have them too close to the screen. You may want to read through the FAQs on Algae Scrubbers • Index page.

Too funny about the star! How did he get in there?

Here's the screen today.

img_1171045_0_cefdc269a25bbf24e63a562127769112.jpg


Cap is holding fine, flow is good. Having a new problem: the acrylic box is bowing outward on the back so I had to fashion a zip tie safety to make sure the top doesn't pop off if it expands too far. Should have had my Dad put slats on to prevent warping, I didn't think it was going to be an issue but I haven't been able to get in there to put a fan in. I might have to re-design the box. Ugh.

Other tweaks: bubble filter, get rocks out of sump (got in trade for Xenia), replace pump return hose w/bigger one, re-do slot tube...the list continues. Good thing I get paid for this one.
 
Oh yeah found out that until I fix the flow problem I can supplement Iron with Kent Iron & Manganese. Should green up the screen. It's yellow because of lack of flow.
 
Might have over looked this...but...Kinda planning out a narrow one sided scrubber for my 55gal, It'll be on top of my canopy and draining into my tank, which will be a FOWLR with a small amount of reef - softies mainly. MY question is... what would be good for a water delivery system? I kinda was thinking a power head and plumbing the output up. Maybe a foot or two at the very max. Has that been done and proven to work or would I need something bigger?
 
Oh yes, definitely. If you're comfortable with it, you can do away with your sump completely and just do a top-of-tank scrubber. In fact, the original design back in the 80s was a dump-style that filled up a container and then dumped it over the screen and into the tank or something like that.

The main advantage to top-of-tank scrubber is that if you have anything that eats pods (mandarin, scooter blenny) there is no pump for the pods to pass through. Also, no sump = less hassle and easier setup. Negative is that you have the scrubber in plain view.

For a 55 you would build it so it had 55 square inches, then build the horizontal dimension so that the screen gets 35 GPH/inch. The problem however with a single-sided screen is that you have to double the screen size so 100 sq in. The other thing to remember is that it's now recommended that you don't put in crosscut in the tube, so with that much water pressure you may get some spray, so you either enclose the screen or build in a spray blocker.

You also run into a space issue on the top of your tank w/respect to where the tank lighting goes. You would only have 6" or so of space in one corner of the tank.

If you have an idea, sketch it up, scan it, and post it and I can take a look at it.
 
Let me get it drawn up, and I'll post it in a few hours once I get to work and such. Saturdays are slow and gives me lots of free time. lol.
 
img_1171337_0_d42cf1eb9b0d7ec2cb1f225403cc4b8a.jpg


Crude drawing... but all I have is word lol

Canopy is 49x13x6 - I should have about a 1/2" lip around the tank. I'll take my router and round that off to finish it some. Everything will be poly'd. The box for the scrubber and canopy will have a square hole/drain since I can make that little easier than a circle :) I'll make it a clear box with a wood holder that spans the canopy so it looks right + make a pitch in the design so water can run off.

Top box(es) are a the canopy, then the scrubber ON TOP. the little square is on top of the canopy and bottom of the scrubber... The drain and supply hole.

One down is the side view. I'll have a 3 inch ledge there.

Plan is to have the full 6inch front panel to swing up for feeding.

I have it like this since I do not have room in my apartment to do much, and the stand I would have to buy or build one for room for a sump as the current stand is not designed well lol.
 
I'm not sure I'm seeing this right but if it drains directly into the tank would you not have a problem with bubbles?
 
Yeah, I can't quite figure out how you are planning to set this up based on those drawings.

As far as microbubble go, yes it's something to consider. Hoever if you look at the "myths" thread back on post #9, it may not be much to worry about. There are a couple ways around the bubble issue, with a top-of-tank scrubber it gets limited though.

One way would be to add a diffuser box filled with bio-balls which would catch the majority of the bubbles if it was set up right. The other way would be to set up exit plumbing in a double-U configuration with the up-to-down turn slotted to let bubbles out. I've tried neither as of yet, but will probably do so very soon.

Similar to this

Algae Scrubbers • View topic - Micro Bubble Removers
 
Gooey

Lots of growth. The areas of green are where it's getting enough flow, yellow not enough. Gotta clean this ASAP, may not get to it until tomorrow though.

img_1171914_0_2cb7d798f6954f99f137dee81d6715f4.jpg
 
I can't use this (I'm a planted FW guy) but it's just so COOL. :lol: this is one of my favorite threads because it's another example of how brilliant natural eco-systems are, and how we can tap into nature's excellence to make really cool and useful things!

:) This is so vastly superior to mere mechanical filtration + nitrogen cycle. Keep up the good work.
 
Thanks for the kudos!!!

I was totally hooked the second I came across the mega-thread on Reef Sanctuary. It took me a week to read through it, I wanted to absorb everything I could. I also found it quite interesting that there were many people down-playing the system as a 'fad' or something along those line, saying that it just can't work, etc. The guy that started the thread (Santa Monica) started dozens of identical threads all over the internet and has been accused of trying to sell something, etc. I'm still not sure what his motives are, because he runs a site where he sells his design (and it looks like he's trying to nail down an international patent) as well as gives advice/comments on people's DIY builds. He's been banned, crucified, and run off from many sites, likely because he's pretty brash. I've been a little frustrated with his one-line responses to my involved questions, I have to ask over and over and over to get a question answered, but I think that's because like most people he has a REAL job too, and gets asked a lot of questions over and over and over. Or maybe he's hoping they'll give up on DIY and buy his design. Either way, it doesn't really matter, the concept behind the idea is solid and completely makes sense, as you said, it mimics the natural eco-system.

Think about this - why do you not test for Iron in SW? It's because algae sucks it up right away. Even in a marine aquarium (versus ocean), various forms of algae perform the vast majority of filtration. So why not use that to your advantage?

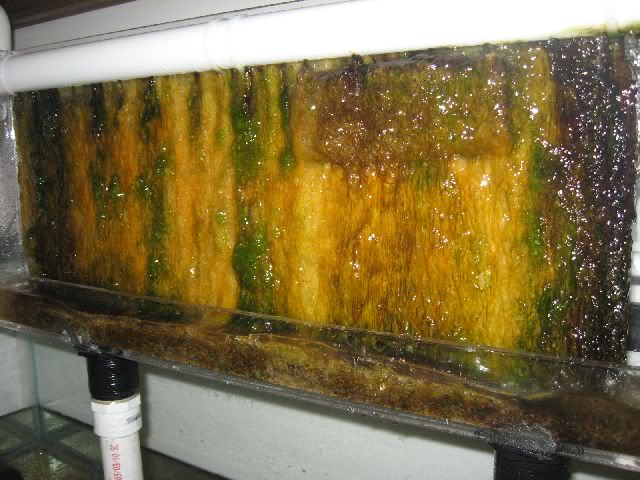
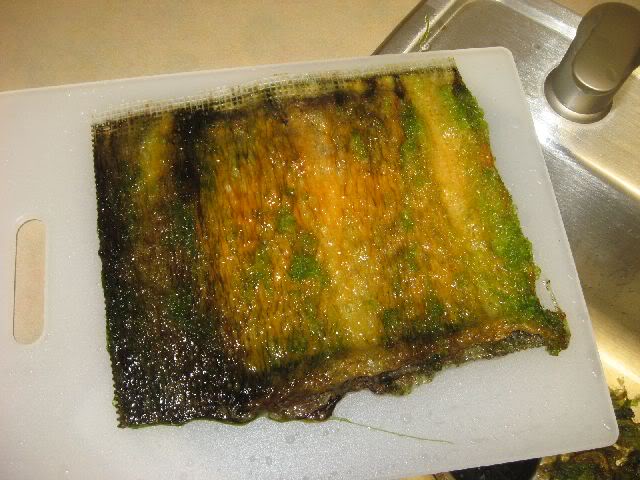
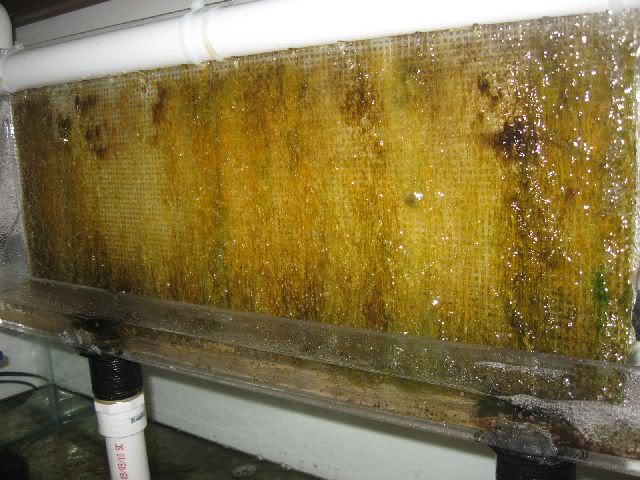
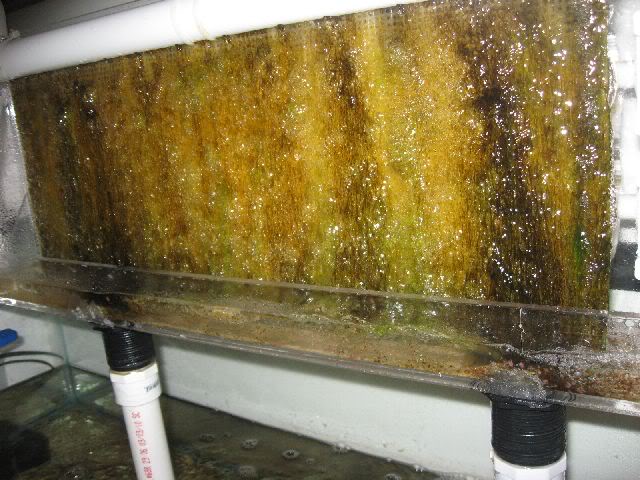
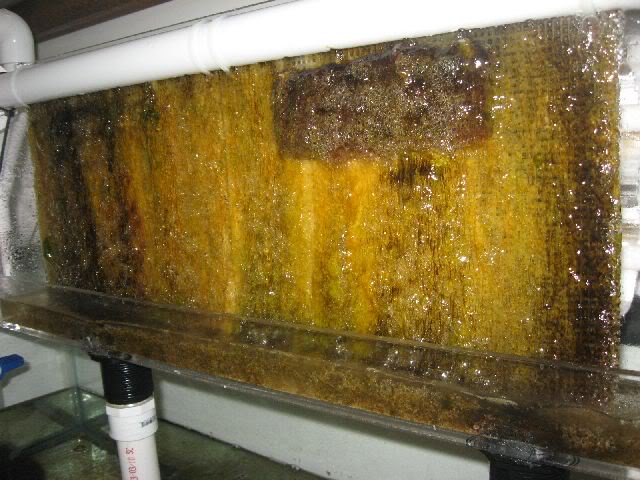
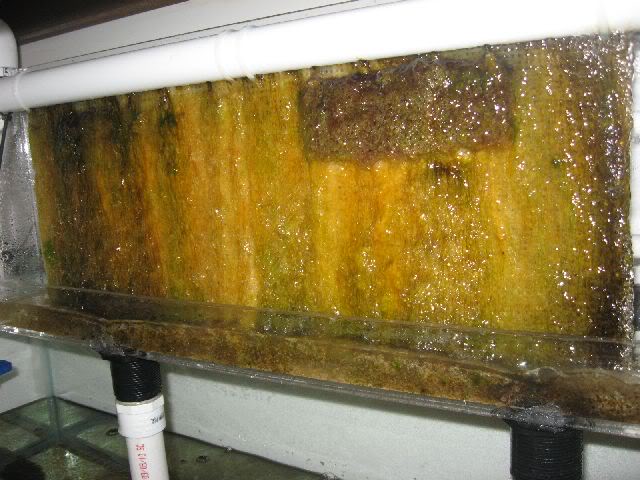
So with that said, here's what 1/2 of the screen looked like yesterday morning before I cleaned it:

img_1172697_0_6dbc5748e57e92909abc735921d30100.jpg


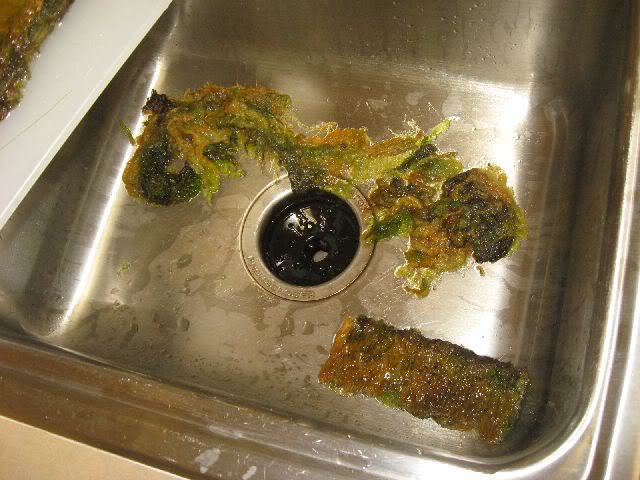
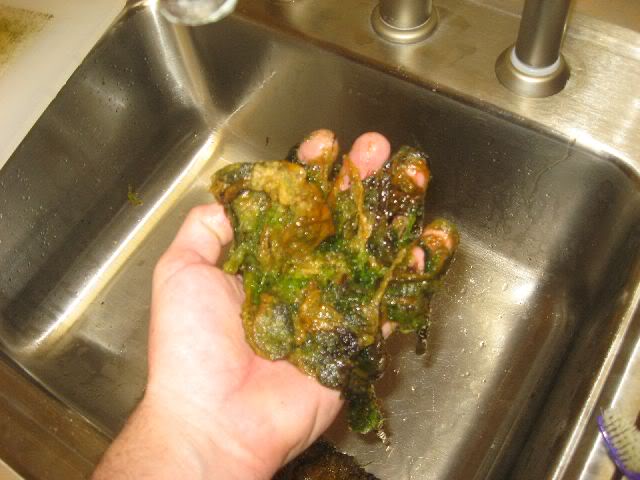
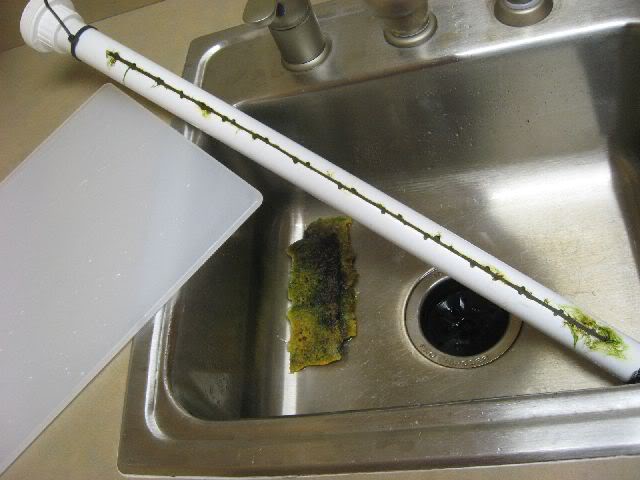
Here's what I cleaned off both sides (just came off with my fingers, no nails)

img_1172697_1_4a479c800728055a145bfc9a253cd340.jpg


Mmmmmmm...

img_1172697_2_71d4a1ab39fb6dce8f5adbf4b6a48663.jpg


And the slot tube, that I need to re-do (to even the slot and get rid of the cross-cuts)

img_1172697_3_3f93696df9104667a01daae8da3ec020.jpg


I was in a rush so no time to take pics of the full screen after cleaning. I took off the seed screens and tossed them. It's established enough (I didn't need them at all, apparently)

Also, I bought a jar of Reef Nutrition Tigger Pods and had them add 1/2 to the tank and 1/2 to the overflow chamber. I swished the screen in the DT before cleaning and didn't see any pods (although there might have been some, who knows) but I figured it can't hurt since there's a scooter blenny in the tank. Also got them some Rod's Food, Oyster Feast, and Arcti-Pods to supplement their pellets & cubes.
 
Hey floyd, got google sketch and im working to 3d design the model i was talking about.
 
I look forward to seeing your idea!

Here's the screen today, 2 days after cleaning

img_1173148_0_9fa68303377dabb14ea16c042b86b8f7.jpg


And the sump is getting a bit dirty. This is the reason I was changing out 2 filter socks every week

img_1173148_1_0a276a75fb4ae96100459f5a2f33b856.jpg
 
img_1173286_0_38e2a52de68e275265720abe6716473e.jpg


Right side is the inside, algae screen angles down to another panel that angles to the drain there on the corner all the way down into top canopy area and close to water surface to protect lights.
 
Ok, now I see what you're thinking of doing. Here's the thing to consider: with a one-sided screen, you have to double the screen size. With a horizontal screen, I think you need to double it also. Which mean you need a screen size 4x that if you had it vertical and lit it on both sides.

So think about this, if you need 55 sq in of screen, that's 10"x5" lit on both sides, 10x10 on one side, and 10x20 on one side and horizontal (which is about what your drawing shows). You could, in theory, make a screen 20x3 or 20x4 with a 24" T5HO on each side as long as you pumped 700 GPH through it. That would probably take up the same amount of space above the canopy. But realistically, it would probably be better to make a vertical screen that was 5" wide and 10" tall with 5x35 or 175 minimum GPH across the screen and lit on both sides. If you think about it, it wouldn't take up that much space if the pump and drain came through the same location in the corner, you could build that into a 5g bucket with holes drilled in the bottom and the lights poking through the sides. But if you're going for aesthetics, and that's the reason for hiding it in above the canopy, then that won't work.

Also, I think your above-the-lighting-canopy idea would have to be guaranteed watertight.

Just some thoughts and things to consider.

I haven't really seen a decent hang-on-tank design. So far they're all sump based, or an unsightly bucket off to the side. I'm sure it's been thought of though. An in/above-canopy design would probably be a new one...
 
Screen today

img_1173353_0_ab5b30fc55afc09fd032f6df84f90f22.jpg


I also added 2 tsp of Kent Iron/Manganese the other day. We'll see if that boosts the green growth this week. That was a recommendation from SM due to the low flow / yellow growth.
 
Hmm I think I need more lighting on mine and maybe rough it up some more. I cant seem to get as much growth on mine as you have on yours.
 
Back
Top Bottom