I have been EI dosing for the past year or so, and over that past year or so I've missed several doses. Missing a day here or there will not cause your tank to crash. However, missing a whole week (vacation or crazy work schedule) of dosing can really wreak havoc on your tank. I thought PPS Pro might be easier since you can use water to make a solution and just pour some in. Then I thought, why not have something do it automatically every day?
I decided to set out to find an automatic doser. I quickly realized that the commercially available ones were far too expensive for me. I decided to start looking around for plans that someone else used. This is when I found out that our very own Neilanh had made one before! Ziggy pointed me to his old build thread (http://www.aquariumadvice.com/forums/f20/diy-auto-dosing-solution-101464.html) and this is when the gears started turning.
I started to piece together a list of equipment that I would need. I wanted to keep costs down so I strayed from Neilan's plans, just a bit. I have listed the equipment I bought below - along with prices.
The Equipment
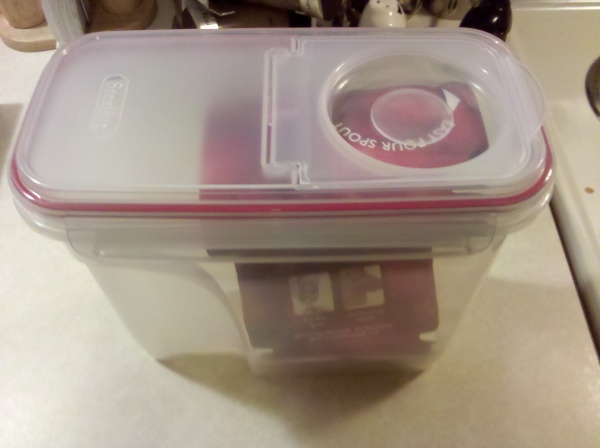
1.) Two 3.8 Liter containers - Target $5/ea
2.) Two Marineland Mini-Jet 606 Pumps - Given to me by a friend (two, new in box!)

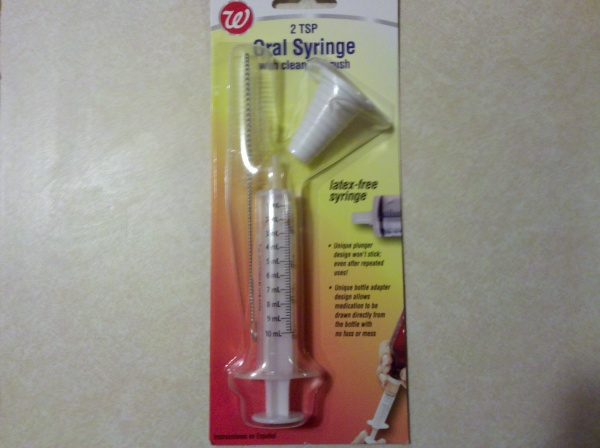
3.) Two Oral Syringes - Walgreens $2.49/ea
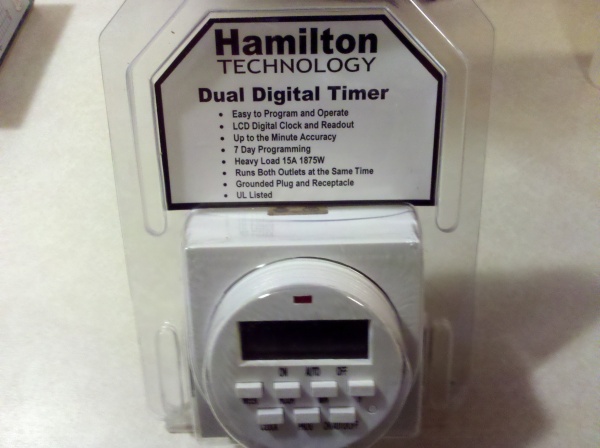
4.) Hamilton Dual Outlet Timer - MarineDepot.com $19.99
5.) 8 feet of 3/16" Airline Tubing - Petsmart $2
6.) One foot of 1/2" Tubing - Free (cut some off an old gravel vacuum)
Total: ~$37 + tax (pumps would be your biggest cost)
The Build:
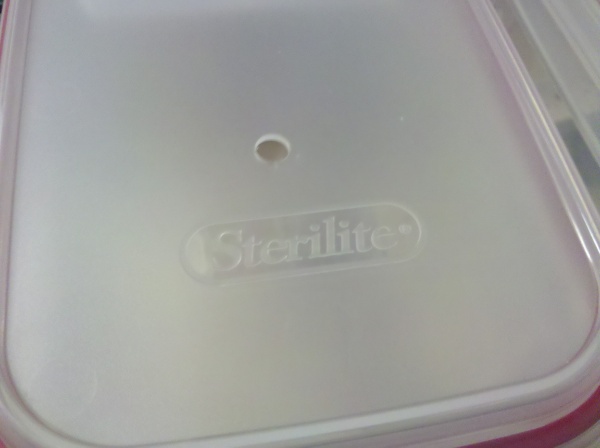
The first thing you need to do is drill a 1/4" hole into the top of each container. Take into consideration where the pump will be inside the container and drill the hole accordingly. Below is a picture of the drilled hole.
This will allow your airline tubing to run out the top of your container, while keeping it relatively sealed. I was concerned about it pinching the tubing but a 1/4" was perfect for my tubing. As far as the power cord for the pump, I just have it running out the top on a side - under the lid.
The next part of the build is to assemble your pump and adapter. Open your syringe up and take the plunger out. Cut a piece of 1/2" tubing to about 2 inches. Push the 1/2" tubing into the "cavity" end of the syringe. It should be a snug fit, mine only went in until it reached the 10ml marking. Put the other end of the 1/2" tubing onto pump's outflow. I forgot to take a picture of this part so I will reference Neilan's picture below.

Source: http://www.aquariumadvice.com/forums/f20/diy-auto-dosing-solution-101464.html
In the picture above you can see the 3/16" airline tubing attached at the top to show you how it "adapts" it from 1/2" to 3/16".
Once you have that assembled you are ready to put it in the container. I put the pump, with 1/2" tubing and syringe attached, into the bottom of the 3.8L container. I then fed the 3/16" tubing through the hole I drilled in the lid and attached it to the end of the syringe.
The next step is to figure out how long to cut your 3/16" tubing. I found these pumps would not push the solution more than 60" straight up so I had to make sure I did not exceed that. Luckily, I was just under 52" and the pumps worked fine.
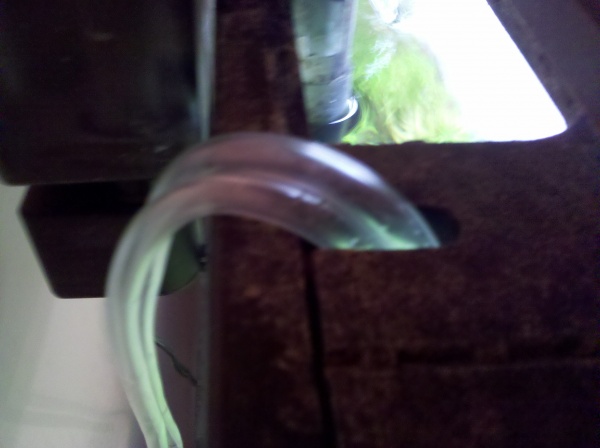
I routed my 3/16" tubing straight out of the container and straight up to the top of my tank. Now I didn't want the ends of the tubing to be in the water (prevent back flow through the tubing) so I positioned them above the water surface. I ran them into my hood, which had a cutout for a power cord. See picture below.
Now that I had my tubing cut to length, it was time to figure out the dosing/mixing of everything. Neilan - the great guy he is - had a nifty spreadsheet that you plug your numbers (tank size, dosing size, container size) into and it tells you, in grams, how much to mix in.
In order to continue I had to find my dosing size (how much solution gets pumped out). This is where the dual outlet timer comes in. The timer can be set in minute increments, so I planned on this coming on for one minute a day and pumping the PPS Pro solution into my tank.
I moved the container and pump over to a sink to do some trial runs. I made sure I had the tubing elevated at the same level as it would be on my tank and then started to run some trials. I filled the container up, set the timer to turn on for one minute and measured what came out in a measuring cup. I started with around 170ml and slowly, as the solution in the container lowered, so did my ml dosed. I averaged what I got out of the pump each time and came up with 125ml.
I took the 125ml dosing average and plugged that into Neilan's handy dandy spreadsheet, along with tank size, and container size and found out how many grams of each fertilizer I need to add. All the macros go into one container and the Plantex CSM+B goes in the other.
I put everything back over on the tank and set the timer. Once the scheduled time (half hour before lights on) came around, the pumps kicked on and out came my fertilizers!
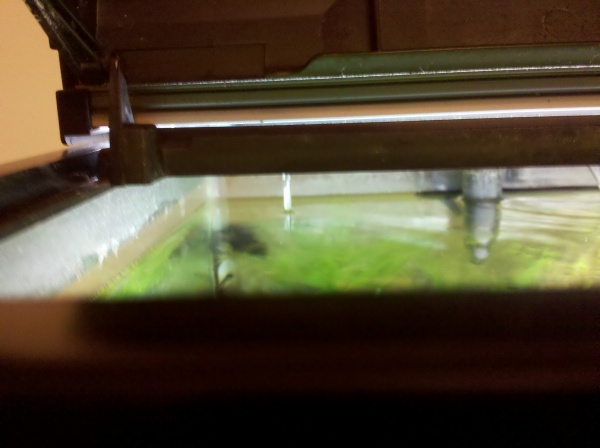
You can see the solution being pumped in to the tank (left of my filter intake).
If you have any questions please feel free to post here or PM me. With Neilan's permission, I will e-mail you the spreadsheet if you are interested (can't seem to post Excel files on here).
The Spreadsheet
You can download it by clicking the link below. It is pretty self explanatory but if you have questions, ask!
PPS Pro Autodoser Calculator.xls
Inspiration and all credit goes to: http://www.aquariumadvice.com/forums/f20/diy-auto-dosing-solution-101464.html and Neilan!
I decided to set out to find an automatic doser. I quickly realized that the commercially available ones were far too expensive for me. I decided to start looking around for plans that someone else used. This is when I found out that our very own Neilanh had made one before! Ziggy pointed me to his old build thread (http://www.aquariumadvice.com/forums/f20/diy-auto-dosing-solution-101464.html) and this is when the gears started turning.
I started to piece together a list of equipment that I would need. I wanted to keep costs down so I strayed from Neilan's plans, just a bit. I have listed the equipment I bought below - along with prices.
The Equipment
1.) Two 3.8 Liter containers - Target $5/ea
2.) Two Marineland Mini-Jet 606 Pumps - Given to me by a friend (two, new in box!)
3.) Two Oral Syringes - Walgreens $2.49/ea
4.) Hamilton Dual Outlet Timer - MarineDepot.com $19.99
5.) 8 feet of 3/16" Airline Tubing - Petsmart $2
6.) One foot of 1/2" Tubing - Free (cut some off an old gravel vacuum)
Total: ~$37 + tax (pumps would be your biggest cost)
The Build:
The first thing you need to do is drill a 1/4" hole into the top of each container. Take into consideration where the pump will be inside the container and drill the hole accordingly. Below is a picture of the drilled hole.
This will allow your airline tubing to run out the top of your container, while keeping it relatively sealed. I was concerned about it pinching the tubing but a 1/4" was perfect for my tubing. As far as the power cord for the pump, I just have it running out the top on a side - under the lid.
The next part of the build is to assemble your pump and adapter. Open your syringe up and take the plunger out. Cut a piece of 1/2" tubing to about 2 inches. Push the 1/2" tubing into the "cavity" end of the syringe. It should be a snug fit, mine only went in until it reached the 10ml marking. Put the other end of the 1/2" tubing onto pump's outflow. I forgot to take a picture of this part so I will reference Neilan's picture below.
Source: http://www.aquariumadvice.com/forums/f20/diy-auto-dosing-solution-101464.html
In the picture above you can see the 3/16" airline tubing attached at the top to show you how it "adapts" it from 1/2" to 3/16".
Once you have that assembled you are ready to put it in the container. I put the pump, with 1/2" tubing and syringe attached, into the bottom of the 3.8L container. I then fed the 3/16" tubing through the hole I drilled in the lid and attached it to the end of the syringe.
The next step is to figure out how long to cut your 3/16" tubing. I found these pumps would not push the solution more than 60" straight up so I had to make sure I did not exceed that. Luckily, I was just under 52" and the pumps worked fine.
I routed my 3/16" tubing straight out of the container and straight up to the top of my tank. Now I didn't want the ends of the tubing to be in the water (prevent back flow through the tubing) so I positioned them above the water surface. I ran them into my hood, which had a cutout for a power cord. See picture below.
Now that I had my tubing cut to length, it was time to figure out the dosing/mixing of everything. Neilan - the great guy he is - had a nifty spreadsheet that you plug your numbers (tank size, dosing size, container size) into and it tells you, in grams, how much to mix in.
In order to continue I had to find my dosing size (how much solution gets pumped out). This is where the dual outlet timer comes in. The timer can be set in minute increments, so I planned on this coming on for one minute a day and pumping the PPS Pro solution into my tank.
I moved the container and pump over to a sink to do some trial runs. I made sure I had the tubing elevated at the same level as it would be on my tank and then started to run some trials. I filled the container up, set the timer to turn on for one minute and measured what came out in a measuring cup. I started with around 170ml and slowly, as the solution in the container lowered, so did my ml dosed. I averaged what I got out of the pump each time and came up with 125ml.
I took the 125ml dosing average and plugged that into Neilan's handy dandy spreadsheet, along with tank size, and container size and found out how many grams of each fertilizer I need to add. All the macros go into one container and the Plantex CSM+B goes in the other.
I put everything back over on the tank and set the timer. Once the scheduled time (half hour before lights on) came around, the pumps kicked on and out came my fertilizers!
You can see the solution being pumped in to the tank (left of my filter intake).
If you have any questions please feel free to post here or PM me. With Neilan's permission, I will e-mail you the spreadsheet if you are interested (can't seem to post Excel files on here).
The Spreadsheet
You can download it by clicking the link below. It is pretty self explanatory but if you have questions, ask!
PPS Pro Autodoser Calculator.xls
Inspiration and all credit goes to: http://www.aquariumadvice.com/forums/f20/diy-auto-dosing-solution-101464.html and Neilan!
Last edited:
")