You are using an out of date browser. It may not display this or other websites correctly.
You should upgrade or use an alternative browser.
You should upgrade or use an alternative browser.
DIY Auto Top Off with Solid State Relay
- Thread starter Serge
- Start date
The friendliest place on the web for anyone with an interest in aquariums or fish keeping!
If you have answers, please help by responding to the unanswered posts.
If you have answers, please help by responding to the unanswered posts.
Serge
Aquarium Advice Addict
Serge
Aquarium Advice Addict
Serge
Aquarium Advice Addict
Serge
Aquarium Advice Addict
Serge
Aquarium Advice Addict
Serge
Aquarium Advice Addict
BillyZ
Aquarium Advice Addict
Very nice! Your explanation of the purpose of the 555 made perfect sense, didn't find it confusing at all.
couple of quick questions.
what did all the parts combined cost, and what would you charge to put 1 together for me?
couple of quick questions.
what did all the parts combined cost, and what would you charge to put 1 together for me?
Serge
Aquarium Advice Addict
BillyZ said:Very nice! Your explanation of the purpose of the 555 made perfect sense, didn't find it confusing at all.
Thanks! Glad to hear this. I do have a tendency to carry on too long when explaining things. Also, English not being my native language, I sometime do not use the proper words to say what I mean. 8O
BillyZ said:couple of quick questions.
Shoot away!


BillyZ said:what did all the parts combined cost, and what would you charge to put 1 together for me?
Ummm.... Good question. I did not really tally up the total cost but, excluding the solenoid, 50$ seems like a good guess. I will try to make a cost estimate, as someone else has also inquired about the cost. 8O
As for making one, I have no idea, I would have to look into it. Tho at this time I cannot do much in the way of hobby or anything else. I bought a new house and am in the process of selling this one, so I have to keep everything neat and tidy for house visits. Unless I want to suffer the wrath of my better half.
But, if you can wait a couple of months, maybe we can work out something for sure. Cheers!
BillyZ
Aquarium Advice Addict
Thanks Serge! I'd say you're english is just fine.
$50 canadian, right? So I could expect to pay about $75ish U.S. thats not bad.
You said, "radio shack type" for the CB; would the following be large enough?
http://www.radioshack.com/product.asp?catalog_name=CTLG&product_id=276-148
i had a quick thought. I think U.S. and Canada have the same power supply levels. But just to be sure i won't need to make further adjustments, what is the power coming out of your typical socket in canada?
any chance we could get a peek at the inside of yours?
Serge
Aquarium Advice Addict
Well, thank you!BillyZ said:Thanks Serge! I'd say you're english is just fine.
Umm.... Usually, it works the other way around.BillyZ said:$50 canadian, right? So I could expect to pay about $75ish U.S. thats not bad.
Low US price, MUCH higher CDN price. Eh! It's not the same type I have but it will certainly do the job.BillyZ said:You said, "radio shack type" for the CB; would the following be large enough?
http://www.radioshack.com/product.asp?catalog_name=CTLG&product_id=276-148
Yes, we have the same voltage and cycle: 115/120 @ 60 Hz.BillyZ said:i had a quick thought. I think U.S. and Canada have the same power supply levels. But just to be sure i won't need to make further adjustments, what is the power coming out of your typical socket in canada?
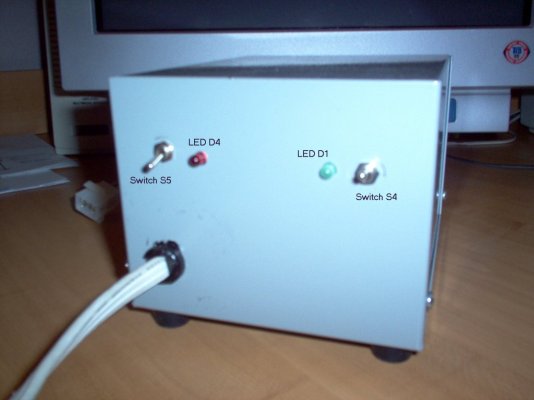
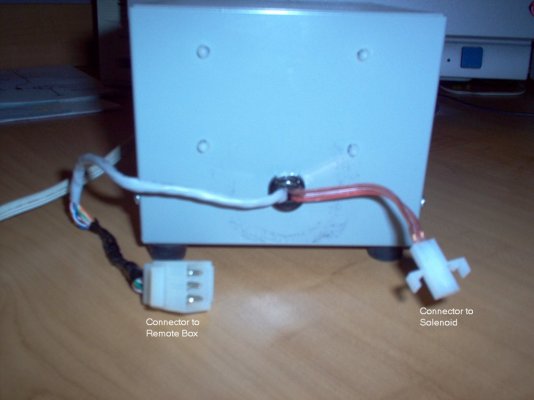
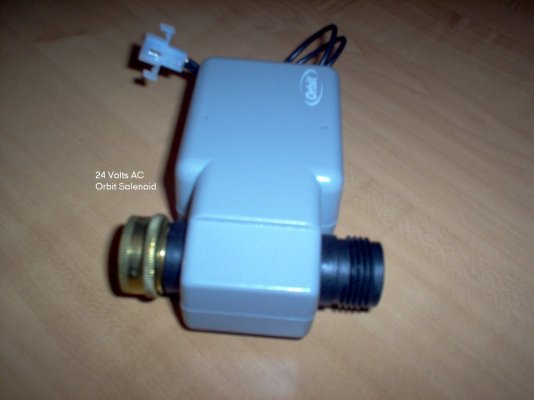
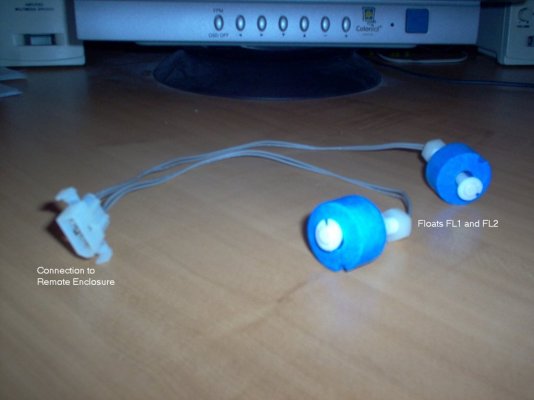
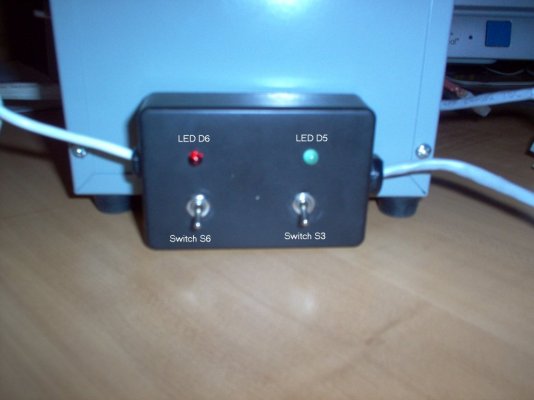
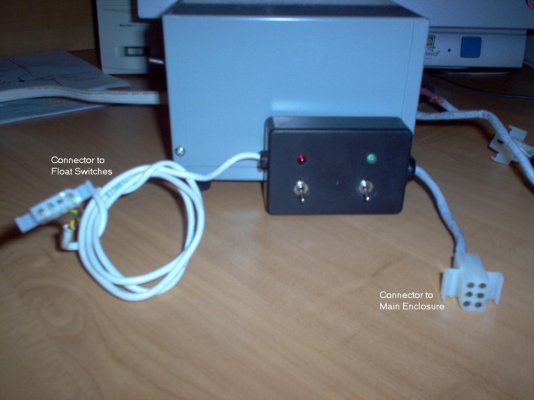
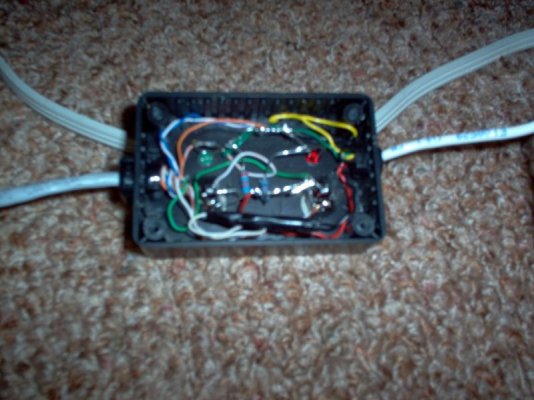
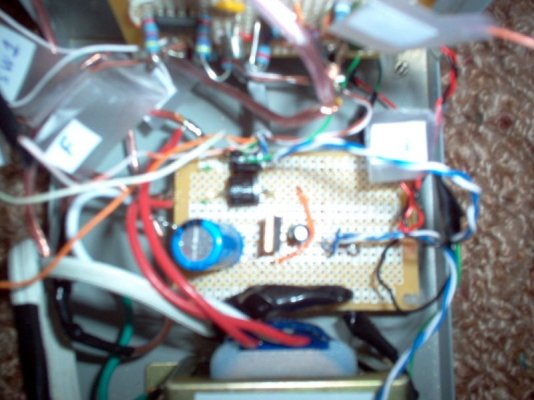
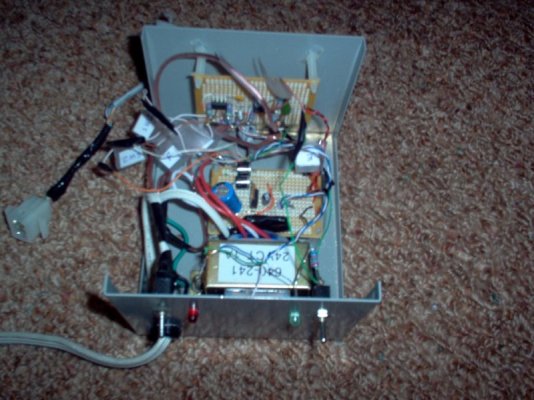
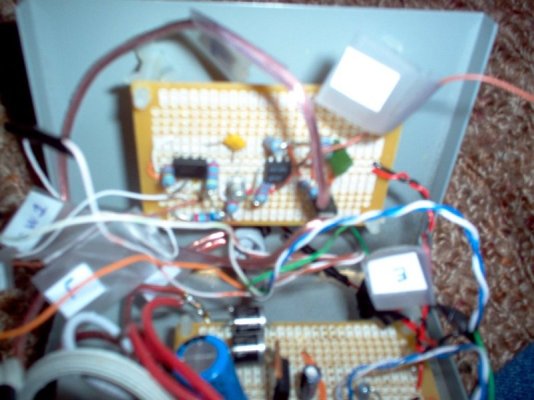
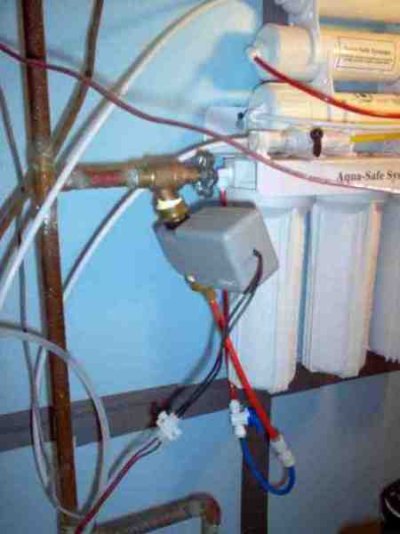
By your command!BillyZ said:any chance we could get a peek at the inside of
yours?
Check the following pictures. Unfortunately, unlike with my 35 mm, I cannot do macro photography with this digital camera, but it should give a good idea.HTH
Attachments

Serge
Aquarium Advice Addict
Serge
Aquarium Advice Addict
Serge
Aquarium Advice Addict
BillyZ
Aquarium Advice Addict
Fantasic! Thanks for all the information Serge!
what are your thoughts on additional resistance/loss of a long run on the float switches? If the leads on those switches were say... 40-50 feet (apx 15 meters), would the additional resistance on the wire call for any adjustments? I'm considering using this rig on an RO unit in my basement, but filling the tank/sump in my living room. The lead runs would be about that length (to keep the run clean)
Thanks yet again!
uhhh yea.. I don't know WHERE my head was on that one. I think I just applied the typical 50% backwards. So then 35-40$ is even better!Umm.... Usually, it works the other way around. Low US price, MUCH higher CDN price. Eh!
what are your thoughts on additional resistance/loss of a long run on the float switches? If the leads on those switches were say... 40-50 feet (apx 15 meters), would the additional resistance on the wire call for any adjustments? I'm considering using this rig on an RO unit in my basement, but filling the tank/sump in my living room. The lead runs would be about that length (to keep the run clean)
Thanks yet again!
Serge
Aquarium Advice Addict
BillyZ said:what are your thoughts on additional resistance/loss of a long run on the float switches? If the leads on those switches were say... 40-50 feet (apx 15 meters), would the additional resistance on the wire call for any adjustments? I'm considering using this rig on an RO unit in my basement, but filling the tank/sump in my living room. The lead runs would be about that length (to keep the run clean)
Thanks yet again!
OK, after a little research, here is what you need to know and don't want to know.
Household telephone wire can be either #22 or #24, so here are the technical details about the wire resistance. Loss is minimal as we are dealing with 5 Vdc.
#22 wire: Resistance is 16.14 Ohms for each 1,000 feet of wire, or 0.01614 Ohm a foot.
#24 wire: Resistance is 25.67 Ohms for each 1,000 feet of wire, or 0.02567 Ohm a foot.
So, for 50 feet of wire, you are looking at very little additional resistance to the circuit, which in this case, the switches are connected to either ground or 5 Vdc.
#22 wire - 50 feet: 0.807 Ohm.
#24 wire - 50 feet: 1.2836 Ohm.
HTH
Serge
Aquarium Advice Addict
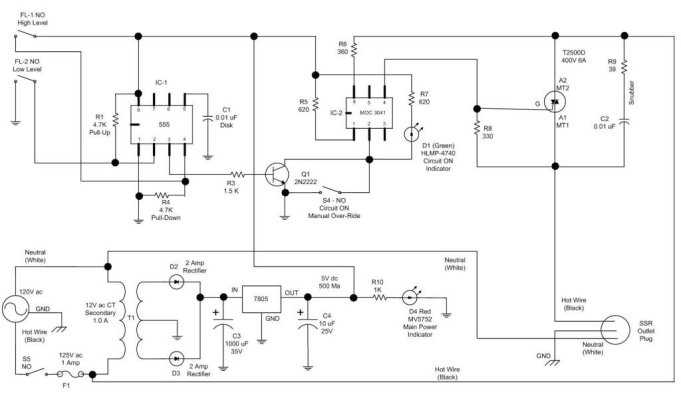
DIY Auto Top Off with Solid State Relay - Improved Schematic
Well folks, here is a revised, improved schematic.
After moving in September, it became apparent that the original circuit was very limited and it needed some design improvements to be usefull to other people. The one I actually built will have to be somewhat modified now that my setup is completely different from my previous house.
This version should allow you to just plug in whatever pump you are using into it, and let the float switches control the On/Off phases. There is still a manual overide and the standard On/Off switches.
The section where it indicates SSR Oulet Plug, is in effect an oulet plug on the enclosure of the circuit, allowing you to just plug your pump.
The kiss principle in action.
The previous caveats still applies. Umm... I had to shrink the size of the file as it was too big for the site. If someone wants a larger one, PM me and I will email it to you.
Enjoy!
8)
Attachments
greenmaji
Aquarium Advice Addict
Ok Serge.. Im very impressed.. and almost completely lost
any chance you could give us a thread on electroinics 101 to help learn how to interperate your schematic?
any chance you could explain what the diffent parts do? and maybe a link or two to places were you could obtain the parts?
TIA
any chance you could give us a thread on electroinics 101 to help learn how to interperate your schematic?
any chance you could explain what the diffent parts do? and maybe a link or two to places were you could obtain the parts?
TIA
Serge
Aquarium Advice Addict
Hey greenmaji!
Umm, there are many web sites that provide tons of information on electronics basics. Beside, I am not a very good teacher, believe me.
Well, all the information/explanation is already presented in this thread. Check the previous pages. The parts ID on the schematic are the same as in the original parts list, except for a few exceptions where the part has changed but the info is on the new schematic. I would suggest that you print this new schematic, before reading this thread from the beginning, to make it easier to follow the explanations I initially provided. No need to reinvent the wheel.
As for the parts, you have your local Radio Shack, I also ordered from Newarks what I could not find locally. Here is a short list of parts supplier:
Newark: http://www.newark.com/
Jameco: http://www.jameco.com
Mouser: http://www.mouser.com
Global Semi: http://www.globalsemi.com
In my situation, what I could not find at Radio Shack, or a local electronic parts distributor, I just ordered from Newark and got the parts in 3 days. By the way, as a precaution, I always buy two of whatever I purchase, just in case.
But, I will gladly answer specific questions.
Happy DIY and enjoy!
8)
Umm, there are many web sites that provide tons of information on electronics basics. Beside, I am not a very good teacher, believe me.
Well, all the information/explanation is already presented in this thread. Check the previous pages.
As for the parts, you have your local Radio Shack, I also ordered from Newarks what I could not find locally. Here is a short list of parts supplier:
Newark: http://www.newark.com/
Jameco: http://www.jameco.com
Mouser: http://www.mouser.com
Global Semi: http://www.globalsemi.com
In my situation, what I could not find at Radio Shack, or a local electronic parts distributor, I just ordered from Newark and got the parts in 3 days. By the way, as a precaution, I always buy two of whatever I purchase, just in case.
But, I will gladly answer specific questions.
Happy DIY and enjoy!
8)
Serge
Aquarium Advice Addict
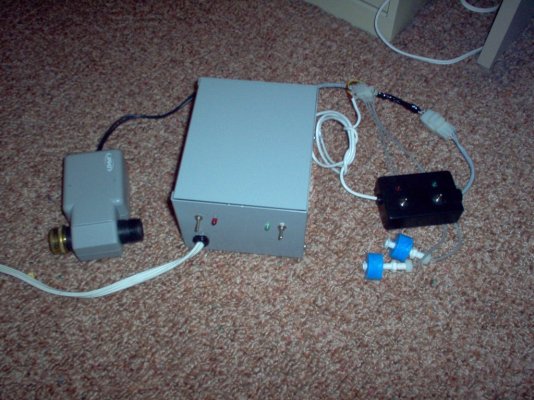
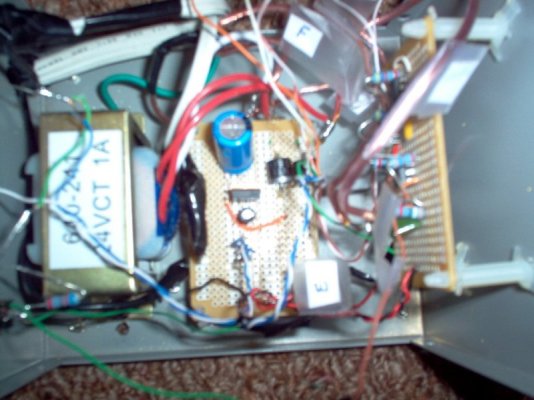
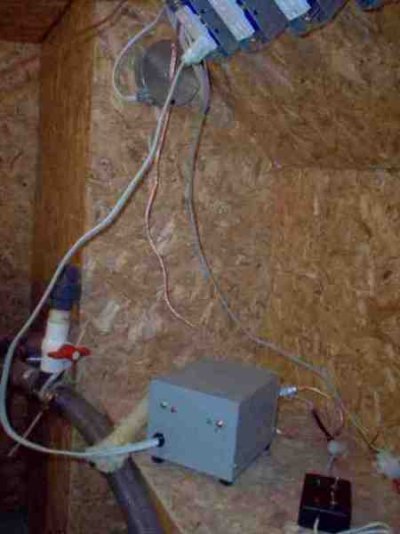
Update - Unit is now operational
Hi folks, just thought I would post a few pics of my DIY top off unit. It has been running for the last 3 days. It's so nice now, not having to worry about forgetting that water valve! Hehehe
Cheers!
8)
Hi folks, just thought I would post a few pics of my DIY top off unit. It has been running for the last 3 days. It's so nice now, not having to worry about forgetting that water valve! Hehehe
Cheers!
8)
Attachments

Similar threads
- Replies
- 7
- Views
- 7K
- Replies
- 1
- Views
- 2K
- Replies
- 7
- Views
- 604