maxwell1295
Aquarium Advice FINatic
I posted this here in the Planted Tanks Forum since it would be of most use to folks with planted tanks. If the mods feel the need to move, I have no problem with that. I just thought it would be more use to the "Plantheads" of AA. 
This is pretty much the standard inline PVC reactor. I saw a few variations of this setup online and decided to build one myself. In the process of setting up a pressurized system for my 46G, I realized that the cheapo glass diffuser in there now would not be sufficient. I have always been able to produce CO2 with my DIY setup, but getting it diffused properly has always been a problem. That's where the inline reactor comes into play. I have a Rena XP filter to which this reactor will be attached (on the outlet side).
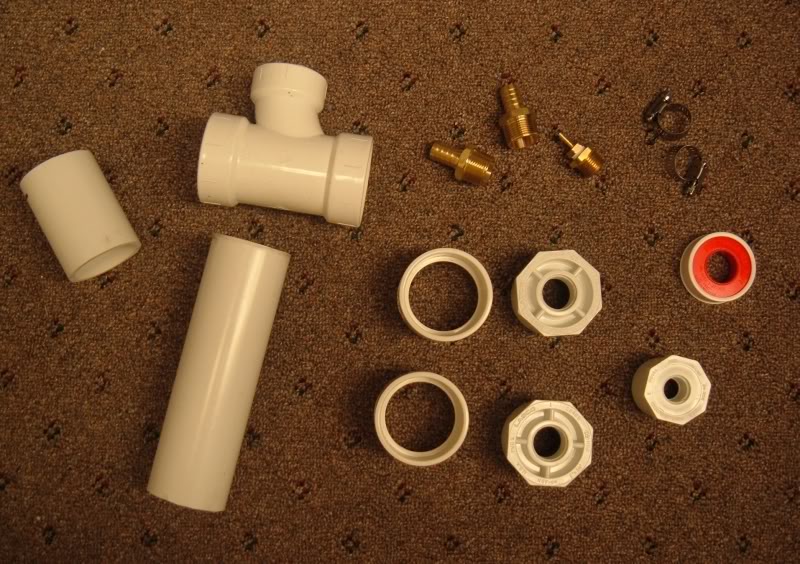
Step 1: The Parts (all parts were purchased at Lowes)
2" PVC pipe
2"x 2"x 1-1/2" sanitary tee
2" couplings
2" x 3/4" bushing adapter (brass)
1-1/2" x 1/2" bushing adapter (brass)
1/2" x 1/4" female adapter (brass)
1/4" x 1/8" barb fitting (brass)
Stuff
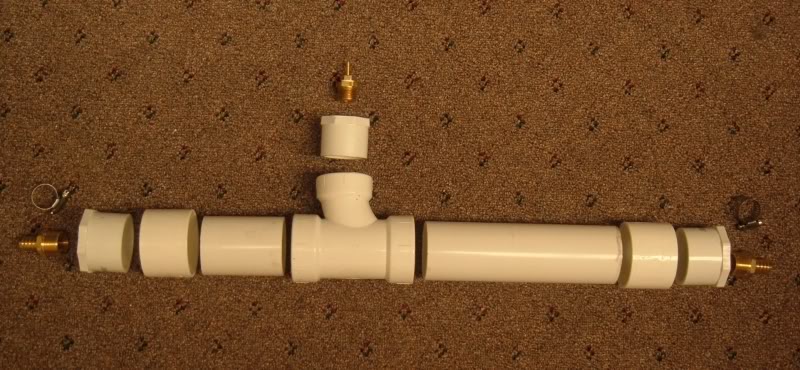
Step 2: Assembly
Assembly was pretty straight forward. I used PVC primer and epoxy on the PVC fittings and teflon tape on the threaded fittings. The PVC pipe was cut into one 8" piece and one 3" piece. I used a sanitary tee since it seems to channel the flow of the CO2 towards the water flow. I figured it would be a bit smother than a standard tee. That was my own added twist. Other than that, everything else is pretty standard.
This unit is pretty much a cross between Rex Grigg's unit that uses 3 tees and the other inline units that use a small airline fitting to inject the CO2.
Exploded view
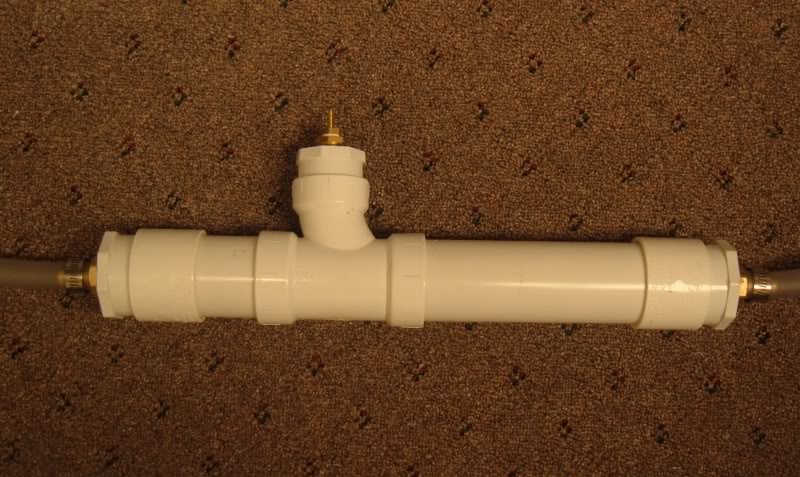
Assembled view
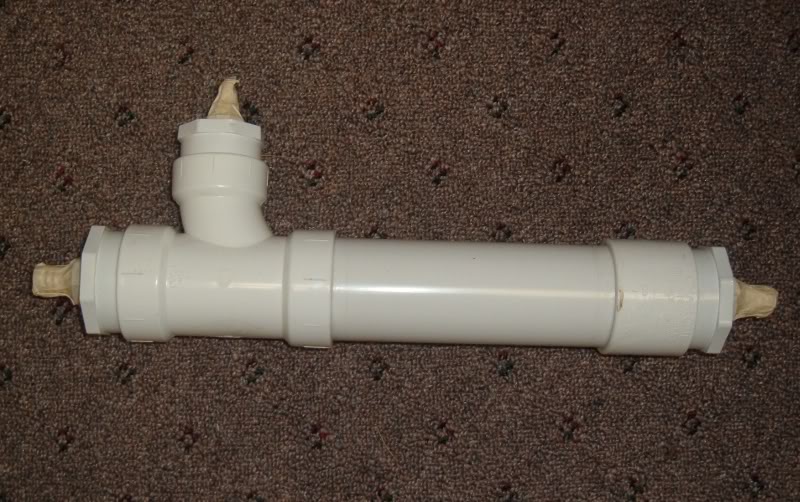
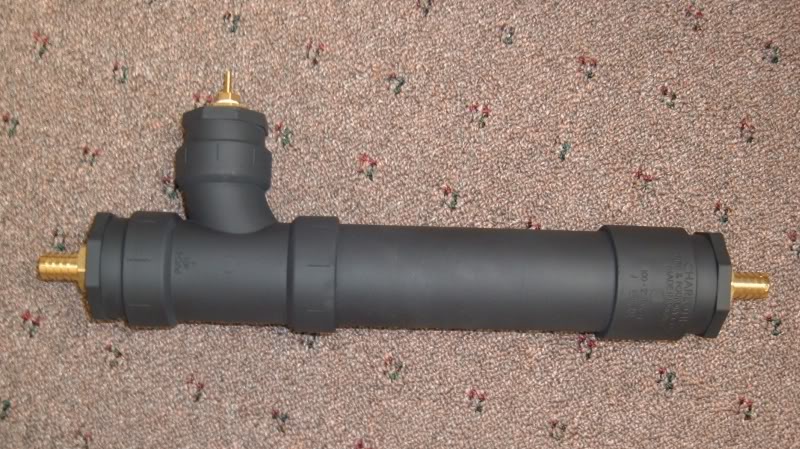
After deciding that the unit was too long, I took out the 3" piece of pipe and assembled it that way. One thing that I didn't take pics of are the nylon pot scrubbers I put inside the long piece of pipe. Those will aid in breaking up the CO2 bubbles into smaller bubbles that should be more useful to the plants.
Final configuration
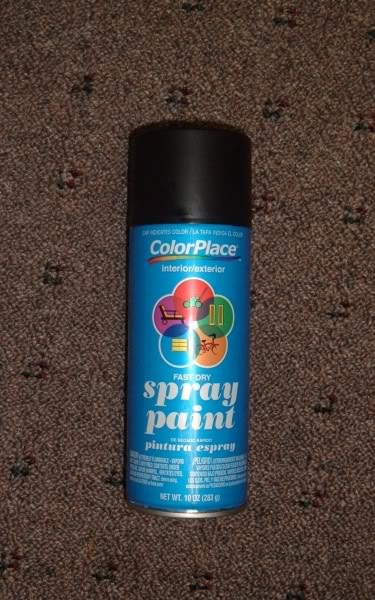
I then used some leftover vinyl paint (designed to spray on plastics) to give it a nice, professional look.
Finished product
Now, I haven't been able to test this unit yet so who knows whether it works or not. Now that I have all the parts I need to complete my pressurized setup, I should be able to get this thing up and running in a couple of days. The only thing I need to do is put together a bubble counter so I can keep track of how much CO2 I'm adding. The goal is to keep a steady 35-40ppm.
This is pretty much the standard inline PVC reactor. I saw a few variations of this setup online and decided to build one myself. In the process of setting up a pressurized system for my 46G, I realized that the cheapo glass diffuser in there now would not be sufficient. I have always been able to produce CO2 with my DIY setup, but getting it diffused properly has always been a problem. That's where the inline reactor comes into play. I have a Rena XP filter to which this reactor will be attached (on the outlet side).
Step 1: The Parts (all parts were purchased at Lowes)
2" PVC pipe
2"x 2"x 1-1/2" sanitary tee
2" couplings
2" x 3/4" bushing adapter (brass)
1-1/2" x 1/2" bushing adapter (brass)
1/2" x 1/4" female adapter (brass)
1/4" x 1/8" barb fitting (brass)
Stuff
Step 2: Assembly
Assembly was pretty straight forward. I used PVC primer and epoxy on the PVC fittings and teflon tape on the threaded fittings. The PVC pipe was cut into one 8" piece and one 3" piece. I used a sanitary tee since it seems to channel the flow of the CO2 towards the water flow. I figured it would be a bit smother than a standard tee. That was my own added twist. Other than that, everything else is pretty standard.
This unit is pretty much a cross between Rex Grigg's unit that uses 3 tees and the other inline units that use a small airline fitting to inject the CO2.
Exploded view
Assembled view
After deciding that the unit was too long, I took out the 3" piece of pipe and assembled it that way. One thing that I didn't take pics of are the nylon pot scrubbers I put inside the long piece of pipe. Those will aid in breaking up the CO2 bubbles into smaller bubbles that should be more useful to the plants.
Final configuration
I then used some leftover vinyl paint (designed to spray on plastics) to give it a nice, professional look.
Finished product
Now, I haven't been able to test this unit yet so who knows whether it works or not. Now that I have all the parts I need to complete my pressurized setup, I should be able to get this thing up and running in a couple of days. The only thing I need to do is put together a bubble counter so I can keep track of how much CO2 I'm adding. The goal is to keep a steady 35-40ppm.