DIY LED Fixture

The friendliest place on the web for anyone with an interest in aquariums or fish keeping!
If you have answers, please help by responding to the unanswered posts.

sudz

Aquarium Advice Addict
Joined
Oct 14, 2005
Messages
1,275
Location
Hamilton, Ontario, Canada
So, Walking the dog, and what do I see... A nice piece of aluminium! I think to my self... Gee... that would make a really nice LED heatsync. I bet its a bunch of pieces.

on my way back, I look at it... and its long and one solid piece!

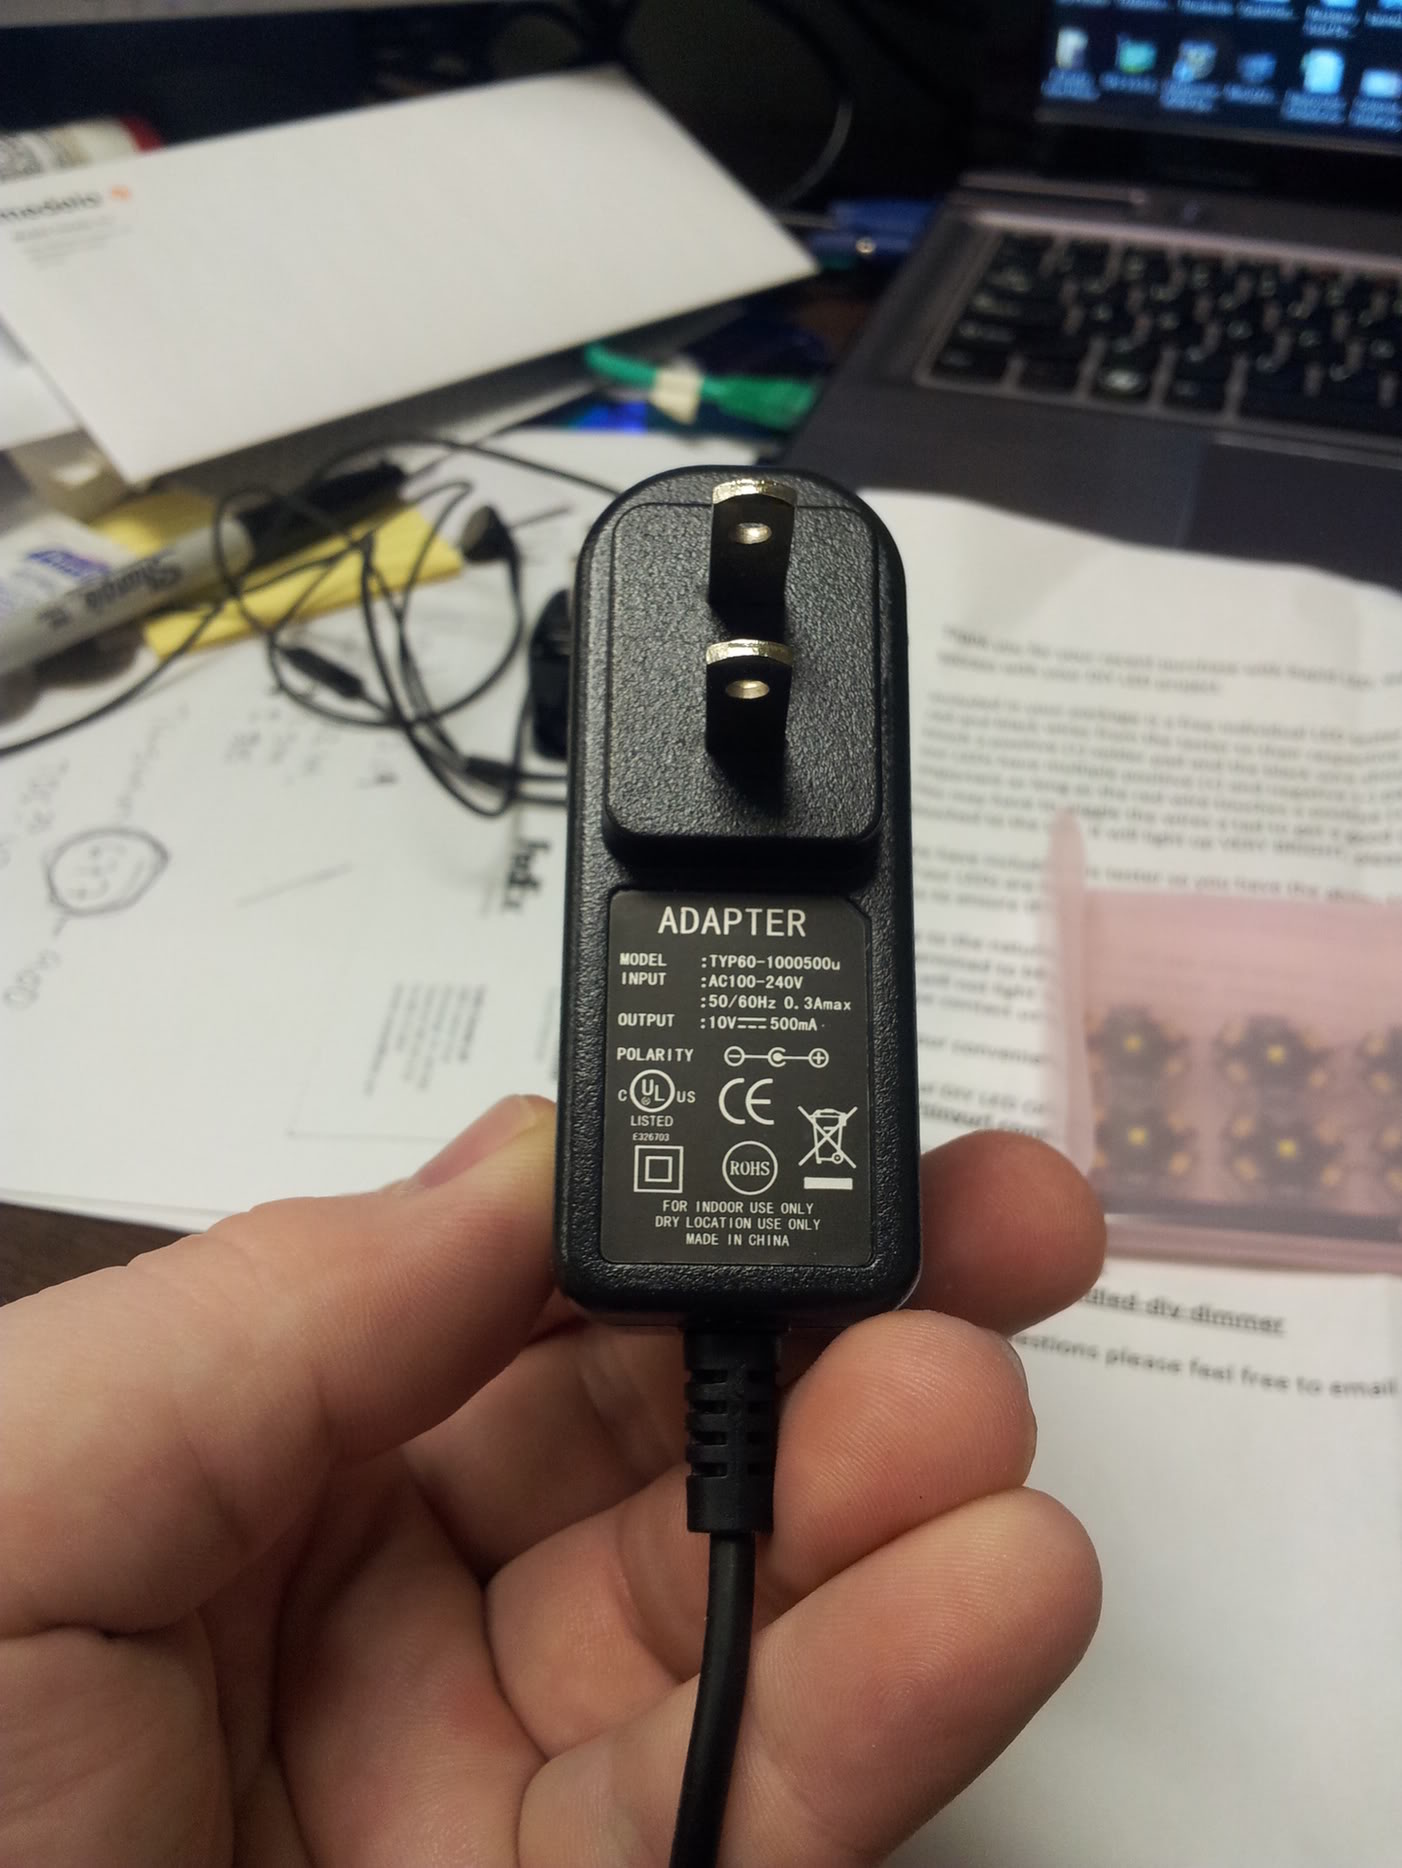
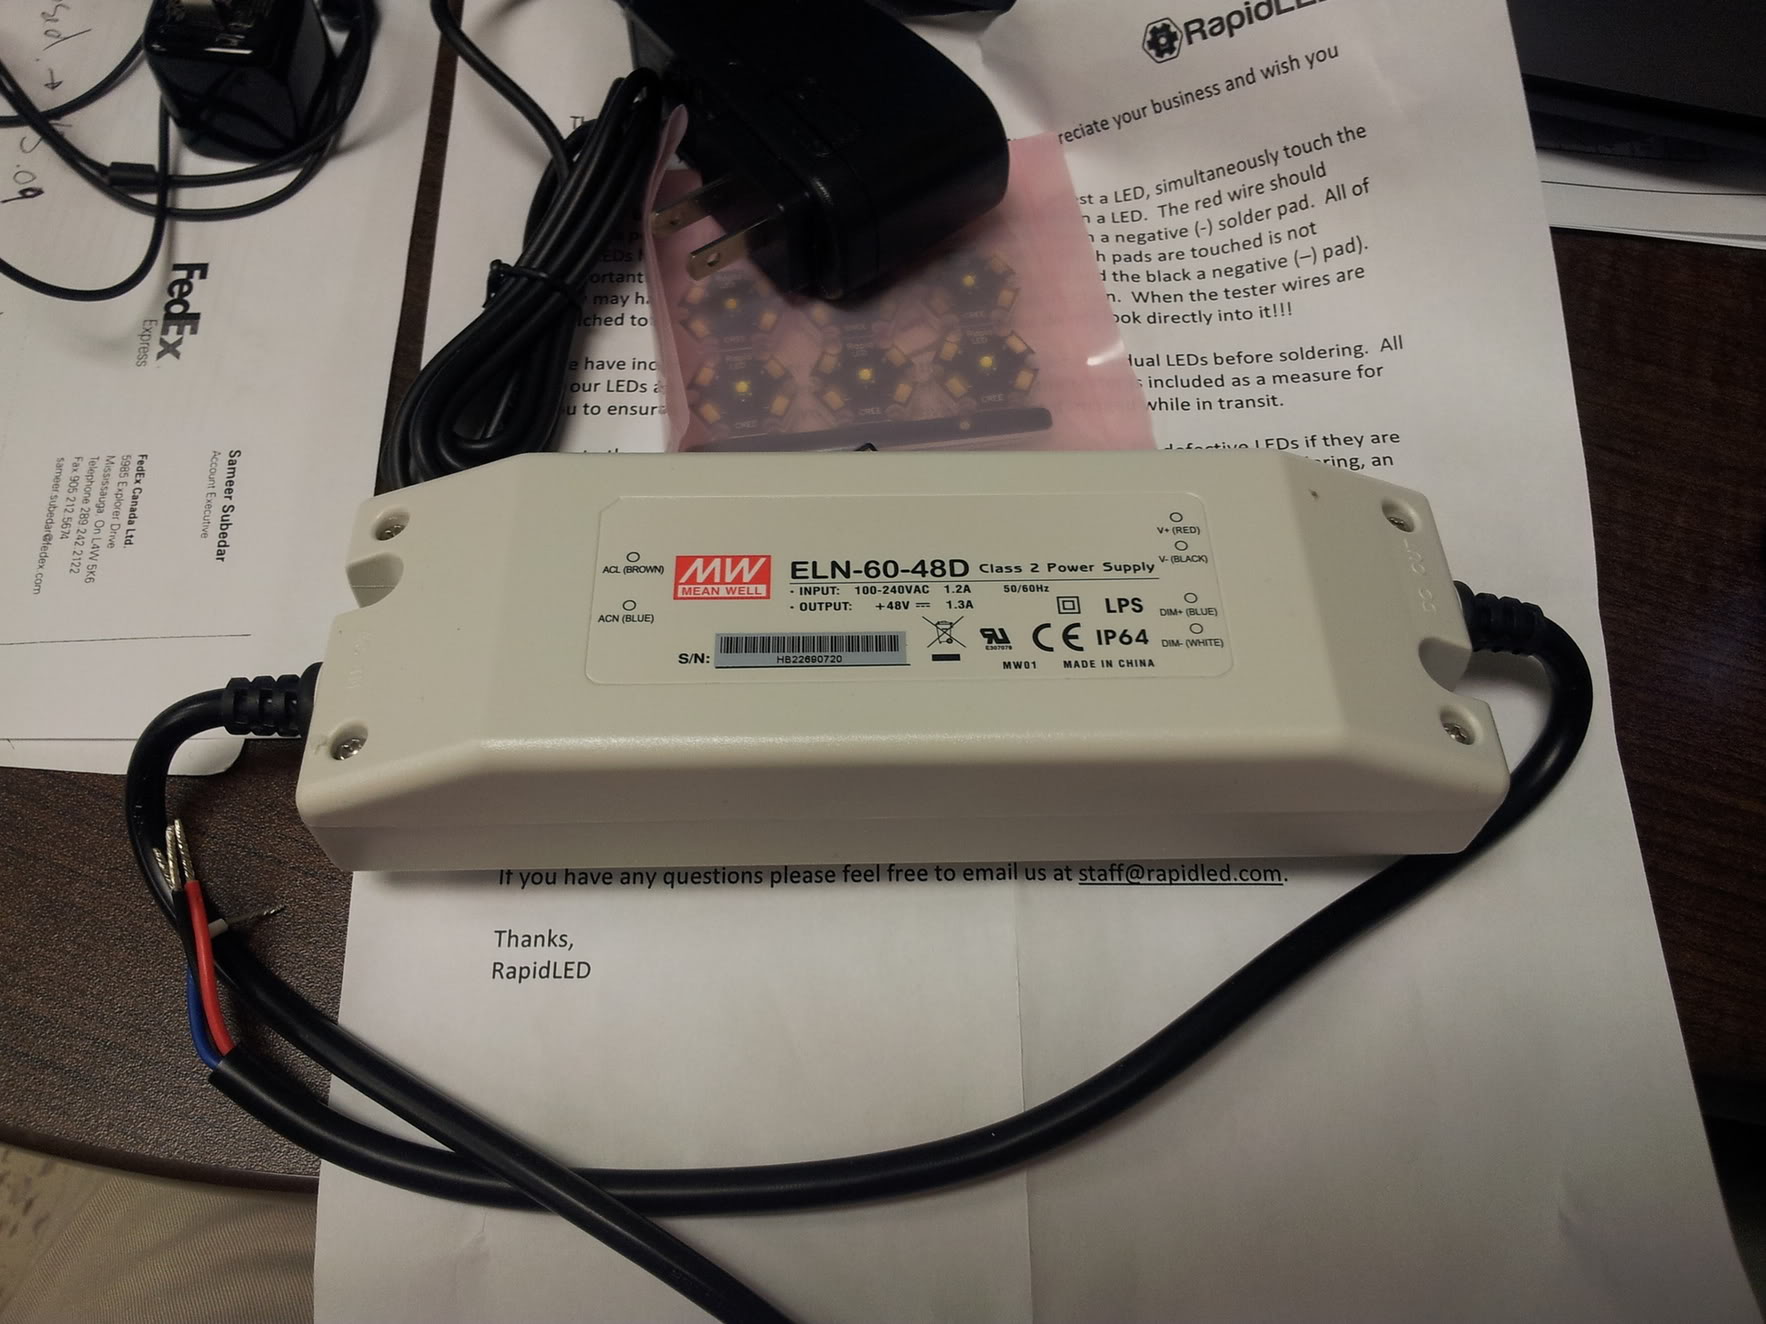
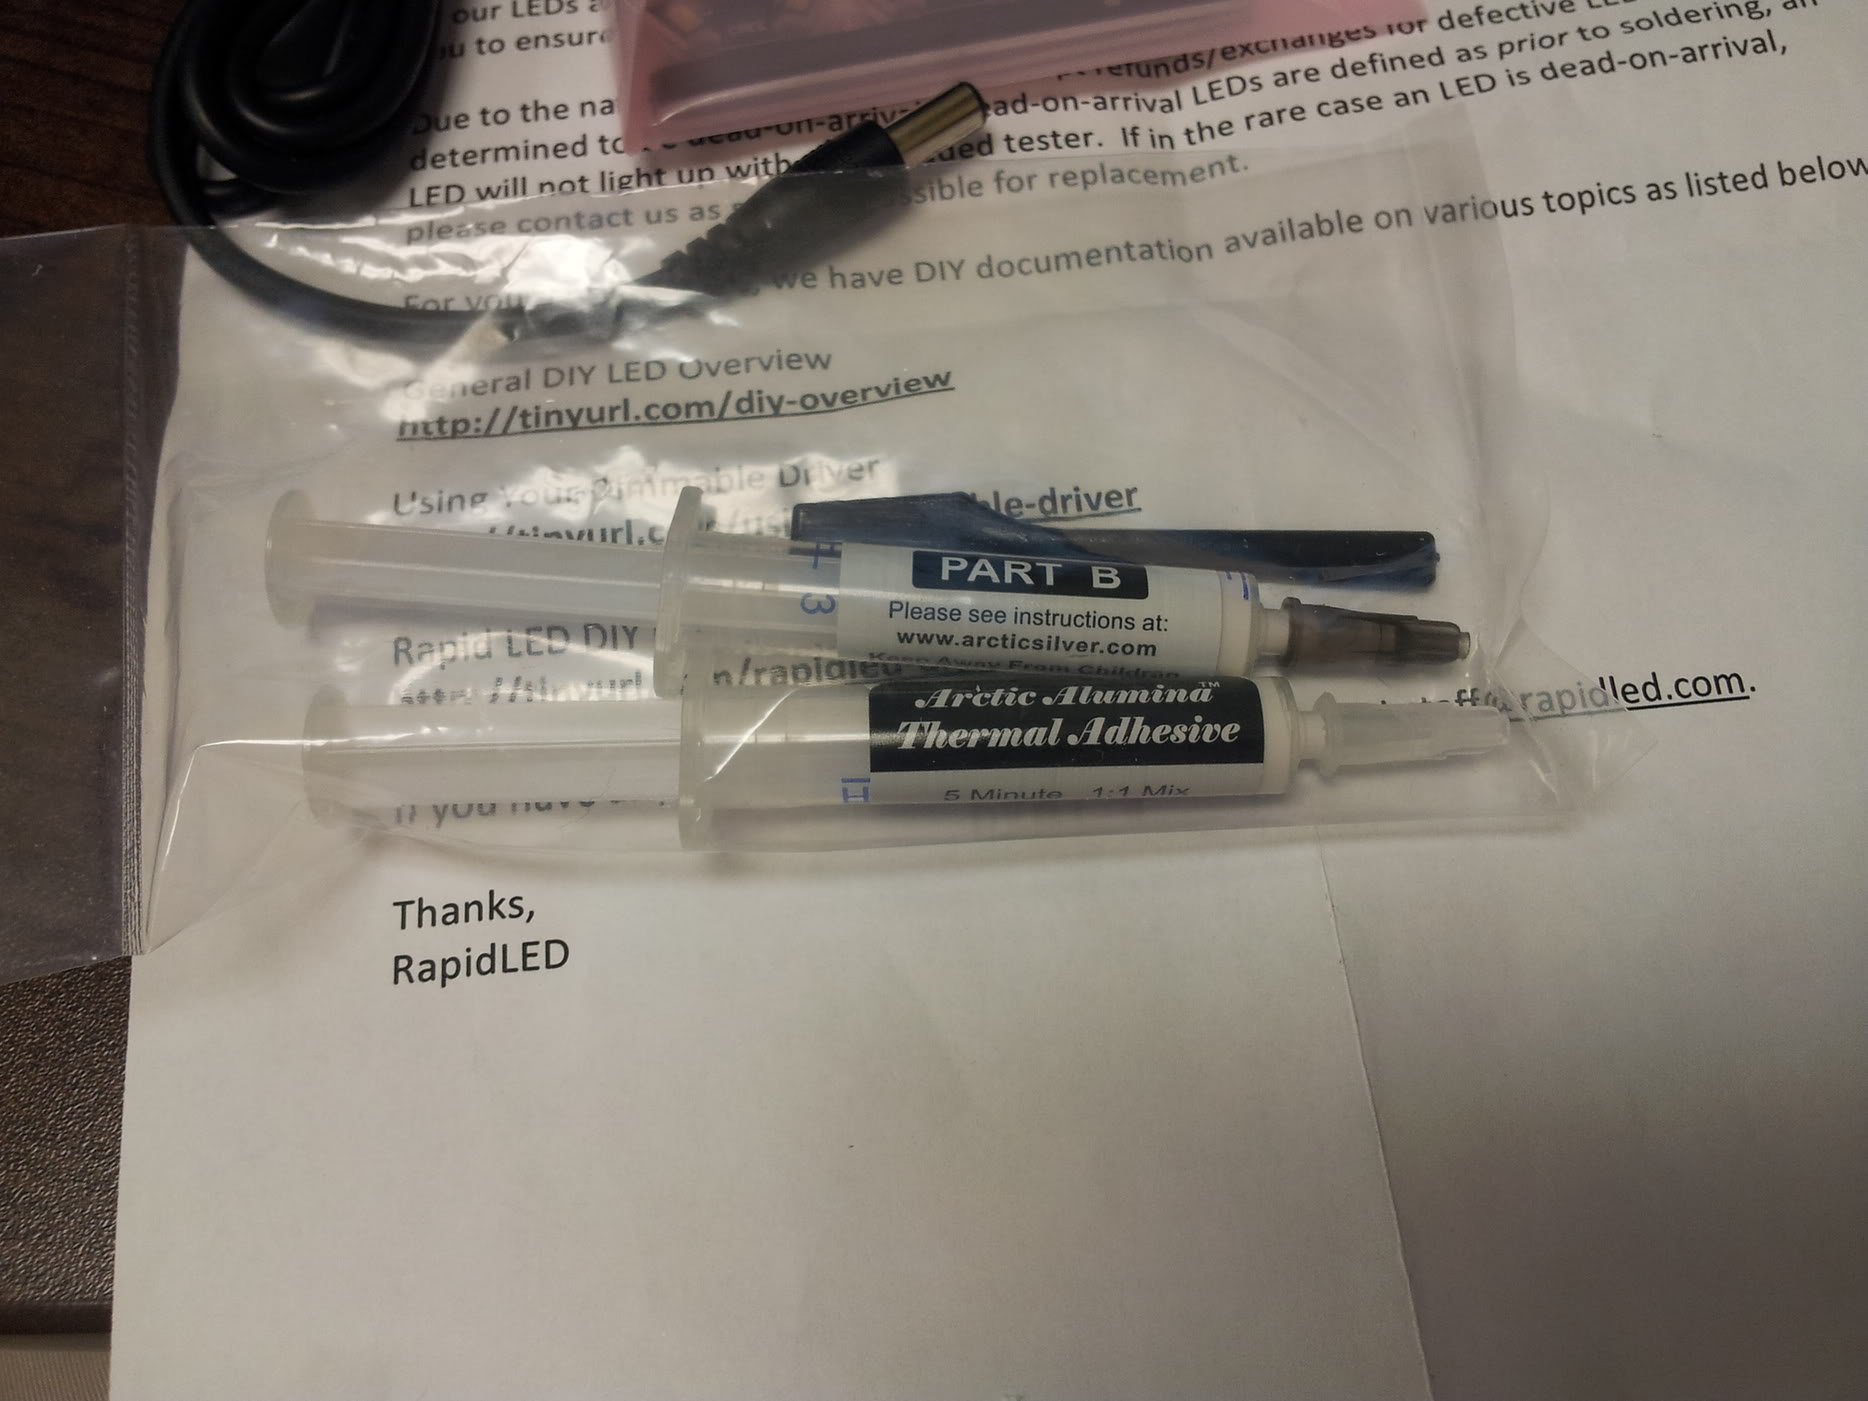
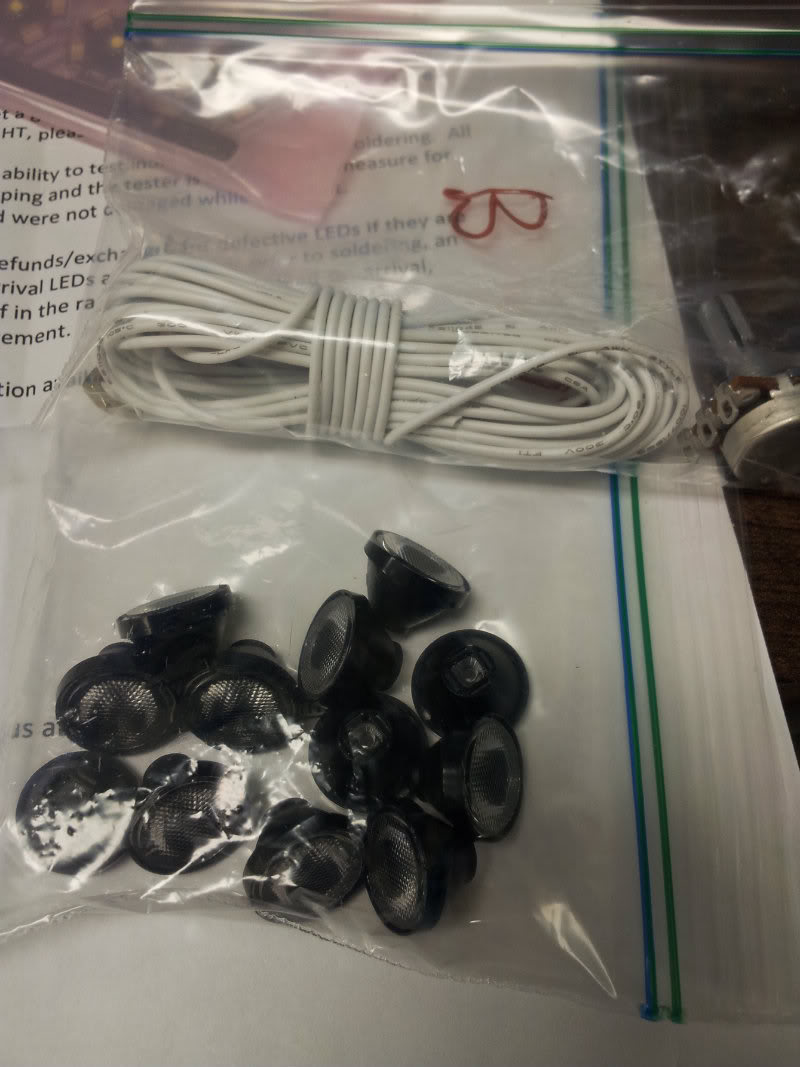
Heres some pictures:

img_1932795_0_5f42b95c198fd50a71d74da03aad1288.jpg

img_1932795_1_94d0b941127e9fbf842db8b2c56d7f9e.jpg

img_1932795_2_0b62d75328ca1cb65154ac284246b4ac.jpg

img_1932795_3_170af0063a7b6234544edc34377c2a7f.jpg


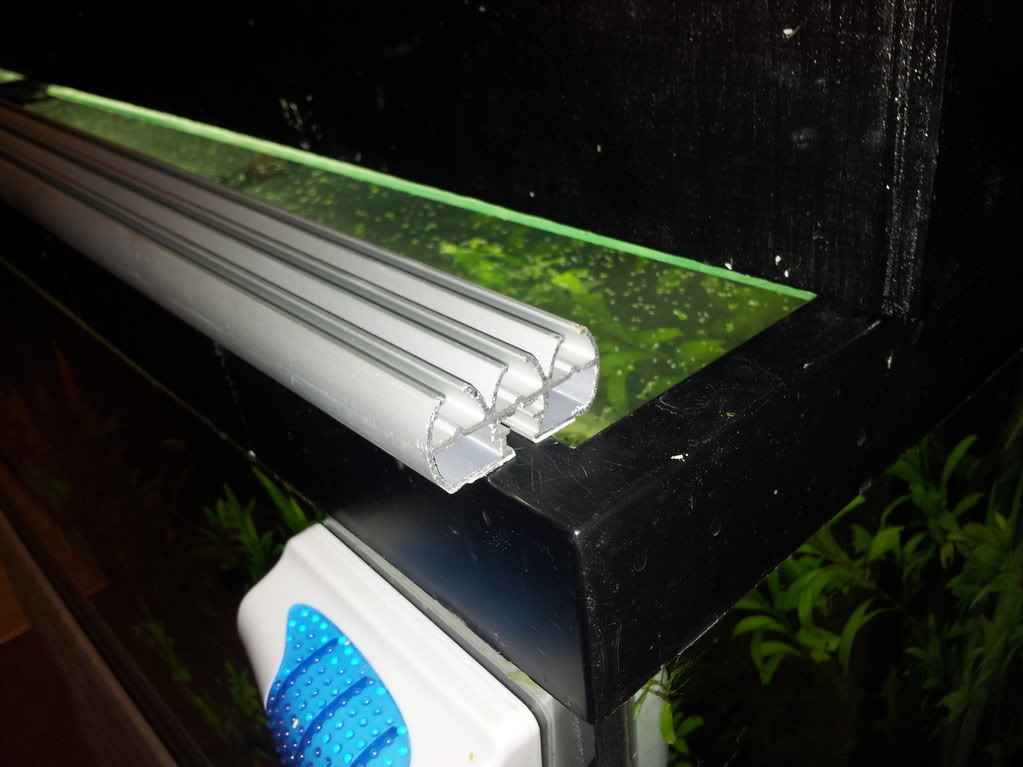
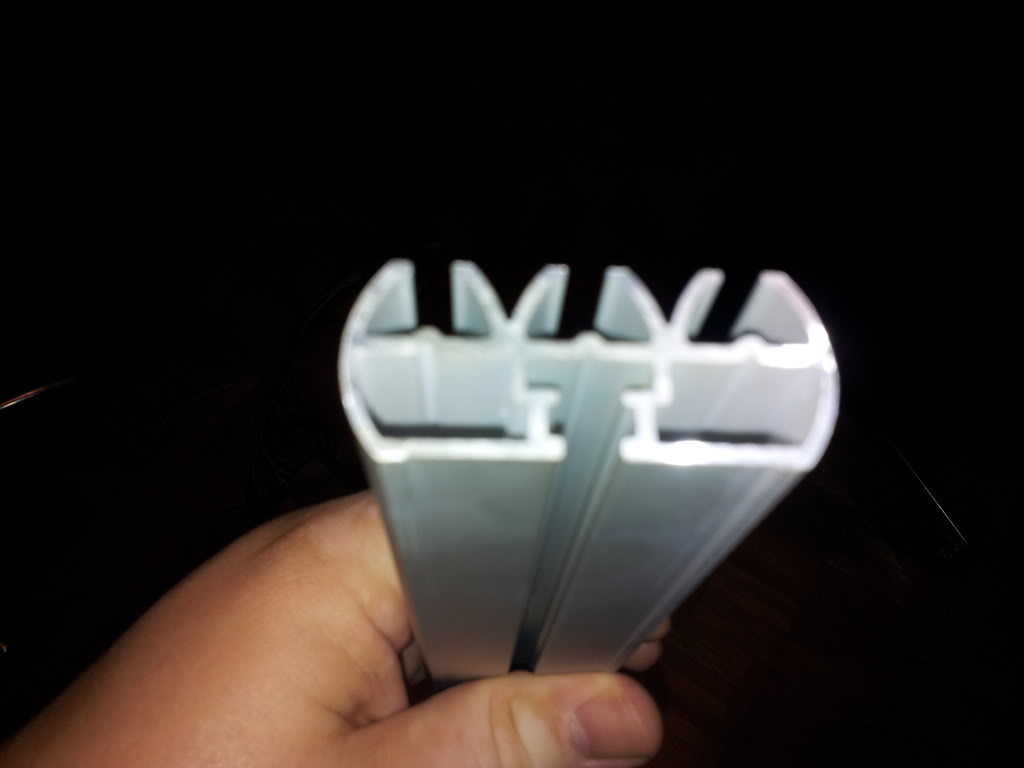
So, the ONLY flaw is that it's not completely flat on the bottom, but if I stagger the LED's, I'm thinking it'll be perfect to put about 6 LED's to give me the ability to grow some higher light foreground plants.

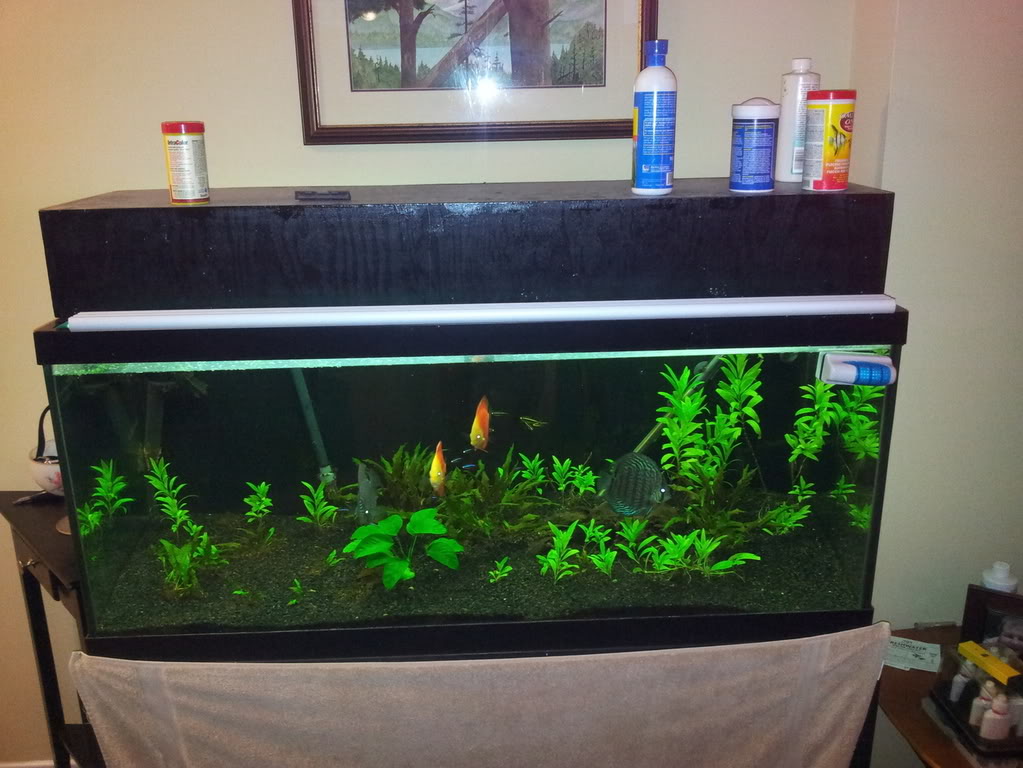
Its going to be on the cheap, and its going to be mounted inside the cabinet I already have. Do you think with 6 3Watt LED's i'll need active cooling on this sucker?

Also... What are the odds? its 47 inches long. It'll fit PERFECTLY inside my home made cabinet. :)

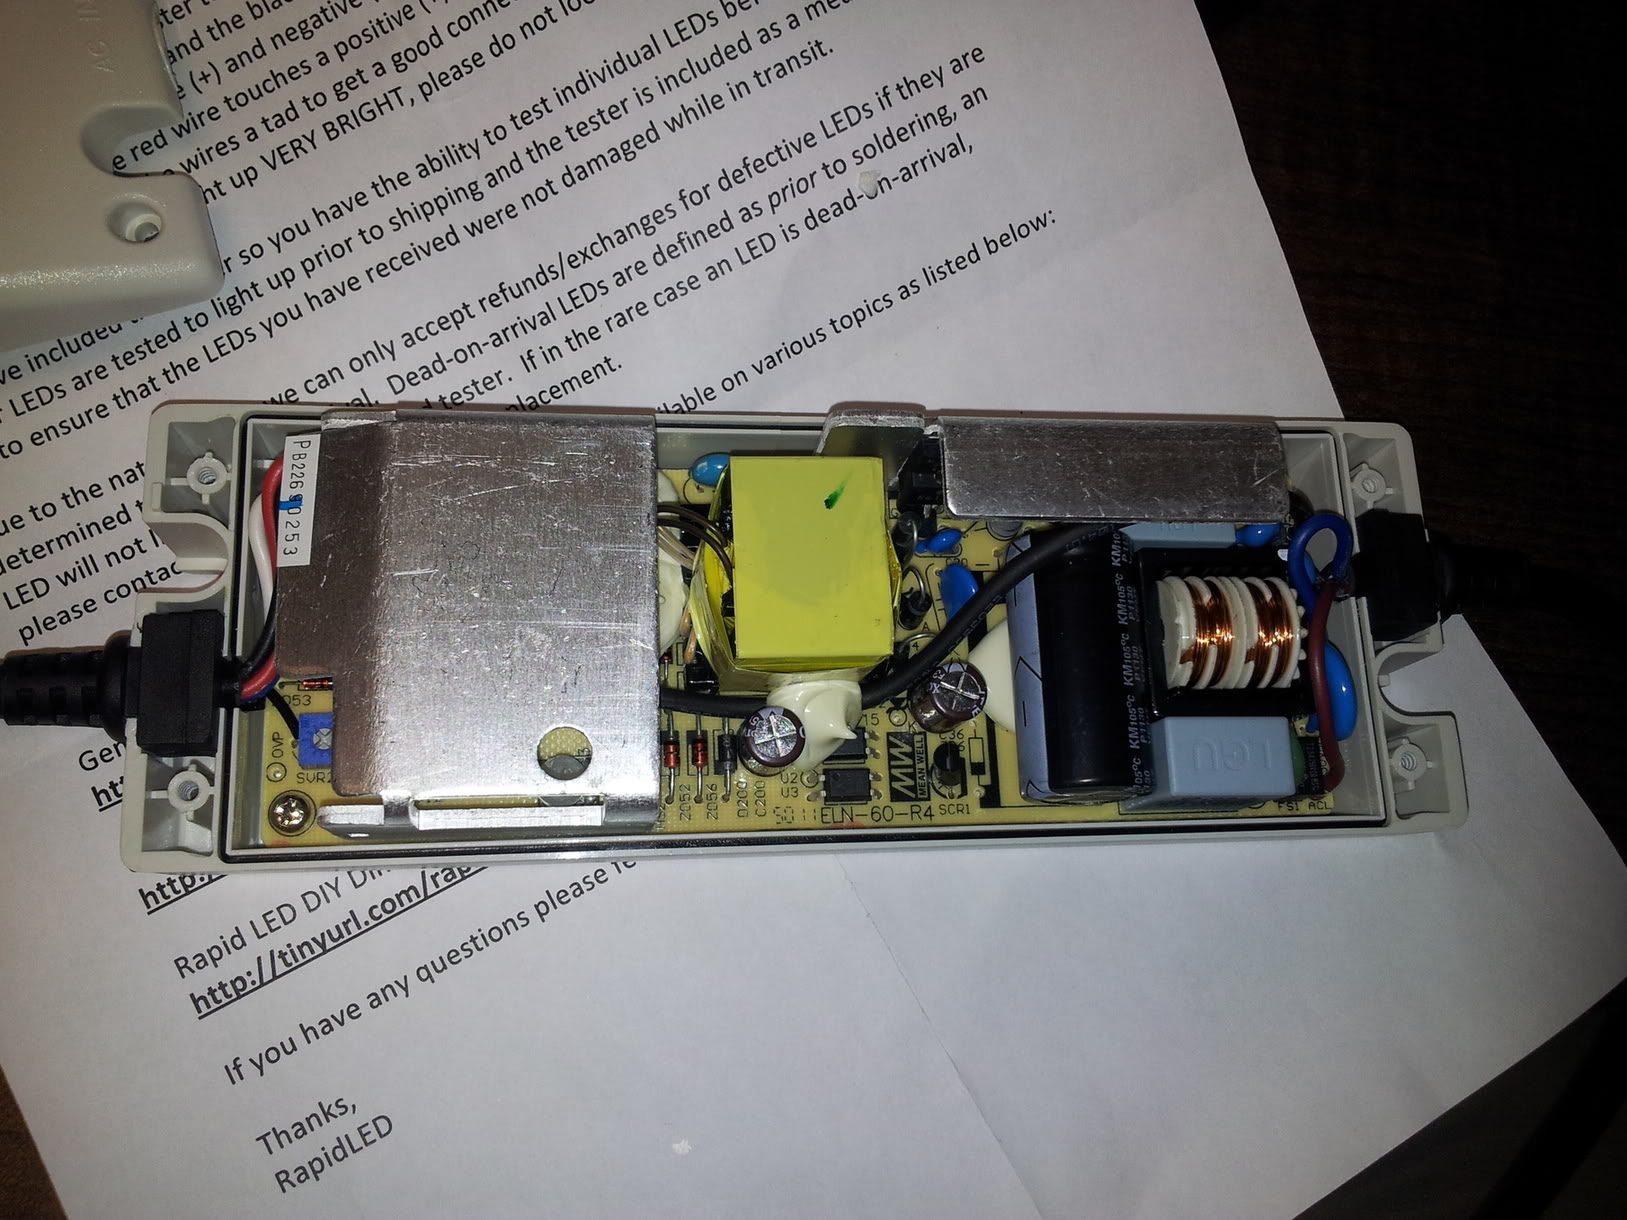
Destiny I think. Going to make some LED lighting :)
 
So, More research/puttering done.

I'm thinking between 5 and 8 Cree XP-G Neutral White LED's, because then I can stick with One Dimmable ballast, and keep this project on the cheap.

Potential Parts List:

Dimmer/Constant Current Driver: $34
Mean Well ELN-60-27D dimmable driver - Rapid LED

5-8 Cree XR-E Neutral White LED' with 40 degree Optics $6 Each
CREE XP-G Neutral White LED with 40°, 60°, or 80° degree Lens - Rapid LED

9 Volt Wall Wort for Diming:
(I have this laying around from electronic gizmo's that have gone the way of old yeller)

A potentiometer for Dimming the 9 Volt signal:
(This, I'm not sure of. What kind of load? I'm assuming because its just a "signal" that it doesn't have to be beefy. Also, I can't seem to see any Voltage rating on Pots. Does that mean it just goes by Resistance? I would think that if you put 230 volts through a small one, it'd just pop. Anyway, the decisions I HAVE made for this are Single Turn, and Linear curve.

Optics: 40 Degree. Below are pictures of various senarios. I don't have a cad program, so I used Photoshop with the following ratio: 10 pixels per Inch. The Aqua square is the floorprint of my Fishtank, 480 pixels by 180 pixels The grey circles are 156 pixels wide, which is what the flood would be with 40 degree Optics at 22 inches off the substrate.

Which light pattern do you suggest?

5 LED:
img_1933386_0_e99480ff13cda8d02c6b1b176d65839f.jpg


6LED:
img_1933386_1_a23ceccc2d8ed548fc882fe33a964aec.jpg


7 LED:
img_1933386_2_6cc1ca1be7035b0708f2203800f4459b.jpg


8 LED:
img_1933386_3_aa6e0885958af3a828ba056c52f21acb.jpg


Anyone have any advice so far?

If this goes right, I could have an LED fixture in place for about 100 bucks!
 
Alright - Took the plunge and ordered 140 bucks worth of stuff from rapidled.com

They were SUPER helpful and answered all 3 of my e-mails within minutes.

I have on order:

12x Cree XP-G Cool White LED's With 80 Degree Optics Pre-installed

15 Feet Wire

Meanwell Dimmable 24-48 volt Driver

Thermal adhiesive

10 Volt Power Supply

Dimmer Switch (Pots)

... Think that's it, lol.

Ran me 140 bucks with shipping.
 
I will be following this thread! I really hope the LEDs will work for you. I have been wanting to build something like this for a long time, I just don't have the motivation.
 
I am beyond excited! I managed to pitch the expense to the fiancee, beacuse we're looking for houses, and will have to pay our own electricity bill.
I guestimated the power numbers and showed her how it would pay itself off in about a year in power and lightbulb replacements. :)

Just got my tracking number from USPS. Excitement!

Here's my order details:


10K Ohm Linear Potentiometer
$3.50 USD


10V AC Adapter
$10.00 USD


Arctic Alumina Thermal Adhesive
$7.00 USD

Bulk Wire (White) (15 feet)
$3.75 USD


CREE XP-G R5 Cool White LED with 40°, 60°, or 80° degreeLens
(Lens Color: Black, Lens Width: 80 Degree) 12 Pack
$66.00 USD

Mean Well ELN-60-48D dimmable driver
$34.00 USD

Subtotal:
$124.25 USD

Shipping:
$15.00 USD


Grand Total:
$139.25 USD
 
Last edited:
Yeah!! I have i led fixture too and although i didnt soldered anything it will be cool to see how you make the fixture!! Plus i ordered yesterday 5 cree xml cool whites to have some carpet plants too but with some bjb solderless connectors and carclo optics too!! I know you are gonna see the differense!! The leds are the best lights when you compare appealing to how good it looks plus the energy, money, and heat costs!! Good luck my friend i'll be following this post 4 sure!!
 
Thanks! Yeah, I'm starting second guess my decision to do soldering. I've done a LITTLE bit... Like... I fixed the Power supply on my Samsung TV when the capacitors let go... but I'm really afraid of "overheating" the LED's when I solder. Does anyone know if the RapidLED ones are "pre-tinned"?
 
I dont know!! But there many youtube videos abut soldering! Even soldering the leds for aquariums!! So if i were you i'd be looking to some guides of how to make it happen like the youtube vids!!
 
Heared back from RapidLED - They are SO friggin fast on their e-mails.

Here's the reply:

Alex,
They don't come pre-tinned, but the board that the solderpads can handle the heat from the soldering iron, so don't worry about it. Just make sure you don't touch the actual LED in the middle of the board with the iron!

Let us know if you have any more questions.

Regards,
Vince
Rapid LED


Gonna start watching Youtube videos. Wish I bought an extra LED or two.
 
That looks like a pretty sweet heatsink with fins to dissipate the heat and the aluminium is a solid piece which means a lot of heat sinking potential. My guess is the LEDs will run super cool, but if not a very small fan to cool the heatsink would make it perfect.

I don't have any experience with LEDs. But I did try to solder a few times when I made a solar panel. It's kind of difficult to do cleanly and takes a little bit of practice to get the right amount of solder in the right place. I would practice first and use a pencil style soldering iron.
 
I have a 25 watt Pistol grip soldering iron, which is less than ideal. Ideally I'd want one hotter than that. After looking at video's of this, I'm fairly certian I'll be OK. I think I'll make some sort of holding mechanizim for the LED to stop it from scooting around everywhere while I try and work. I have the solder already as well from when I repaired my LCD Television
230656_210617692295160_100000407933961_765010_458636_n.jpg

(not sure how long that photo will work for - Copied from facebook)

I'm just worried about getting the LED too hot, but from what I can see about "reflow" soldering to mount them to the board, that the LED is plenty hardy. its amazing really!

I think I'll just make sure to solder them before attaching them to the heatsync. My 25 watt soldering iron would have a tough time combating the heat dissipation of all that aluminium!
 
So, Still waiting for the parts to come in from RAPID LED. Tracking shows its stuck at Customs :-(

Also started thinking about Controlling it.

I COULD just plug it into my 24 Hour timer... But then I started thinking about Fading the LED's on, and then having a relay turn on my main T5's once it reaches about 70%, to lessen the "shock" of bright lights turning on. Kind of a sunrise then sunset.

Do they make relays that handle 0-10 volts, and can actuate the Mains of 120 volt? (not sure if that makes sense)

The signal would only be 500mah, so the relay would have to be fairly efficient.
 
It Arrived! it arrived!

Everything is as it should be. Tested all LED's. Need new retina's now. They're super bright with two AA Batteries.

The Optics don't come pre-mounted, But they've told me that the thermal adhesive works well to mount it, and to avoid superglue as the fumes can fog the lens.

I'm going to see if I can pre-tinn all the LED's and the wires tonight.

Unboxing:
img_1953455_0_4a7268a6ebf769c9346855b9bd8fb407.jpg

img_1953455_1_7d65f1deb3ea15ccd7ef4a835d7acd38.jpg

img_1953455_2_6a52f98f11cd017366db7cd80d50c477.jpg

img_1953455_3_a3097d0f1e81286299813e2b1212eea8.jpg

img_1953455_4_d1dd8dec43ae4016c74c222b5fdb02a9.jpg

img_1953455_5_3f0fb3e31bbb81ac0768a3d6d6c31c73.jpg

I've already turned down the Drive to minimum (300mah?) as to not forget. The LED's I have can be driven at the maximum, but not without great cooling, so for testing reasons I'll leave it at 300mah until everything is all assembled.

img_1953455_6_6ef45604a05edc11b827f30644527c64.jpg
 
Alright, Super Busy Night!

I don't know what I was smoking, but I saw that the Star (Mounting) for the LED was 13mm wide... Turns out it was 20mm wide, which was way to big to fit on my heatsync because there is a tiny lip on it.

I took a risk, and "clipped" part of the heat sync off with some sidecutters. I tested to ensure that it was still electrically isolated. It was. After clipping all 12 LED's, 2 of them didn't work. I took a file to the two that didn't work (after they were pre-tinned) and was able to fix them up.

They are now glued to my heatsync via Arctic Silver Adhesive.

Now that they are mounted, I've tested them all with the AA tester. I'm fairly sure I've done permenant damage to my eyes as there is a green/yellow blob in my vision. I smartened up (a little late) and wired my dimmer switch in so I could stop giving myself welders flash with the LED's. These suckers are BRIGHT.

My biggest fear now, is that when I wire it all together, the Solder will run over the cut edge and short out. I'm really going to have to be careful when doing this. Everything is now pre-tinned, so I won't have to add any solder. This should help, but I am nervous!

For those of you who are afraid of tackling this yourself due to the soldering aspect... Its actually quite easy. My biggest BIGGEST bit of advice - Don't be impatient, Let your soldering iron heat up fully! (5+ minutes!) Once you get going, then it really only takes 2-3 seconds per Terminal to pre-tin. Also, Make sure you get a solder with a rosin core. I had a bit without it, and it just did NOT want to stick. I realzed after 1 LED and switched to the rosin core, and it went so much faster.

Also... Ventilate. I've got a killer headache right now, and its 100% because of soldering inside my apartment.
 
Also... Ventilate. I've got a killer headache right now, and its 100% because of soldering inside my apartment.
There is a reason why fume extractor was invented :)
As for the soft start, it depend on your electronics skills.
This super cheap 3 component circuit will soft-start your leds, its only 30-50 sec before full brightness reached, by changing the R1 value to a larger will increase the time to reach full brightness.
uTwIB.jpg


If you willing learn or already have experience with micro-controllers, check out this link
 
Ok, so I've got them installed on the heatsync, and I bought a multimeter as well. I have it tuned to 1 amp. The LED's can do 1500mah, and the driver can do 1300mah, but I decided for now to leave it lower as I don't run CO2. It also leaves me some headroom for the future, will run cooler, and still should provide a LOT of light. (4200lm)

Wish I had a par reader.

Next, I'll test fit in my enclosure (involves moving my T5H0 to the edge of it) and then throw it on top of the aquarium. If all goes well, I'll mount the optics.
 
Back
Top Bottom