STANNY
Aquarium Advice Apprentice
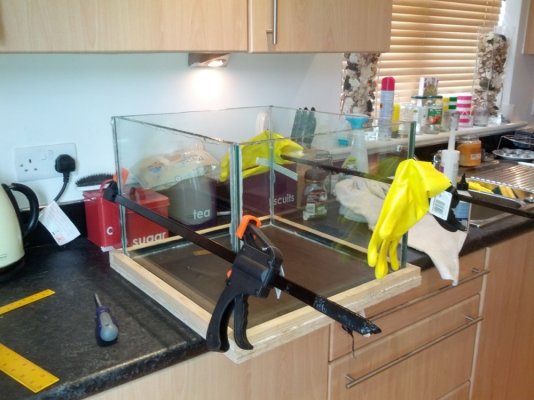
So I was on site today, speaking to one of the window fitters, when he mentioned that someone had ordered too many panes of glass, I joked that id take them off him, to my surprise he said take them. So I've got them home, 4 of them and measured them. All of them are the same size, 481mm x 372mm (18.9" x 14.6"), so a nice little nano tank I believe. Now I've measure the thickness of the glass and it seems to be 9mm thick, however I am struggling to tell whether it is double glazing. I cant see a gap between the glass but there is a metal strip that runs in the glass around the edge, which is apparrently a sign of double glazing.
So first question, does anybody know of a simple sure way to tell whether it is double glazed or not?
Second question, if it is double glazing, is there any reason why a couldn't or shouldn't use it to build a nano tank?
Third question, If it is double glazed would it be worth trying to split them, potentially leaving me with enough for 2 tanks? Though the glass would then only be 3-4mm thick possibly too thin?
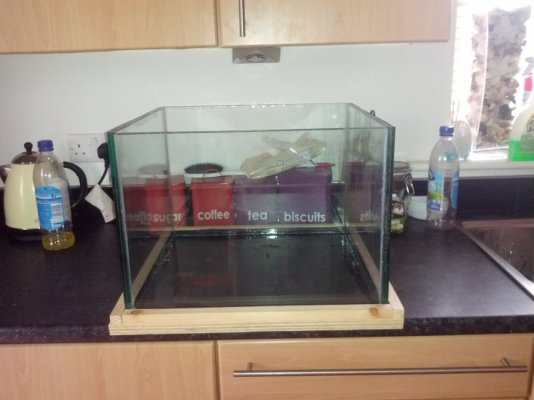
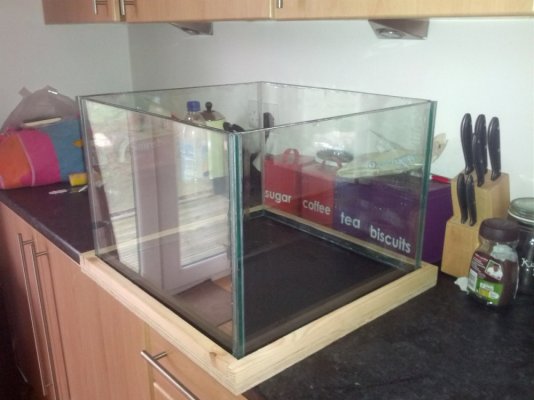
Now ive had a good think about the tank, and obviously only having 4 panes means I would have to have a wooden bottom. Ive looked at a couple of ways of waterproofing this. Ive seen 2 part epoxy paint on solutions like a1 pond paint by antel or p1 pond sealant by pondsafe, these seem easy, although a bit expensive for the sake of the bottom of a nano tank. Another option of course would be some sort of inert plastic sheeting that could be glued to the bottom and the tank built on top. Any thoughts on this tank bottom would be much appreciated?!
Now I'm thinking of doing as much of this build myself as possible. I'll build the tank myself. Obviously I cant build the heater myself, but the filter i can. So I'm considering making a moving bed filter similar to the one in these videos,
video 1,
video 2
Any thoughts on this would also be much appreciated.
Now I don't really have the time or spare money to put into the project right now, so expect a long planning period, but I will keep this post updated throughout the build, and I would appreciate any advice on the above points and anything I haven't mentioned.
Update:
I have established that the glass is definitely double glazed. So it is 2x3mm panes with a 3mm gap in between.
So I could do with some advice or ideas on the best course of action. I have a couple of ideas i'll put to you and hopefully we can decide what is the best most viable option.
First idea, Leave the glass as it is and build 1 nano tank with the double glazed units.
Second idea, seperate all the panes of glass so that i have 8 sheets at 3mm thickness. Meaning I could potentially build 2 nano tanks.
Obviously the second idea is my preferred, as it means I get 2 tanks and I guess 1 single pain of glass would be better for viewing the contents of the tank than looking through 2 sheets with a gap between.
So first question, does anybody know of a simple sure way to tell whether it is double glazed or not?
Second question, if it is double glazing, is there any reason why a couldn't or shouldn't use it to build a nano tank?
Third question, If it is double glazed would it be worth trying to split them, potentially leaving me with enough for 2 tanks? Though the glass would then only be 3-4mm thick possibly too thin?
Now ive had a good think about the tank, and obviously only having 4 panes means I would have to have a wooden bottom. Ive looked at a couple of ways of waterproofing this. Ive seen 2 part epoxy paint on solutions like a1 pond paint by antel or p1 pond sealant by pondsafe, these seem easy, although a bit expensive for the sake of the bottom of a nano tank. Another option of course would be some sort of inert plastic sheeting that could be glued to the bottom and the tank built on top. Any thoughts on this tank bottom would be much appreciated?!
Now I'm thinking of doing as much of this build myself as possible. I'll build the tank myself. Obviously I cant build the heater myself, but the filter i can. So I'm considering making a moving bed filter similar to the one in these videos,
video 1,
video 2
Any thoughts on this would also be much appreciated.
Now I don't really have the time or spare money to put into the project right now, so expect a long planning period, but I will keep this post updated throughout the build, and I would appreciate any advice on the above points and anything I haven't mentioned.
Update:
I have established that the glass is definitely double glazed. So it is 2x3mm panes with a 3mm gap in between.
So I could do with some advice or ideas on the best course of action. I have a couple of ideas i'll put to you and hopefully we can decide what is the best most viable option.
First idea, Leave the glass as it is and build 1 nano tank with the double glazed units.
Second idea, seperate all the panes of glass so that i have 8 sheets at 3mm thickness. Meaning I could potentially build 2 nano tanks.
Obviously the second idea is my preferred, as it means I get 2 tanks and I guess 1 single pain of glass would be better for viewing the contents of the tank than looking through 2 sheets with a gap between.
Last edited: