My DIY Stand Build (WARNING Lots of Pics)

The friendliest place on the web for anyone with an interest in aquariums or fish keeping!
If you have answers, please help by responding to the unanswered posts.

Evilgrin

Aquarium Advice Regular
Joined
Sep 15, 2012
Messages
86
This is a brief Photo Journey of how I choose to build my Stand for my 55g tank. Some may wonder why I choose the dimensions I did all will be explained over the course of this rambling post.

Ok first off I built my stand at 40" to the top most sheet of plywood now with a standard 55g that puts the top of the tank at 5' approx. off the floor did this for two reasons 1. at 6'2" I can still reach in and touch the bottom of the tank with little trouble. 2. I wanted to see the tank from a seated position (bar stools) and not feel like I'm looking down into the tank. and 3 my toddler can't reach the glass to bang on it
icon_smile.gif
. Eventually I plan to build a custom tank from acrylic that matches the dimensions of the stand but they may be 2 - 3 years down the road, but figured why build 2 stands when I have the materials on hand to build one big enough now.

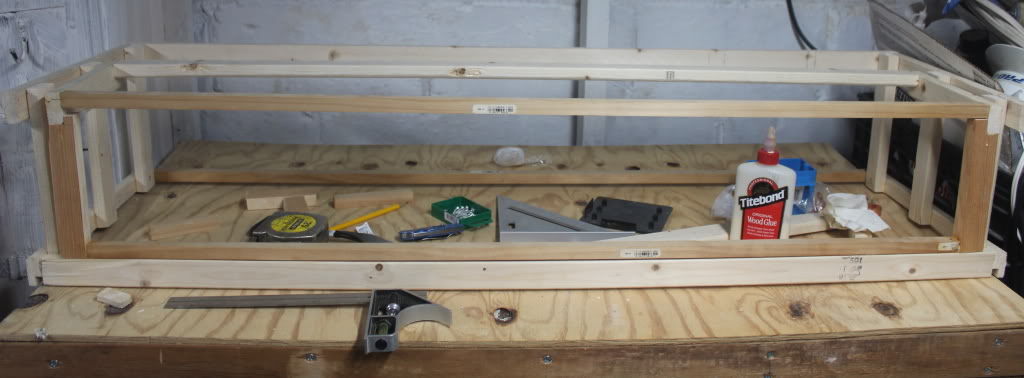
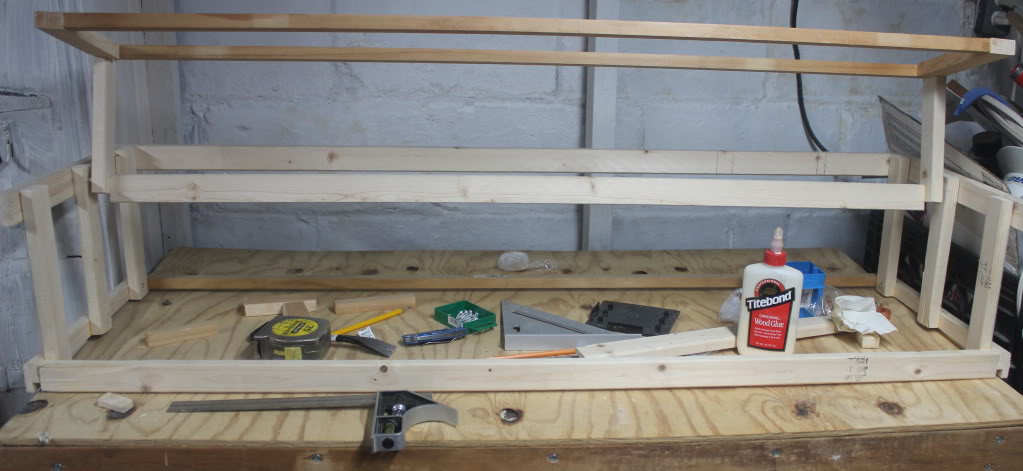
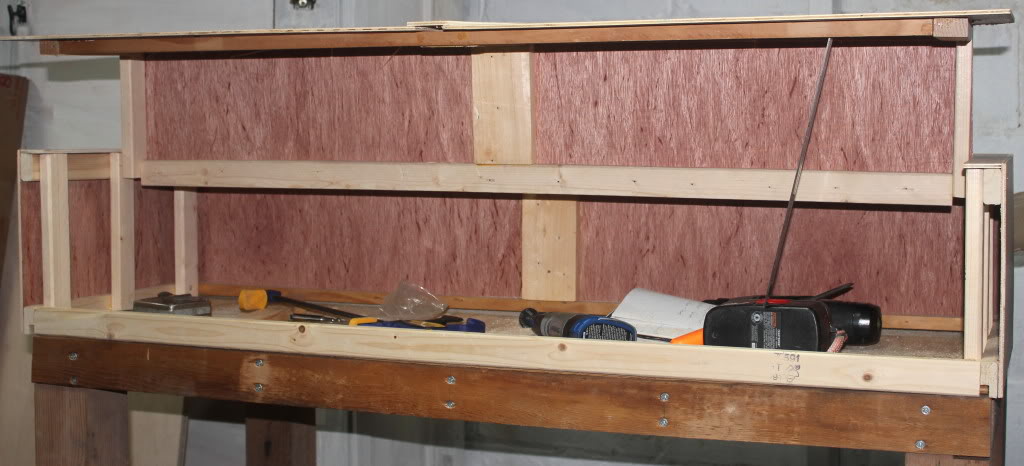
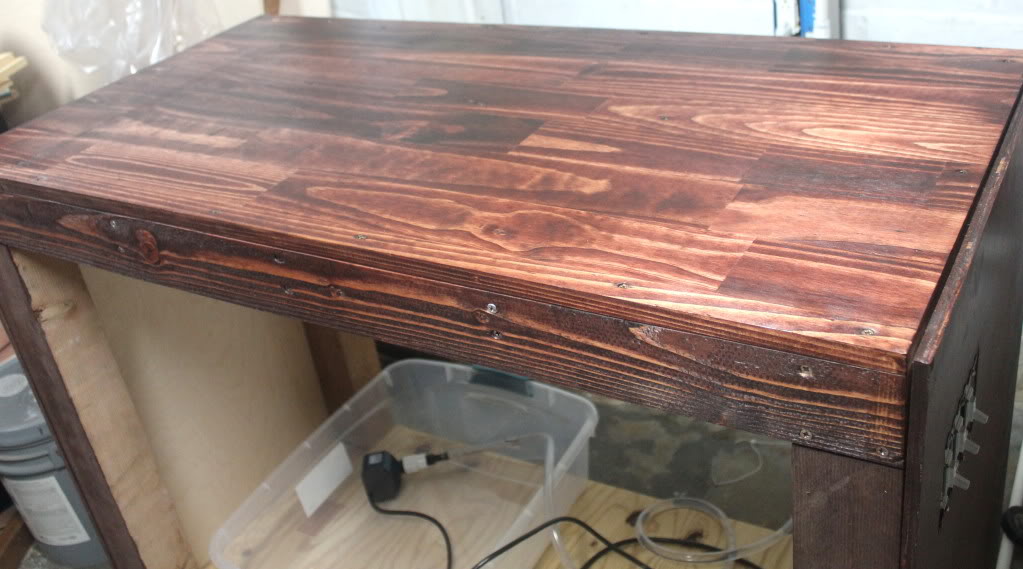
Any way the stand dimensions are 40" tall 48" wide 24" deep it's B I G. Corner posts are 3 X 3 with 2 X 4 cross members. Plenty of room underneath for a sump or just another tank or two. I'm currently still in the build process but the base frame is pretty much done still need a few more strings for the bottom shelf but other then that the base frame is done. Now on to the pics.

img_2153545_1_02e0fa40bba5e4e1776ca18364e4fb55.jpg


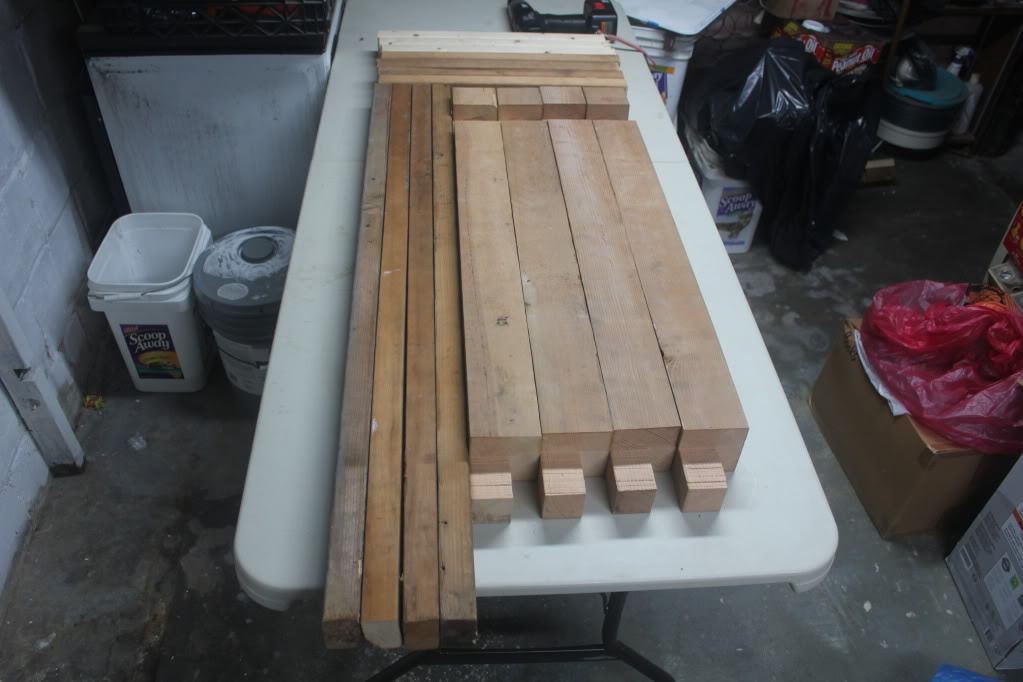
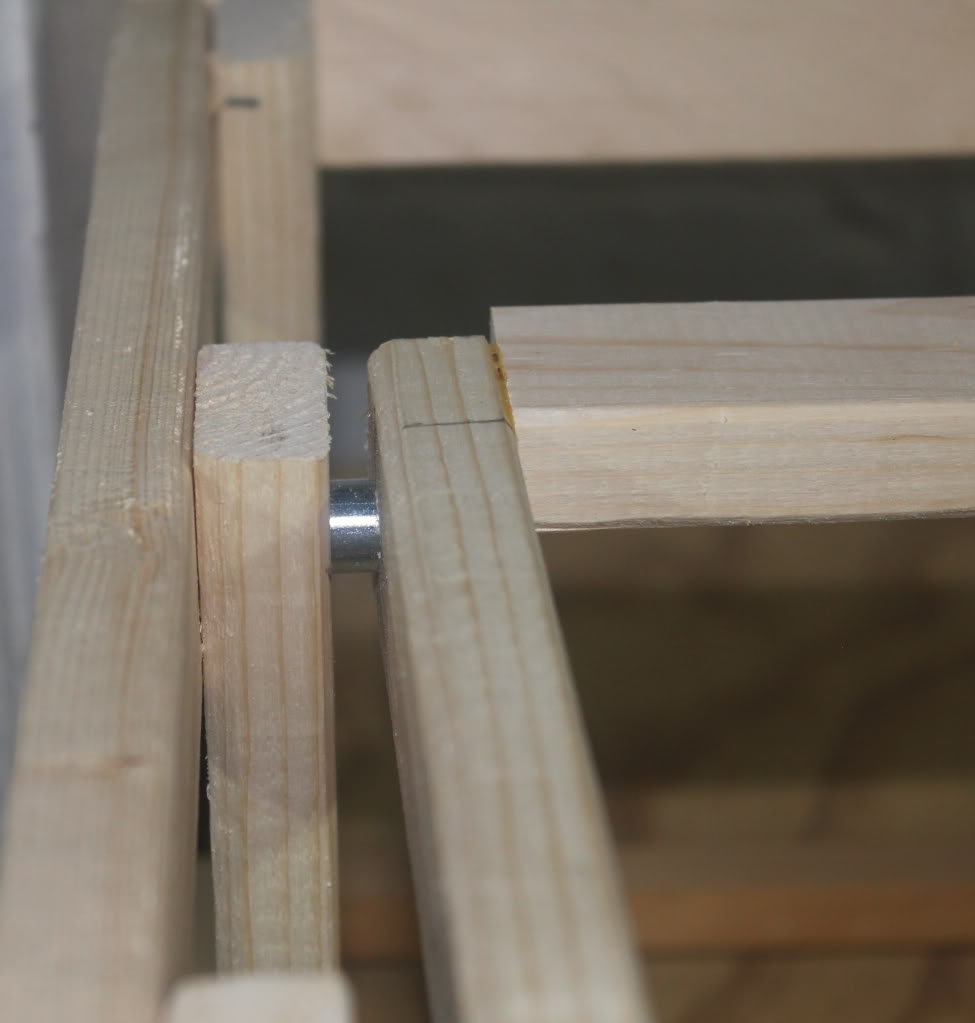
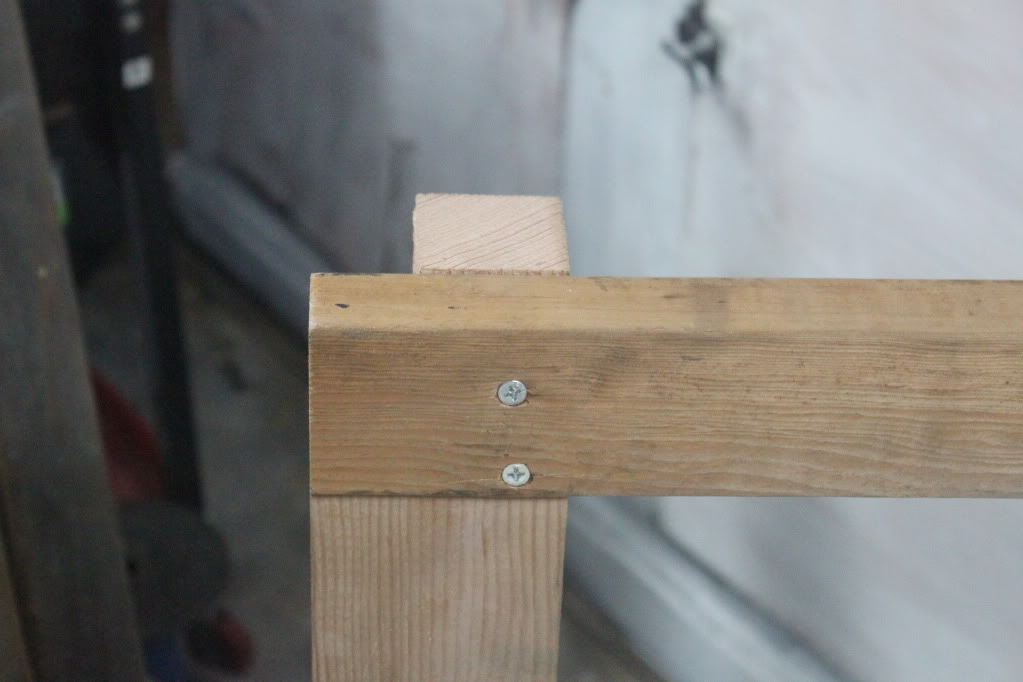
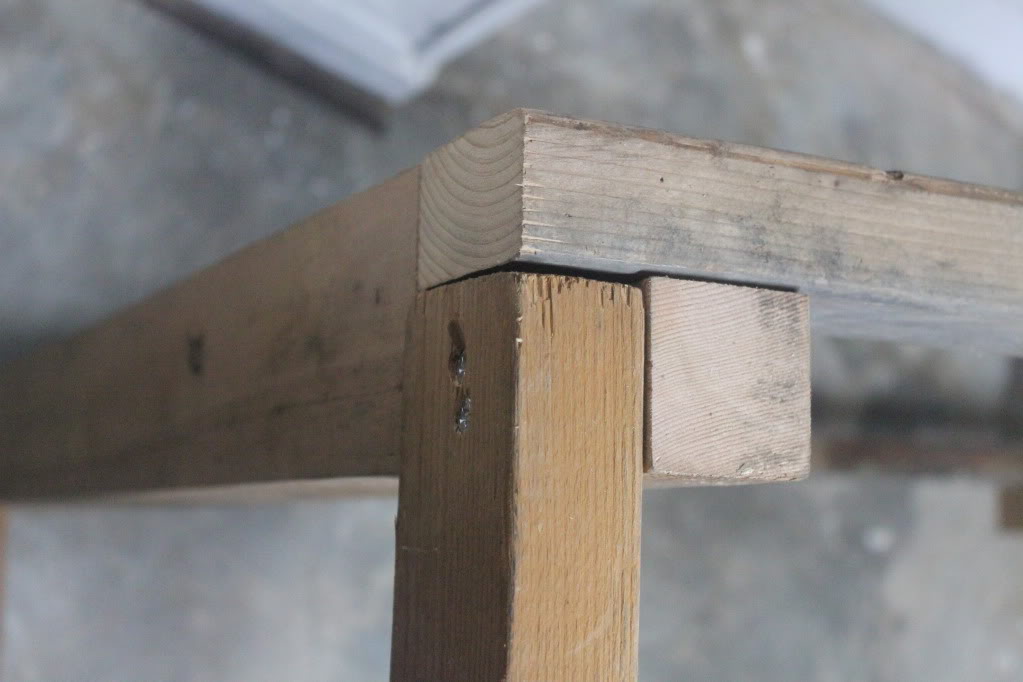
In the Above pic I have all the wood laid out after making all of my cuts. Skipped taking pics through most of the actual build process the curse of working alone, but did take some shots of the joints.

img_2153545_2_f85d87bc7b88a0be10afd8b6236f4b0a.jpg

img_2153545_3_a584068be68aef806203fce15558f4e2.jpg

img_2153545_4_73122de7ca720adaac76be23b9a78963.jpg


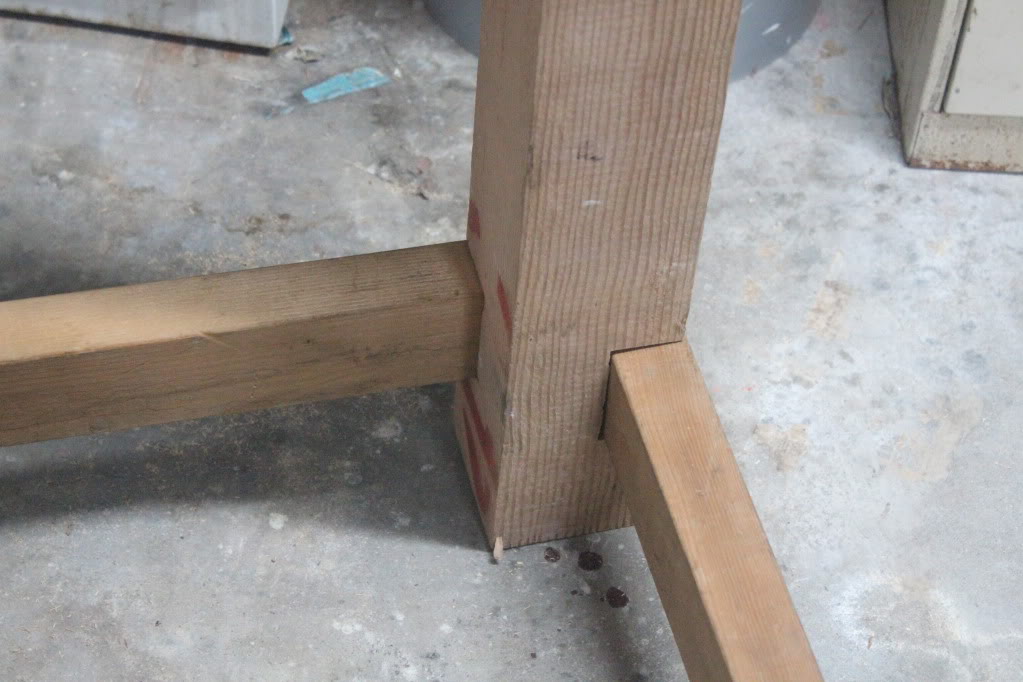
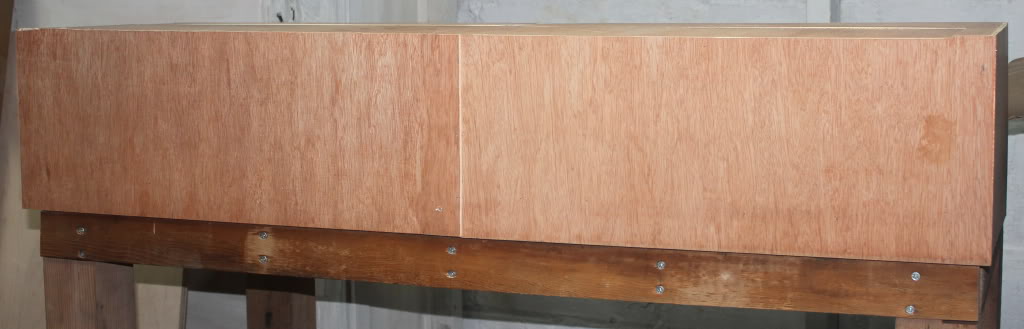
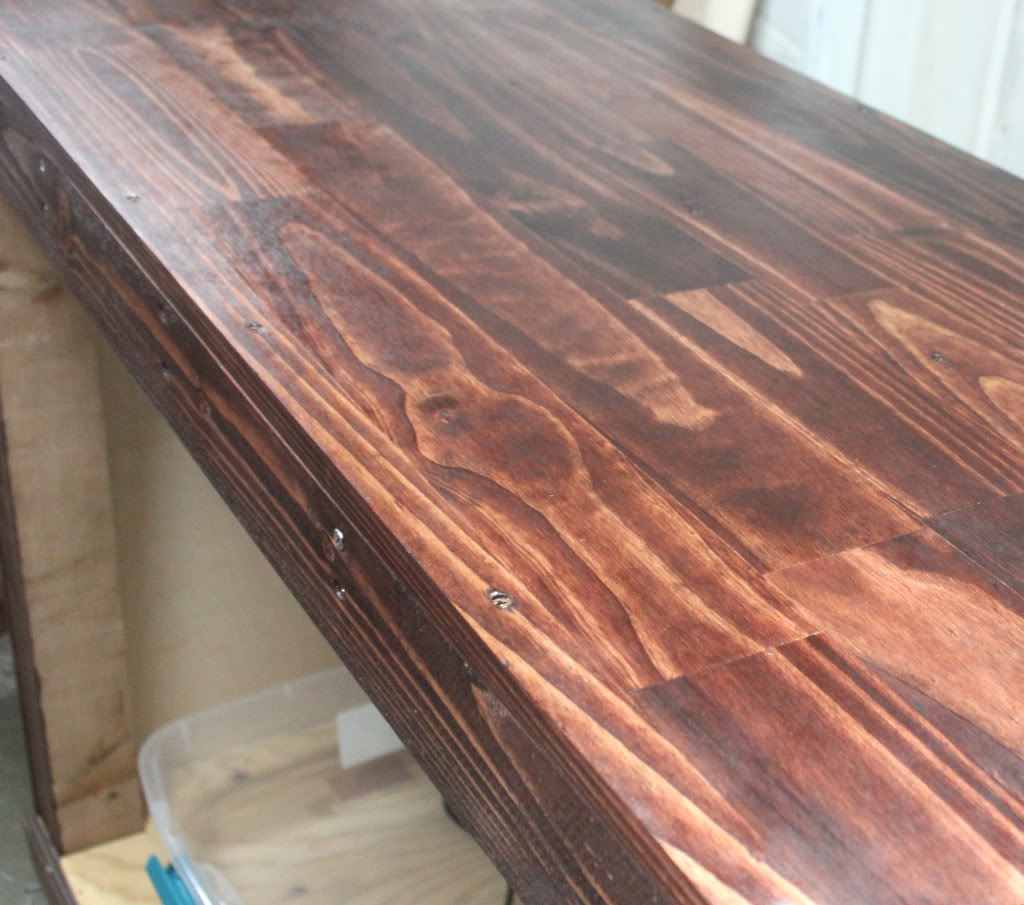
And Below we have the completed base frame.

img_2153545_5_b4fbe2ad6969b00c97c8348d9803f683.jpg


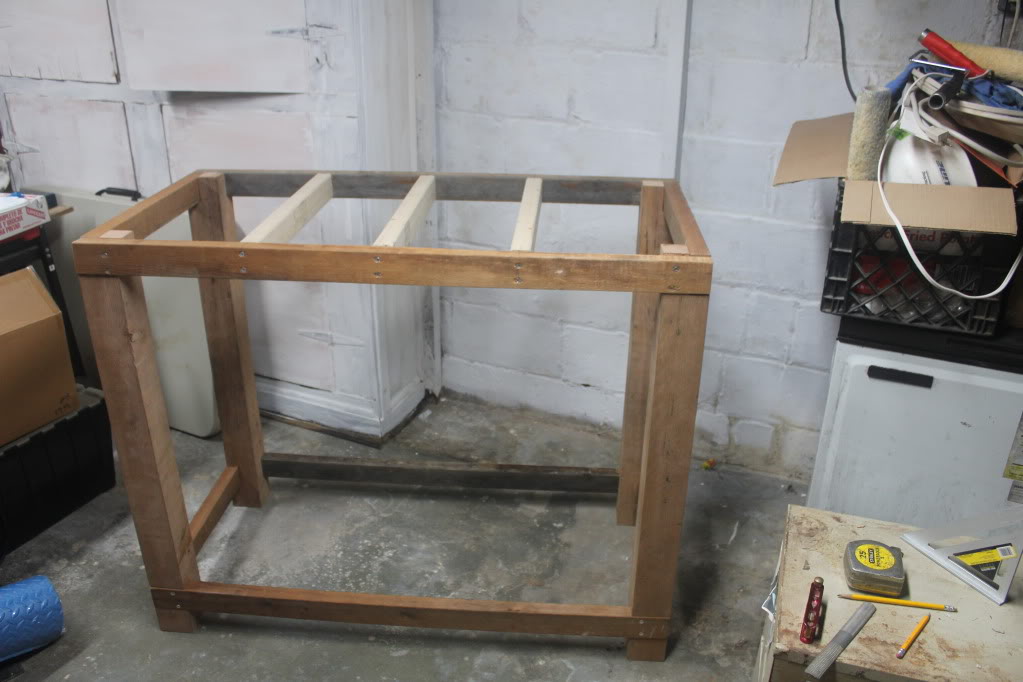
Total cost so far about 10$ for a box of 2 1/2" screws all the wood was reclaimed or left over from another previous project.
 
Following as well im going to build a custom stand too when i get my 55 glad to hear your dimensions as i am also 6'2" lol plus little ones
 
Well here is am update to my progress so far, I had to stop work on the stand for a bit to work on building the frame for the canopy before I got too involved in the stand, that and the stand make for a great workbench as is.

Here are some pics of the canopy as it sits currently.
img_2156261_0_4a6792b3a40332456704e70f44f5e033.jpg

img_2156261_1_c6063baf5d1867cdac03b75b59cb08ba.jpg

img_2156261_2_e4d740987ad6a60c3b6f8803ea7144ea.jpg


Now I'm no carpenter and my woodworking skills are not what I would like them to be but I think I did a passable job so far with the limited tools I have available. Now the fun part wrapping my brain around how to cut down a 2 X 4 sheet of wood to fit the canopy that has a width of 49" hmmm something will dawn on my sooner or later. :redface:
 
Evilgrin said:
Well here is am update to my progress so far, I had to stop work on the stand for a bit to work on building the frame for the canopy before I got too involved in the stand, that and the stand make for a great workbench as is.

Here are some pics of the canopy as it sits currently.

Now I'm no carpenter and my woodworking skills are not what I would like them to be but I think I did a passable job so far with the limited tools I have available. Now the fun part wrapping my brain around how to cut down a 2 X 4 sheet of wood to fit the canopy that has a width of 49" hmmm something will dawn on my sooner or later. :redface:

A good circular saw like a skillsaw or a table saw i work maontenance at a apartment complex and we rebuild decks alot
 
As mentioned a circular saw or table saw would be about the easiest option. When I skinned my stand I used a router with a flush trim bit to cut. The other option is when you purchase the wood have the dimensions with you and have the store chuck it up on the panel saw and cut it for you.
 
Lepomis said:
As mentioned a circular saw or table saw would be about the easiest option. When I skinned my stand I used a router with a flush trim bit to cut. The other option is when you purchase the wood have the dimensions with you and have the store chuck it up on the panel saw and cut it for you.

Agreed lowes or home depot will do that for you
 
I have a circular saw but of course it's MIA loaned it to someone a few weeks ago now have to track them down and threaten bodily harm. Canopy is done and I'm not overly thrilled with it but it will do for now till I can get the materials to rebuild it properly but over all not bad for less then 20$ in materials and working slightly tipsy and over tired.

I doubt anyone at lowes or home depot could cut a 2 X 4 panel at 49 inches considering the panel is only 24" X 48" I think you two need more coffee. LOL!

The stand I've decided to go with 1/2 maple plywood for the wrap just need to reclaim my circular saw and have at it and pray I make no mistakes on my cuts other wise it's design change in mid build. Yea that never happens.

I have a router just not used to using it yet guess I will be before this project is over, go figure my projects are always more ambitious then then my skill level warrants. Go big or go home, oh wait I am home.

I'll post some pics later on Right now I need a shower and a nap.
 
Evilgrin said:
I have a circular saw but of course it's MIA loaned it to someone a few weeks ago now have to track them down and threaten bodily harm. Canopy is done and I'm not overly thrilled with it but it will do for now till I can get the materials to rebuild it properly but over all not bad for less then 20$ in materials and working slightly tipsy and over tired.

I doubt anyone at lowes or home depot could cut a 2 X 4 panel at 49 inches considering the panel is only 24" X 48" I think you two need more coffee. LOL!

The stand I've decided to go with 1/2 maple plywood for the wrap just need to reclaim my circular saw and have at it and pray I make no mistakes on my cuts other wise it's design change in mid build. Yea that never happens.

I have a router just not used to using it yet guess I will be before this project is over, go figure my projects are always more ambitious then then my skill level warrants. Go big or go home, oh wait I am home.

I'll post some pics later on Right now I need a shower and a nap.

Lol ive had coffee and doughnuts yah thats true with the 49" issue but using the length of an 8 footer the cut for 49" would be done the length then cut the width from the 4 ft for the squaring it off but sounds like you got it figured out lol
 
Well after a good night err days sleep here are some updated pics.

img_2157438_0_ec65eb8b9e8faf3feed1ffa3ca21854d.jpg

img_2157438_1_0952ea9d12e1508dc79954c2c8c66362.jpg


I'm not entirely happy with it as I said I'm no carpenter and my ambitions have meet with reality but I did learn a few things and what will need to be changed in order to get it to what I envisioned but for now it will do the job it was designed to do. My construction budget is nearing exhaustion so I'll have to live with it for a few months. Thankfully this is going to live in the basement so looking great is not that important, down here in the dungeon it's more about function then looks. :brows:
 
Evilgrin said:
Well after a good night err days sleep here are some updated pics.

I'm not entirely happy with it as I said I'm no carpenter and my ambitions have meet with reality but I did learn a few things and what will need to be changed in order to get it to what I envisioned but for now it will do the job it was designed to do. My construction budget is nearing exhaustion so I'll have to live with it for a few months. Thankfully this is going to live in the basement so looking great is not that important, down here in the dungeon it's more about function then looks. :brows:

Looking good cant wait to see it finished
 
not a whole lot of progress on the stand so far life has a nasty habit of getting in the way although I did manage to get some of my lighting and all my electrical done as well as complete the little bit of plumbing done so now I can get the waste water over to the drain.

I have pics of the lights mostly haven't had a chance to get closeup shots of the rest yet.

img_2168952_0_927e49640ce96faa7b432f130dbacca3.jpg


img_2168952_1_58b21aa20d2ae6afc489b8eb6264dadf.jpg


img_2168952_2_d28c2081ec304453b4c14c3d30f61806.jpg


Hopefully will have more to show soon.
 
I did also get the side panels on as well started on the building the face frame for the doors before I got side tracked with other things but it was worth it came up with a completely different way of accessing the under tank area just going to mount one large panel instead of doors I think it will give it a cleaner look over all not to mention simplify the build considerably. Translation the wife is getting tired of all the wood dust since it's too cold and rainy to cut everything out side, so the front panel may have to wait till spring to get cut and mounted or at least till she'll be outta the house for several hours.

I'll post some close up pics of the under stand lighting as well as the inside of the light hood and some of the plumbing a little later on today.
 
Evilgrin said:
I did also get the side panels on as well started on the building the face frame for the doors before I got side tracked with other things but it was worth it came up with a completely different way of accessing the under tank area just going to mount one large panel instead of doors I think it will give it a cleaner look over all not to mention simplify the build considerably. Translation the wife is getting tired of all the wood dust since it's too cold and rainy to cut everything out side, so the front panel may have to wait till spring to get cut and mounted or at least till she'll be outta the house for several hours.

I'll post some close up pics of the under stand lighting as well as the inside of the light hood and some of the plumbing a little later on today.

Very nice always nice to simplify lol cant wait to see the pics is this fw/ sw
 
Going to be a fresh water planted tank not going for a definite aqua-scape just want it to be heavily planted with a good assortment of colorful fish.
 
Evilgrin said:
Going to be a fresh water planted tank not going for a definite aqua-scape just want it to be heavily planted with a good assortment of colorful fish.

Always a good option you should look up forktail rainbow fish
 
Actually I'm going with Bosemani Rainbows, Iranian red rainbows, and Turquoise Rainbows. At least that's the plan still have to see what is available locally the Bosemani and the reds I know are available the rest is still up in the air may have to wait till spring to order them through the mail.
 
Ok major update to this project had a few design changes due to my own lack of preparation and planning some things you just don't consider until you get there and all you can do is move on or give up I choose to move on and chalk it up to a learning experience.

So far the doors have been given the axe in favor of a much simpler removable panel just need to get the hardware and trim it to fit as well as getting some trim pieces to give it a nice finished look. Unfortunately Due to exhausting my construction budget that part of the build is going to have to wait till spring. The W.A.F. (Wife Acceptance Factor) is in the danger zone with all the dust not to mention the stink of stain and polyurethane so the rest of the construction is on hold till the spring.

Well on to the pics.

First of the canopy has been stained and has a one coat of wipe on poly.
img_2172456_0_9424088ba94b6d8f2e7380c137de877d.jpg


Have about 4 coats of satin wipe on poly on the top of the stand
img_2172456_1_e080948831ac428718bbb4c0f8333f90.jpg

img_2172456_2_2a98eb5573231266212b318f54f08d74.jpg


Finished up the electrical so everything is working as planned, Switch 1- Hood lights, Switch 2- Under stand maintenance lights, Switch 3- Water pump to evacuate waste water to nearest drain.
img_2172456_3_975b0cfad85f0b9045adc0809863f386.jpg


Good look at the led lighting under the stand as well as the electrical still needs to be neatened up.
img_2172456_4_81cb389876d2978c4c26a10a9f51563f.jpg


Close up of the LEDS mounted on my aluminum bar complete with 60* optics, Fan mounted on the back to help dissipate heat. also a shot of my old 50/50 power compact fluorescent the bulbs are over 10 years old but they still work so I'll replace them eventually.
img_2172456_5_7df16f91cc526050ae07876dcb9c87bf.jpg

img_2172456_6_d9790a616be5a8865d052e8223e62cd4.jpg

img_2172456_7_f39382ecb03de23c1b4b4c849ca6232b.jpg


and the final shot of the plumbing at least on end any way ball valve is there to keep water from flowing back into the pump I'd rather leave it in the pipe till the next time. Also what I consider a must is the GFCI outlet that powers everything on the stand can't be too cautious.
img_2172456_8_07f2bad29113cf19840407b7a67902ac.jpg


All the wood is maple ply except for the top that is solid maple and the hood is clad in luaun ply (sp) stain is red Mahogany.
 
Back
Top Bottom