t4runnr
Aquarium Advice Freak
- Joined
- May 5, 2013
- Messages
- 297
I've posted some of the pics before in other threads but I wanted to consolidate them here and better describe what I did.
Here are 2 pics of the display in my basement.
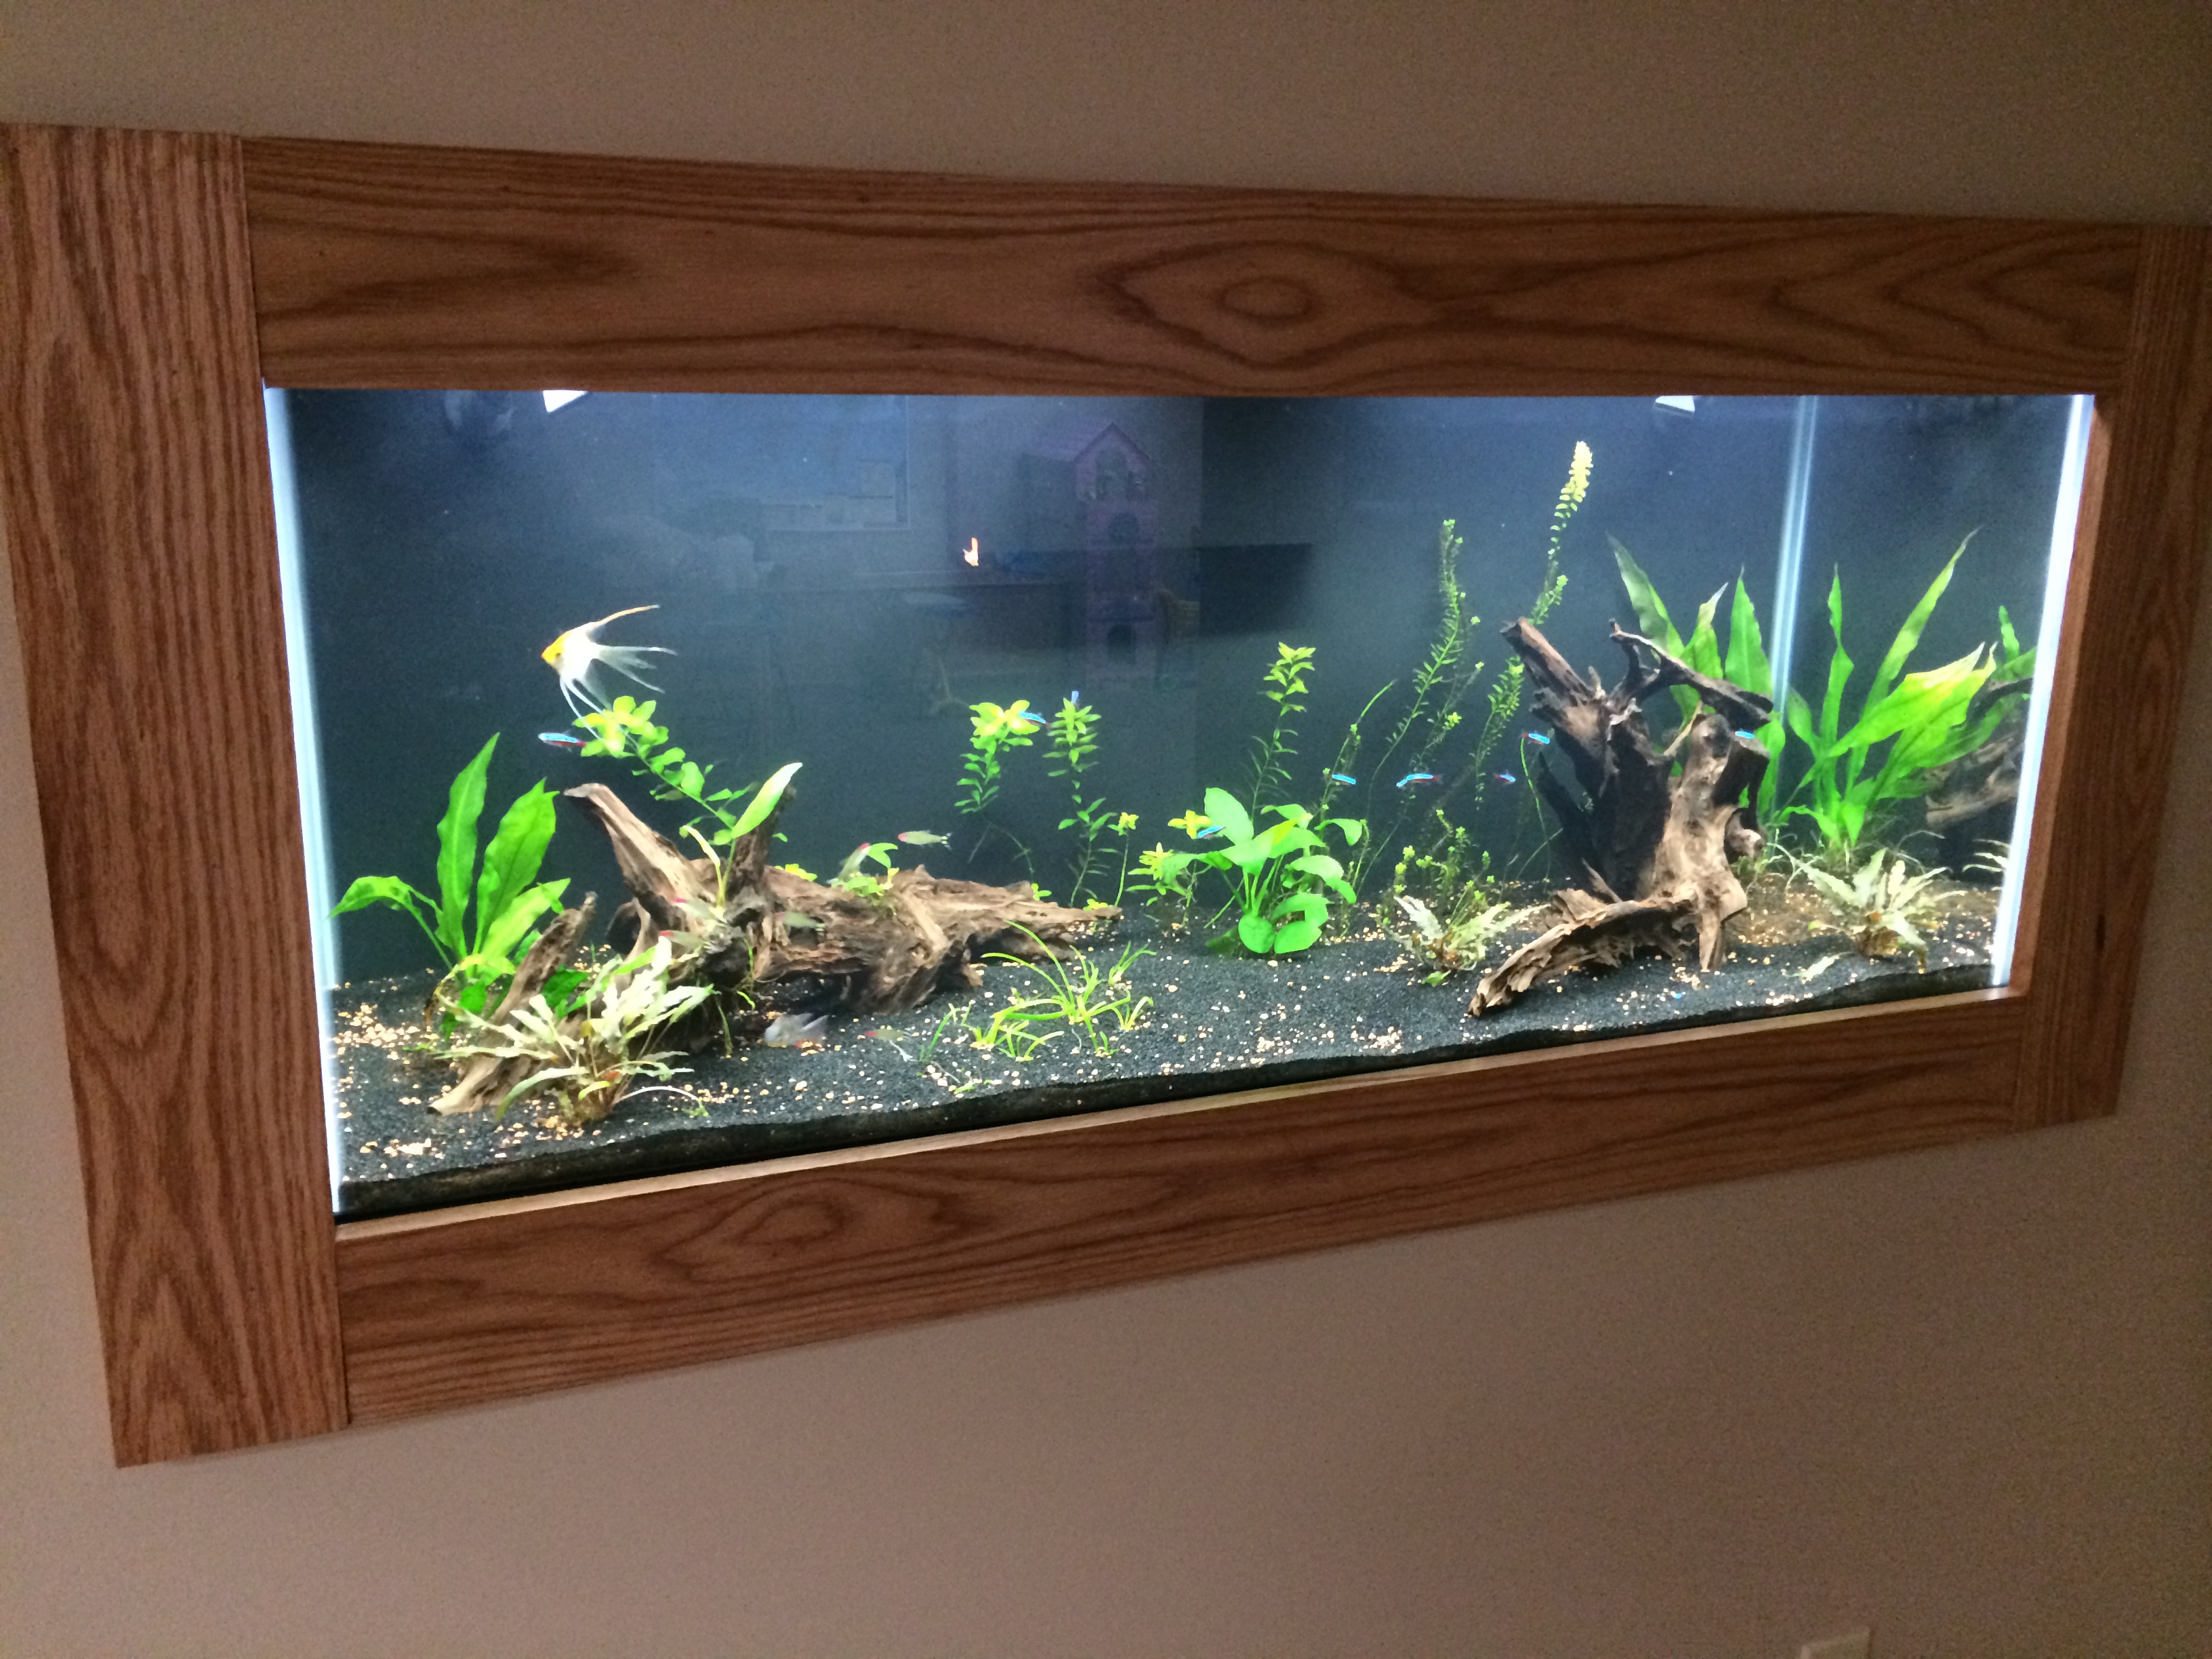
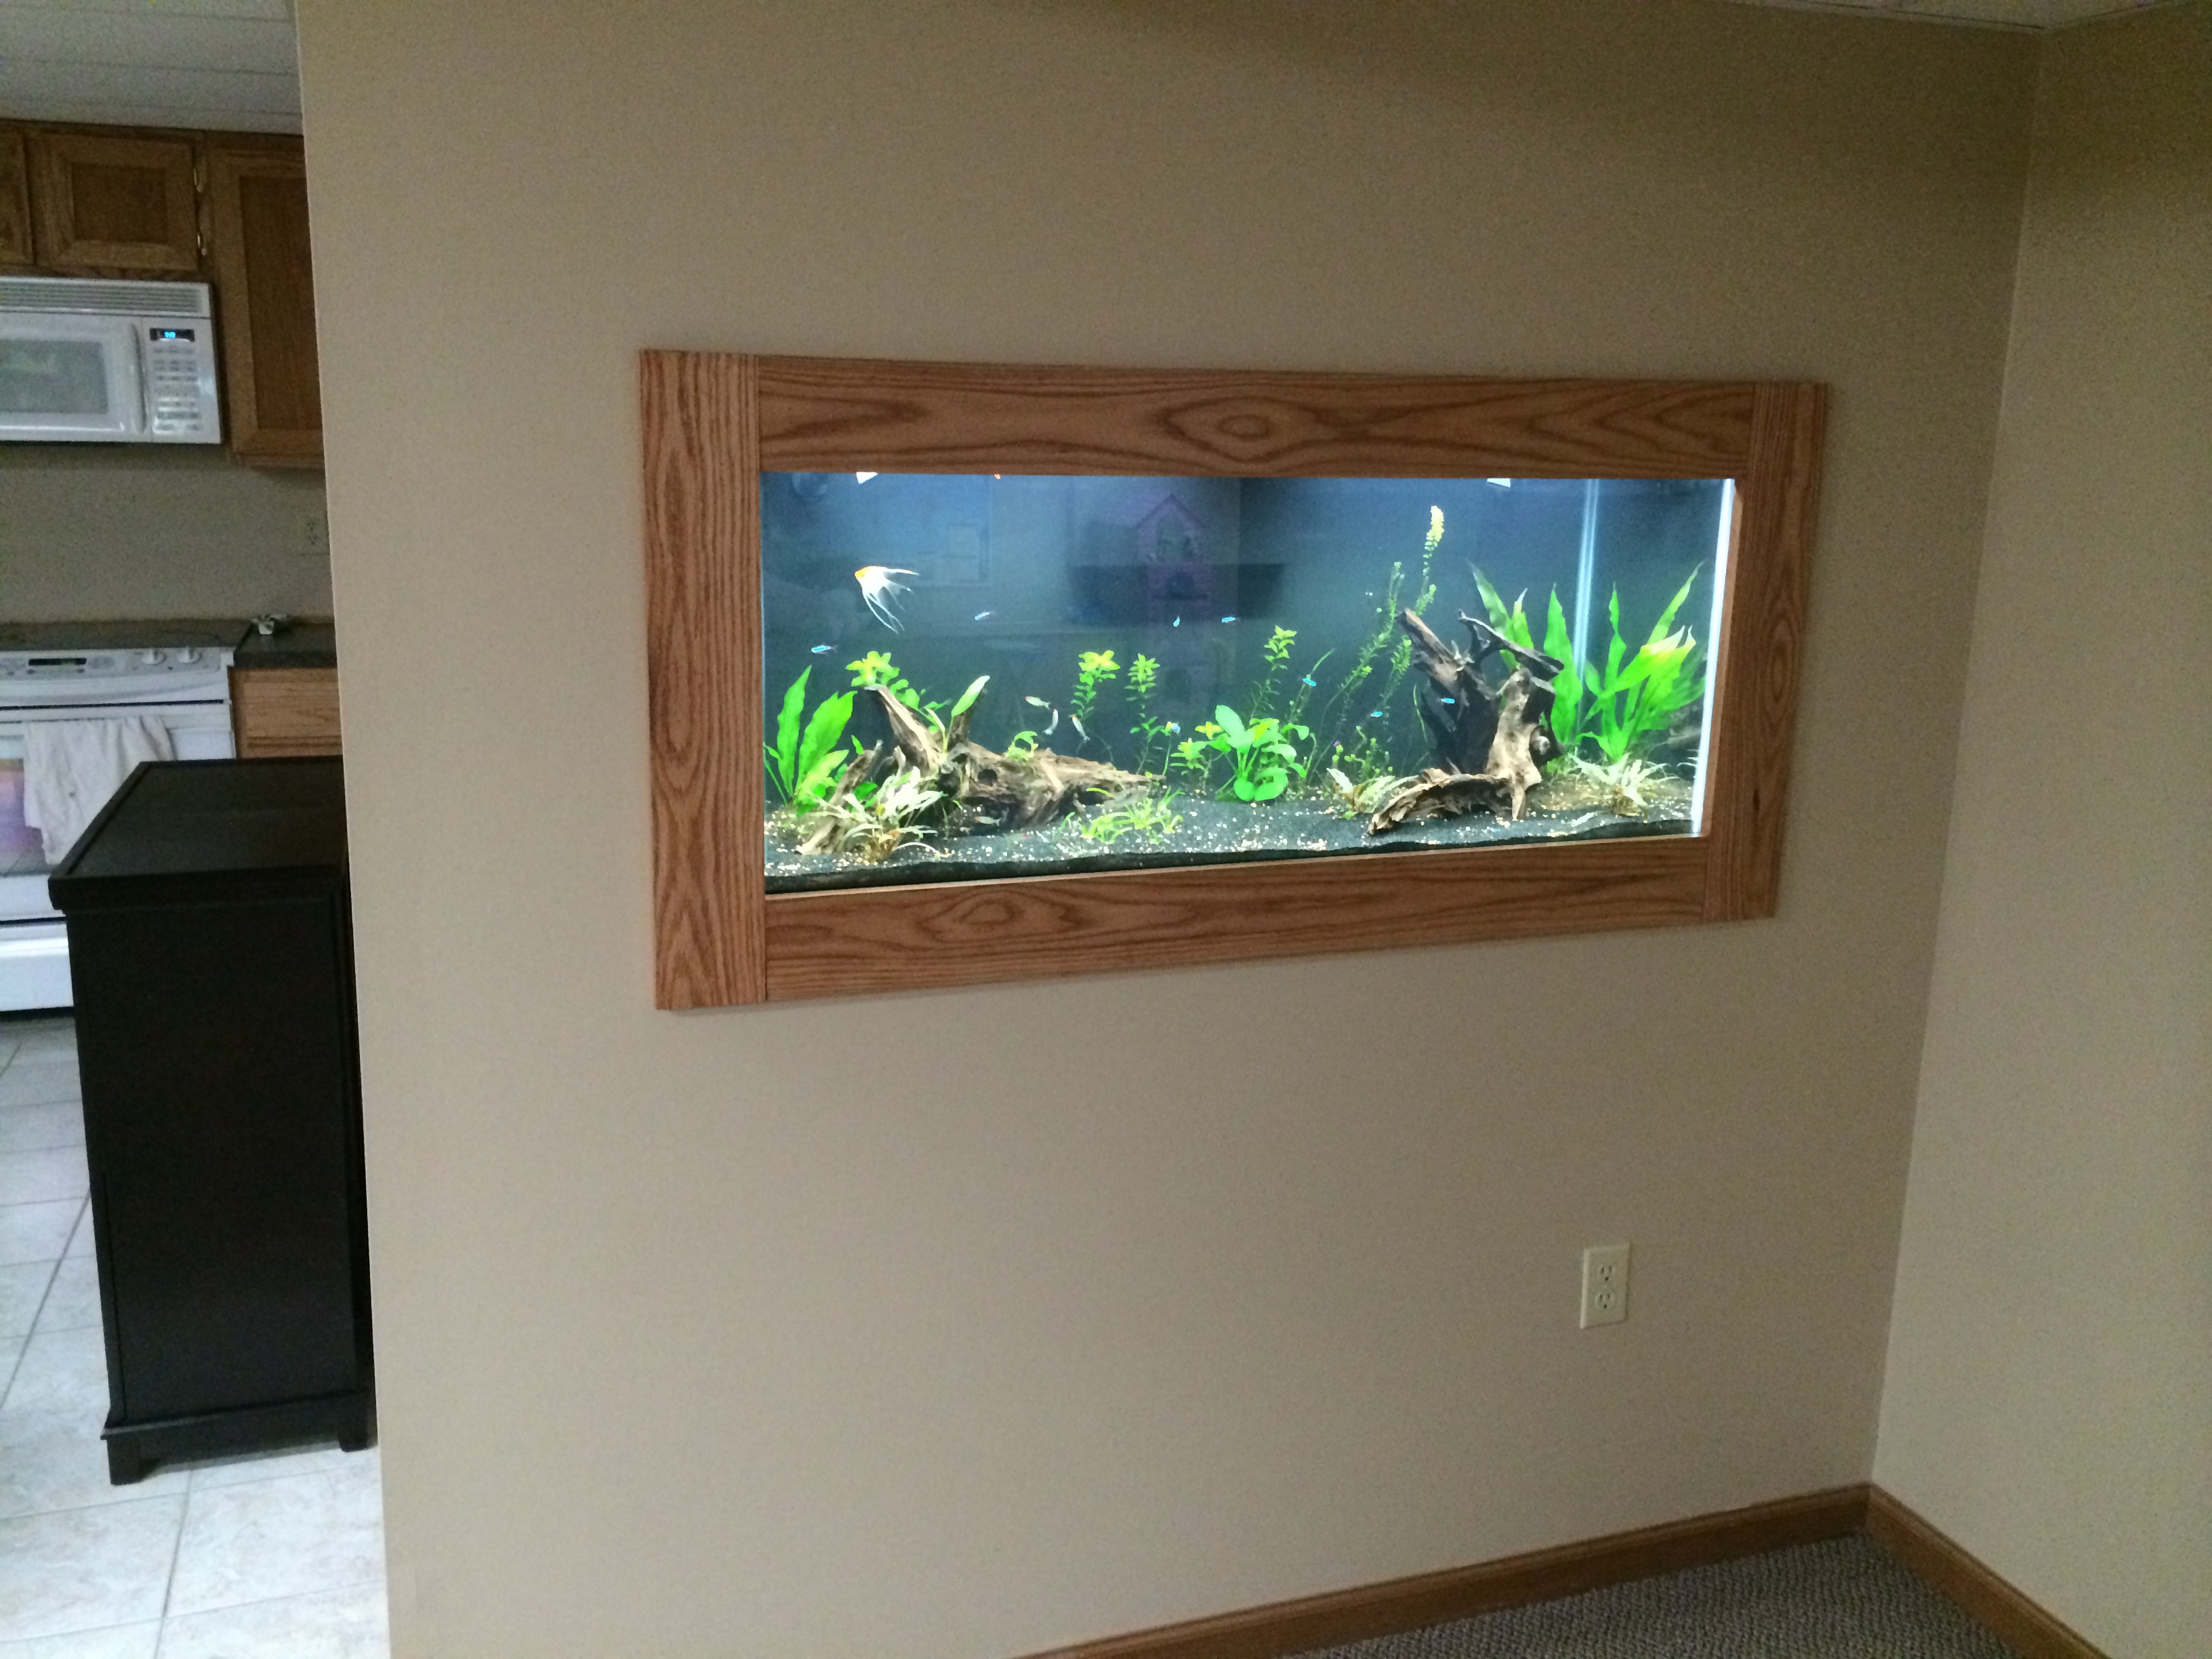
The tank is a standard 75 gallon 48x18x21. The frame is red oak stained with a pecan satin stain. All occupants of the tanks (except for the rams) were transferred from my old 55 gallon tank once this was ready.
Current stock:
4 bolivian rams (thanks to Lazer) - 2 pairs that are still trying to sort out their territory.
1 angelfish
2 bn plecos - mated pair although they haven't laid eggs in a while.
10 cardinal tetras - I plan to up that to 20
6 rummynose tetras - I plan to up that to 12-15
2 otos - i had 4 but 2 died shortly after the transfer. might have been more from the shock of being chased around by a fish net a few times. I plant to get 2 more cuz they're soo cute according to my 9 year old daughter.
4 amano shrimp
3 nerite snails
tons of malaysian trumpet snails
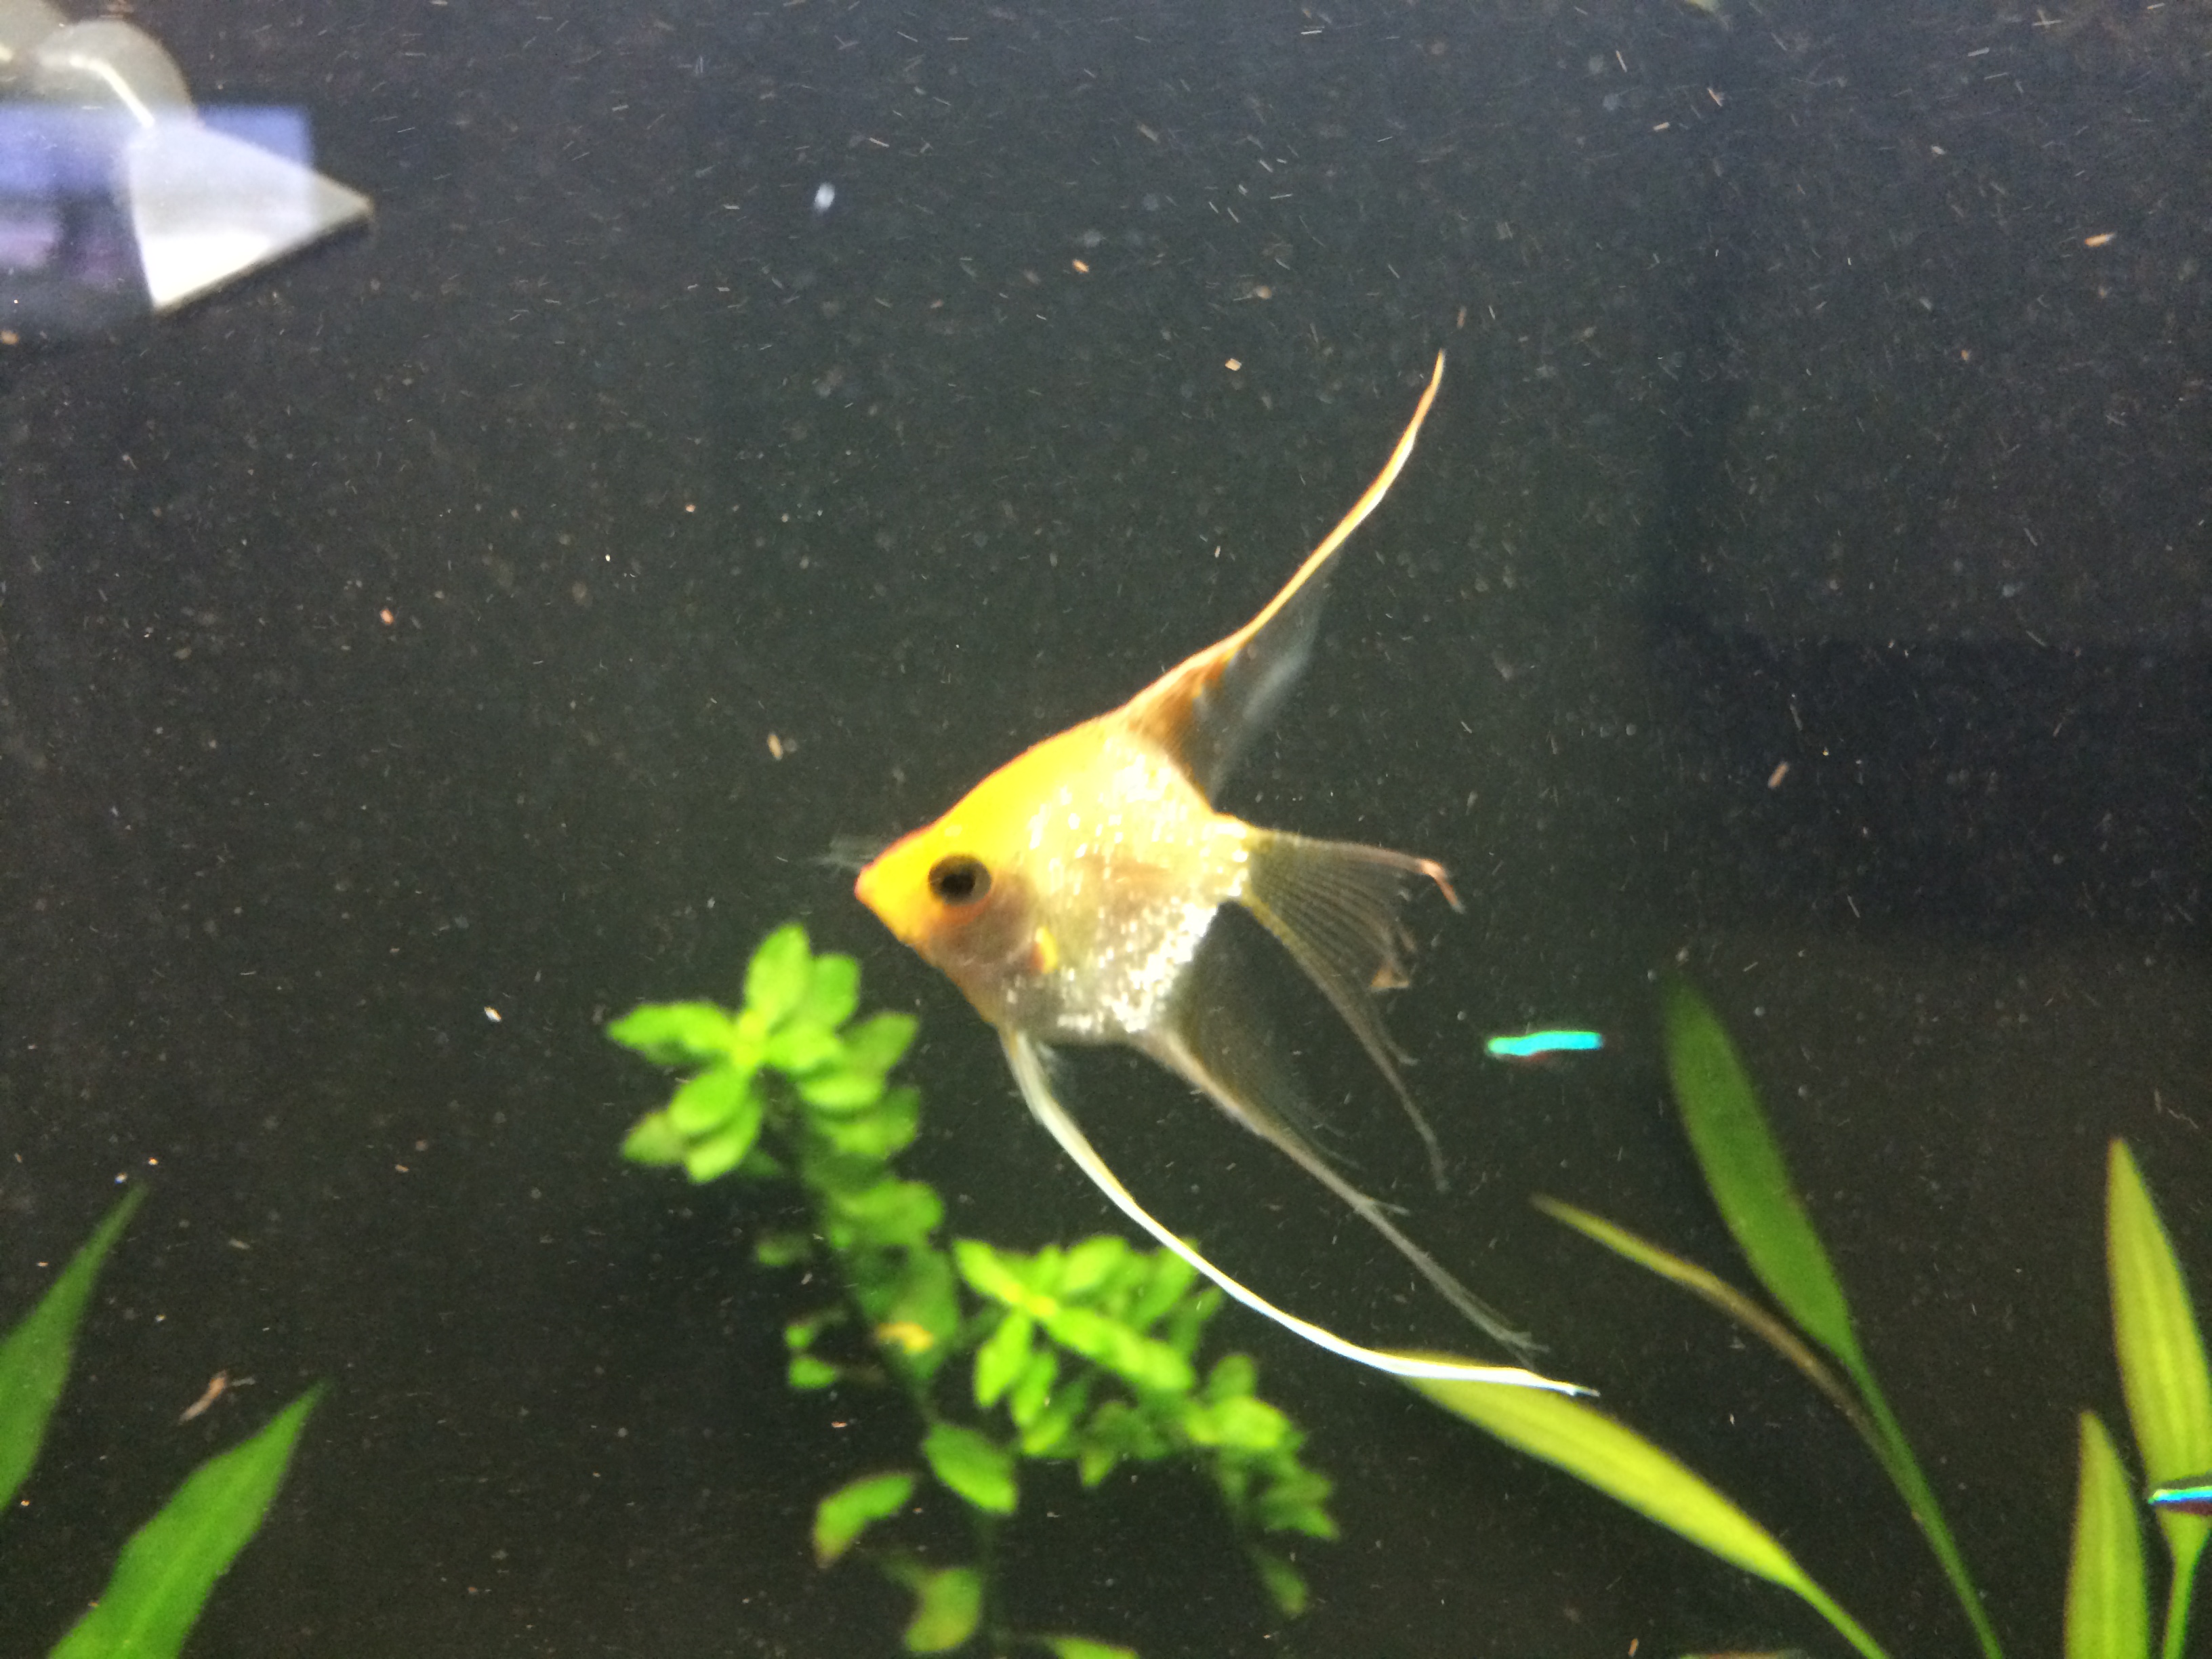
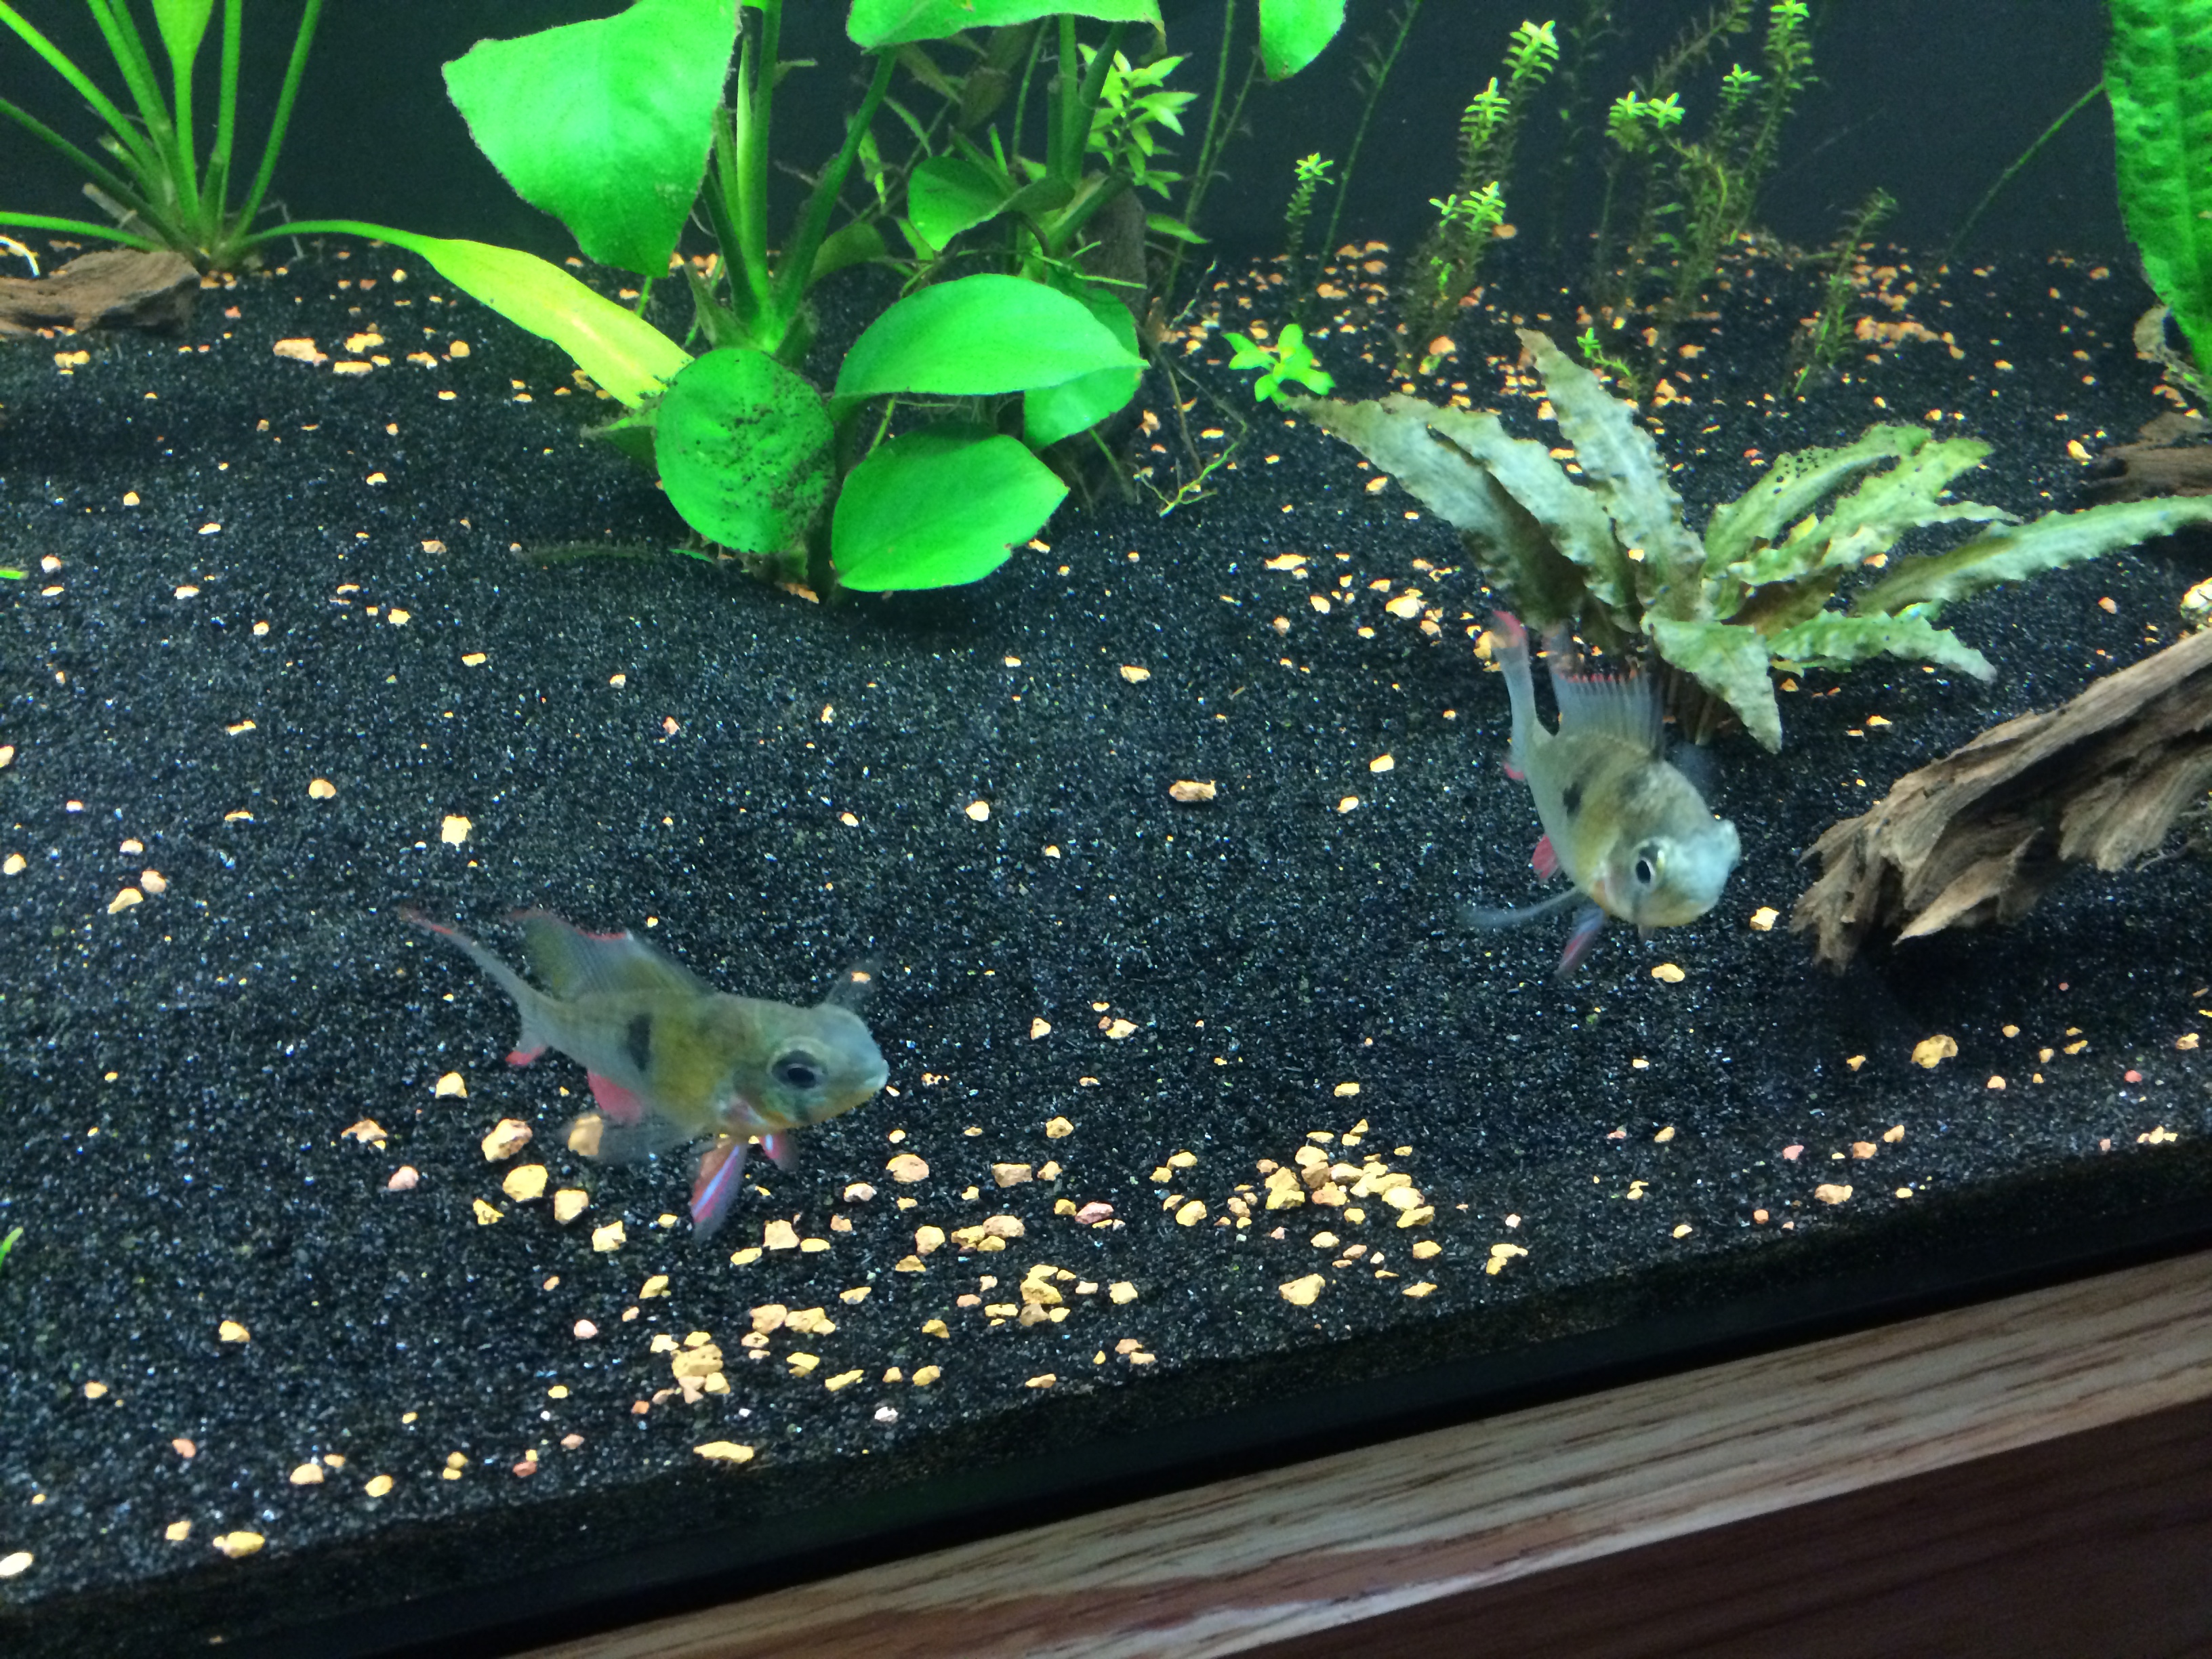
Additional future stock: I'm considering a small school of kuhli loaches because my son wanted some kind of eel type fish in there and I really didn't want actual eels at this time.
The plants consist of (all my heavy root feeders melted a bit to a lot with the transfer but they're growing back strong):
2 swords
1 other sword (at least I think it is from Lazer) - leaves are melting but new ones are coming in now
a few java fern
a few anubias (2 different kinds)
ludwigia (2 differnt kinds)
rotala rotundifolia
a small bunch of wisteria that I just added
I plan to eventually add more.
Here is the other side of the wall:
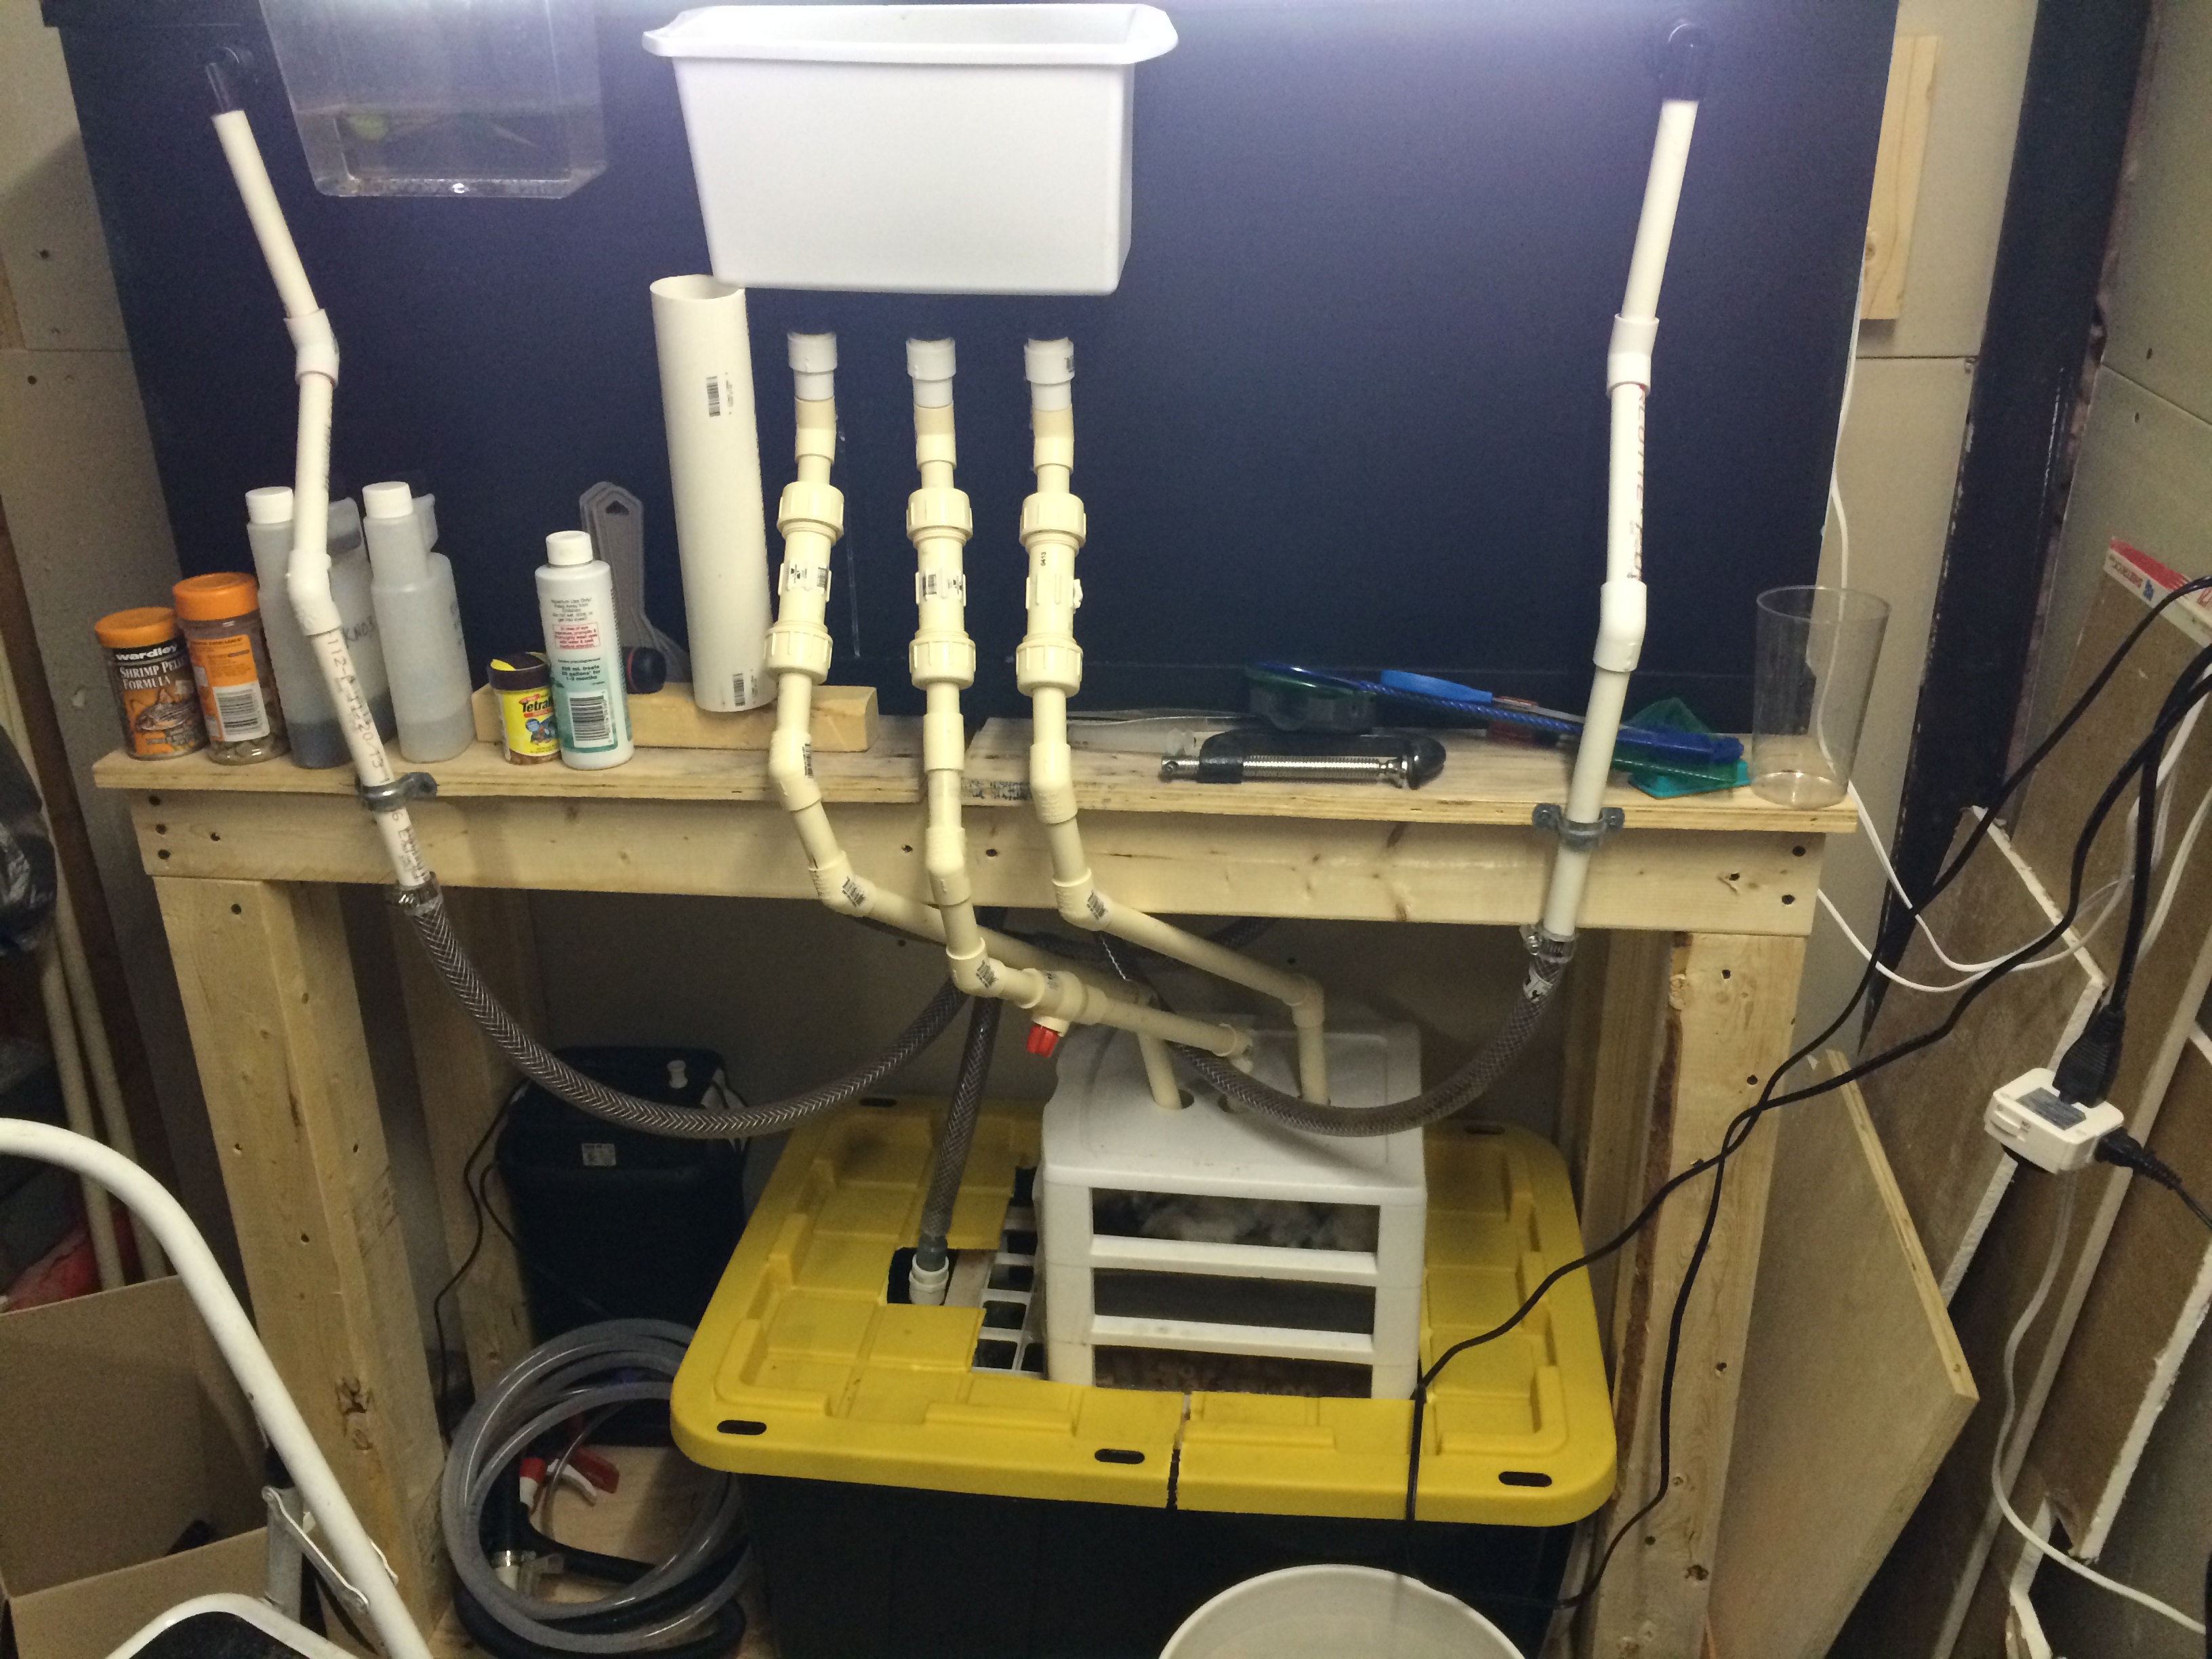
I built the stand from 2x4s and integrated it into existing wall studs (there were 3 in the drywall). The wall was originally a full wall (non-structural) that I put in years ago. It wasn't until last month that I decided to go knock the hole in the wall and put a tank there. Anyway, the stand is really strong. I have no fears of collapse anytime soon.
The tank is drilled - 2 returns near the corners and 2 drains in the middle. The 2 drains are part of the 1500 overflow kit from gl*******s. When I first installed the entire kit and used their elbows the noise from the gurgling was unbearable. We could hear it upstairs. So I took a plastic ice tray that I bought from Target and mounted it to the back of the tank.
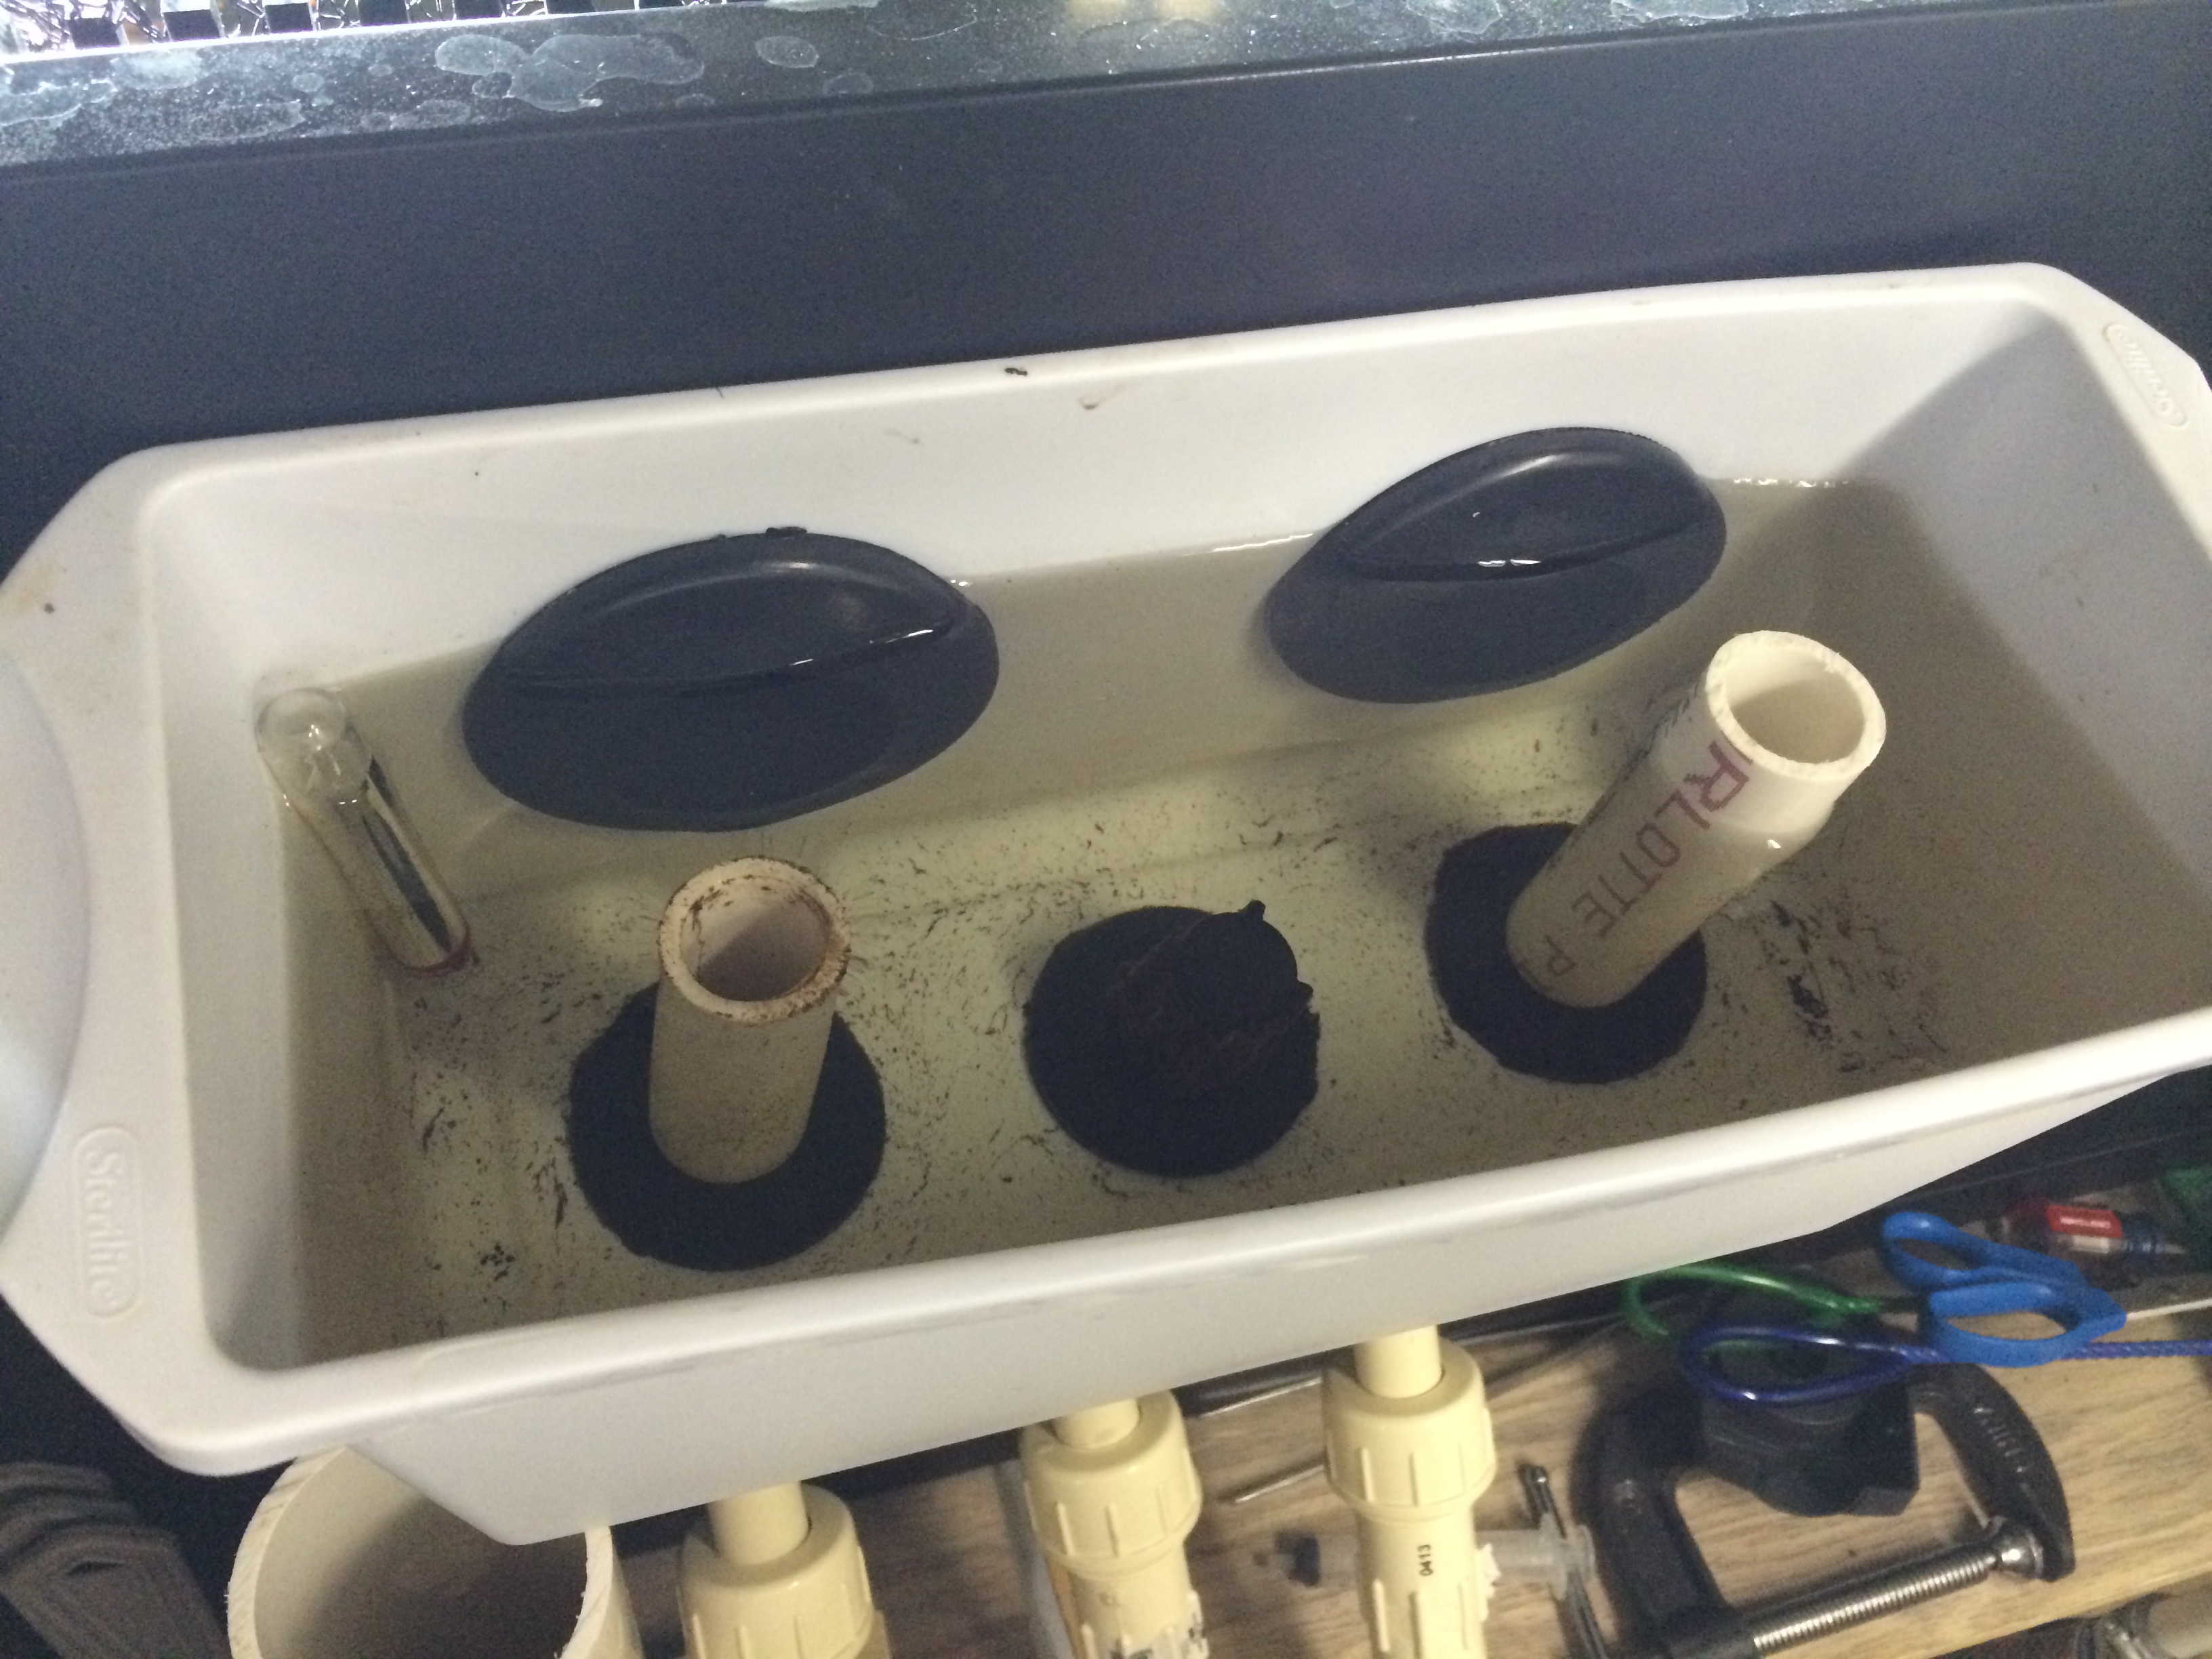
The plastic ice tray is pretty strong yet flexible enough to allow me to tighten the bulkheads firmly and not worry about leaks. I drilled 3 holes into the bottom of ice tray and put 3 more bulkheads in. The middle bulkhead is the main drain. There is bulkhead strainer there. The bulkhead on the left is my secondary drain and it sets the operational depth of the water in the ice tray and overflow box in the tank. The bulkhead on the right is the emergency drain that is set about 1/2" higher than the secondary. That way if any of the other 2 lines gets clogged, this will get used when the water rises. Please pay no attention to the color of the water. I took these before doing a water change and my purigen is currently getting recharged.
The main drain line (the middle one) has a ball valve about halfway down. I close this enough to get the water in the ice tray to rise up enough to just barely start flowing down into the secondary drain. Doing this method has done wonders for drain noise. Its virtually silent even standing behind the tank. The sump is actually louder but silent enough to not be heard from outside the room or unbearable in the back room.
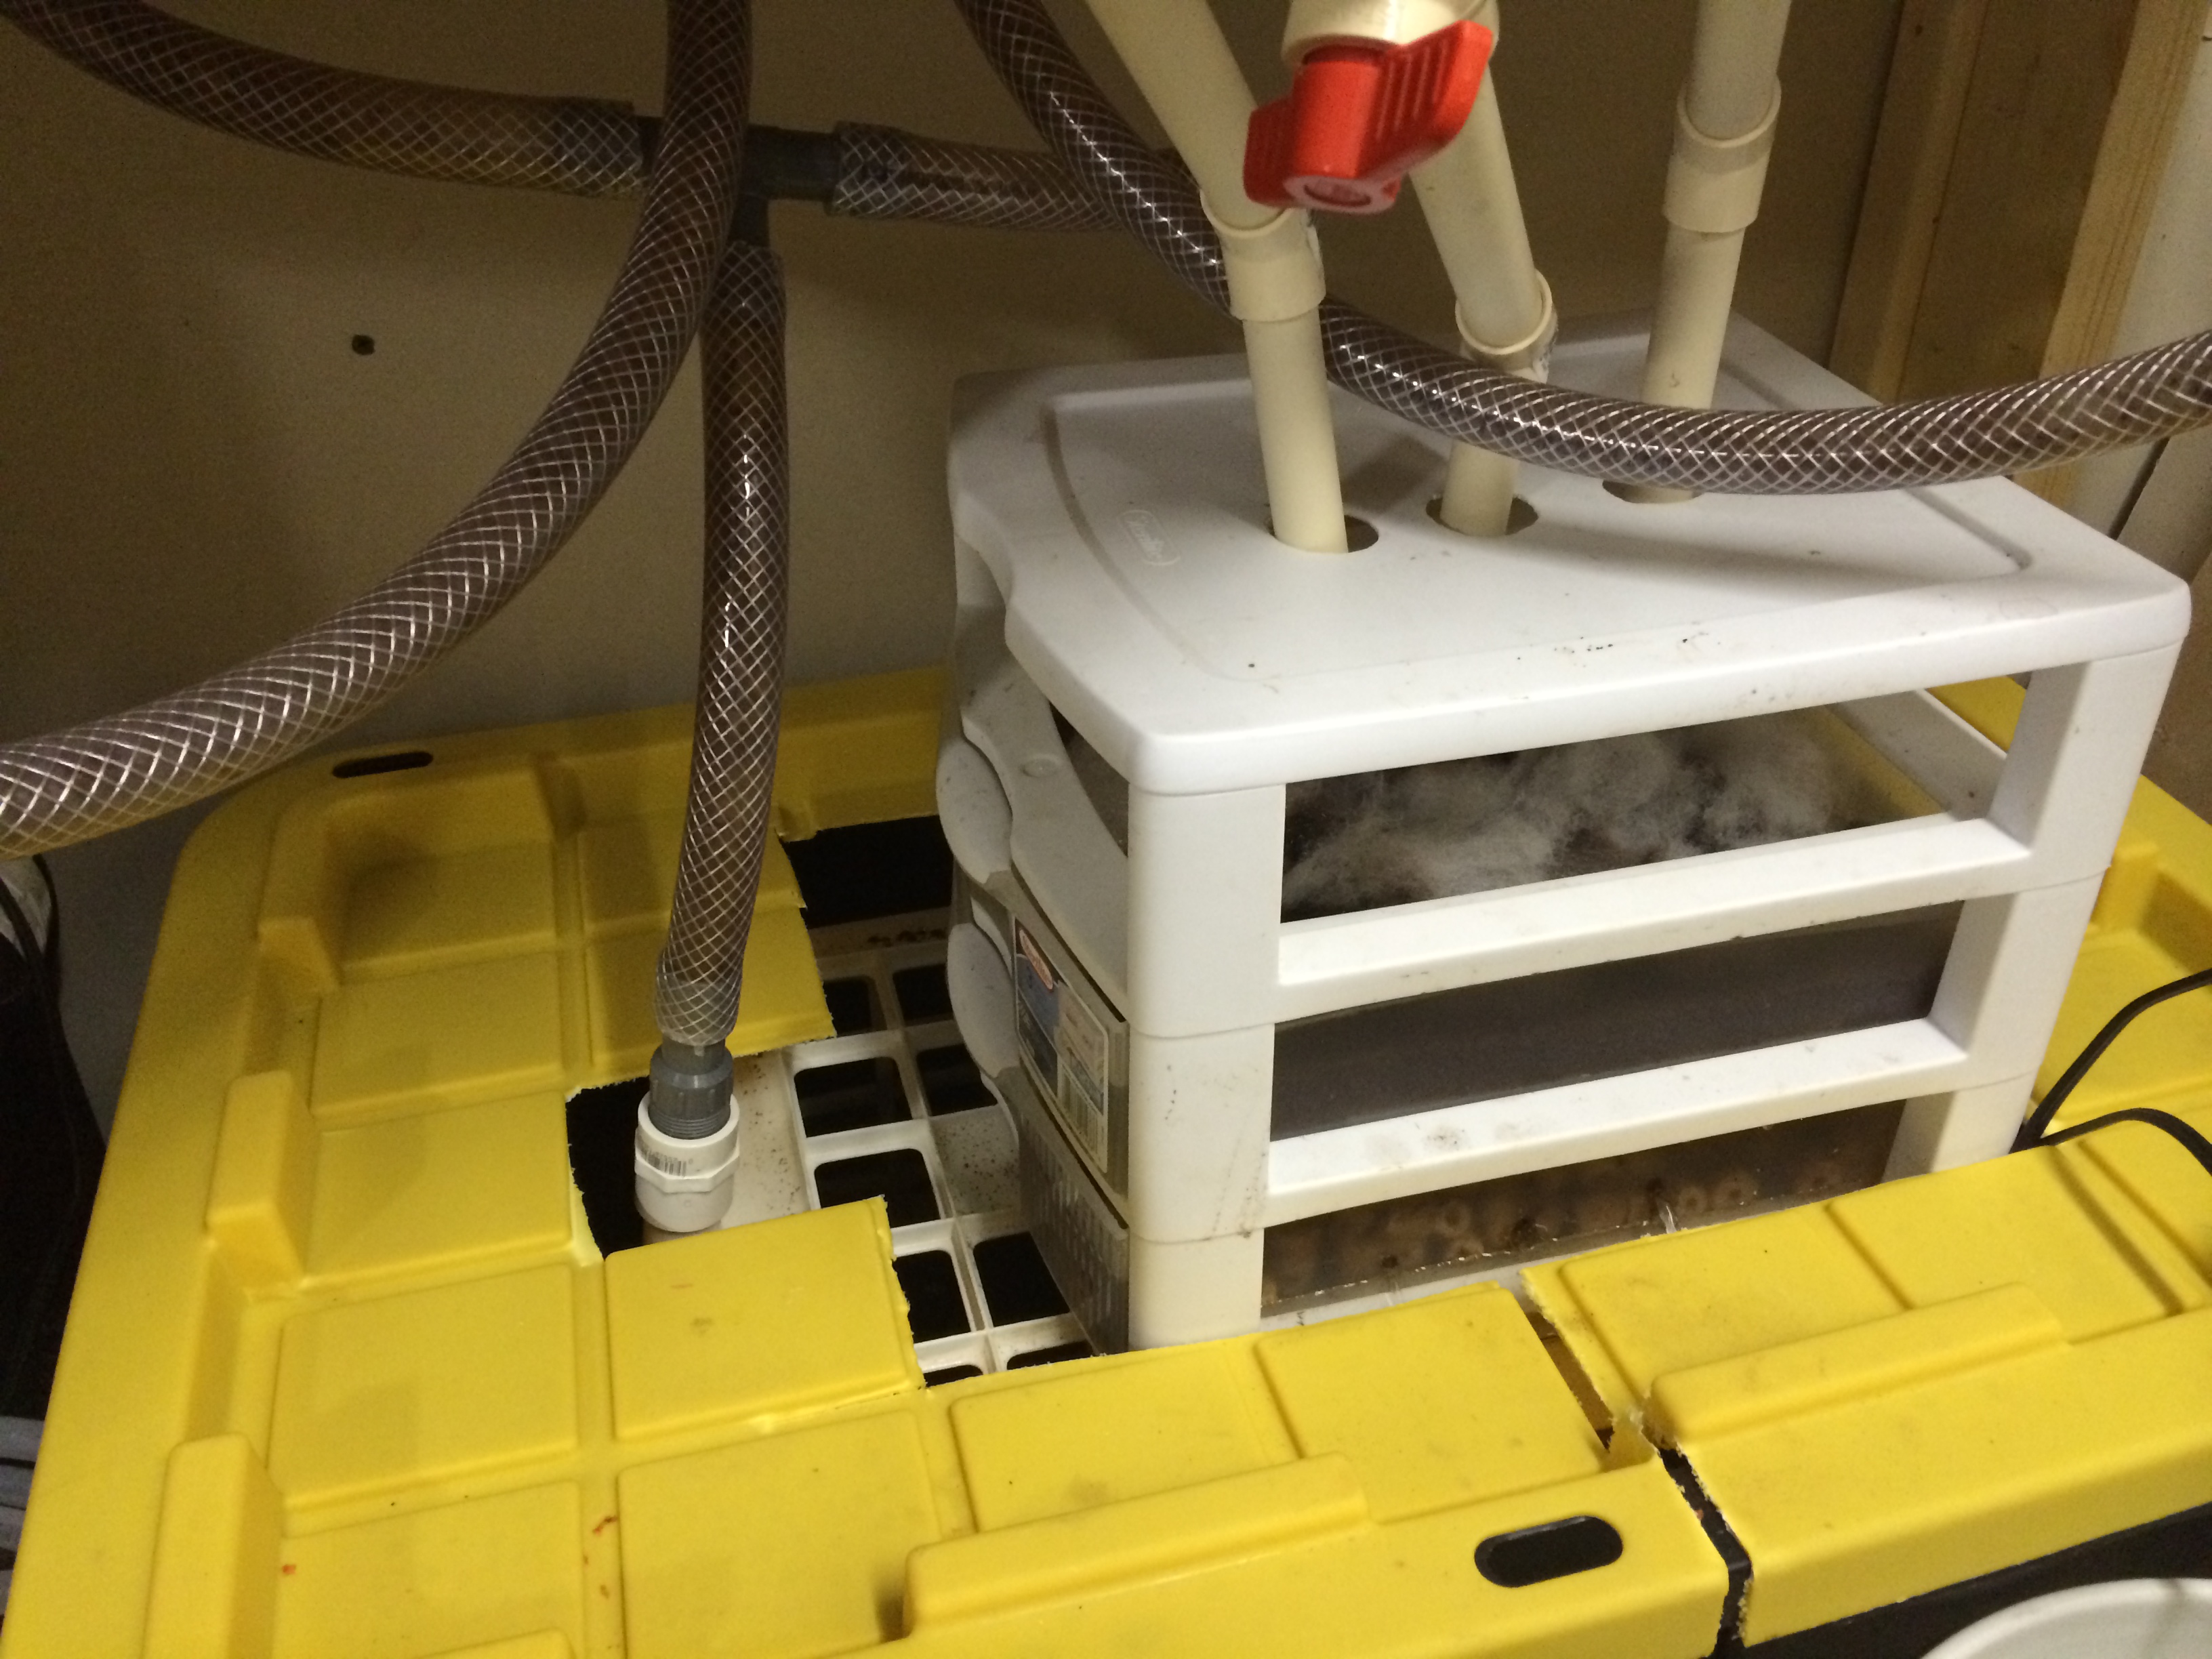
The drains go into my filters. I just used one of those plastic drawer sets from Target as well. It originally came with 3 drawers but I only use the bottom 2. The top drawer has a bunch of holes drilled in like a drip tray. I have poly fill sitting on top of my old fluval 406 main filter sponges. The water filters through these and through the drip tray into the 2nd drawer that houses my ceramic media (again all from my old 406 that I used on my 55 gallon). This tray has 2 of the same bulk heads as the ice tray and each has a short pvc pipe setup to add a little water depth for the ceramic (this made it a lot quieter). The drawers are sitting on top of an old milk crate that I found laying around in one of my storage rooms. The entire thing is sitting in a 27 gallon heavy duty plastic storage bin.
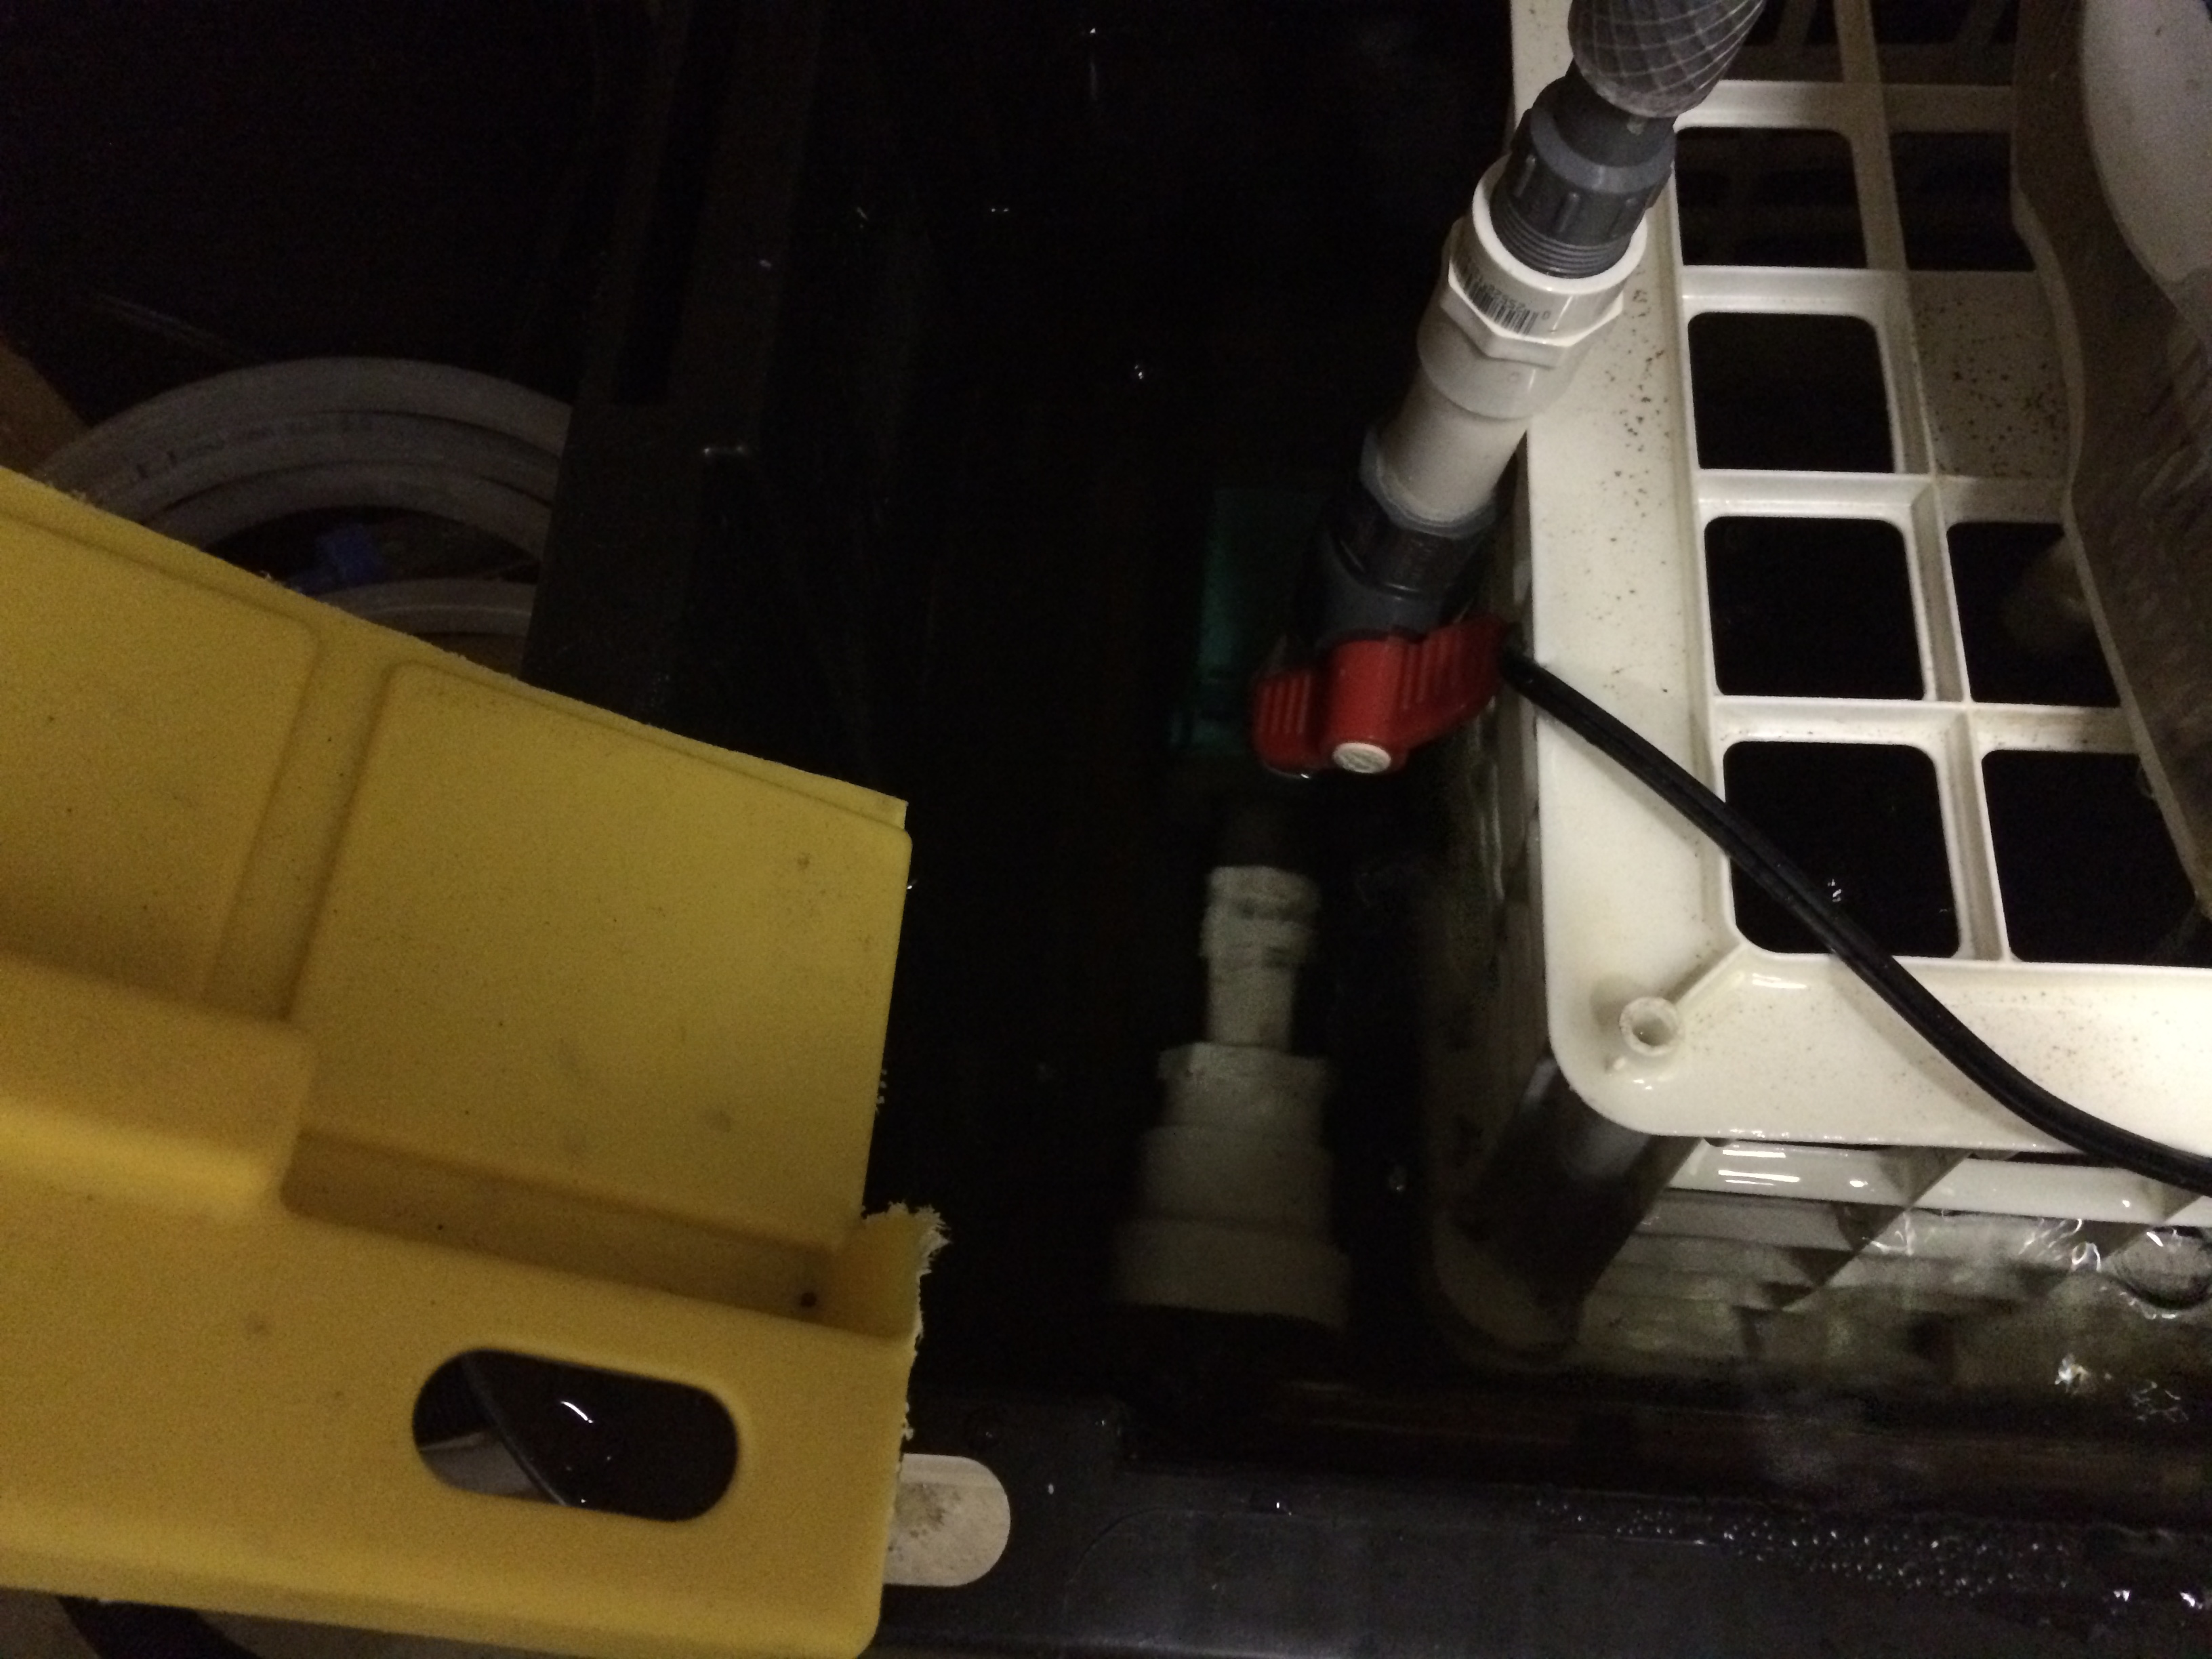
The pump is a marineland (I forgot the model number but its rated for 700 gph). The inlet has pvc with an expander. Right at the expander is where I put the bag of purigen. The ball valve just after the outlet sets my flow rate into the tank. The one thing that is not installed inline yet is my check valve to prevent the water from siphoning back into the sump from the return lines. I plan to add that Easter weekend.
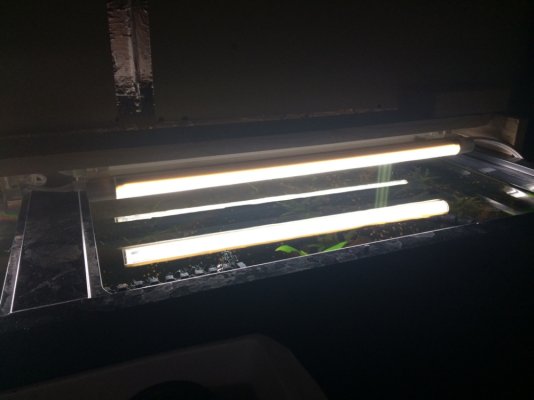
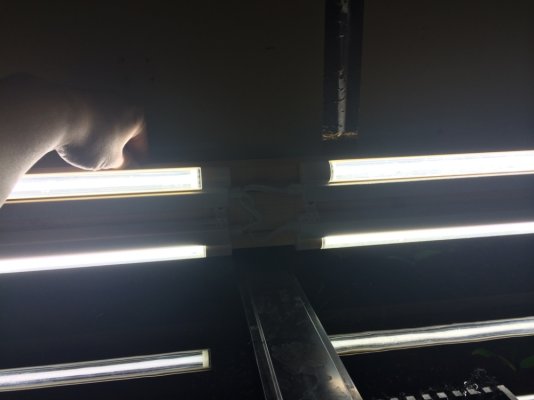
What I haven't shown a picture of (since I forgot to take some) is the lights I'm currently using. I decided to try the18" T2 6400k lights that have built in reflectors and are adjustable. I have 4 of them (2 inline and each inline pair is side by side) that spans the tank. I've had them for about a year on the 55 gallon tank and they are doing fine. I eventually plan to get either a BML or a fugeray planted+. I may even give pressurized CO2 a shot next year.
Sorry for the long post but now the project is done and the family gets to enjoy the tank and show off to friends and family.
Here are 2 pics of the display in my basement.


The tank is a standard 75 gallon 48x18x21. The frame is red oak stained with a pecan satin stain. All occupants of the tanks (except for the rams) were transferred from my old 55 gallon tank once this was ready.
Current stock:
4 bolivian rams (thanks to Lazer) - 2 pairs that are still trying to sort out their territory.
1 angelfish
2 bn plecos - mated pair although they haven't laid eggs in a while.
10 cardinal tetras - I plan to up that to 20
6 rummynose tetras - I plan to up that to 12-15
2 otos - i had 4 but 2 died shortly after the transfer. might have been more from the shock of being chased around by a fish net a few times. I plant to get 2 more cuz they're soo cute according to my 9 year old daughter.
4 amano shrimp
3 nerite snails
tons of malaysian trumpet snails


Additional future stock: I'm considering a small school of kuhli loaches because my son wanted some kind of eel type fish in there and I really didn't want actual eels at this time.
The plants consist of (all my heavy root feeders melted a bit to a lot with the transfer but they're growing back strong):
2 swords
1 other sword (at least I think it is from Lazer) - leaves are melting but new ones are coming in now
a few java fern
a few anubias (2 different kinds)
ludwigia (2 differnt kinds)
rotala rotundifolia
a small bunch of wisteria that I just added
I plan to eventually add more.
Here is the other side of the wall:

I built the stand from 2x4s and integrated it into existing wall studs (there were 3 in the drywall). The wall was originally a full wall (non-structural) that I put in years ago. It wasn't until last month that I decided to go knock the hole in the wall and put a tank there. Anyway, the stand is really strong. I have no fears of collapse anytime soon.
The tank is drilled - 2 returns near the corners and 2 drains in the middle. The 2 drains are part of the 1500 overflow kit from gl*******s. When I first installed the entire kit and used their elbows the noise from the gurgling was unbearable. We could hear it upstairs. So I took a plastic ice tray that I bought from Target and mounted it to the back of the tank.

The plastic ice tray is pretty strong yet flexible enough to allow me to tighten the bulkheads firmly and not worry about leaks. I drilled 3 holes into the bottom of ice tray and put 3 more bulkheads in. The middle bulkhead is the main drain. There is bulkhead strainer there. The bulkhead on the left is my secondary drain and it sets the operational depth of the water in the ice tray and overflow box in the tank. The bulkhead on the right is the emergency drain that is set about 1/2" higher than the secondary. That way if any of the other 2 lines gets clogged, this will get used when the water rises. Please pay no attention to the color of the water. I took these before doing a water change and my purigen is currently getting recharged.
The main drain line (the middle one) has a ball valve about halfway down. I close this enough to get the water in the ice tray to rise up enough to just barely start flowing down into the secondary drain. Doing this method has done wonders for drain noise. Its virtually silent even standing behind the tank. The sump is actually louder but silent enough to not be heard from outside the room or unbearable in the back room.

The drains go into my filters. I just used one of those plastic drawer sets from Target as well. It originally came with 3 drawers but I only use the bottom 2. The top drawer has a bunch of holes drilled in like a drip tray. I have poly fill sitting on top of my old fluval 406 main filter sponges. The water filters through these and through the drip tray into the 2nd drawer that houses my ceramic media (again all from my old 406 that I used on my 55 gallon). This tray has 2 of the same bulk heads as the ice tray and each has a short pvc pipe setup to add a little water depth for the ceramic (this made it a lot quieter). The drawers are sitting on top of an old milk crate that I found laying around in one of my storage rooms. The entire thing is sitting in a 27 gallon heavy duty plastic storage bin.

The pump is a marineland (I forgot the model number but its rated for 700 gph). The inlet has pvc with an expander. Right at the expander is where I put the bag of purigen. The ball valve just after the outlet sets my flow rate into the tank. The one thing that is not installed inline yet is my check valve to prevent the water from siphoning back into the sump from the return lines. I plan to add that Easter weekend.
What I haven't shown a picture of (since I forgot to take some) is the lights I'm currently using. I decided to try the18" T2 6400k lights that have built in reflectors and are adjustable. I have 4 of them (2 inline and each inline pair is side by side) that spans the tank. I've had them for about a year on the 55 gallon tank and they are doing fine. I eventually plan to get either a BML or a fugeray planted+. I may even give pressurized CO2 a shot next year.
Sorry for the long post but now the project is done and the family gets to enjoy the tank and show off to friends and family.


