mr funktastic
Aquarium Advice Addict
i am sure this has been done but i thought i would just make a little thread on what i did and how much it all costs. ok so here we go...
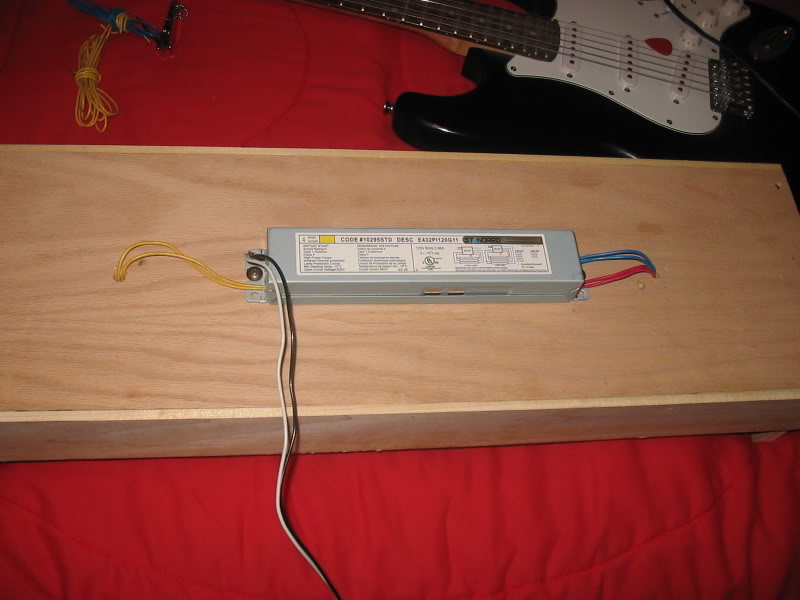
i started with a trip to my good old trusty home depot. i purchased 2 dual t-8 light ballast for 17 dollars each. these ballast said they were rated up to 24" t-8 but after buying them and installing everything i found out they were actually only rated for 15" t-8 bulbs and 24" t-12 bulbs... which was a real **** off but life goes on lol. so i started again. i went to an electrical supply store and found out my options. the guy there said i could either run 2 ballast, each one powered 2 lights up to 36" long which costs $25 each.... i said no thanks. my next option was 1 ballast that powered 4 t-8 lights rated for up to 36" aswell for only $30... i said yes please lol. so i bought this and 8 end caps for the ballast which were .85 cents each. i had some spare wire at home which i then used to wire into my endcaps. they do not supply u with enough wire to attach them to the end caps. i merreted and taped all my wires so there was no chance of fire hazzard. once i was done i was ready to mount the end caps.
i mounted the end caps simply by attaching the end caps to the bulb like u would when putting a bulb into a fixture and then marked it on the wood that i was screwing it to. i then screwed the other ones by the same method by evenly spacing them out by eye (not to technical but worked fine) once i had them all marked on the wood i screwed them down. did a test fit for each one with a bulb to make sure everything was good to go.
the box.... i made my box the outside measurement of the plastic on my tank then add 1 1/2 " (3/4" wood times 2 = 1 1/2. cause i wanted inside measurement) so mine was 24 1/2" top peice then 2 side peices which i made 5 inches ( 3 inches above the tank then the other 2 inches went down the side to the bottom of the plastic trim) i then made the front side peices which were 26" (24 1/2 plus the 1 1/2 for the thickness of the wood) and 3 inches wide so the whole light is actually resting on the side peices and that is what is keeping it on the tank. the bulbs are 1" diameter and the end caps are 1 1/4 inches so technically u could make the fixture as low as 1 1/2 if u wanted low sleek look but i wanted room to play with.
ok i think that covers the basics of it. so here is a cost tally...
1 4X 24" t8 ballast = $30
t-8 end caps = .85 x 8 = $6.80
cut off wood at home depot = 6 dollars (i got it for free but this is what u would normally pay)
small spool of wire = $4(again i got this for free but this is what it would cost)
bulbs = up to you. as cheap as 4 dollars each at home depot and as much as 15 each from pet store.
my bulbs cost more than the whole light fixture lol
grand total =46.80 plus bulbs.
i figure that isnt to bad if u consider this will bring u up to 5.64 watts per gallon on a 20 gallon tank. 80 watts old way 113 watts new way. plus this ballast i bought is good for up to 36" so this can be used on larger tanks aswell just build a hood to fit.
i have some pictures right now and will update as i go. i havent installed me new ballast yet becasue i am wating to get it. but i can cover most of it. i hope this helps at least one person on here lol.
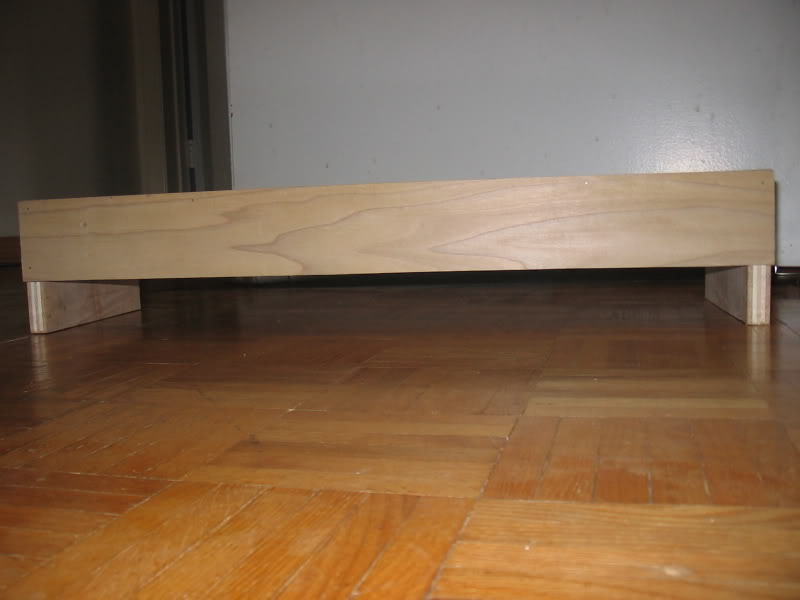
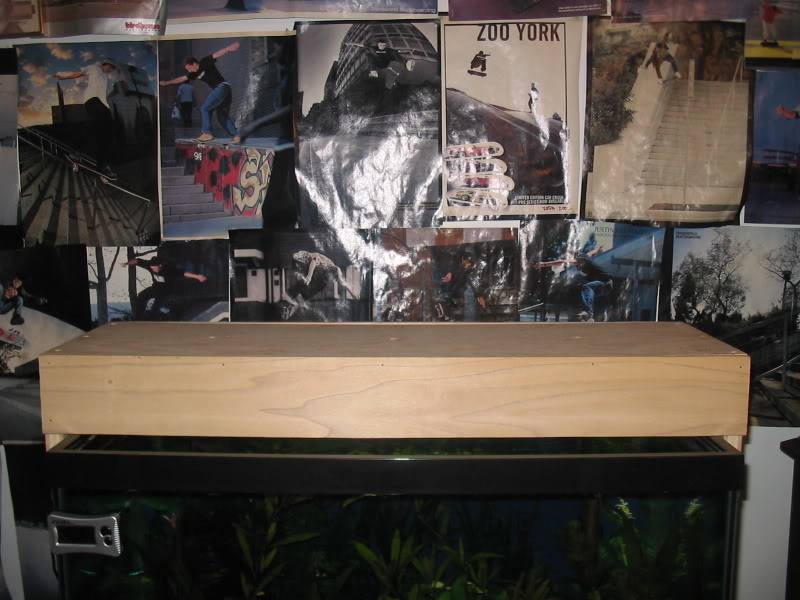
this is my light hood
this is how u mark where to mount the end caps
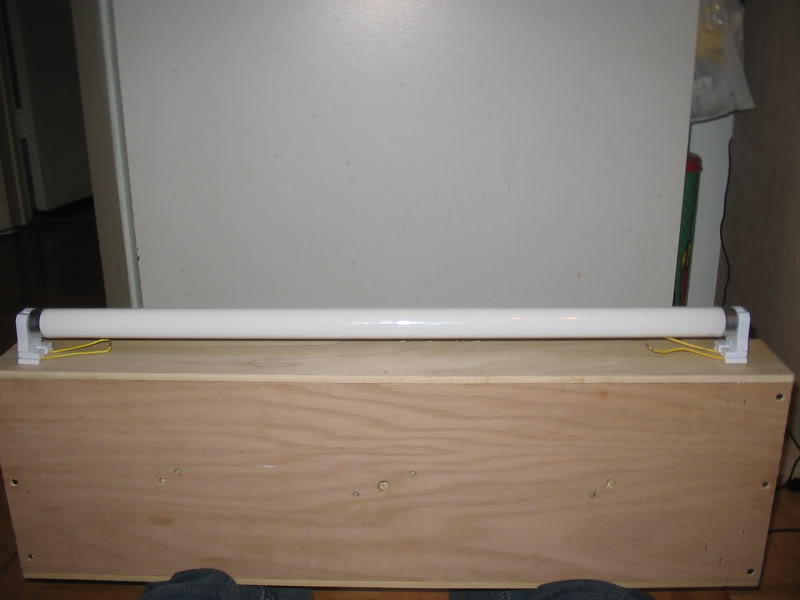
this is what i mean by the 2 inch drop on the side which i made to long lol
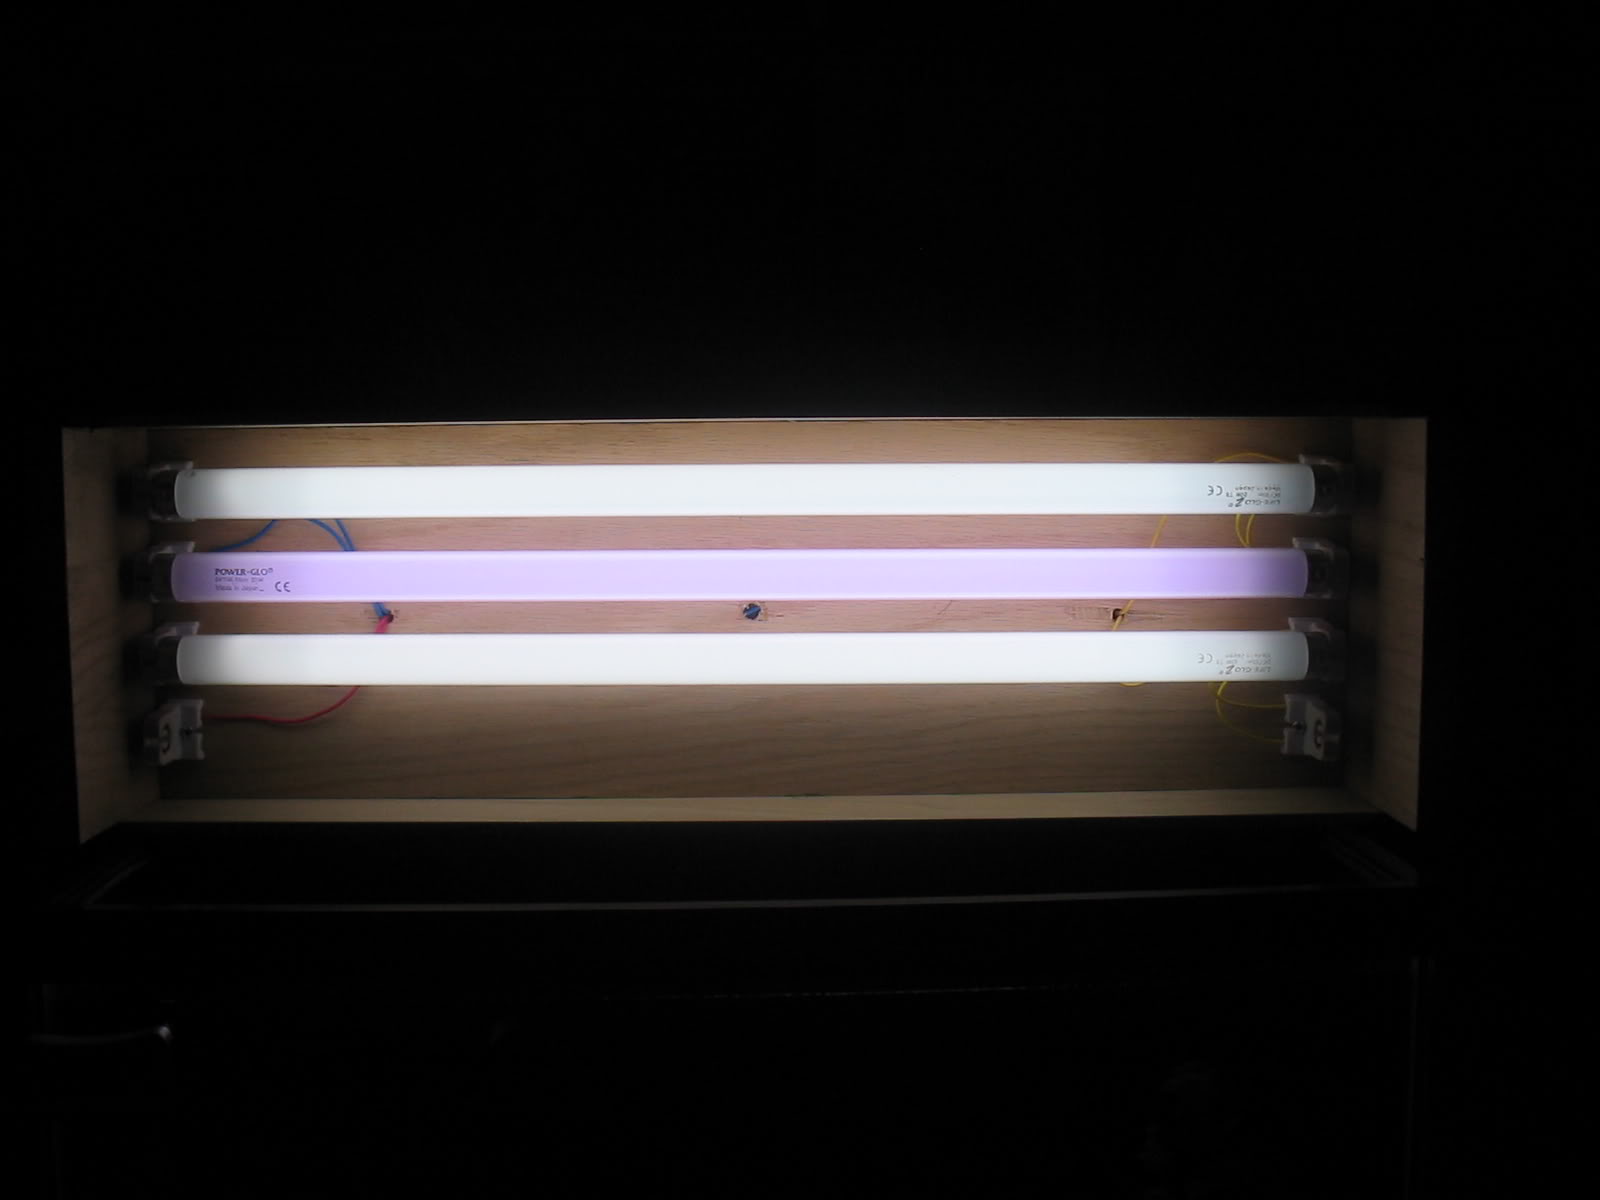
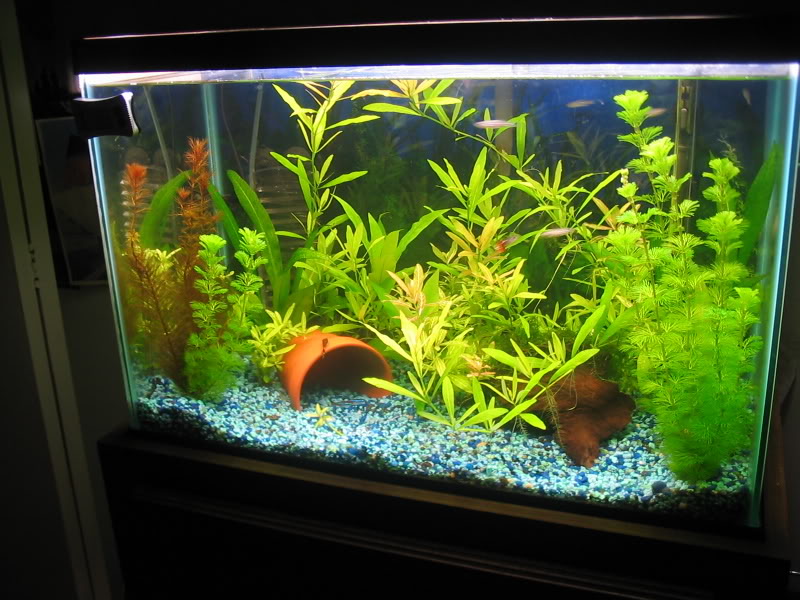
what the lights look like on my tank
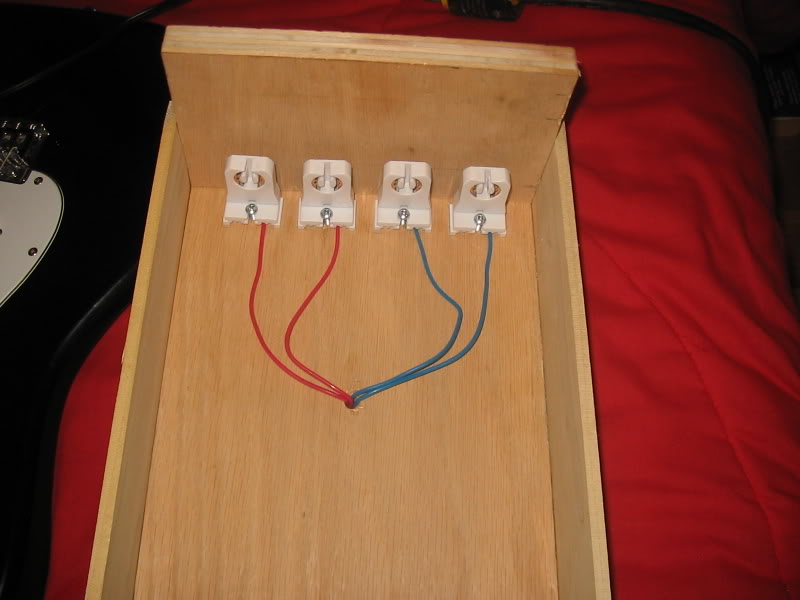
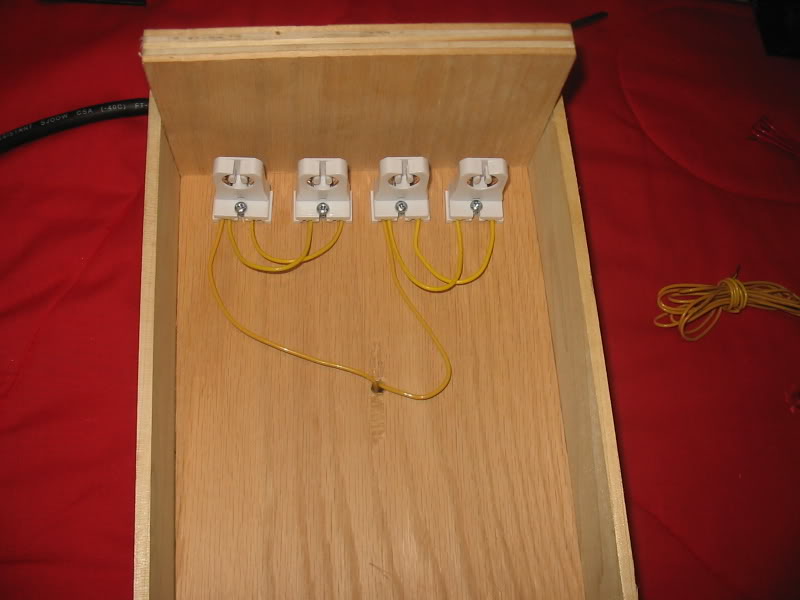
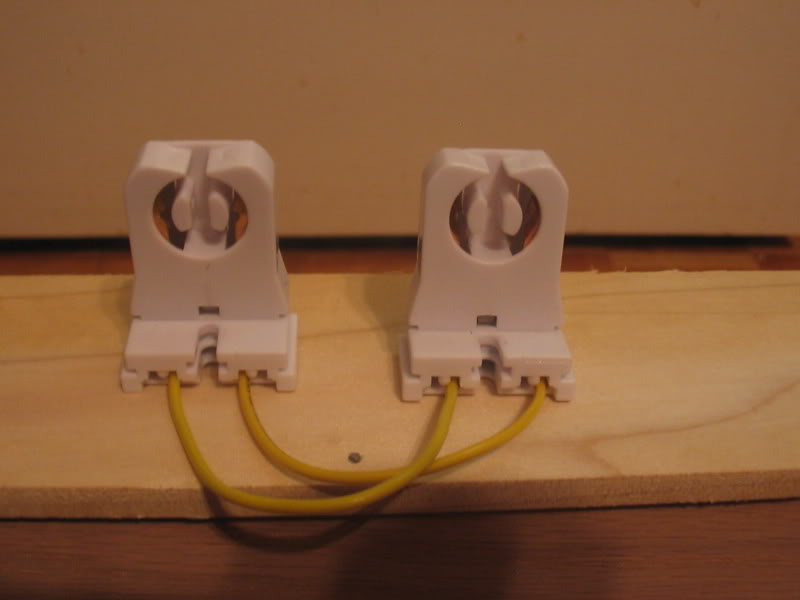
how to run the jumps on the end caps for the yellow wires. inside to inside outside to outside pretty basic but i still managed to do it wronge lol the second one should have been in the first hole.
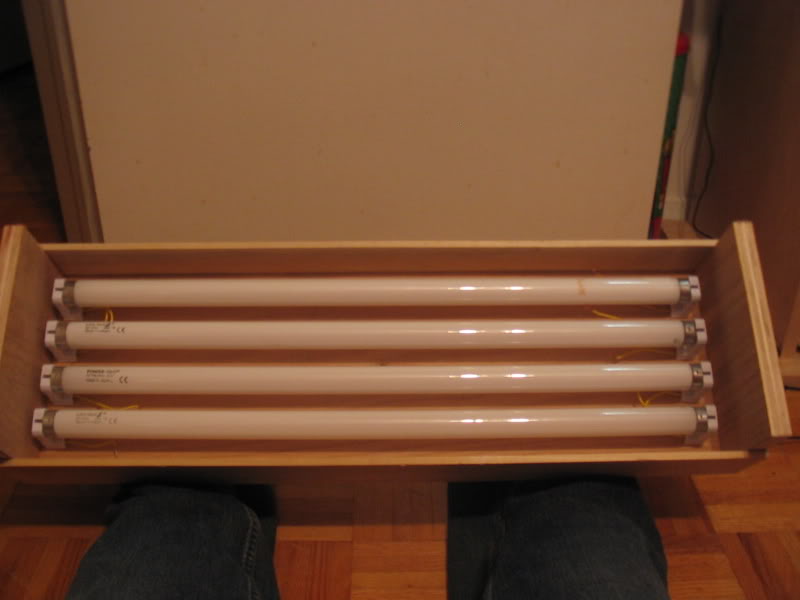
with bulbs
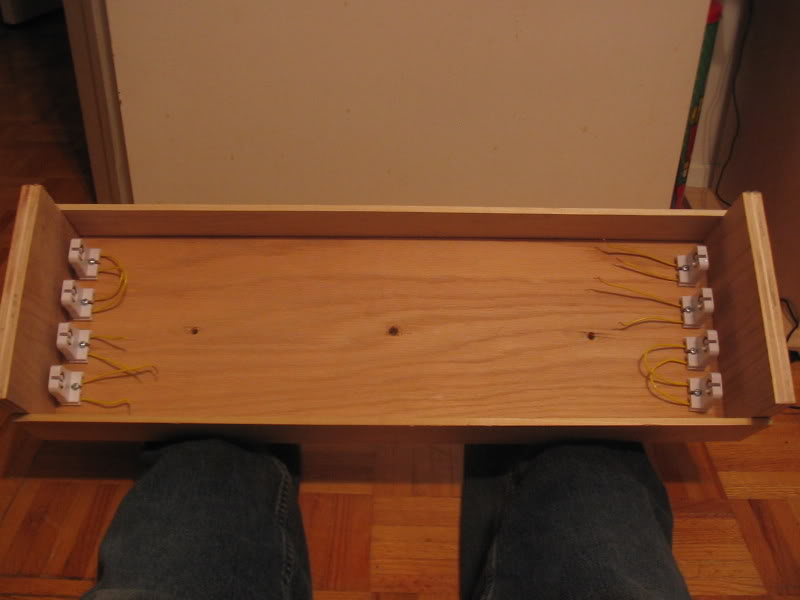
without bulbs
that is all i have untill i get my new ballast but i will post detailed pics of how to wire it for all those people who arnt technically inclined lol.
i started with a trip to my good old trusty home depot. i purchased 2 dual t-8 light ballast for 17 dollars each. these ballast said they were rated up to 24" t-8 but after buying them and installing everything i found out they were actually only rated for 15" t-8 bulbs and 24" t-12 bulbs... which was a real **** off but life goes on lol. so i started again. i went to an electrical supply store and found out my options. the guy there said i could either run 2 ballast, each one powered 2 lights up to 36" long which costs $25 each.... i said no thanks. my next option was 1 ballast that powered 4 t-8 lights rated for up to 36" aswell for only $30... i said yes please lol. so i bought this and 8 end caps for the ballast which were .85 cents each. i had some spare wire at home which i then used to wire into my endcaps. they do not supply u with enough wire to attach them to the end caps. i merreted and taped all my wires so there was no chance of fire hazzard. once i was done i was ready to mount the end caps.
i mounted the end caps simply by attaching the end caps to the bulb like u would when putting a bulb into a fixture and then marked it on the wood that i was screwing it to. i then screwed the other ones by the same method by evenly spacing them out by eye (not to technical but worked fine) once i had them all marked on the wood i screwed them down. did a test fit for each one with a bulb to make sure everything was good to go.
the box.... i made my box the outside measurement of the plastic on my tank then add 1 1/2 " (3/4" wood times 2 = 1 1/2. cause i wanted inside measurement) so mine was 24 1/2" top peice then 2 side peices which i made 5 inches ( 3 inches above the tank then the other 2 inches went down the side to the bottom of the plastic trim) i then made the front side peices which were 26" (24 1/2 plus the 1 1/2 for the thickness of the wood) and 3 inches wide so the whole light is actually resting on the side peices and that is what is keeping it on the tank. the bulbs are 1" diameter and the end caps are 1 1/4 inches so technically u could make the fixture as low as 1 1/2 if u wanted low sleek look but i wanted room to play with.
ok i think that covers the basics of it. so here is a cost tally...
1 4X 24" t8 ballast = $30
t-8 end caps = .85 x 8 = $6.80
cut off wood at home depot = 6 dollars (i got it for free but this is what u would normally pay)
small spool of wire = $4(again i got this for free but this is what it would cost)
bulbs = up to you. as cheap as 4 dollars each at home depot and as much as 15 each from pet store.
my bulbs cost more than the whole light fixture lol
grand total =46.80 plus bulbs.
i figure that isnt to bad if u consider this will bring u up to 5.64 watts per gallon on a 20 gallon tank. 80 watts old way 113 watts new way. plus this ballast i bought is good for up to 36" so this can be used on larger tanks aswell just build a hood to fit.
i have some pictures right now and will update as i go. i havent installed me new ballast yet becasue i am wating to get it. but i can cover most of it. i hope this helps at least one person on here lol.
this is my light hood
this is how u mark where to mount the end caps
this is what i mean by the 2 inch drop on the side which i made to long lol
what the lights look like on my tank
how to run the jumps on the end caps for the yellow wires. inside to inside outside to outside pretty basic but i still managed to do it wronge lol the second one should have been in the first hole.
with bulbs
without bulbs
that is all i have untill i get my new ballast but i will post detailed pics of how to wire it for all those people who arnt technically inclined lol.