Bubble in seam

The friendliest place on the web for anyone with an interest in aquariums or fish keeping!
If you have answers, please help by responding to the unanswered posts.

Floyd R Turbo

Aquarium Advice Addict
Joined
Feb 7, 2009
Messages
1,682
Location
West Des Moines, Iowa
I just set up this glass tank after moving everything from an acrylic tank that had a crack:

http://www.aquariumadvice.com/forums/f20/turbos-reef-project-141630.html

Now I have noticed this:

img_1356822_0_7eb3c98a686dc1702cfeb83e2f7c26ce.jpg


img_1356822_1_4635aed0ba235b992ffaf56617bb9122.jpg


img_1356822_2_cbcd9f24f756546997d8b065f59556c6.jpg


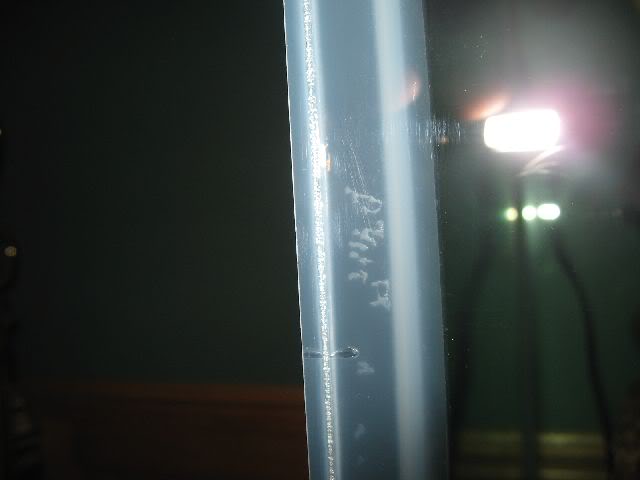
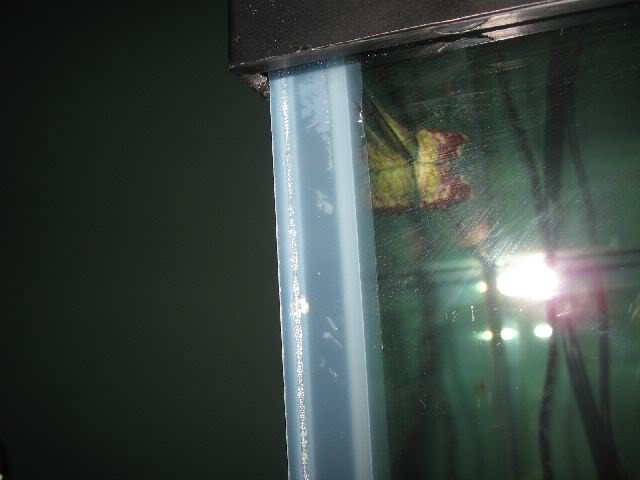
I've read plenty about the 'typical AGA silicone job' and I've seen tanks in stores with bubbles in the seams, but does this look like anything to worry about?

I didn't notice it when I set the tank on the stand, but I admit I wasn't really paying attention. I just noticed it this morning before I left for work.

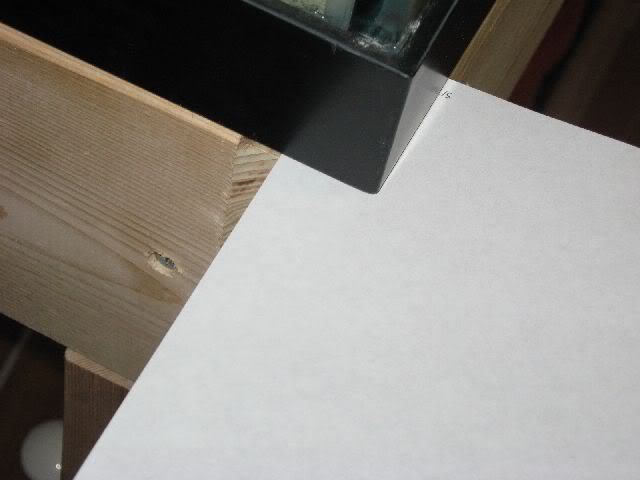
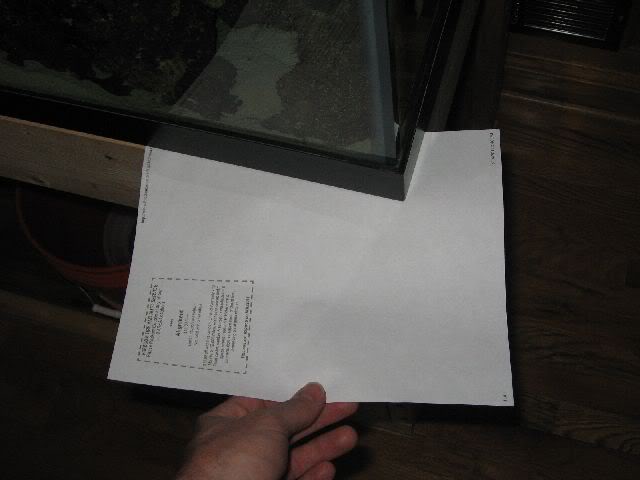
I made the stand myself and the tank was flat and level on it after setting it up (check the tank build thread for description of that effort) but I wonder if the stand settled in a bit under all the weight, because now I can slide a piece of paper between the tank and the stand along the front and side edges that meet up at this corner. I used a ton of screws and gorilla glued all the members and it is really solid.

So honest opinions here. Should I be having a heart attack, again, or is this just a typical AGA seam that I shouldn't worry so much about?
 
I really don't think it would be cause for much concern... In other words, if it were my tank, I wouldn't even worry about it. I'd say worst case scenario is if it did fail, you'd notice some water in plenty of time to transfer everything. This poor location must have a ghost or something in it....
 
This tank is in my house, so I think the bad juju comes with the contents!

I got a similar response from a local reef club member also and added this additional piece of info:

What about the piece of paper width gap? I was looking at it really closely and noticed that the front 2x6 on my stand is slightly higher where it meets up with the side 2x6 on the left side under this seam (like the board isn't planed perfectly flat), so the front of the bottom casing is not in direct contact with the stand, and then it is in full contact with the side 1.5" back from the front corner in question along the left side, then there is a paper-thin gap from that point along the left side for a few inches. My thought was that this is creating a point load on that piece of 2x6.

Now with that being said, does that change your opinion at all?

I guess the way to correct that would be to take a few pieces of the cedar underlayment shingles that are very thin and drive them into the gap to close it up. Now if I do that, would I have to drain the tank? I have 2x 44g BRUTE cans and I was thinking I should drain as much out as I can, tap the shims in, and fill it back up.

I wish I had thought about checking over the seams really close before filling it. This is my main cause for concern. If I had noticed it before, I would have chalked it up to a poor seam job. I've seen bigger tanks in stores sitting empty with worse looking bubbles in the seams (petsmart brand 150) but I was so preoccupied with getting this all transferred that I didn't pay any attention, so I don't know if this appeared after filling or if it was there before.
 
I just looked, both my 125 and 40 have bubbles in the seams. As far as your idea with shims, I think that's probably a good idea. I do think it would be better to get as much water as possible out, so that you don't risk breaking the tank by hammering in those shims. I wouldn't force them too much, just a couple light taps to convince them to stay.
 
My thoughts exactly. With 120g of water weighing in at 1000lbs and probably 250-300lb of LR, I'm not taking any chances. I may have to wait until the weekend to do it, but I'll get it done. Thanks MFD
 
I think I figured out why I didn't see it before. When the lights are on, the coloration totally blends out the bubbles. The only one you can easily see is the one that is in the second picture where it looks like there is no silicone in contact with either piece of glass. Weird.

Anyways, I took a few pics to illustrate the contact point I was trying to describe.

Here is the corner where the bubbles are:

img_1357446_0_2d401ea7eb55a380cb9165068558b166.jpg


So as you can see, the 2x6 at this point is higher where the side piece butts up against it.

And here is the other front corner

img_1357446_1_ae34f2cd76f8954616b9aa373840db12.jpg


But I see nothing on that seam.
 
Well after much contemplation and a near aneurysm, I took today off and the guy that helped me move in the first placecame over and helped me tear it down. Thanks to awesomely sound advice from another local club member I went and got a sheet of 3/4" ACS plywood cut for the top of the stand last night, and after the tear down we put that plywood on and shimmed up the edges and set it back up. The bubbles are closing up and a few are actually gone. (crosses fingers)

As it turns out, the stand was not in full contact along the edges (L and R). We carefully shimmed the gap between the plywood and the stand with the tank (empty) on it, and checked for gaps with a piece of paper and it looked good.

The positive side is that I got to re-arrange the tank and it looks much better.
 
You would think so if they weren't getting bigger. The top bubble got bigger again over the last few hours (tank is not full either) so I put a bar clamp on it. The LFS that sold me the tank is going to see what he can do (crosses fingers) but it only has to hold up until I can get my customer's tank situation figured out, then I will likely have to buy a new tank if I want to set it up again.
 
Back
Top Bottom