My Paludarium Build (timeline)

The friendliest place on the web for anyone with an interest in aquariums or fish keeping!
If you have answers, please help by responding to the unanswered posts.

Amphibiman

Aquarium Advice Apprentice
Joined
Jan 23, 2017
Messages
17
suB8qpWE.jpg


I'm a new member here and want to share my paludarium build project as it develops. I'm at the beginning stages and welcome any suggestions you might have on how to improve upon my approach. Hopefully something I'm doing will also help other members.

My past endeavors have been with reef aquariums, planted tanks, and amphibian/reptile enclosures. This will be my first paludarium. I intend to incorporate some of the techniques from each hobby into the new build. As a result, the approach will be a bit unconventional.

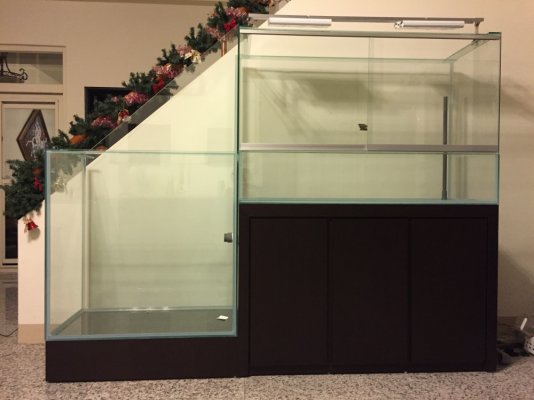
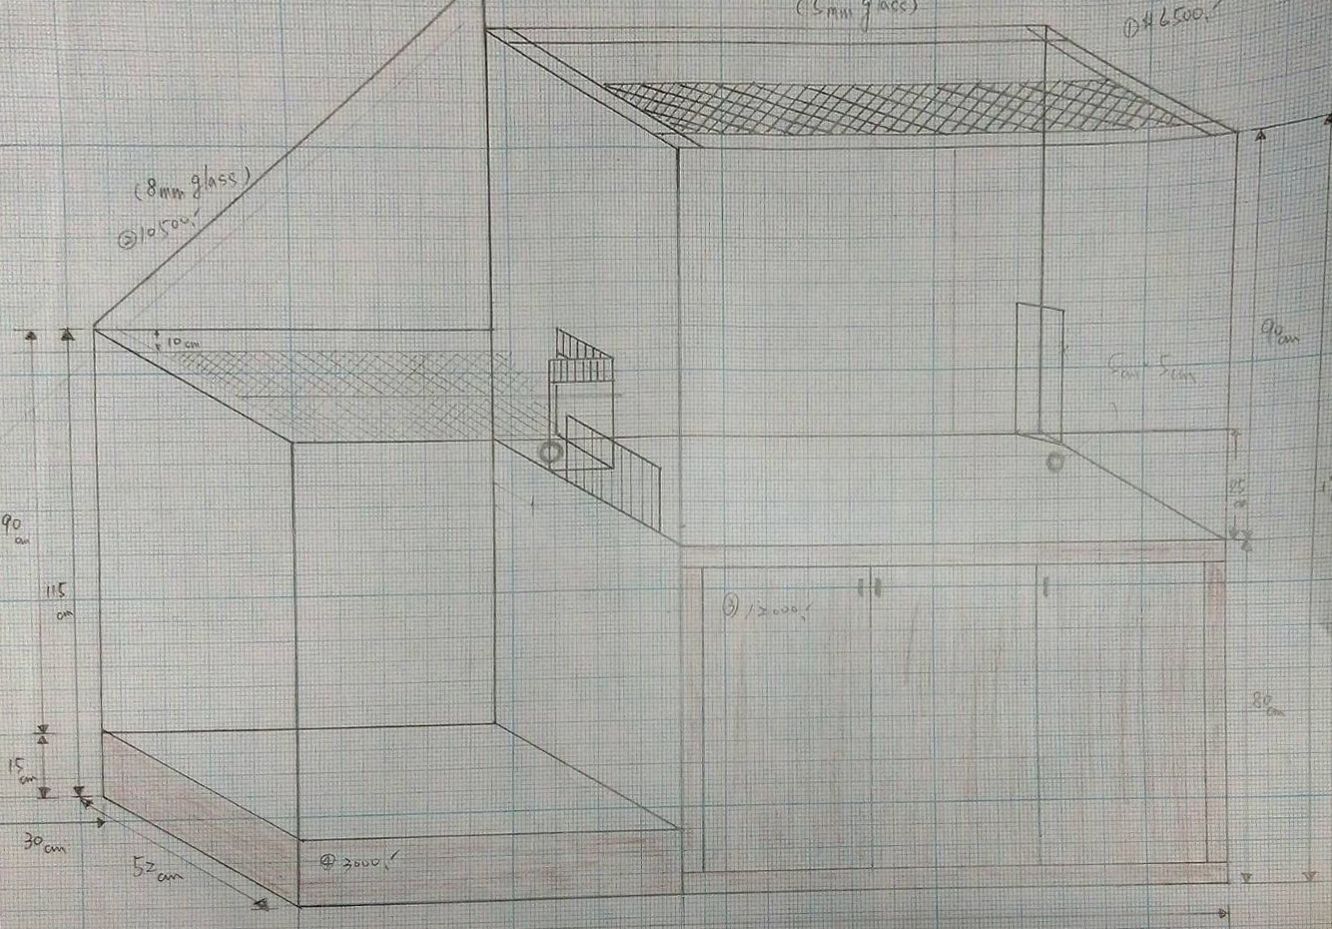
The picture above is of the initial design which has changed slightly. I have moved the overflow box from the paludarium portion into the planted tank portion. The top of the paludarium section will have a 100% screen top rather than glass/screen. There are several aspects that will go into the design that I will try to address. Some of which are the following.....

1. The landscape/aquascape design of the paludarium portion of the enclosure.

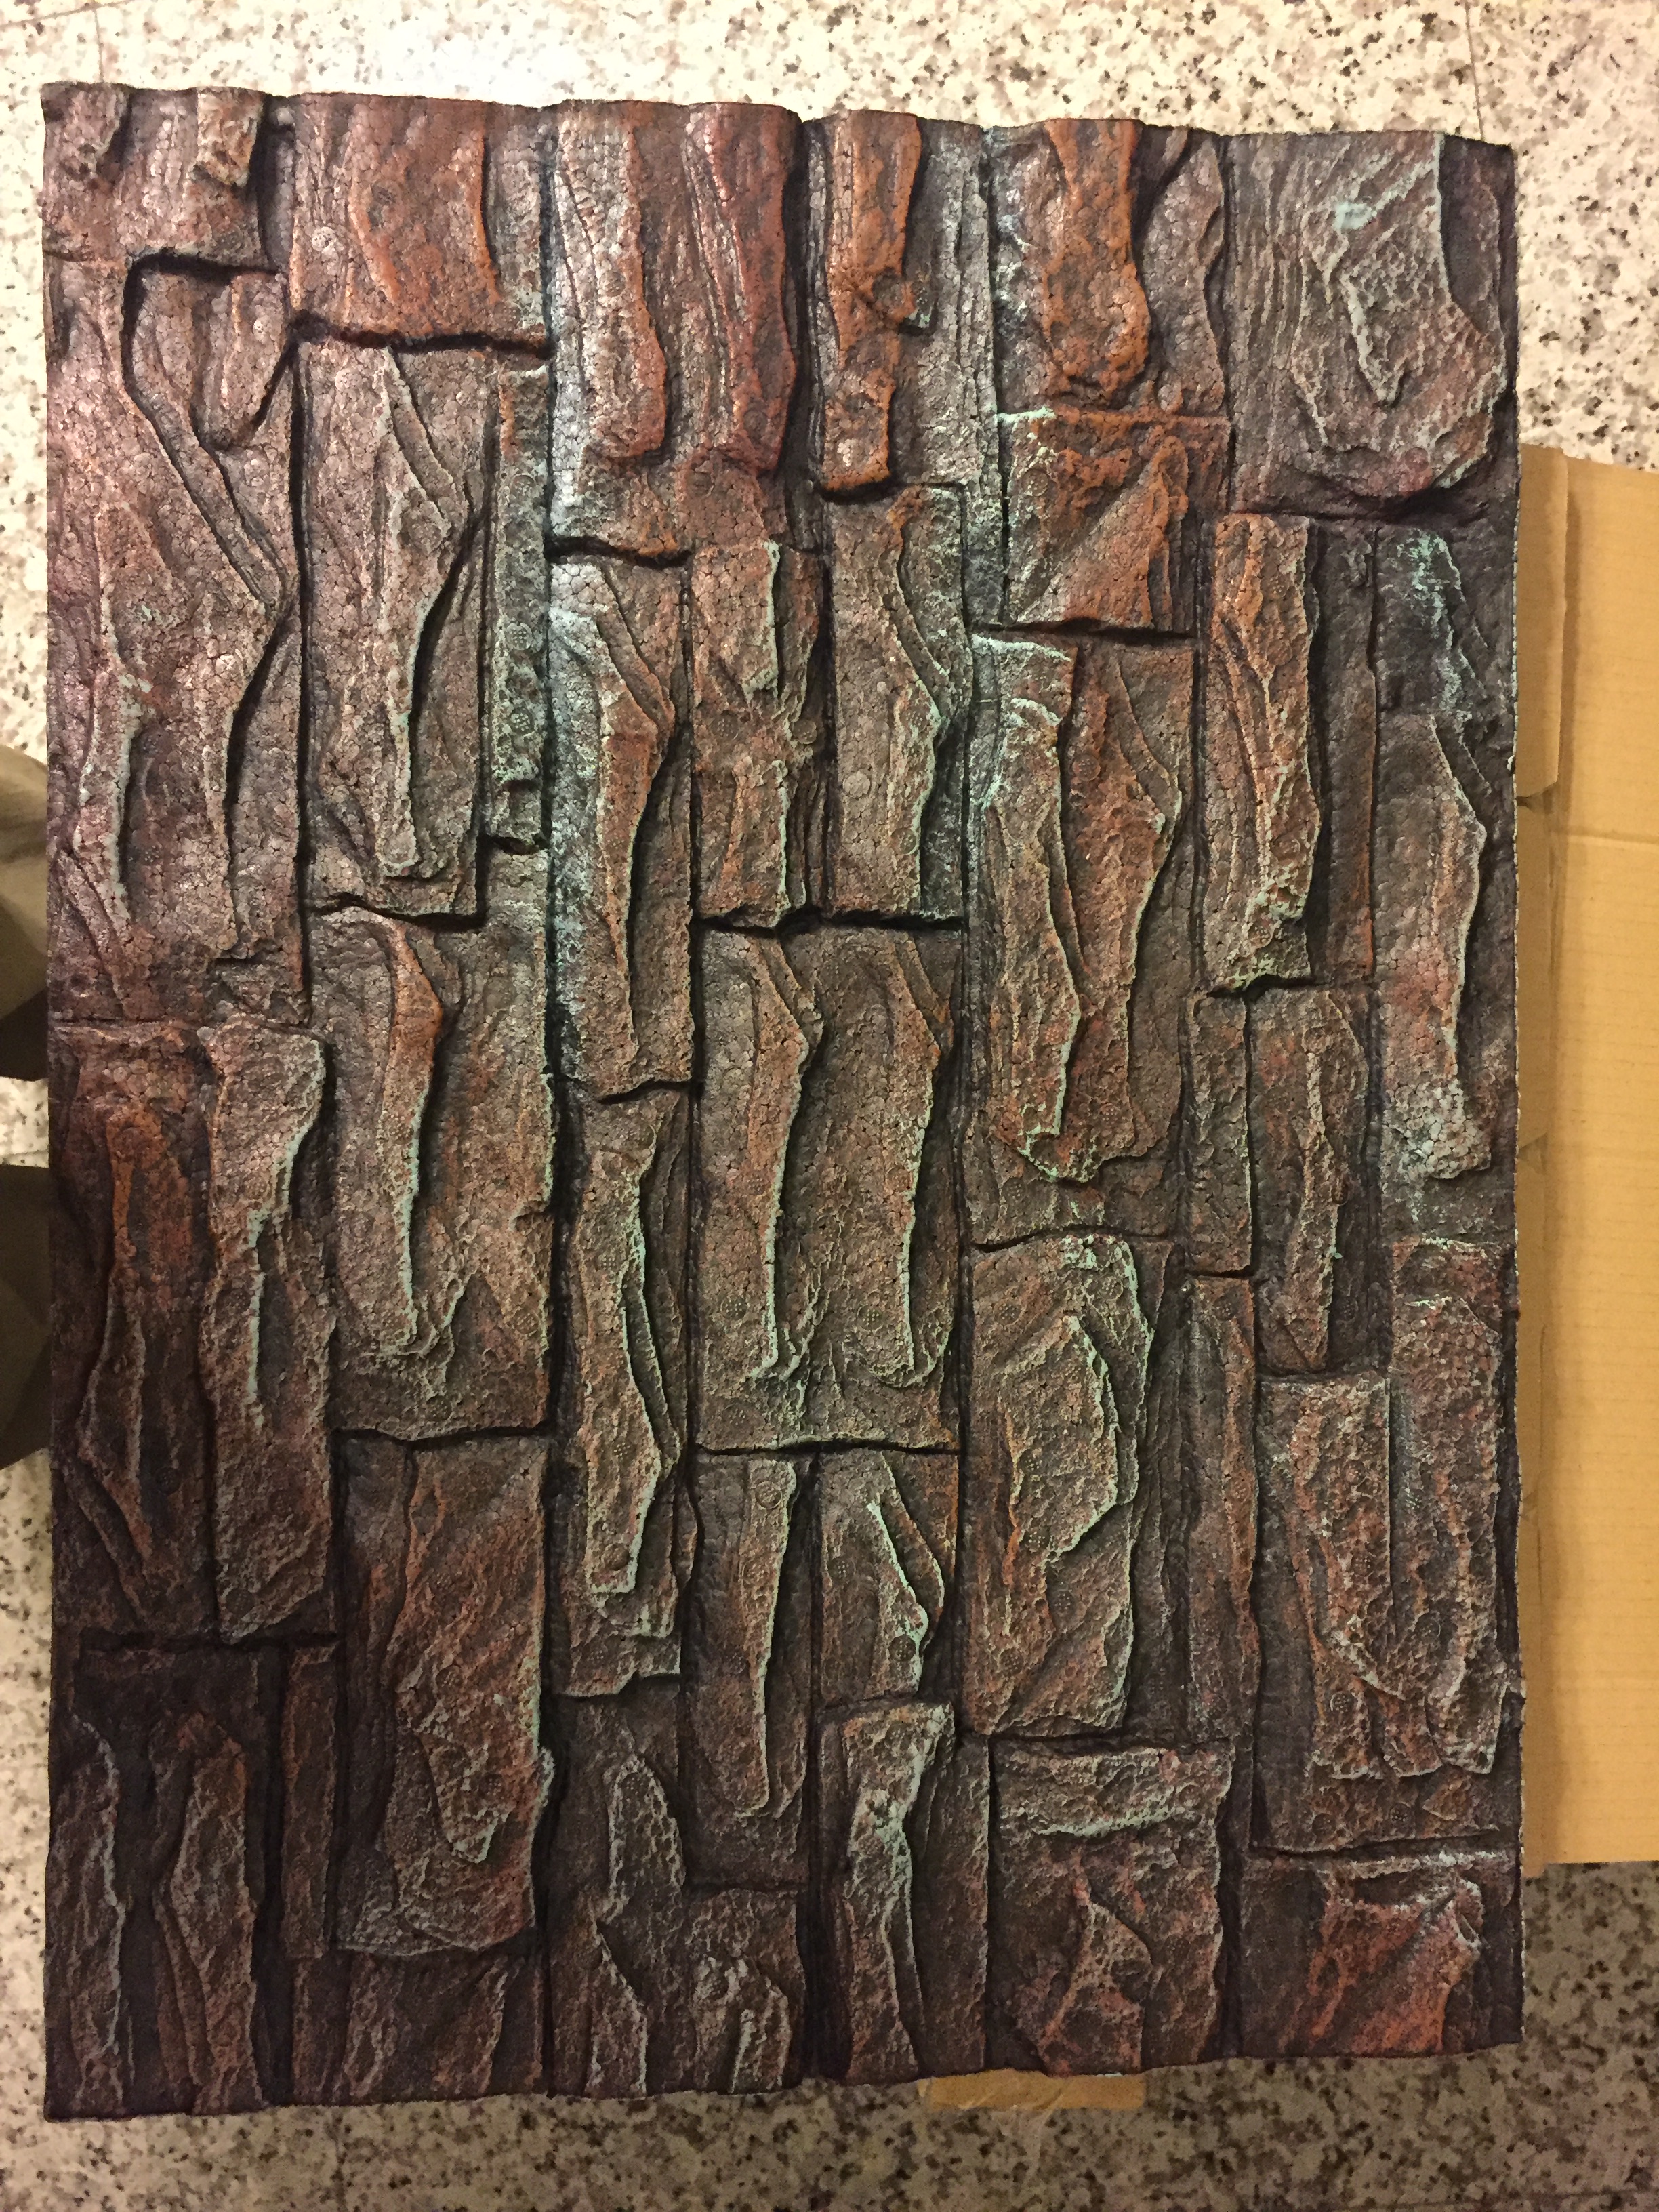
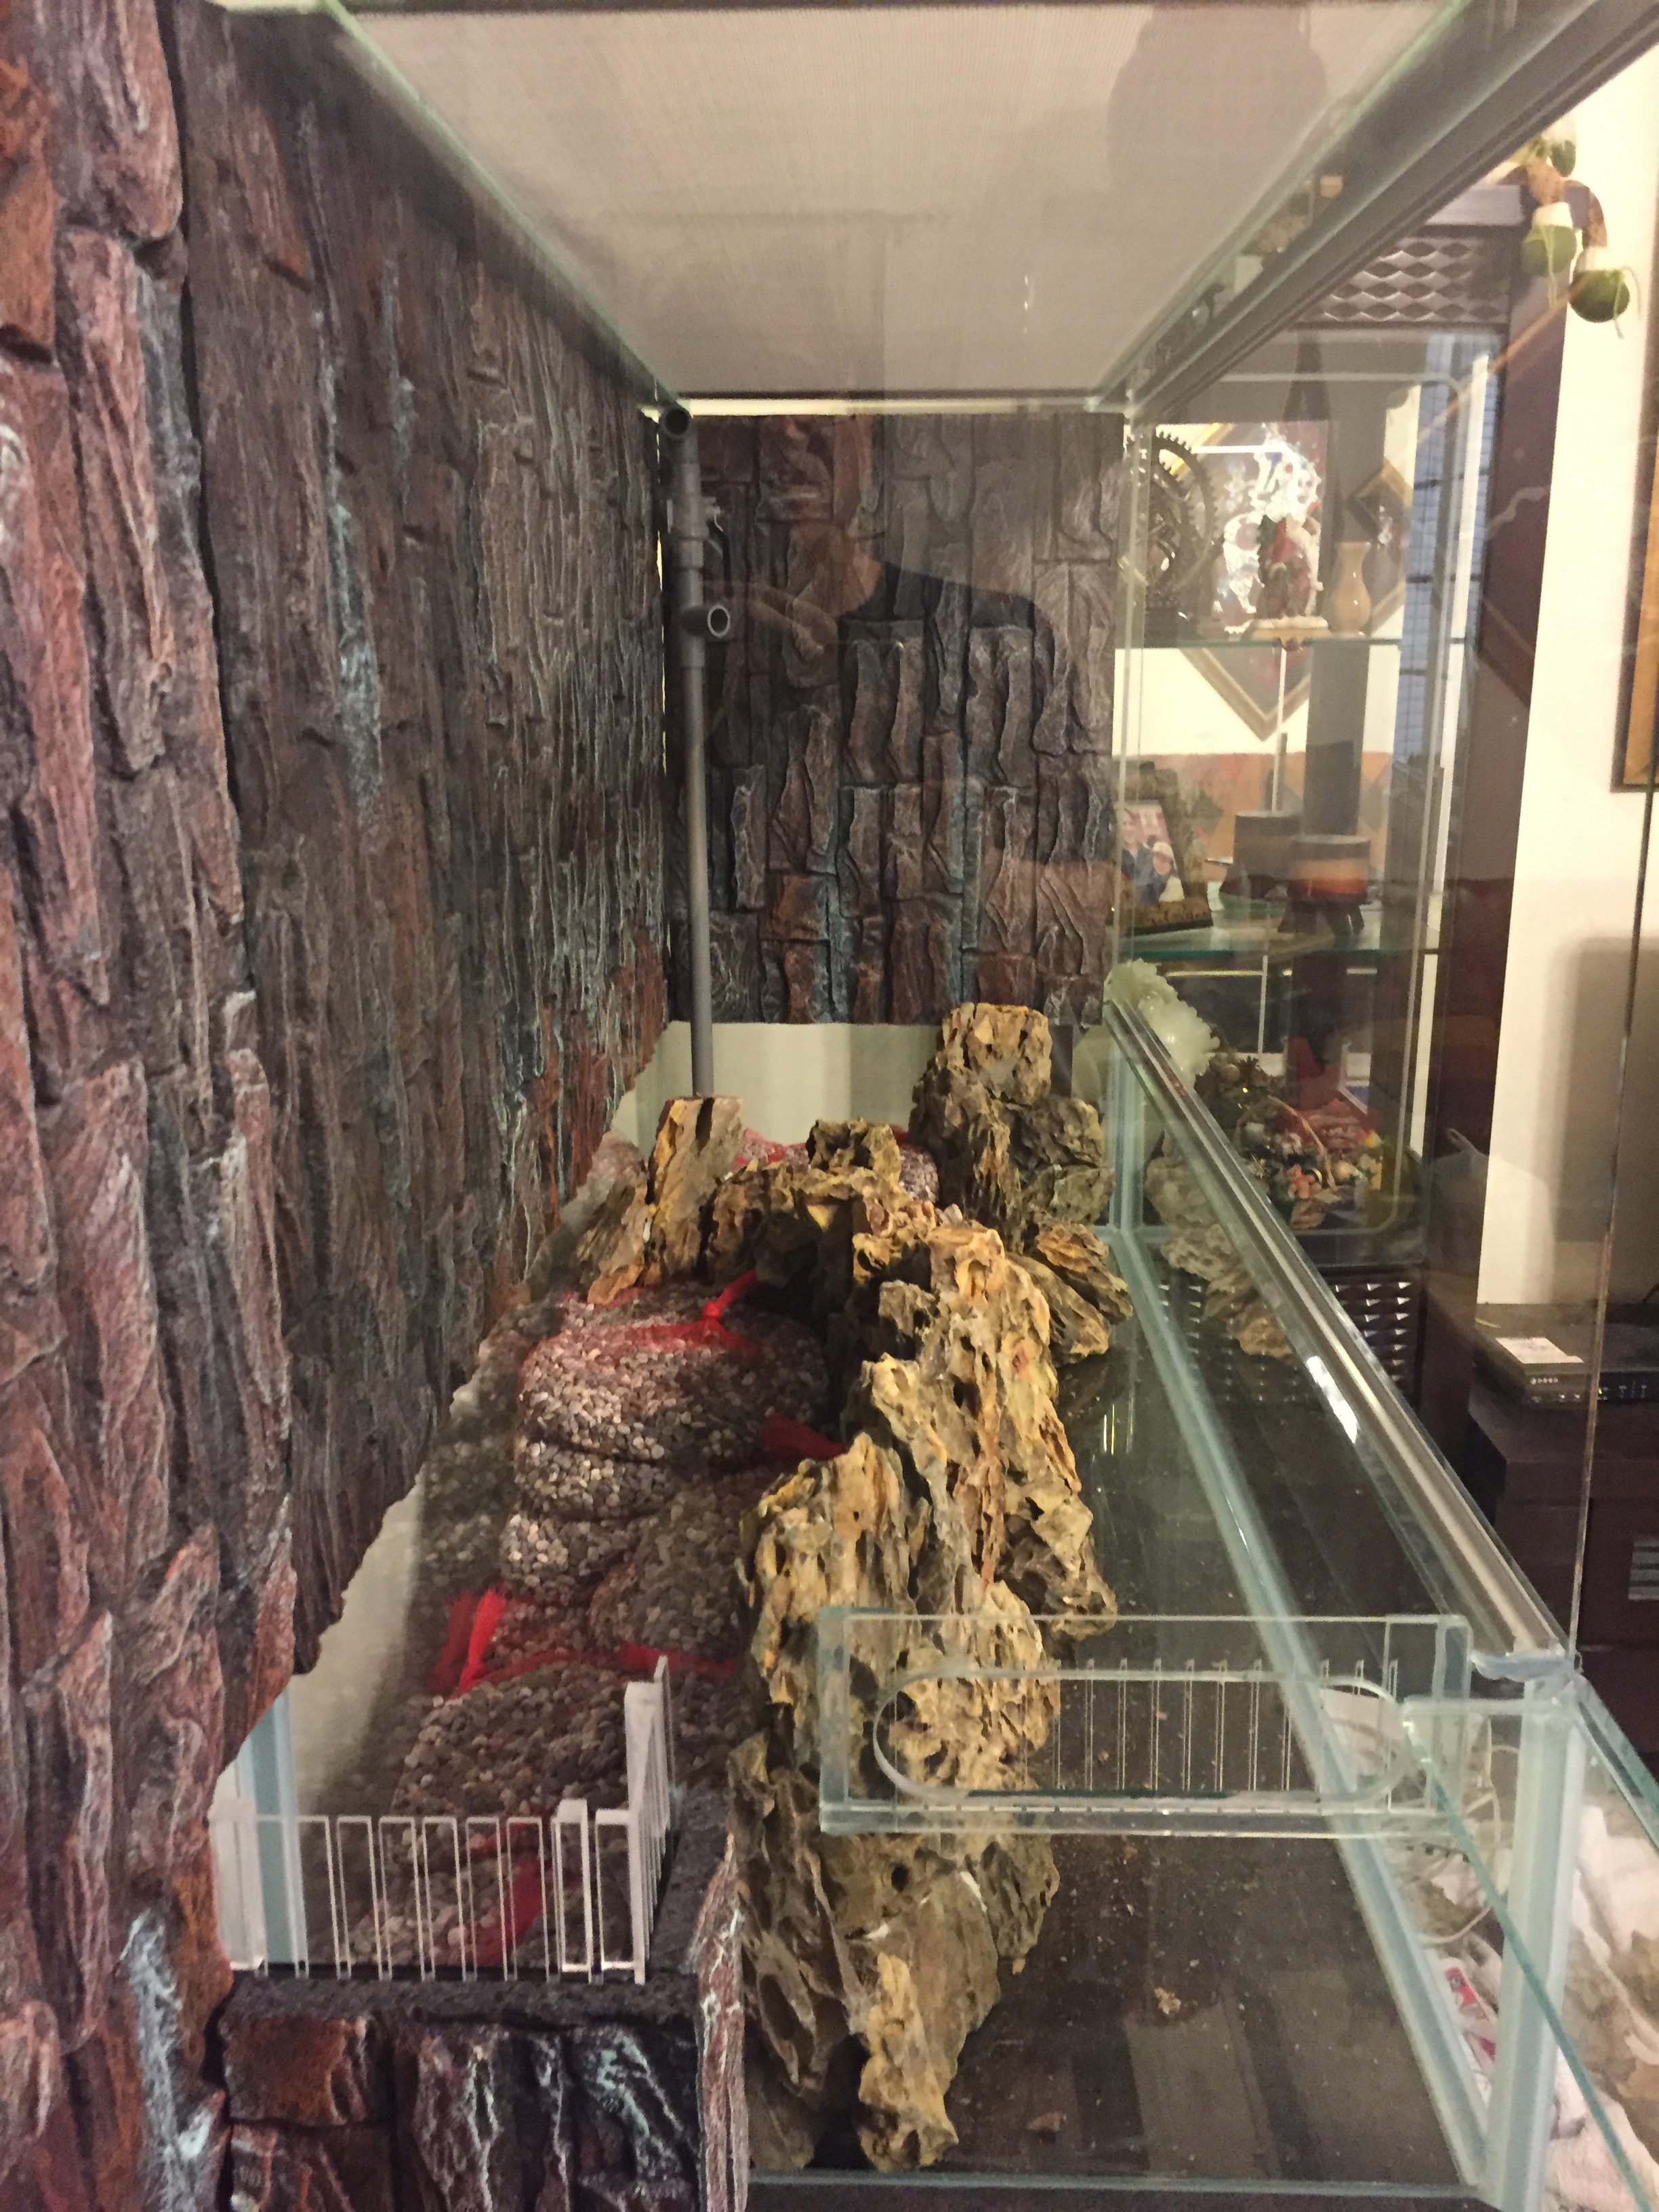
The paludarium will have two waterfalls being plumbed up from the sump. One will be a PVC drip system along the rock wall background. The second will be a cascading one that extends from the back right-hand corner to the midsection. The second land mass will be on the opposite side in the back left-hand corner. Of course below the land surface will be the water portion in the foreground of the set up.

2. The aquascape of the planted tank portion.

This portion of the enclosure will extend from the floor up to the paludarium section where they connect at mid-height. The water will flow from one to the other. The triangular background above the planted tank will also have a rock wall and PVC drip showering over it.

3. The sump design beneath the paludarium portion.

The sump approach with mechanical biological and chemical filtration is where the build gets a bit "unconventional". It will be somewhat of a hybrid system incorporation techniques from both fresh and saltwater aquariums. For example, I will be using my saltwater protein skimmer as a "water fractionator" (freshwater term), so some modifications will need to be made. With the amount of waste from the amphibians and reptiles potentially entering the water column I anticipate needing a more aggressive approach to extracting waste before it breaks down.

Since the bioload will be heavier, I will also have a moving bed and static bed filter made up of select media and plumbed through large reactors.

There will be much more to report and discuss later in this thread as the project unfolds. I will provide video and photos as updates.

Stay tuned. :)
 
So the enclosure stand and plumbing are finished. Now it's time for the hardscape, aquascape and landscape.
 

Attachments

  • Paludarium.jpg
    Paludarium.jpg
    181.7 KB · Views: 190
Sounds interesting. How long will it take to complete?
I've ordered all the panels, driftwood and rock this week.

As I gradually piece it all together, I will brief this thread. I'm guessing several weekends of work. The bulk of the work should be finished in 3 weeks time. There will be tweaking of minor details beyond that.
 
Wow ! NICE....
Do you plan on using ozone in the protein skimmer?
Is it old school or venturi type skimmer .. I tried a venture on my FW and it was useless .. I gave it 6 months ofadjustments ,but it was venturi and I did not have ozone then...
I kept a Chinese water dragon over a 75g with mega overflow to a 30g sump for about 7-8 years.
Simple sump with a large clown knife in the water portion for all the time...
It was for my son and he LOVED that tank as much as I...
Following with great interest.:cool:

Yep I used ozone with the protein skimmer for my reef as well.

If I could have multiple tanks I would also choose a Chinese Water Dragon. They are very active and entertaining. Since this one will be hosting Red Eyed Tree Frogs, a CWD would be out of the question.
 
I set up a vivarium as a quarantine tank to stage future additions to the paludarium.

I modified a humidifier to work with the vivarium. I also added an automatic misting system (Zoo Med's Reptirain). The lights are LED and support the plant growth. It also has a UVB T5 (Zoo Med's Reptisun). The heating elements are three Flukers heat pads (one large and two small). The large is placed under the terrarium. the two small are mounted on the sides over the vents. The container inside the vivarium has two Red Eyed Tree Frogs. They will be introduced to the paludarium when it is up and running.

Here is a video....
https://youtu.be/ZUcaapCrvwI
 
So I rinsed all the stone.

it took hours to flush out all the impacted sediment in the porous cavities. The texture and color is what attracted me to the stone. The downside is that it took far more time to prepare.

mrsxJq7I.jpeg
 
So here is the driftwood....

I bought one large piece that will act as the center piece. It has texture and cavities similar to the stone. I will embed epiphytes, bromeliads and moss on the branches.

BZ2WvqwP.jpeg


The pieces of driftwood in the bag will be woven in a thin layer across the rock panels to drape the back walls. This will mask the panels as well as give dimension and depth the the background.

I5bObdQT.jpeg


mAsumiKd.jpeg
 
These are the rock wall panels being masked by the layer of driftwood. There are 9 pieces.

HgMaAkW8.jpeg
 
These are the rock wall panels being masked by the layer of driftwood. Therer are 9 pieces.

HgMaAkW8.jpeg
 
W5AK9laD.jpg


The rock wall partition has been pieced together much like a puzzle. The stone pieces have been bonded together with an epoxy putty. The many small crevices in the rock structure, will allow water from the PVC drip bar along the back wall, to pass through and not overflow the land fill.

As you can see from the picture, the land area is filled with bags of gravel. A top layer of Aqua Labs Black Earth will be used as the substrate for the plants.

When the rock is wet, it has rich colors of oranges and browns, similar to coffee colors. It is almost identical to the colors of the driftwood that will layer and mask the back wall.

The waterfall will descend from the ball valve opening on the PVC bar in the back corner. I will begin construction today.
 
Back
Top Bottom