Unique (budget) container pond build

The friendliest place on the web for anyone with an interest in aquariums or fish keeping!
If you have answers, please help by responding to the unanswered posts.

jetajockey

come get me tang police!
Joined
Apr 25, 2011
Messages
12,046
Location
In a swamp near you /Pensacola, FL
Okay guys so I've been working on this project over the last month or so, and it has evolved quite a bit.

My goal: To make an above ground pond, and to keep it clear enough to grow aquatic plants. Side goal: Collect and maintain breeding stocks of certain native fish species. My overall goal with the native fish species is to selectively breed for color and fin variants, I think that our hobby is missing out on a huge opportunity to have some beautiful tankmates that come out of our own proverbial backyards.

I initially intended to create (2) separate concrete block ponds on our back patio, which is currently just a bare concrete slab. I wanted to do it in such a way that we'd still have some room for patio furniture as well as a small firepit feature.

To make this happen I intended to built the two ponds in an L shape.

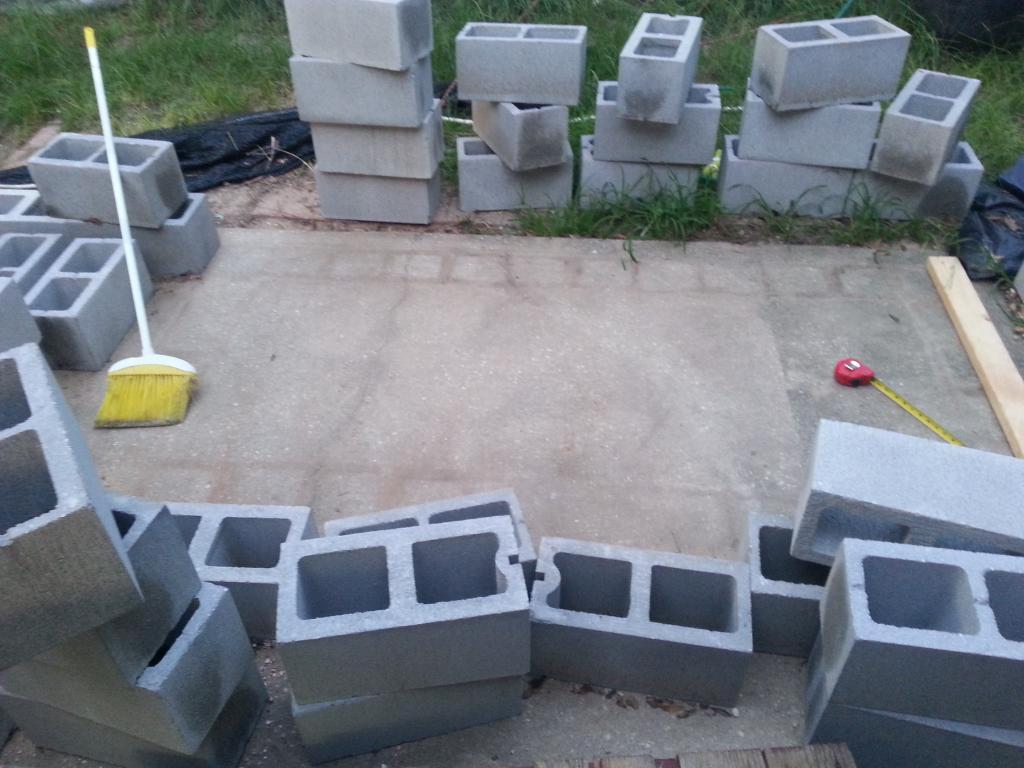
So I'm building 2 of these, and I have one mostly done. The second one is going to be perpendicular to this one on the same concrete slab. This could be done in your yard if you poured a basic footer first. My first step after calculating materials was cleaning off the area. I stacked the blocks ahead of time and saw what it was going to look like, then adjusted the dimensions a bit to make it work better for the area I am using. My initial plan was to have it a lot wider, but it took up too much of the concrete slab and I wouldn't be able to make an equal sized one next to it.
img_3011558_0_6754b8f7db84a4f6ef358c2b5f138baf.jpg


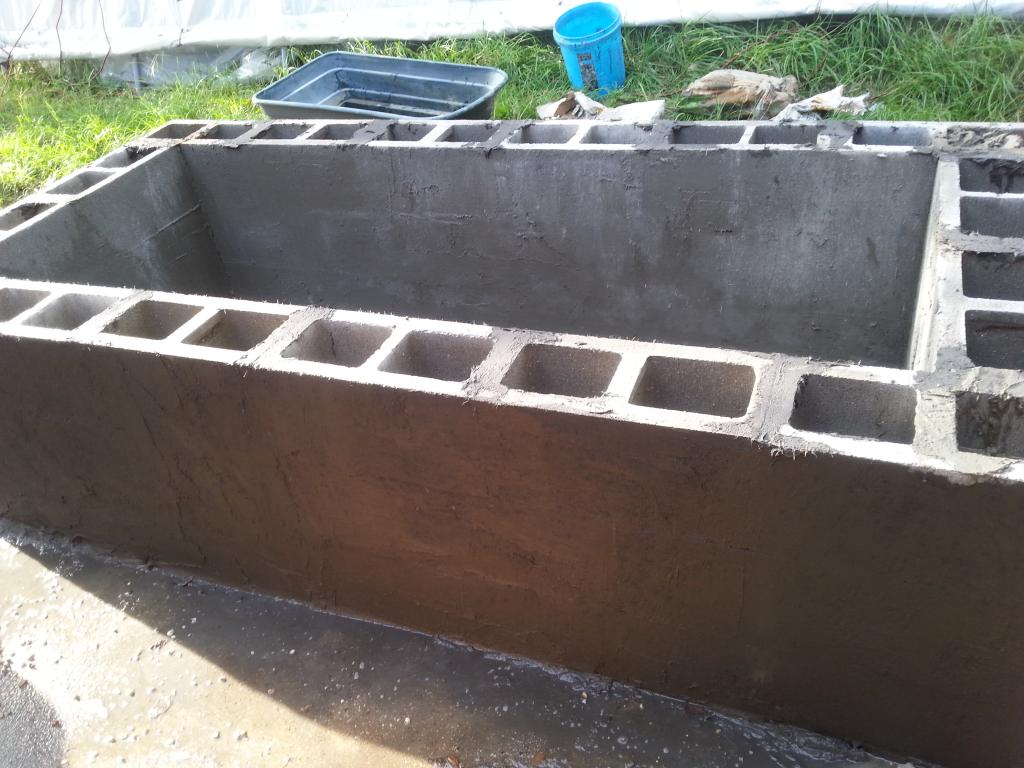
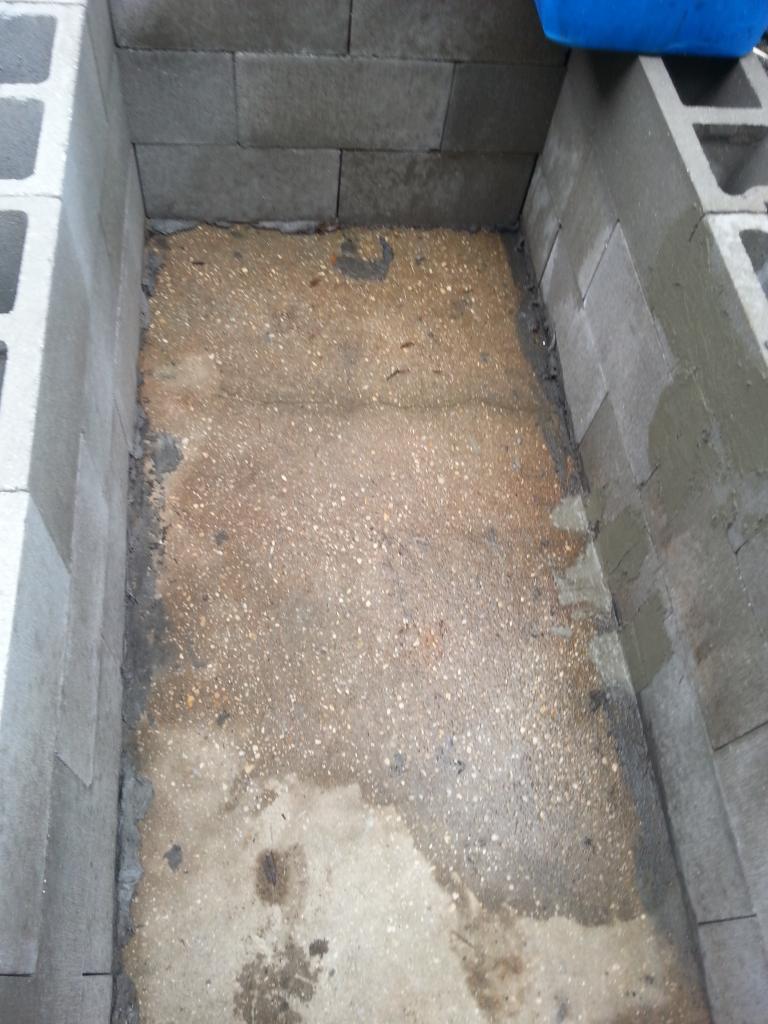
The next step was put some concrete down and stick the first row of blocks to it. Not really rocket science, but I do suggest lining them all up like you want them FIRST, and then moving them out of the way one by one as you are cementing them into place. This avoids any potential lineup issues as you work your way around. I did not want to deal with the hassle of mortaring each individual block (mostly because I have no experience with it, and it looks a bit tricky and time consuming). So I dry stacked them like this. I feel like this isn't the best way to do water holding structure, but considering that it's only 2 feet tall I'm not too worried about it.
img_3011558_1_47f34be979652e95a5c2073325ce2873.jpg


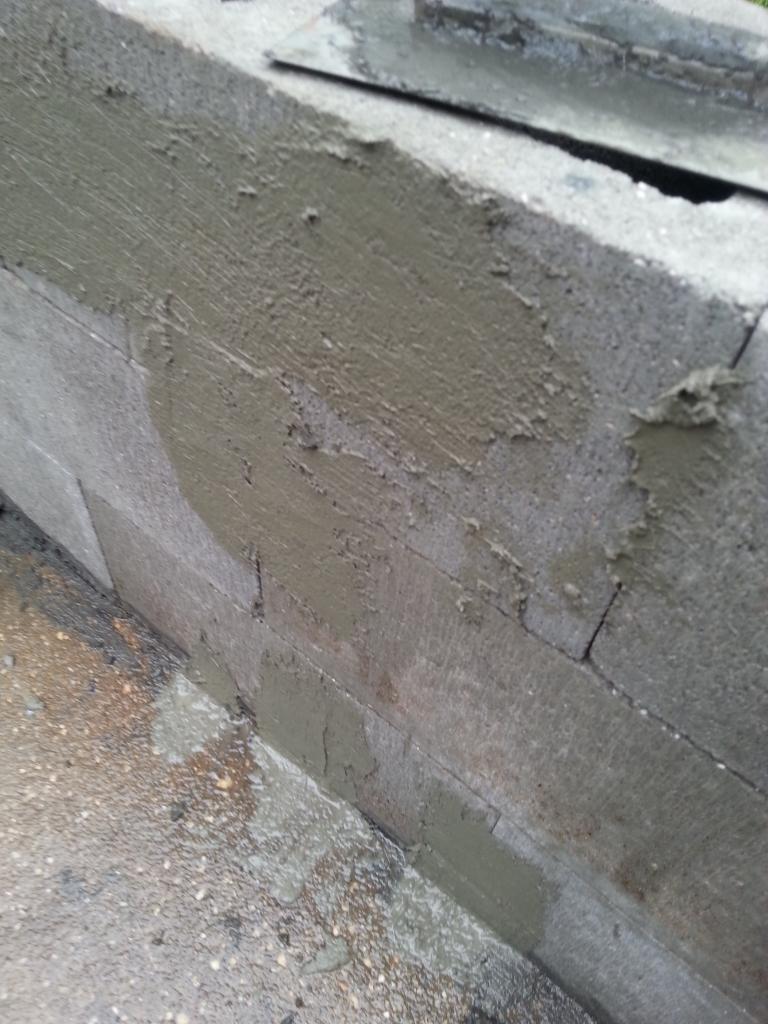
I used Sakrete surface bonding cement to then cover the inside and outside of the blocks. This was a little laborsome on the hands but only took a trowel and bucket. And it was MUCH faster than mortaring and leveling each individual block.
img_3011558_2_578fcfe156b99c0d61b041474bd2f9a5.jpg


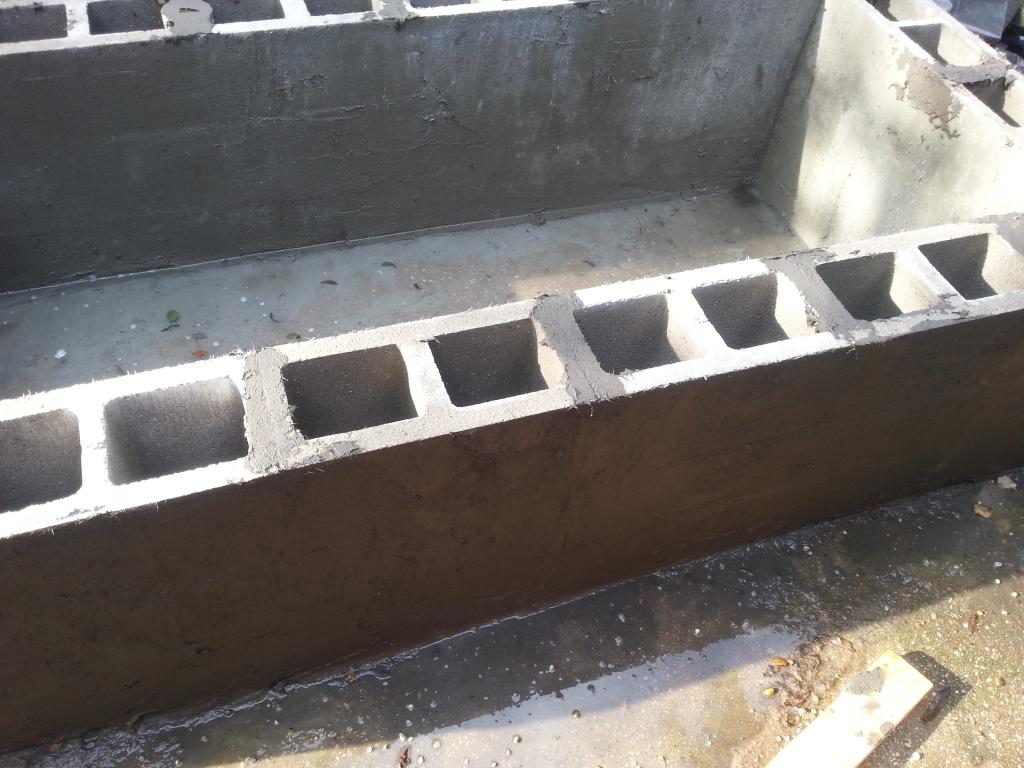
The inside went off without a hitch, midway through the outside covering though it began to rain, and the rain washed away a lot of my work. So I waited another day, and then started again. I mixed this batch with some charcoal concrete dye.
img_3011558_3_394a22c00568fb41c203471bd2d908f9.jpg


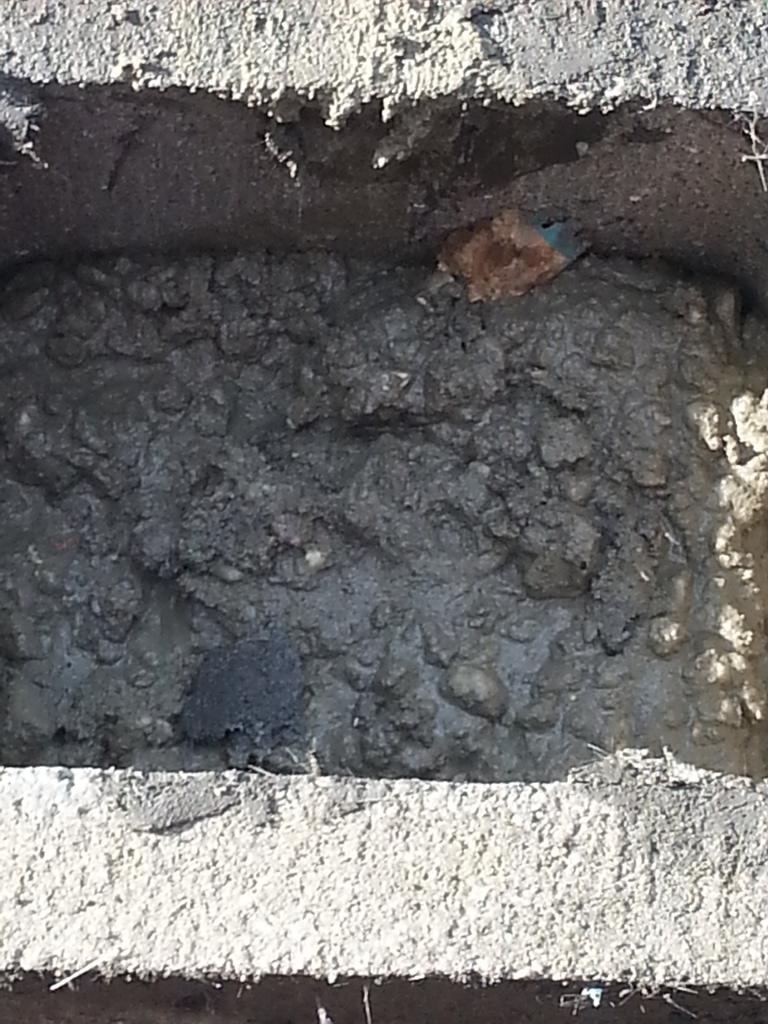
To add a little bit of rigidity, I also bought a few bags of concrete and poured them into the corners. I intend to get another 2 bags to pour into every 3rd or 4th hole. I know that some will recommend adding rebar but for the purpose of this build I dont see it as a justifiable expense.
img_3011558_4_92b59f4d7ff5baf29dbc758ef56c0289.jpg

img_3011558_5_76f0739603b2b166361de5aaee84810f.jpg

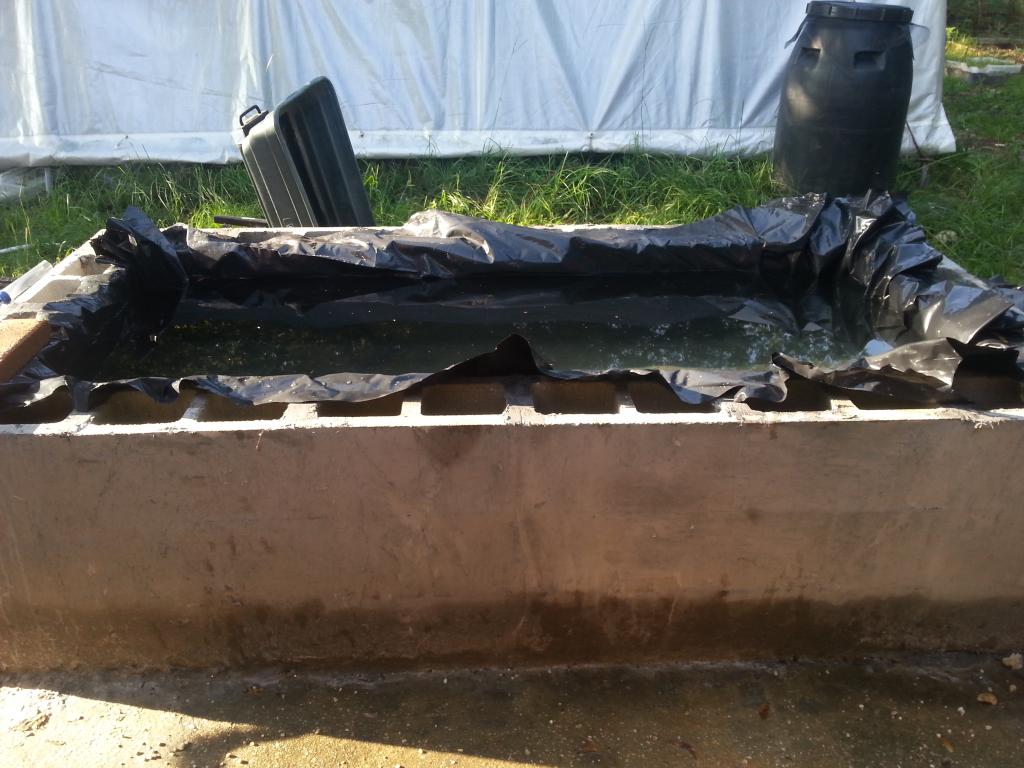
I let it cure for a few days, and then put a liner in. I opted to use a basic 5mil plastic sheeting from tractor supply. This is primarily because I already had it on hand. If it springs a leak then I'll switch to a real pond liner.
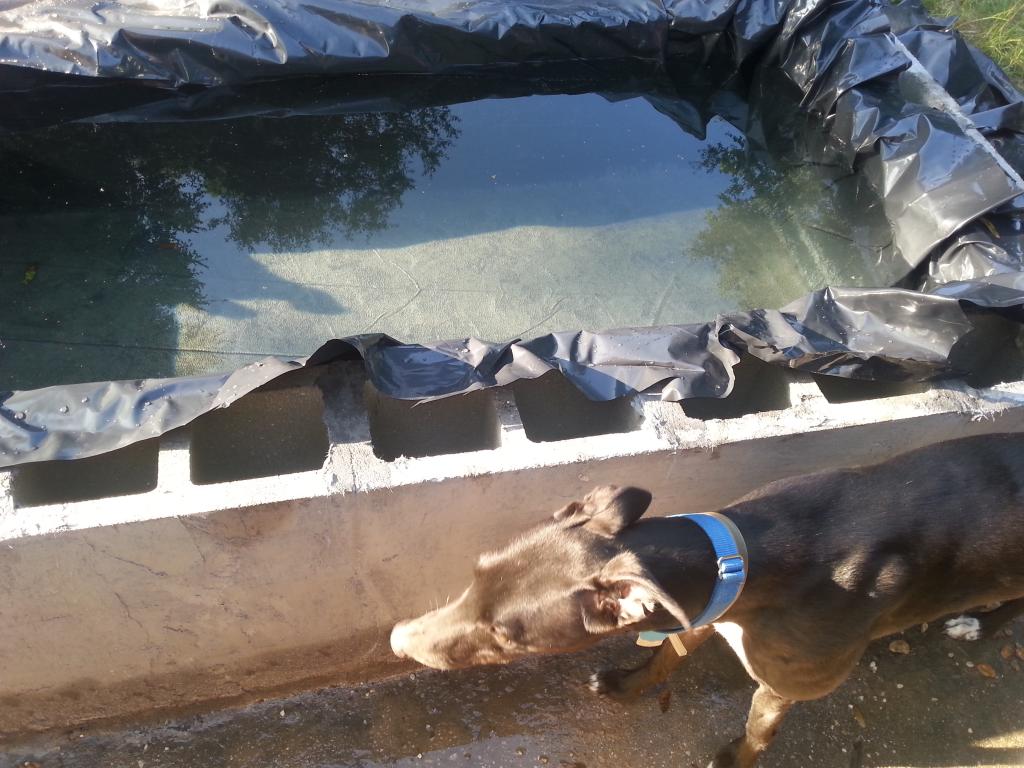
img_3011558_6_93428be47a6a392dfbf8578bcc5df9a6.jpg

Total cost up to this point was around $120. Could've been a bit cheaper using landscape timbers, but what's done is done.
 
img_3011575_0_b14bdb0da33d523102f7f12023abd504.jpg

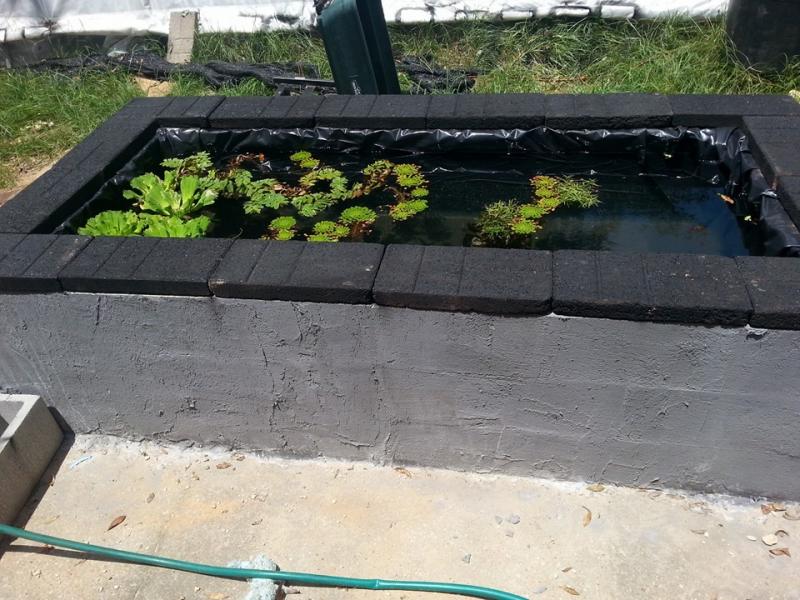
I found some old pavers to put around the top. Painted them flat black. May change this out at some point but again I might just stick with the black and grey theme. I just threw some random floating plants in there to help keep it shaded for now
img_3011575_1_3e936c2ec398c66790a79d3e95318994.jpg


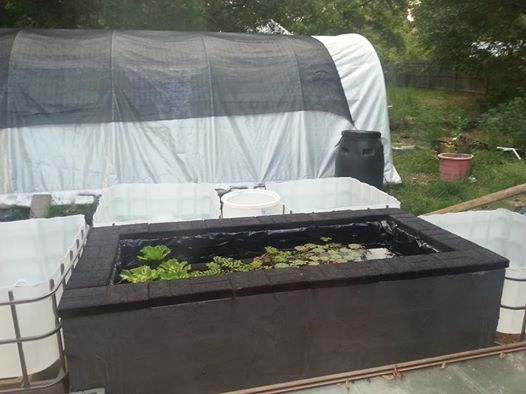
And this is where the project took a big turn. Instead of adding another identical pond next to this one, I found a good deal on IBC totes on CL. So I got 2 250g IBCs, cut them in half, and then added them around the existing pond. I got them for $50 each, so it worked out a lot cheaper in the end. (The main pond is only around 250 gallons)
This is a mockup picture, I haven't set these into place yet, I still need to level the ground under the ones in the back and then raise them up. This is just so I have a basic idea of how it will look.

img_3011575_2_6a3df2ae85b1964cd7122cfd4bf7a7ec.jpg


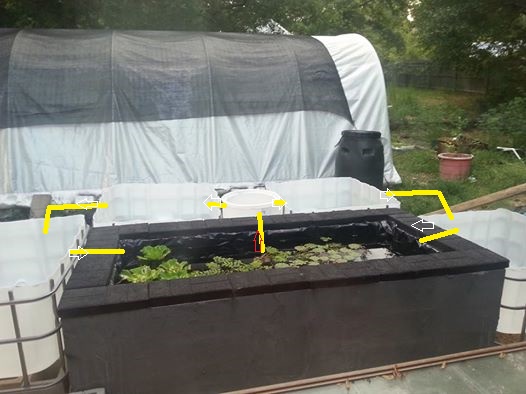
So this is my flow plan. I have a 1350gph pump, but may tie in another if I dont like the flow rate. I'm also running an 18w UV sterilizer in-line.
img_3011575_3_98e6fa2664d73bc55f0f4f430315b634.jpg


The filter is a 30g barrel, planning to do an upflow sand filter with a multi purpose backflush/"bottom drain" pipe. I'll do more updates as it comes together.
 
I'm also considering painting the IBCs while they are empty, but I haven't decided yet. I might just leave them as-is. The reason why most people paint these things is to block light, which I don't think will be necessary.
 
Great job, Jeta!! Love the practicality and affordability of this project and look forward to your breeding endeavors! :)
 
Will painting the totes cause it to get too hot, (if they are gonna be black with your theme colors) since it is a smaller space, it maybe will cause more problem overheating. Although you are in FL so maybe that isn't a concern, since it is pretty hot all summer. :lol:

This is a great budget deal. I made a trash can filter for about $20 and it worked very well after I got it figured out how to run it without dumping all my water out of my pond :rolleyes:.

Keep us posted on the breeding progress too.
 
Looks awesome so far, jeta! Any worry in Florida about predators eating any livestock in your ponds?
 
Epic pond build! ! Can't wait to see how it progresses.

Sent from my SAMSUNG-SM-G900A using Aquarium Advice mobile app
 
Thanks guys for the support!

azmodan - There's some potential for birds like hawks, eagles, herons. I see them a lot out on the creeks and river, as well as in the bay. We are only a mile or so off of a substantial creek system, about 3 miles from a river and 5 miles from the bay, so it's something I'm going to have to watch. I'm hoping that since its on the back patio it's so close to the house that any predatory birds won't get brave enough to try, but we'll see. If the sun becomes an issue I may end up hanging a shadecloth above the entire setup so that would also make it a little less visible to anything flying by.

Autumnsky - Yeah I'm not sure how much the painting would do heat-wise, but I'll be sure to get a thermometer in it to measure the temp. I may end up turning the entire thing into more of a sand/stone type theme with basic desert colors. I think I'm just going to get it all up and running and then when I get bored I'll focus more on the aesthetics.

I'm working on the filter tomorrow, I got most of the PVC parts today. It ended up being around $40 in PVC pieces and piping, although I'm doing 2 filters at the same time (the other one is tying into my greenhouse system.
 
Wow this is so nice!!! I want a pond so bad but I don't have the time, space, nor money for it right now. But it does look amazing


Sent from my iPhone using Aquarium Advice
 
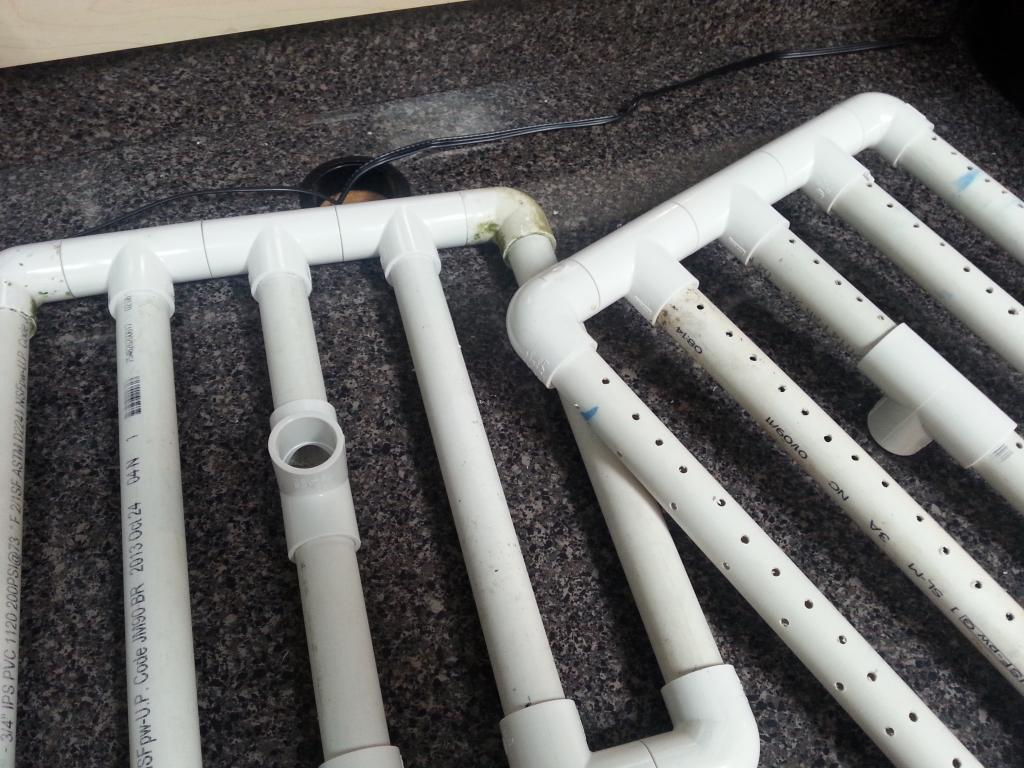
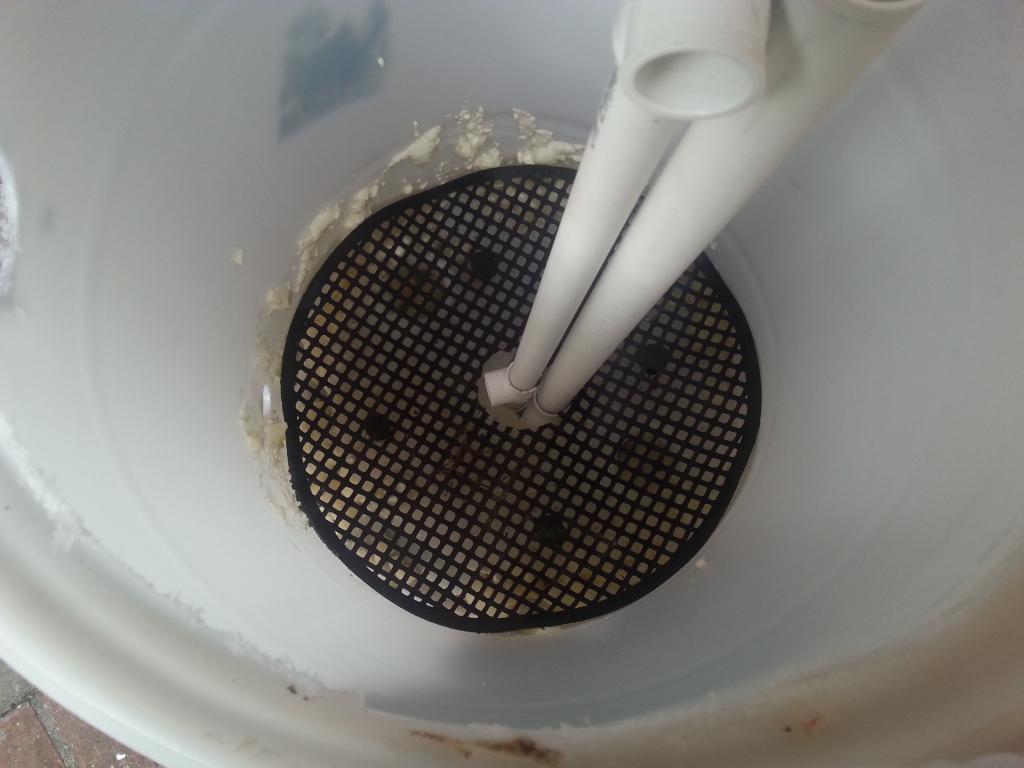
Tiny update. Been working on the filter(s) (doing one for my greenhouse also). Built this doohicky to suck settled waste when I crack open a valve, and also plan to put a Tee into it so I can blow compressed air into it when I want to backflush the entire system. There's one for each filter here but just took a photo of each side so you can get an idea. The open Tee on the left side is what the standpipe will go into.

My goal with this is to make a modified version of the more common (and popular) skippy style upflow sand filter. The original has a single pipe coming up with a similar contraption to this that is used to backflush the system, but instead it uses a shower drain or bulkhead drilled through the bottom of the barrel to collect settled waste. i don't really like the idea of drilling the bottom of the barrel and the shower drain fitting was a little pricey, so I decided to make 2 into one.

I still have to drill a hole in the side of the barrel but I'm using a simple 3/4 Uniseal which is cheap and effective. (<$2 each). I've not tested this design yet but it seems promising.

img_3016006_0_88288c884aa082fce2d0afdcf3ba62c6.jpg
 
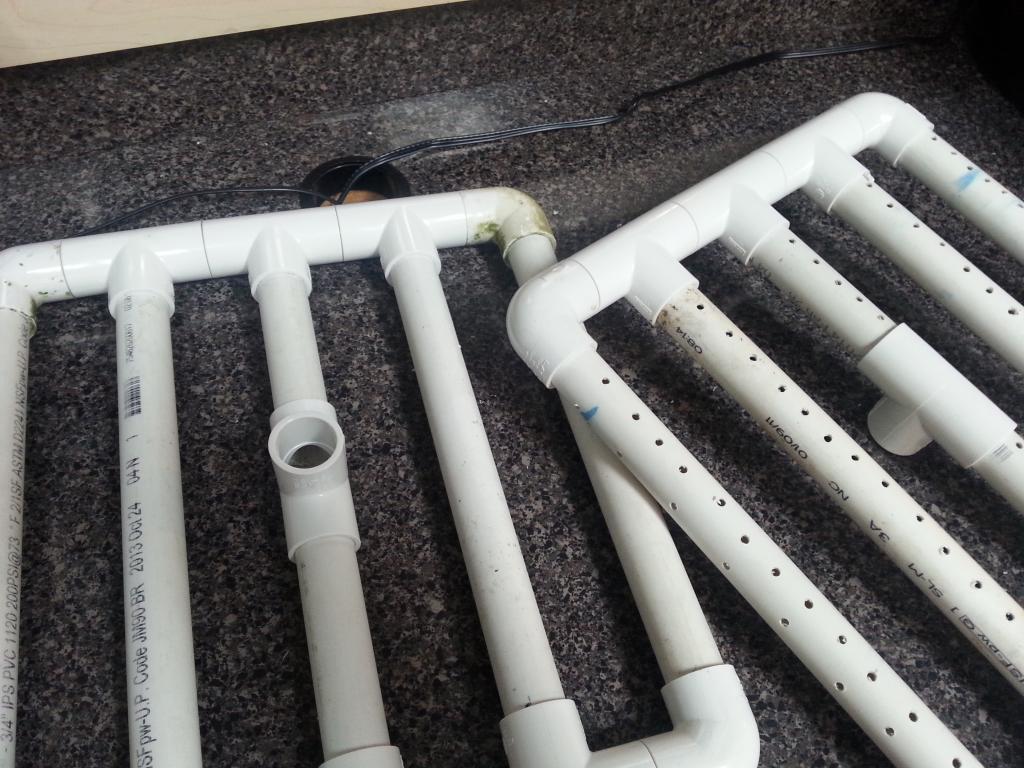
Tiny update. Been working on the filter(s) (doing one for my greenhouse also). Built this doohicky to suck settled waste when I crack open a valve, and also plan to put a Tee into it so I can blow compressed air into it when I want to backflush the entire system. There's one for each filter here but just took a photo of each side so you can get an idea. The open Tee on the left side is what the standpipe will go into.

My goal with this is to make a modified version of the more common (and popular) skippy style upflow sand filter. The original has a single pipe coming up with a similar contraption to this that is used to backflush the system, but instead it uses a shower drain or bulkhead drilled through the bottom of the barrel to collect settled waste. i don't really like the idea of drilling the bottom of the barrel and the shower drain fitting was a little pricey, so I decided to make 2 into one.

I still have to drill a hole in the side of the barrel but I'm using a simple 3/4 Uniseal which is cheap and effective. (<$2 each). I've not tested this design yet but it seems promising.

img_3016056_0_88288c884aa082fce2d0afdcf3ba62c6.jpg

Great idea(s)!
 
Next tiny update:
now that the weekend is upon us, I'll get this thing knocked out!

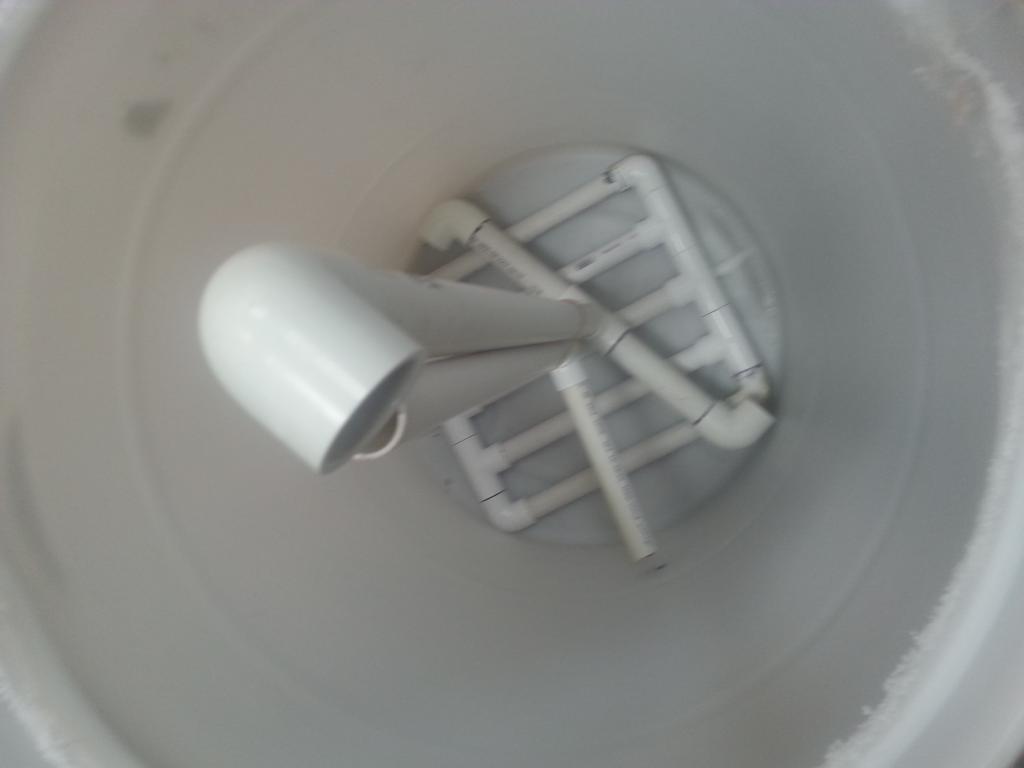
I've got the filter(s) nearly complete. In hindsight, I would recommend getting a 5-way fitting for the input line. This is the fitting that has an upright hole and then basically a cross, the result would be more rigidity since it would have 4 pipes going out of it. My setup only uses a Tee so I ended up throwing a spare piece of 1" pipe on the opposite side of the tee to help the plastic plate above it stabilize. The purpose of this plastic plate (it has a ton of holes drilled in it, as well as a black plastic mat thingamabob that I found in one of my barrels), is a flat surface to start piling the rocks on to. It gives a little bit of space for the input flow to swirl around and allow solids to settle on the bottom before the water flows upward to the overflow. I also used some "Great Stuff" expanding foam to help fill in some gaps.

I'm using 1 bag of pond pebbles, 1 bag of river rocks, 1 bag of pea gravel, 1 bag of PFS, and then a few pounds of crushed oyster shell. I don't know if it will all fit, but we'll see tomorrow.


Goal tomorrow - Fill the filter with media and get the overflow piping installed-
Getting the IBC totes at the right height, scrubbed, and then filled. In an effort to continue with the cheapness, I'm scoring 6 wooden pallets from my wife's work to help raise the totes to the right height. The side totes should be fine with one pallet on top of cinder blocks, while the other 2 in the back by the filter will most likely rest on 2 pallets each on top of cinder blocks.

img_3017641_0_fc4ed464854f8a250a7a779ec5d459d5.jpg

img_3017641_1_89b3daed8fa0f9d3637ec1b1ce866507.jpg
 
I went over to this guys house.two.days ago and he had a 2500 gallon pond... and he just had fishing line spaced out every foot, creatimg 1x1 sections of fishing line over the pond...he said herons etc trip and stay away and that the pond was too deep for raccoons. Was pretty sweet

Might be something to try if theres any issues?

How does he manage to clean it or do anything in it? Mine is netted but it's easy to remove for access to the pond. And I have fishing line trip lines around the outside and at one foot and two foot intervals beyond the pond. And a 4ft steel mesh fence into the ground surrounding the yard. Still not sufficient to keep predators out but it helps!

@Jeta, looks great! Look forward to seeing the finished project! :)
 
Since this thing is on my back patio next to the house I'm hoping predators won't be an issue. We have big dogs also (they don't stay outside though), so I think they keep a lot of critters from getting brave.

Tiny update time. I've been working on the piping this weekend and I have most of it in. Word to the wise: Do not attempt to cut holes for uniseals freehand (i.e. no hole saw bit) unless you are just awesome at it. I thought I could do it, but I failed on 3 out of 4. I decided to just pay up for a bit, even though I didn't want to. I have a regular hole saw kit but none of them are big enough. I'm using 2" uniseals and they utilize a 3" hole.

On the fail holes I took a piece of hard plastic and siliconed it over them from the inside, it *should* stop any leaks. It's going to make my overflows (had to drill new hole(s) kinda cockeyed but I don't really care.

One of the IBCs screw on caps had some holes tapped in it so I had to seal those off as well.

Tomorrow, if I get time, I'll finish the overflow piping. I ran out of 2" pvc also, I had enough to do the overflows, but I want to put a 90 on the overflows and have some pipe going down into each container so that they pull water from near the bottom to help get debris.

My other hangup is installing the UV sterilzer. I got an 18 watt oddysea UV and I need to rig up a way to attach it to 1" pvc pipe. Right now it just has barb fittings on it.

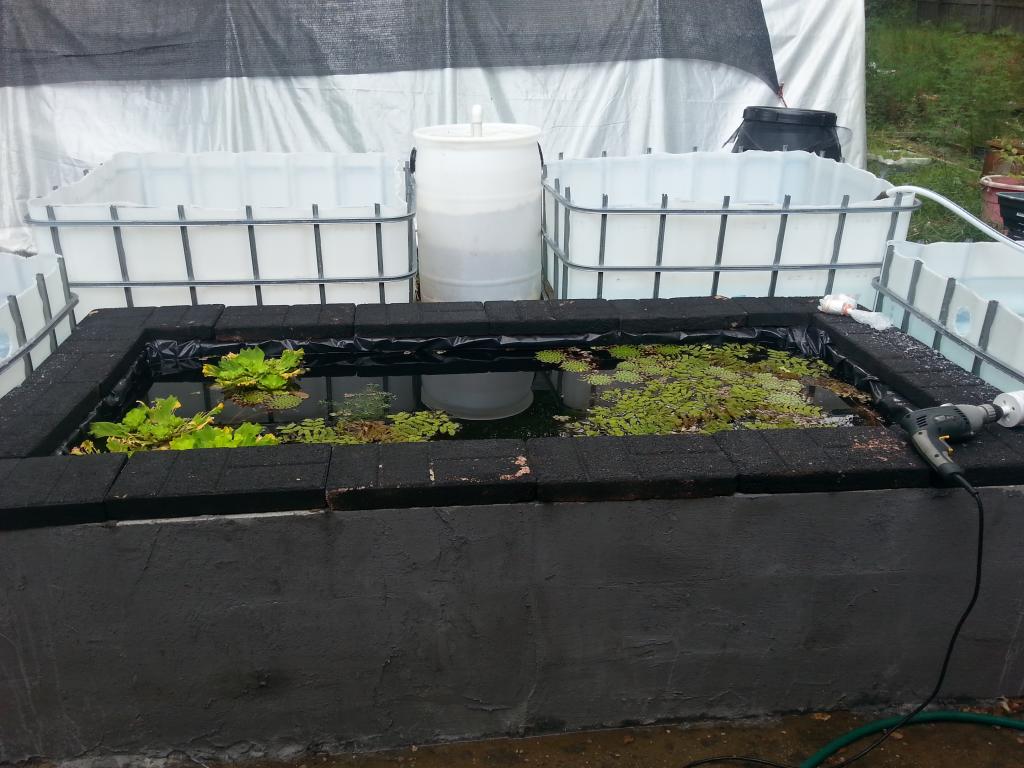
Here's a pic prior to putting most of the piping in. I got the tanks all the right height. The ones in the back are down a few inches lower than they are in the photo, the water weighs them down significantly.

I also ended up using 1.5 bags of PFS.
img_3020087_0_0bab041bf94d5a69b4da65b96febd225.jpg
 
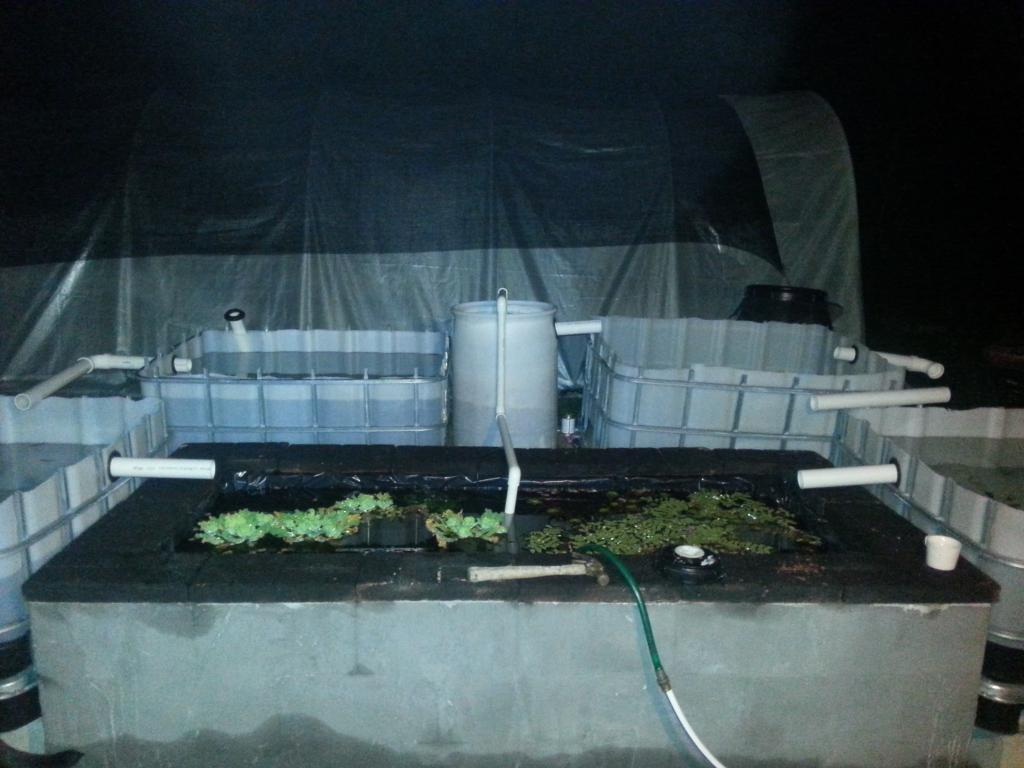
Sort of update - Didn't do a single thing today, was busy putting together packages in my downtime. I just got a quick pic (dark) of some of the piping. As you can see, the top right container is empty, which is making it sit up a few inches higher than it would while filled. I'm going to fill it tomorrow and finish the piping if the weather holds up.
img_3020924_0_f137580e6ca5876aff5a66cb9a1760b3.jpg
 
Small update. Have some plants in there now and did a short vid of what I put in there so far. Still lacking substrate but plan to do some dirt pots tomorrow for the stem plants.

 
Back
Top Bottom