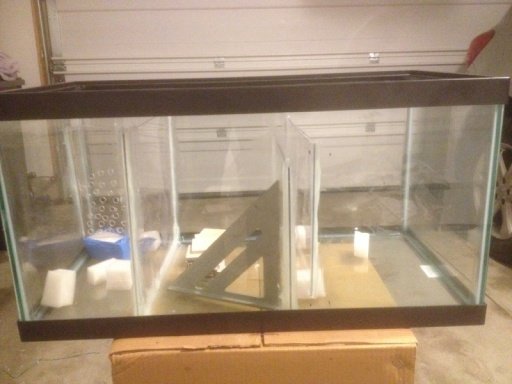
I still gotta figure out the sump. There is some bracing inside the stand that I didn't see before... and it is going to make it nearly impossible to get both a sump and ATO reservoir into the stand. I think the ATO res will have to sit to either side. I am probably just going to have to build the sump myself - I can't find anything that will fit both my skimmer, and my return pump. I went with an eheim pump as the reviews were amazing, and it is supposed to be extremely quiet, which is important to me. But, it is 6.25" wide, and most pre-built sumps that are 24" long have a 4" wide return section.
You are using an out of date browser. It may not display this or other websites correctly.
You should upgrade or use an alternative browser.
You should upgrade or use an alternative browser.
fort's 57 gallon Rimless Reef Build
- Thread starter fort384
- Start date
The friendliest place on the web for anyone with an interest in aquariums or fish keeping!
If you have answers, please help by responding to the unanswered posts.
If you have answers, please help by responding to the unanswered posts.
Ziggy953
Aquarium Advice Addict
SWEET!!!
I am so excited about this thread! I can't wait to see what an incredible tank/reef you create!
I am so excited about this thread! I can't wait to see what an incredible tank/reef you create!
cmor1701d
Aquarium Advice Addict
Looking great. Hope you take the paper out of the tank before filling it ")
Is the bracing structural? If not you can tap it out an pop it back avter getting everything inside.
Is the bracing structural? If not you can tap it out an pop it back avter getting everything inside.
This build is looking pretty nice. What pumps are you planning for the sump? Have you thought about going with a refugium instead of a plain sump. Dont get me wrong, added water volume is a good thing but extra biological filtration with added water volume is great also. As far as the pumps you cant go wrong with mag pumps. I have alot of pump power in my tank so I dont even need PH`s in the tank. Good luck on the build.
Sump construction is under way. Left side is skimmer and inflow. Middle will be a refugium. Right side will be return.
It isn't pretty but it should work. Just have to add 1 more baffle and it will be complete. The back left corner will hold live rock rubble and I will jam my hose/filter sock in there.
I went with an eheim 1262 for the return. It is supposed to be super quiet. It is rated at 900 gal/hour at 0 head. I will probably have to restrict it a bit with a ball valve.
Yes it is structural, unfortunately. The way it is built it restricts the floor space available. I won't have an issue getting stuff in as there are doors on 3 sides. My options are just limited. I think my plan will work well though. The ato reservoir will go behind my tower speaker for the entertainment center and will be well hidden. At least that's the plan. I need to find an ato reservoir container still. I am thinking something like a Gerry can. 7-10 gallons would be nice...
It isn't pretty but it should work. Just have to add 1 more baffle and it will be complete. The back left corner will hold live rock rubble and I will jam my hose/filter sock in there.
melosu58 said:This build is looking pretty nice. What pumps are you planning for the sump? Have you thought about going with a refugium instead of a plain sump. Dont get me wrong, added water volume is a good thing but extra biological filtration with added water volume is great also. As far as the pumps you cant go wrong with mag pumps. I have alot of pump power in my tank so I dont even need PH`s in the tank. Good luck on the build.
I went with an eheim 1262 for the return. It is supposed to be super quiet. It is rated at 900 gal/hour at 0 head. I will probably have to restrict it a bit with a ball valve.
cmor1701d said:Looking great. Hope you take the paper out of the tank before filling it
Is the bracing structural? If not you can tap it out an pop it back avter getting everything inside.
Yes it is structural, unfortunately. The way it is built it restricts the floor space available. I won't have an issue getting stuff in as there are doors on 3 sides. My options are just limited. I think my plan will work well though. The ato reservoir will go behind my tower speaker for the entertainment center and will be well hidden. At least that's the plan. I need to find an ato reservoir container still. I am thinking something like a Gerry can. 7-10 gallons would be nice...
Attachments
Last edited:
Alright, sump is finished (I think). I added an extra bead of silicon to each joint that I could reach. It seems like it bonded really well. The tube of silicon was next to the lexan panels at HD, and it says specifically for bonding lexan, but also bonds to glass. Hopefully it holds up. I put a LOT of it on as it doesn't really matter what it looks like as long as it functions (How often will you here me say that??). It also said good for marine applications, and it does not have any additives like mildew control or what have you. From what I have read, it should be safe. I just hope when I start running 600GPH through it, the panels hold up.
I have the bulkheads installed in the tank, along with the plumbing for the overflow and return. Unfortunately, the tubing I ordered from BRS doesn't fit properly, which is weird (both the pump, and the outflow bulkhead). It is a 1" hole out of the tank, and a 1" bulkhead, but the hose barb accepts 1 1/4" hose. Go figure. The 3/4" tubing ID for the return fits the eheim, but the stuff they sent is super thick, and the OD doesn't fit into the compression fitting. So, more HD plumbing aisle time for me I guess.
Lights I will have Monday, as well as salt and my vortechs, rack mount power supply, and heater. Rock and sand has not shipped yet as far as I know, so I suppose I will wait for that before I start to fill 'er up. Picked up a Reef Master Test Kit from API, and have a refractometer. I think I have all the parts but the hose either here or on the way.
I am going to use a 27W CF fixture for the refugium... I have an extra here already.
Am I missing anything?
Ziggy953
Aquarium Advice Addict
Sounds like you have things covered to me.
What size tank is that you used for the sump?? 29g?
What size tank is that you used for the sump?? 29g?
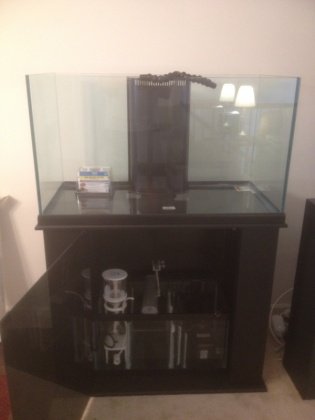
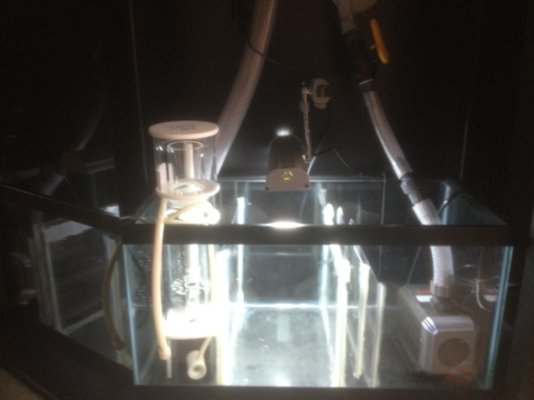
Alright sump is still curing but the baffles feel solid. I put it in place with the equipment. Everything fits well and it is easy to get access to everything.
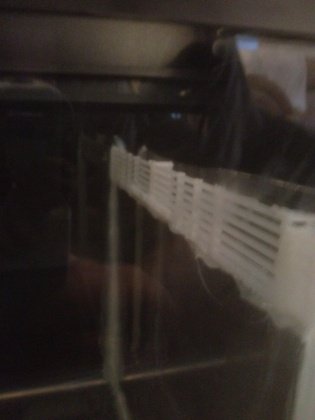
I installed a small louvered gate (pictured) on top of the baffle that separates the fuge and the return. It is part of an old under
Gravel filter system that I had laying around it ought to prevent anything from leaving the fuge but I hope it doesnt restrict flow too much.
On a side note, I cracked open my bubble magus skimmer to set it in the sump. The directions are... Lacking I will say. I am going to need someone's help hooking it up as there are 2 hoses and an adjustment wheel, And I have know idea what any of it does.
Return area turned out well. My ATO bracket fits nicely in the back, and I made it as large as possible to account for evaporation.
Attachments
mfdrookie516
Aquarium Free - 2+ Years
Haha... the instructions are definitely lacking. The big tube goes from the collection cup out and has a stopper on the other end. The other tube hooks in to the pump and feeds through a guide hole and sticks up.
So the little tube just sucks in air I take it. The other tube hooks to the barb on the collection cup? Where does the other end need to be? What does the dial dealie do? Nothing has to hook to either end of it?
Ziggy953
Aquarium Advice Addict
Tube attached to motor sucks air yes
tube attached to collection cup allows gook to drain....
I'm not sure what dial dealie do you are referring to..lol
tube attached to collection cup allows gook to drain....
I'm not sure what dial dealie do you are referring to..lol
mfdrookie516
Aquarium Free - 2+ Years
The dial dealie is just a stopper. My only assumption is that it's an emptying tube... which is what I use it for. Mine just kind of hangs there, so I can just put a bucket under it and dump the cup out, while holding my nose.
Ah ok. I get it.
The dial I am referring to is on the PVC tube that runs vertically next to the cylinder.
I assume it controls how much flow the skimmer takes? I guess I don't really get what that pipe is for.
The dial I am referring to is on the PVC tube that runs vertically next to the cylinder.
I assume it controls how much flow the skimmer takes? I guess I don't really get what that pipe is for.
TLTGF
Aquarium Advice Addict
The is the output pipe - the gate valve controls the back pressure in the skimmer, raising or lowering the water inside skimmer
cmor1701d
Aquarium Advice Addict
No water shooting out. The air line cause the pump to inject air bubbles into the reaction chamber. DOCs bind to the bubbles and move up and into the collection cup. You can adjust how high the water in the chamber is thereby adjusting the output from 'wet' (a light tea color) to 'dry' (black coffee). I go for just darker than regular coffee look to the skimmate (the stuff that ends up in the collection cup).
Great job so far. I use only Salifert test kits for Ca, Alk, Mg, and NO3 as they are titration tests with a sharp color shift so I don't have to match colors of my test result to a strip of paper. Being color blind those close calls don't work for me. The Salifert sharp change of color works great.
Don't chase pH. It will change during the day being lowest at lights on and highest at lights out. Keeping Alk, Ca and Mg in line should maintain pH at an acceptable level. If you get an electronic pH meter be aware that it reads much lower than liquid test kits.
Looking great. I'm jealous and now thinking of moving furniture or getting rid of some so I can start another tank
When you're ready for corals get a Hanna phosphate checker. Can't be beat for the price.
If you want some cheato for the sump I can send you some for the cost of shipping (~$9.00). It's time for me to prune mine again.
Keep posting your progress.
Thanks Cmor. I will definitely check out the phosphate checker. The titration PO4 test takes forever. I only check it in my planted tanks every 6 weeks or so, but obviously it will be much more critical in a reef setting. The easier the better!
I have a pH controller laying around from my fw days. I was going to hook it inline with my ATO float valves as a failsafe.
I have a pH controller laying around from my fw days. I was going to hook it inline with my ATO float valves as a failsafe.
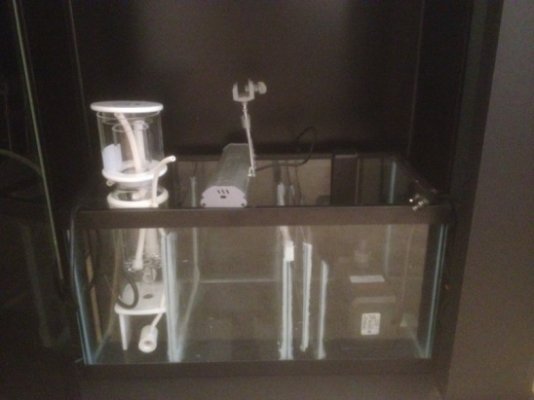
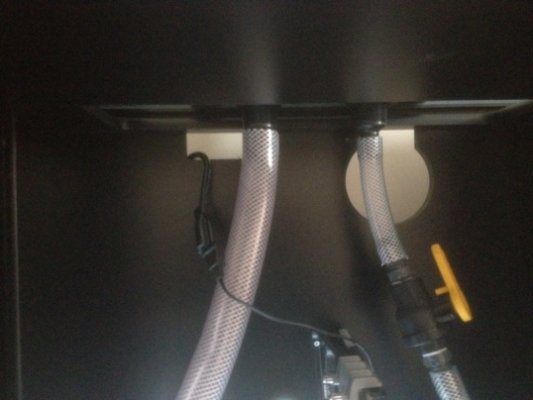
Ok plumbing in sump is basically done and fuge light installed.
The hose on the drain bulkhead is a bit loose for comfort. It is snug, but not snug enough. I think I will just throw a hose clamp on it. I cut the drain hose so that it is about 2" below where the water line will be in the first sump compartment.
The hose on the drain bulkhead is a bit loose for comfort. It is snug, but not snug enough. I think I will just throw a hose clamp on it. I cut the drain hose so that it is about 2" below where the water line will be in the first sump compartment.
Attachments
Last edited:
Similar threads
- Replies
- 8
- Views
- 785
- Replies
- 23
- Views
- 4K
- Replies
- 40
- Views
- 2K