Rick's 225g Build

The friendliest place on the web for anyone with an interest in aquariums or fish keeping!
If you have answers, please help by responding to the unanswered posts.

AquaRick

Aquarium Advice Addict
Joined
Sep 3, 2011
Messages
2,638
Location
Northern CA
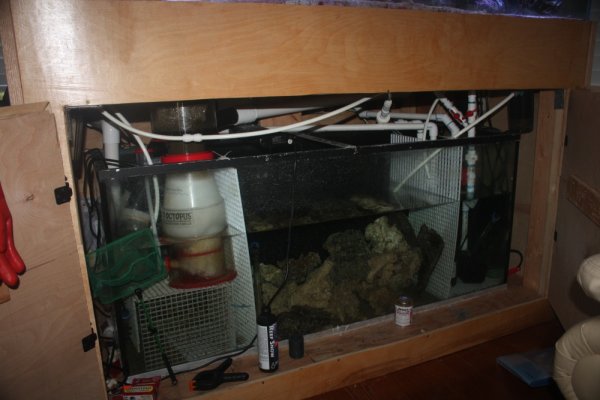
Last week while I was cleaning my 125g tank I ended up popping the center brace of the tank. After the initial fear and anger set it, I decided it was time to upgrade. I never really liked the size of the tank (60" x 18"" x 26"). It had no depth and in order to get a decent aquascape going, I had to sacrifice space in the back between the glass. This has caused flow problems ever since I had it set up. It also wasn't drilled. I had been using a DIY overflow that required an aqualifter pump for priming. Really not the best way to go, but was all I could do at the time. The tank was previously used and had some minor scratches. I ended up buying it for a steal since the brace was cracked which I replaced with a DIY aluminum corner siding.

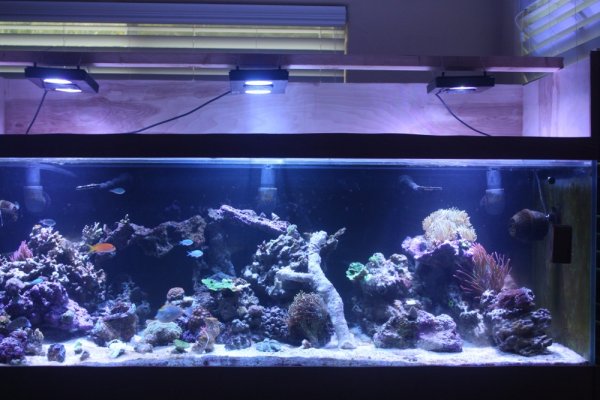
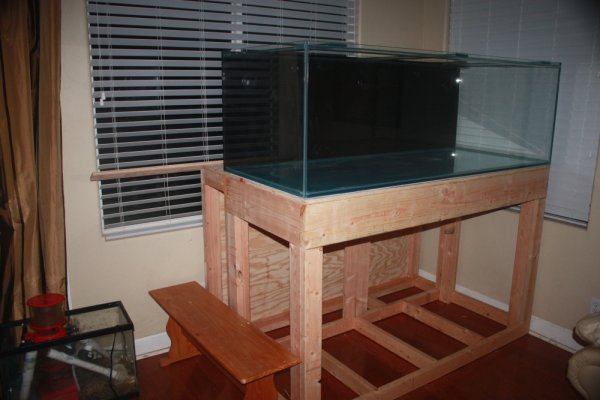
I ended up purchasing a 225g tank from my LFS. It's a 72" x 30" x 24"H starfire tank. I love the size of this thing. a 30" depth will give me a ton of room to aquascape and leave enough room around the rocks for great flow.

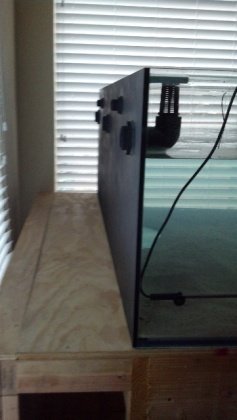
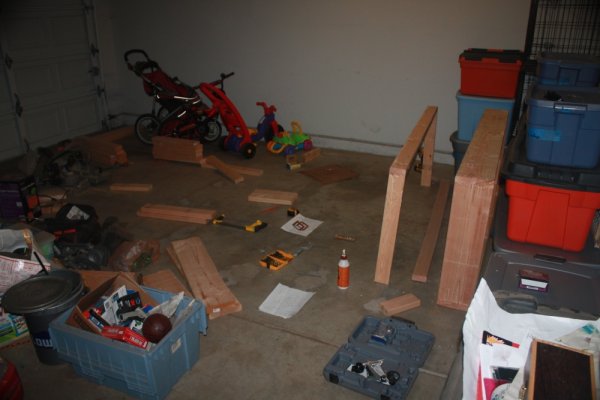
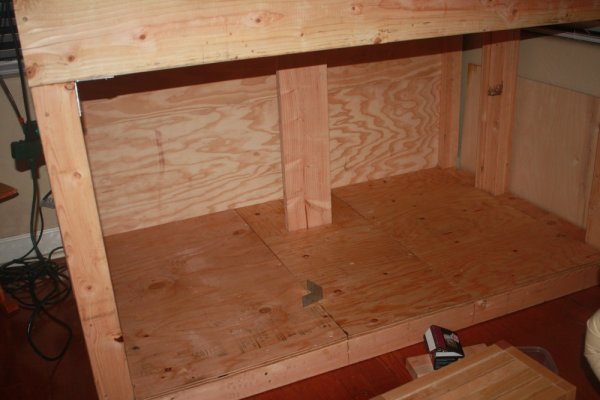
I built the stand using 2x4's and 2x8's. I decided to build a larger stand and give myself an extra 10 inches behind the tank. This will allow me to get behind it and clean it from the back if needed. The stand is pretty tall at 44", but I designed it this way to give me ample room to adjust things in my sump. When I built my previous stand I didn't bother calculating the height and barely made it tall enough to house my skimmer inside. I wanted more room this time.

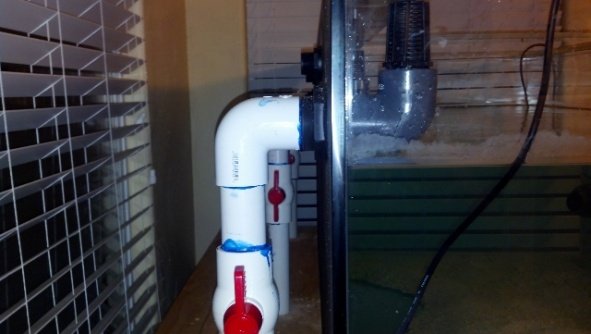
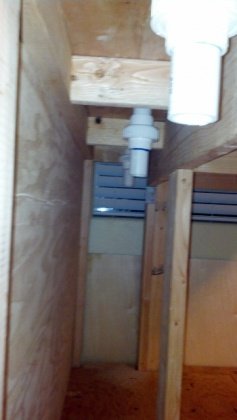
Here are a few pictures of the stand/build so far.

Link to old 125g build:Original 125g Build
 

Attachments

  • IMG_0636.jpg
    IMG_0636.jpg
    171.9 KB · Views: 293
  • IMG_0638.jpg
    IMG_0638.jpg
    190.3 KB · Views: 338
  • IMG_0695.jpg
    IMG_0695.jpg
    181.4 KB · Views: 351
Last edited:
Looking good! How the window doesn't get direct sun, but I'm sure you already considered that. I've heard cool things about the clarity from starfire glass, but it scratches easy? I can't wait to follow a fresh build from on of the guys who's helped me become as close to an expert as possible.
 
Sniperhank said:
Looking good! How the window doesn't get direct sun, but I'm sure you already considered that. I've heard cool things about the clarity from starfire glass, but it scratches easy? I can't wait to follow a fresh build from on of the guys who's helped me become as close to an expert as possible.

Thanks Hank. Yes the windows are an issue. But this was the only spot the tank could fit and not make the living room feel awkward. I'm planning on putting some shade covers on the outside of the windows down the road.

Starfire does scratch more easily but not as bad as acrylic ime. Figured I'd just go with it. I really enjoy how clear the tank is. Makes me miss acrylic.
 
I'm hoping to get my plumbing done today. The tank has three 1 1/2" overflows. I'm seriously debating tying all 3 lines and plumb it to a single 2" line and run that line only into my sump. I'm a fan of low flow in my sump/return so I'm not worried about tying them to one line. Not sure if i want to create the manifold up above the stand or bring the lines down into the stand and create the manifold in there. Any opinions?
 

Attachments

  • ForumRunner_20121009_112254.jpg
    ForumRunner_20121009_112254.jpg
    31.1 KB · Views: 308
Plumbing is set up. I decided to run 3 separate lines instead of running them into 1 larger pipe. I may go for a closed loop circulation down the road so I figured i would keep my options open. All that's left to do is attach it to some pond supply hose. For whatever reason i couldn't find flexible spa hose in 1 1/2" size. The pond supply hose is 2" and isn't as flexible but will work just fine.

ForumRunner_20121010_112425.jpg
 

Attachments

  • ForumRunner_20121010_112435.jpg
    ForumRunner_20121010_112435.jpg
    60.8 KB · Views: 273
Here's another look of the plumbing under the stand
 

Attachments

  • ForumRunner_20121010_112633.jpg
    ForumRunner_20121010_112633.jpg
    27.9 KB · Views: 291
I'll be honest, I don't see the point of a closed loop system with how cheap powerheads can be. That and it is easy to adjust with a powerhead over a closed loop, atleast how I envision things.

I can't wait to see how your setup looks underneath. I want to get a new tank and build an ideal base and canopy for it badly. After having the first tank on a table and second on a DIY stand the previous owner made, It'd be nice to have everything under the tank rather than behind it on the floor... Dang it Rick you got me going again!
 
Love your philosophy, "eh, the brace broke, don't like it anyway..I'll get something almost twice it's size." Looking great already! I have the same plumbing as you do except 1 is the main one and the other the emergency flow..and all this time I thought it was plumbed wrong (secondhand tank).
 
I'll be honest, I don't see the point of a closed loop system with how cheap powerheads can be. That and it is easy to adjust with a powerhead over a closed loop, atleast how I envision things.

I can't wait to see how your setup looks underneath. I want to get a new tank and build an ideal base and canopy for it badly. After having the first tank on a table and second on a DIY stand the previous owner made, It'd be nice to have everything under the tank rather than behind it on the floor... Dang it Rick you got me going again!

Totally agree on the closed loop system Hank. I just happen to have an extra pump lying around. That and 3 overflows and 2 returns on this tank. Figure I could plumb one of each and go for it. Maybe I'll try it down the line, but honestly, i'm just too lazy to set it up right now lol.

Hank, you know you want to build your own stand for your tank. Imagine all the extra room you'd have..... :brows:

Seriously though, a DIY stand is the way to go. You can customize it however you want.
 
Love your philosophy, "eh, the brace broke, don't like it anyway..I'll get something almost twice it's size." Looking great already! I have the same plumbing as you do except 1 is the main one and the other the emergency flow..and all this time I thought it was plumbed wrong (secondhand tank).

Lol...I just used it as an excuse. My LFS had been holding that tank for me for the last couple months. I was going to wait a bit more to buy some more LED light fixtures, but enough was enough.

At this point I'm not sure if I want to replace all 8 bulbs on my 4' T5 unit and use it on this tank. I could also steal the radion over my 60g tank, buy another radion, and just use those two over my tank. Really wanted to go LED on this build.
 
Well I haven't updated in awhile and with due cause I guess. In the process of moving my 125g tank over to the new tank, I moved the rock on which my Magnifica anemone was attached to. In the morning my tank was cloudy and white. Turns out the anemone had gotten chewed up by the powerheads. I ended up loosing all my corals and fish.

Well, needless to say I was pissed. Mostly at myself for being stupid and not taking the time to move over my tank inhabitants the right way. So for everyone reading, don't do a tank transfer at 4am unless you absolutely have to.

I ended up waiting a few months before I started working on the new 225g tank again. I had an empty tank afterall....I couldn't just let it sit there. So I finshed transferring over the rock and sand from the old 125 and cycled the 225 in a couple weeks. I transferred over a few fish and corals from my 60g cube to the new tank. I took the Gen1 radion from the 60g and bought two new Gen2 radions to replace the old 48# T5 fixture I had running.

I ended up using the 125g as a sump. Overall I'm really happy with having a large sump. The extra water volume is awesome compared to the way things used to be. I didn't like the baffles I used in my old sump design so I ended up using egg crate and zip ties to create sections in my sump. I really like how things are working now. I bought a few more pieces of equipment and now have my octo skimmer, a biopellet reactor, phosphate reactor, and carbon reactor. I bought an additional Mag9 pump and now have two mag9's feeding the main returns and the 3 reactors. I love love love, how things worked out. I'm feeding a decent amount of food every day and still can't detect much nitrates or phosphates. Fish are plump and happy now. Corals are doing well and seeing lots of growth on my acros and other SPS.
 

Attachments

  • IMG_0912.jpg
    IMG_0912.jpg
    242.7 KB · Views: 202
  • IMG_0946.jpg
    IMG_0946.jpg
    196.7 KB · Views: 206
With the sump, you are just using the egg crate to divide the sump. No walls or anything to regulate water levels or flow?
 
With the sump, you are just using the egg crate to divide the sump. No walls or anything to regulate water levels or flow?

Correct. The egg crate is just used to divide the sump. Water level will be regulated by an ATO. I've had it sitting in my garage for a few weeks. Just too lazy to install it. I just add rodi water every 3-4 days as needed. Wasn't an issue in the winter when there wasn't too much evaporation. With the hotter months comming, I really do need to install that ATO soon.

As for flow the two pump intakes and 3 reactor outputs are good enough. I'm not too concerned with the flow in the sump.
 
I was just curious of your set up. I'm in a very slow process of setting up my first saltwater tank and haven't seen that style of sump used before. What are the pros and cons of that approach, if any?
 
Things look great on the revamp Rick. What is the point of using the egg rate to divide the sump? Won't algae just flow through?

Thanks Hank. The egg crate is really just to keep rock in the middle without making a mess around the pumps, skimmer, and heaters. At the moment I don't have the fuge lighted as the parameters are staying near 0 without it so there's no algae growing down there. There is a ton of sponge growth though. I have sock filters on each of the 3 drains but I may just remove them altogether and just siphon out the detritus from where it collects in the sump.
 
I was just curious of your set up. I'm in a very slow process of setting up my first saltwater tank and haven't seen that style of sump used before. What are the pros and cons of that approach, if any?

To be honest, I think I went this way simply for ease of use. I really didn't care to have sand in my sump/fuge this go around. I felt that with the added water volume, rock, and other equipment I could get by without a DSB. Since I didn't want sand and my skimmer is already broken in and wasn't creating microbubbles, I realized i really didn't need extra baffles for a bubble trap. I'm happy with the low flow going through the sump so I just went with it. So far so good and I'm happy with how it turned out. Not having to silicone was nice also ;)

However, one thing to note, if my sump was smaller I think I would have definitely done a fuge with a DSB and baffles in the more traditional sense.

The cons are that I can't have sand in the sump. Also if my skimmer was newer or still producing a lot of microbubbles, then the microbubbles would have gone into my DT as I have no bubble trap. Other than that I don't know if there are too many cons for this style.

It's really up to you and how you want to set it up to fit your needs and tank makeup. What kind of system do you plan to run?
 
Back
Top Bottom