18" - 20" DIY lighting

The friendliest place on the web for anyone with an interest in aquariums or fish keeping!
If you have answers, please help by responding to the unanswered posts.

dskidmore

Aquarium Advice Addict
Joined
Aug 21, 2005
Messages
2,616
Location
Genesee Valley
I took an in-person trip to Home Depot, and an online visit to Lowes, and I could find neither an 18" shoplight, nor a ballast that supports 18" bulbs. Is there any way I can rig a ballast rated for 2' bulbs with 18" bulbs, or should I just order slimpaqs? The slimpaqs seem very reasonably priced, I'd just have to wait longer for shipping.

Any opinions on putting a 24" fixture on a 20" tank? The ends are dimmer than the middle, so there's not a ton of light waste.

Goal: High light 10 gallon. So many people offered me clippings for my 2.5 gallon desktop, that I am not sure I have room for all the promised plants. I want the 10 gallon to serve as my "art box" for the other two more aquascaped tanks. Given that the WPG rule breaks down on very small and very large tanks, I think I've correctly estimated that 2 T5HO or 3 T8 bulbs would equate to high light. (Unfortunately the slimpaq 18" seems to not come in HO, will take quite a few of those.)
 
It's not a DIY solution, but you could go with either a 1x40 watt or 2x40 watt Current Satellite Fixture. You'd need to swap out bulbs to dial into the level of lighting that you'd want. With a daylight and 50/50 bulb in the 2x40 watt fixture you could have fun with Very High Light. I'm currently using one of the 2x40 watt refurbished units from the linked vendor and it's working great.
 
Maybe I should hunt the local LFS stores for a PC fixture. I'm kinda in a hurry to get this tank set up before the plants come! The 75 gallon will do for temporary holding, but not long term. I thought it would be a quick shot to pick up a shorter shoplight...

I'm seriously considering the oversized hood option if I can't find a fixture locally. The sunpaqs are less tempting now that I realize the smallest one doesn't come in HO.
 
Is there any way I can rig a ballast rated for 2' bulbs with 18" bulbs
I haven't done this yet, but I believe so since most electronic ballasts are "load sensing." Another alternative is wiring two 18" bulbs in series and using a 36" rated ballast to fire them. Electrically it should be the same.
 
The paper I had found on sieral wiring said that 120 v was not enough to fire two lamps, but this was common in Europe where the voltage is higher. If the bulbs are short enough it will work?
 
You may be right; since voltage will split among the bulbs maybe its below the threshold of firing the bulbs. I perhaps incorrectly assumed a "load sensing" ballast would see it as one long bulb and discharge whatever was needed to fire it. I'll defer to those more experienced until I try it: sorry.
 
Not sure as to how DIY you're looking, but AHsupply has another option to put out there. Their 36W bright kits would probably do the trick. You could use either 1 or 2 and then swap in a 50/50 to get to where you wanted. The only real downside imo is that the 1x36 kit is around $40 and you still have to get a bulb ($16-18 ) for it. They've also got tips for DIY enclosures as well.


In any case, the current satellite fixtures are probably cheaper than this route anyways (if you can get a refurbished unit).
 
If possible, I'd like to DIY this just to be able to get the parts locally and have this up and running in the next few days.
 
The cheapest and easiest (and readily available locally) for 10g tanks would be the screw in CF bulbs into an older incandescent hood. Or I'm sure you could rig a screw in socket into some other type of DIY enclosure. It's not hard to get

I understand that this is probably not the route you're looking for (it could end up looking pretty craptacular), but blank sockets are readily available at just about any hardware store.

Good luck.
 
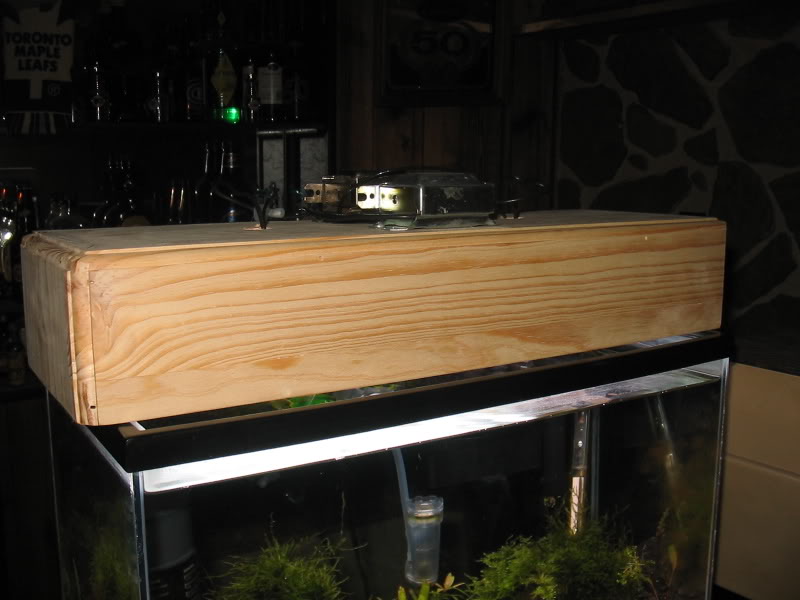
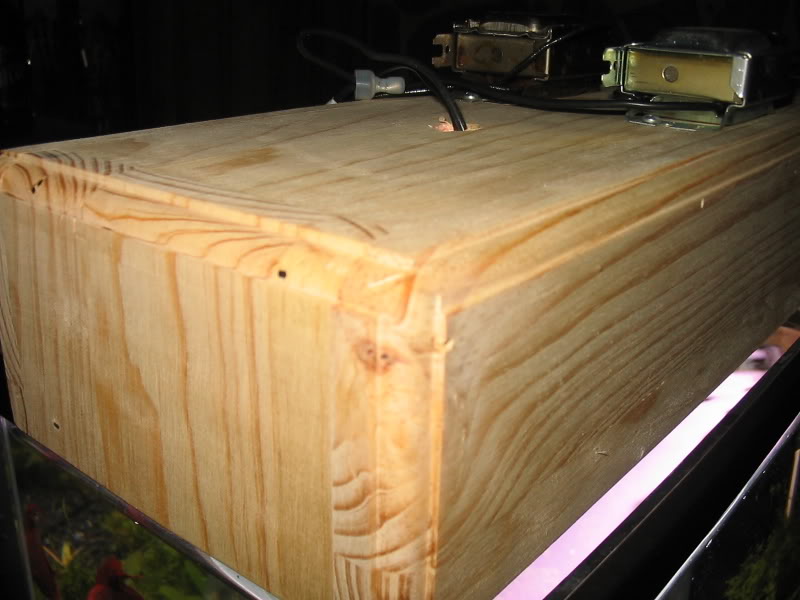
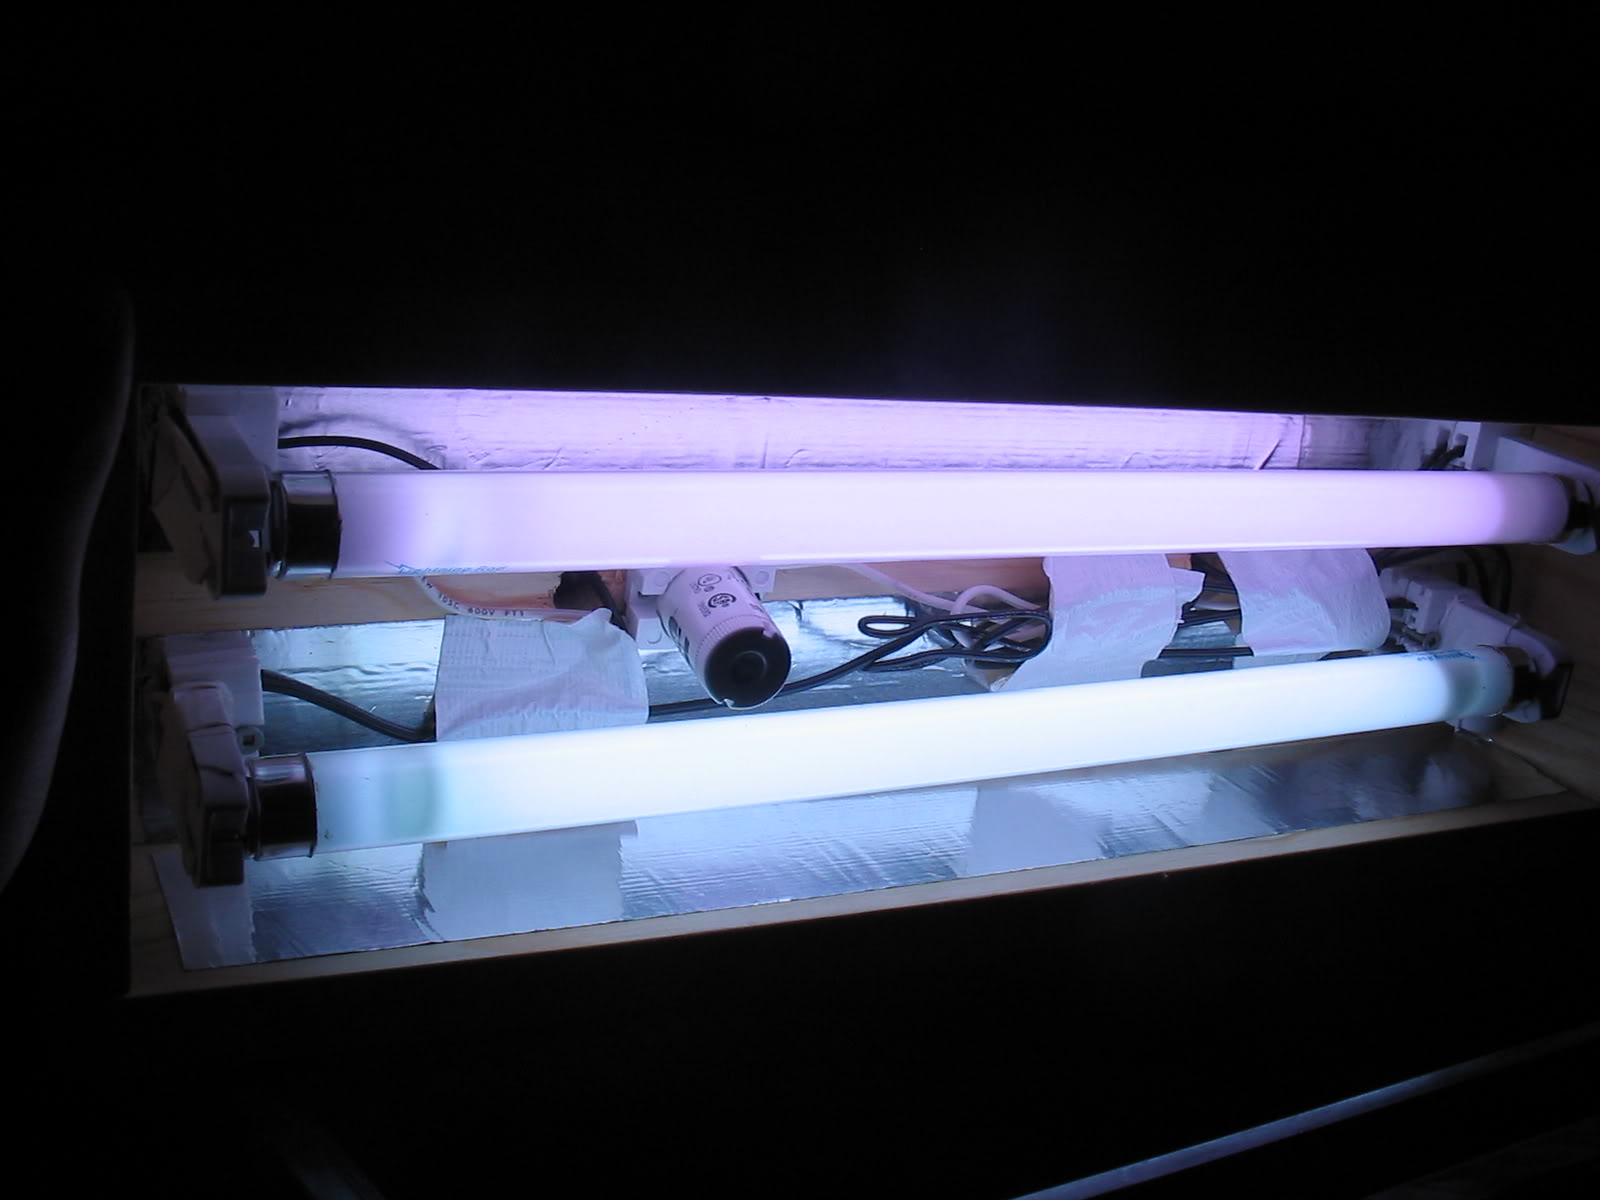
i just built a hood for my 5.5 gal tank. i used a fixture given to me that was made for a 15" bulb and i had another made for a 18" bulb. i put a 15" bulb in the 18" fixture and it worked fine. if u truly want to do to DIY then go to an electric supply store and simply ask for a ballast for however much light u need. i think 3 15" t-5 would be more than enough light. u can buy ballast that are made to support a variety of different combinations of bulbs. i have a ballast that is made to support up to 4 48" t-8 bulbs but i am running it at only 3 24" bulbs. very simple to hook up since the instructions are right on top of it. home depot sells alot of 18" light strips aswell so i am suprised u couldnt find any. the hood is also really easy to make. its only 5 peices of wood and u can use all glue if u arnt handy with drills and hammers. i really prefer a DIY hood casue u can make it exactly the way u want to.
here is the hood i just made. simple but efective. looks nice to :)
img_691040_0_b3a927206a947c5467e04b85b373f607.jpg

img_691040_1_73febecc47ca1e195eec74dd1d386de3.jpg

img_691040_2_7f05c14c1212c5c60a487bc8ea9f5d06.jpg
 
I have been thinking about setting up 8 sockets over my three 10 gallon tanks for lighting. All spaced evenly in the stand I built for them. Should be more than enough light. Paint the surface white for good reflection and voila, enough light for all 3 tanks. 3 of these bulbs over one 10 gallon tank would be awesome light but would still only be medium high light IMO. They would easily fit over the tank in a custom made fixture. On different switches you could even control how much light the tank gets through the day.
Sorry, I was thinking about putting in standard light sockets to use 20-25 watts screw in fluorescents, that's what i am thinking about using.
Good site for ballasts
I know nothing about overdriving them but I would assume a 25 watt ballast on a 17 watt light is overdriving and they have them.
 
that isnt overdriving. overdriving is when u use a ballast designed for more than one bulb but wire it up as 1. for example: if u have a ballast made for 4 bulbs but u only wire up 2(each end cap has room for 4 wires to go in like this .. .. and u normally only use 2 of the holes) it tricks the ballast into thinking that it is powering 4 instead of 2 and u get a bulb over driven 100%. or if u wired all 4 into one bulb(a little tricker to do) u get 400% overdrive(i think, correct me if i am wrong) overdriving is a great way to get more power over a smaller space but it also burns out your bulbs alot faster. its great if u are using cheapy bulbs from home depot but not if u are using good bulbs. if u power a 17 watt light with a 25 watt ballast it automatically(usually) sensors the size of bulb and adjusts the power out put. i hope that makes sense :)
 
Well, I was on the way to Home Depot when those last few posts came in, so I have what I have:

6" x 10' flashing for grounded reflector 4.48
2x florecent socket pairs 7.94
Machine screws for attaching ground wire to reflector 0.98
Washers for machine screws 0.98
8' power cord 6.14
2x Daylight T8 18" bulbs 13.18
Electronic 4F32T8 ballast (yeah, overkill) 29.97
Plywood leftover from other projects 0.00

Project total: $63.22

I hope to do assembly tomorrow. I'll let you know how it goes. I plan to run the two bulbs in serial, and overdrive them 2x. (15 watts * 2 bulbs*1.5 overdrive effect = 45 watts.) If I decide this is not enough, I may increase the multiplier. The max I could do with this ballast is 4x, creating 60 watts NO.)

The end effect will be similar in effect to the AH supply 2 x 36 watt Bright Kit for $62.99. All I'm really saving here is shipping. I wouldn't recomend this course for everyone. The Professionally assembled kits have better studied performance characteristics, and come with a warranty.

If you DIY this one, note that there were slightly cheaper ballasts ($20 range) that would have worked for this project, but the one I picked up could replace the magnetic ballasts on my main tank (no overdrive) if the little tank doesn't stay up. One of the two ballasts in the main tank is slow to light, so I'll likely be buying another ballast if the little tank never comes down.

mr funktastic said:
...it tricks the ballast into thinking that it is powering 4 instead of 2 and u get a bulb over driven 100%. or if u wired all 4 into one bulb(a little tricker to do) u get 400% overdrive(i think, correct me if i am wrong)
Minor correction:
2x overdrive, 100% gain in effective wattage
3x overdrive, 150% gain in effective wattage
4x overdrive, 200% gain in effective wattage

These numbers are rounded, the efficiency of the bulb is hurt by elevated temperature, which goes up with overdriving. There are also issues with the ballast factor going down with more wires in use.

BTW mr funktastic, I like the detailing on your hood. Did you do that with a router or molding?
 
Now that we are on the subject and I know it is not overdriven, is there any real performance difference to get a ballast that is F32T8 to drive a F17T8? I know it is overkill but if it helps in the performance and maybe makes the ballast last a little, if not a lot longer, it might be worth it. I don't think I would ever overdrive a setup but having the option of 4 bulbs in all different K ratings should make for a beautiful light color. That and I would probably burn the house down.
 
the ballast and bulbs will run alot cooler. i can hold onto my bulbs after they have been running all day and it is olny warm to the touch. compared to a stock hood that the ballast is made to support just the ublb size its made for. the ballast will also run cooler. dskidmore - i used a router. very quick and easy. i like it better than moulding becasue there are no seams where u attach the moulding. plus it is easier to do. thanks by the way :)
 
Sorry dskidmore, I didn't mean to hijack another thread. Is a lot of information I am going to need and I don't know how to ask the questions. Thanks for being patient and not yelling at me. ;) I wanted to be an engineer because electronics are just way out of my league.

I want to see what your hood looks like when it is done. The more I see the closer I am to doing my own.
 
fish_4_all said:
I want to see what your hood looks like when it is done. The more I see the closer I am to doing my own.
Will do. I hope to get initial work done tonight:

1. Will at least take stock of the wood on hand and assemble a box. (Nothing as fancy as funktastic's, plywood doesn't route too well.)
2. Will install reflector, likely just line the box, as I'm not advanced enough to make the perfect curved M reflector.

Might have to wait till tomorrow:
3. Physically install Ballast and end caps.
4. Wire it up.
5. Stand back with fire extinguisher, power up for the first time.
6. Test for RF interference, and if necessary, shield the wiring.

I have a digital camera, will take pictures as I go. You'll get to see the goofy background on this tank, that I made when I was a kid.
 
A) Forgot about a previous appointment, made no real progress today.

B) Flashing has sharp edges and is spring loaded. Learn from my mistakes. On the positive side, it doesn't look like it will have residual curl to work out.
 
Back
Top Bottom