Almost 100% diy 40g build

The friendliest place on the web for anyone with an interest in aquariums or fish keeping!
If you have answers, please help by responding to the unanswered posts.

jkdubs2

Aquarium Advice FINatic
Joined
Apr 22, 2011
Messages
585
Location
Missouri
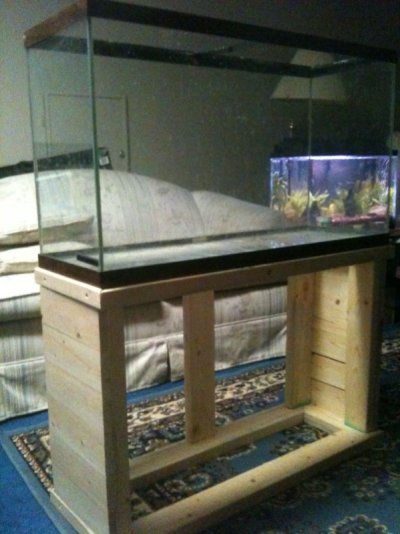
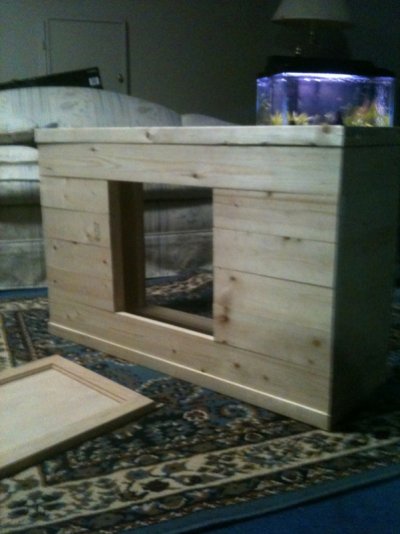
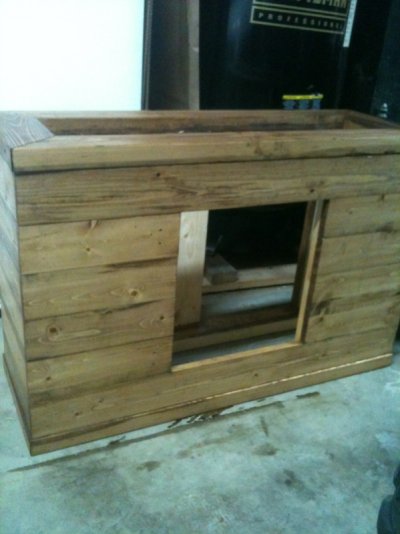
K so the actual tank is not gonna be built by me as I already have the tank and the heater will no be a DIY either for obvious reasons. But almost everything else is going to be DIY. I'm going to start with the stand and maybe do a canopy for it not sure tho. Any ideas on what types of DIY projects you guys would like to see, I'm all ears? It's goin to be a freshwater planted specifically for breeding inverts and feeder platties for now, for my turtles. But I wanted to do something fun. So we shall see how it turns out. Ideas?
 
So far I've got the stand mostly together. There a front panel and door to worry about and then staining it.
 

Attachments

  • image-2750032699.jpg
    image-2750032699.jpg
    152.4 KB · Views: 280
Heera said:
Nice stand! I will follow along. ;)

Thanks. I'm hoping to kinda bring together the cheaper easier DIY projects in one tank on one thread. So if u have any DIY projects you'd like to see let me know. I'll see if it fits into "cheaper than buying it" category and consider it! Total so far the stand has cost 15$. Gonna shoot for under 25$ total for the whole thing. Much cheaper than buying it!
 
Ok so today I got the front pieces of wood on and got a hole cut for front access to under the stand. I bought the wrong kind of hinges today so the door isn't on it yet. Tomorrow I'll be wood filling and sanding and staining if I have the time so stay tuned. it should be finished by the weekend or during the weekend.
 

Attachments

  • image-278650631.jpg
    image-278650631.jpg
    136 KB · Views: 224
Looks great so far. This under 25$ bit hard to believe. Wow. Plz list the materials and plan. I may built one in aug. when I am home for a month.

Any cool designs for canopy to come later?
 
Ok so far I've spent about 20$. I had some things around the house so they are not factored into the price. All listed below:

Four 2x4s total 10$ and change
1 door and hinges and magnetic closer total 8$ and change
Wood filler 2$ and change
Had seven 1x4s at the house that I got for free from my father. Total 0$
Screws I had already total 0$
Nails for nail gun total 0$
So far thats it. I'll have to buy the stain and poly so add prolly 8$.
Total time invested so far 3 hours of actual work.

I'll lay out the plans next post I do. I'm gonna run and buy the stain and poly so I have it. You should definately build one yourself though it's alot of "fun" lol. Mostly just seeing something you made turn out good and be put to use.
 
Ah yes I got my lady to pick the stuff up for me so here goes the plans

The total height of the stand is 2ft high. There are 5 support beams all 1'9". 3 are in back 2 are in front (4 corners and one is middle of back). Then I measured the width of the tank and added 3/4 inch to total stand width. Then I measured the tank length and add 3/4 inch to total stand length. Cut the bottom base and top base pieces to length and then cut 45 degree angles on the ends of the pieces so they fit together in a rectangular shape. Screwed the base pieces together and then screwed the support posts onto the base pieces (top and bottom bases). After that you can really just put siding on it the way you want. Oh btw all support pieces and bases were made from 2x4s
 
jkdubs2 said:
Ah yes I got my lady to pick the stuff up for me so here goes the plans

The total height of the stand is 2ft high. There are 5 support beams all 1'9". 3 are in back 2 are in front (4 corners and one is middle of back). Then I measured the width of the tank and added 3/4 inch to total stand width. Then I measured the tank length and add 3/4 inch to total stand length. Cut the bottom base and top base pieces to length and then cut 45 degree angles on the ends of the pieces so they fit together in a rectangular shape. Screwed the base pieces together and then screwed the support posts onto the base pieces (top and bottom bases). After that you can really just put siding on it the way you want. Oh btw all support pieces and bases were made from 2x4s

Thanks this is great. I am going to attempt it for my 90 gallon
 
Heera said:
Thanks this is great. I am going to attempt it for my 90 gallon

Cool let me know how it goes for u. You may need thicker wood for supports as well as more supports in case tank is too heavy when full of water. Just be careful.
 
I used an early American stain to make it look older. This is only a first coat I still have to resand and stain again then poly coat. It will be a bit darker when done.
 

Attachments

  • image-209035057.jpg
    image-209035057.jpg
    126.9 KB · Views: 204
So the second stain coat is done I have to wait at least 8 hours until I can apply the poly coat so I should be able to finish the first coat later tonight and have the second coat done by tomorrow. Hopefully I'll only need two. I'm ready for this part to be done! I wanna get going on the filter! I've decided tho to add an under cabinet light to this stand, doubt I'll need it and it isn't necessary to a stand build so I'm not goin to include it into my total cost but If anyone wants to know it was 10$ at Walmart.
 
Hated the polying and waiting. Looking good though. Patience is key.. following along.
 
scottayy said:
Haited the polying and waiting. Looking good though. Patience is key.. following along.

Thanks, got home late and just finished the first coat of poly. Hopefully it'll be ready to at least set the empty tank on it by Monday. I'll have more pics when I wake up later today of it after the second poly coat.
 
Back
Top Bottom