DIY 20 Gallon LED Hood

The friendliest place on the web for anyone with an interest in aquariums or fish keeping!
If you have answers, please help by responding to the unanswered posts.

yowen

Aquarium Advice Apprentice
Joined
Nov 16, 2012
Messages
11
Location
Michigan
Hey guys, I am new here, I've also posted in the introduction forum.

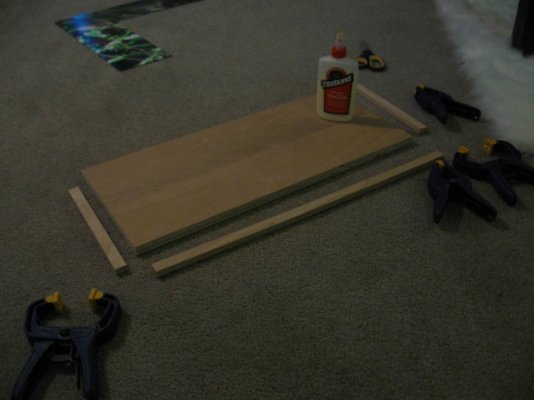
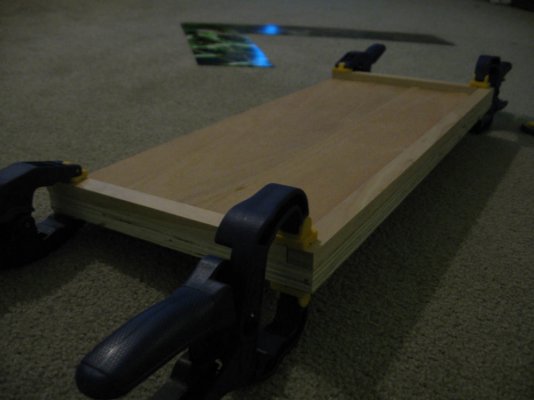
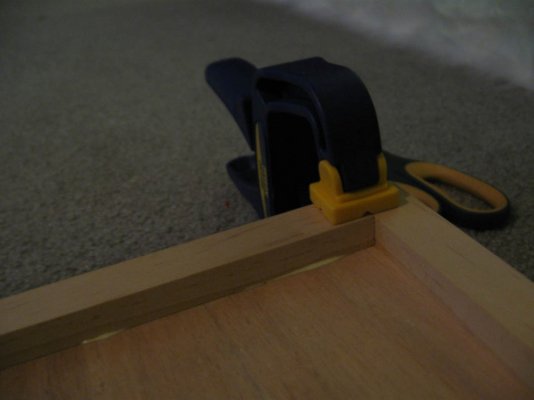
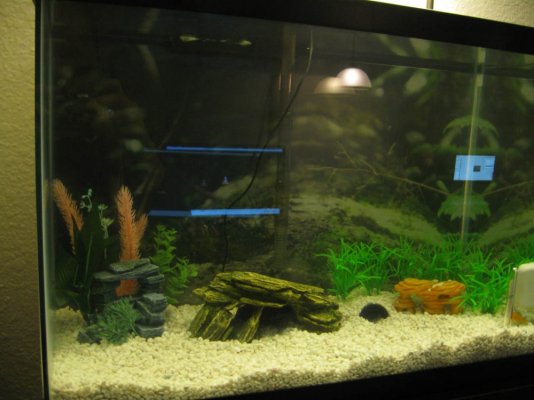
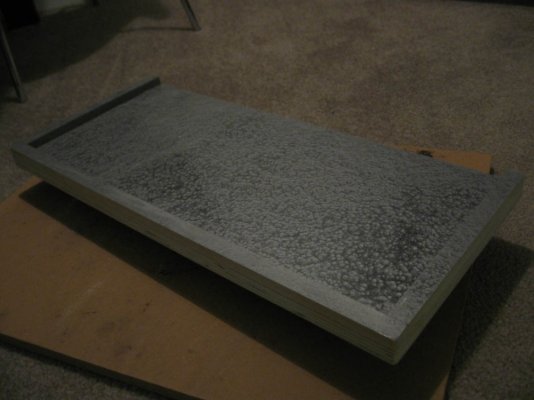
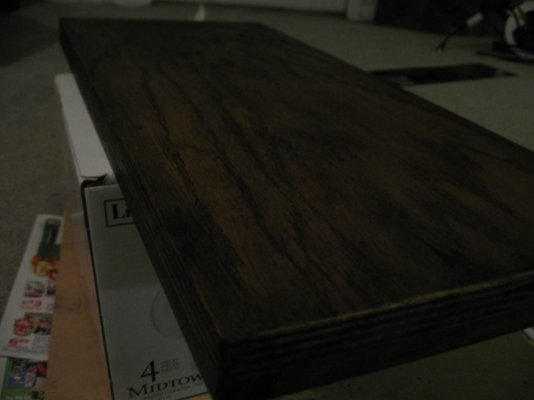
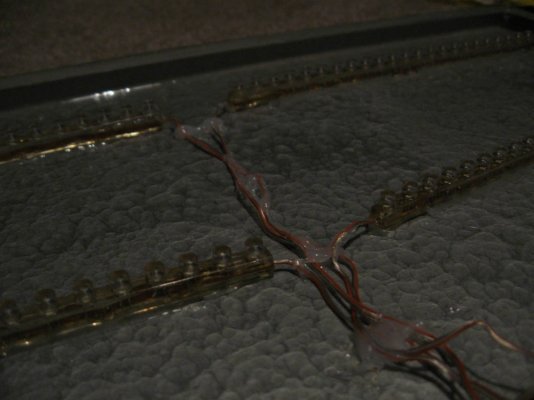
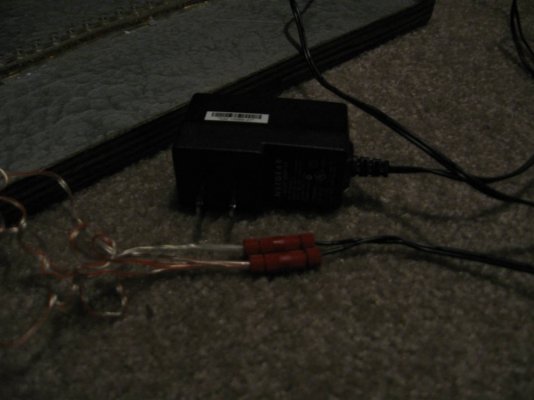
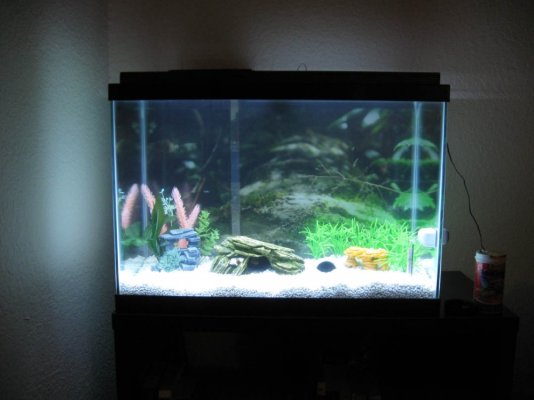
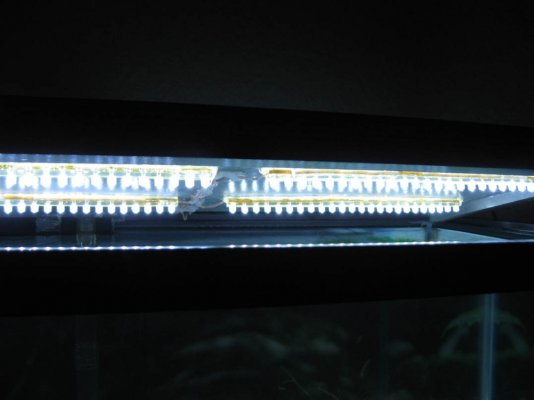
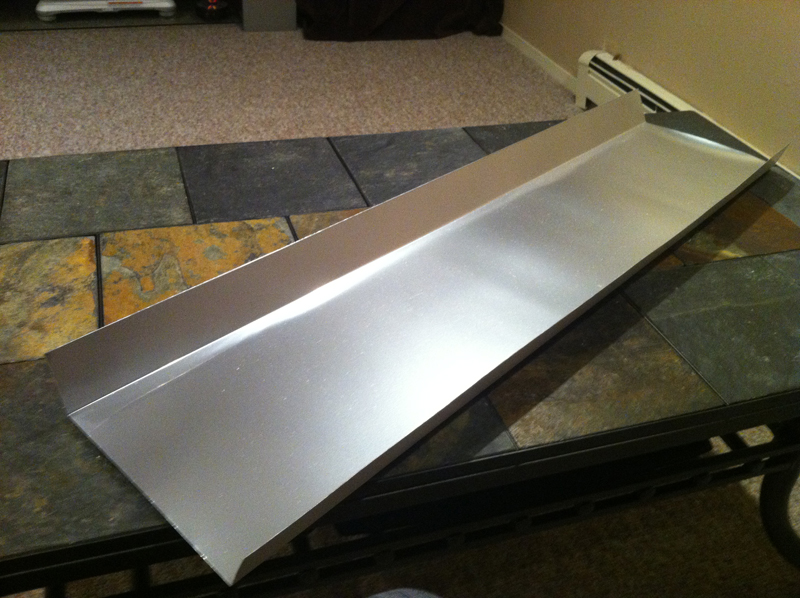
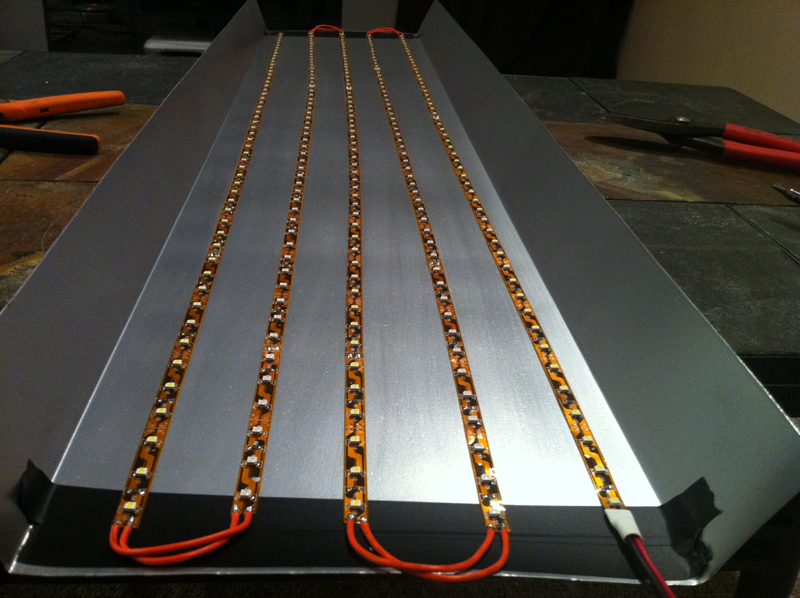
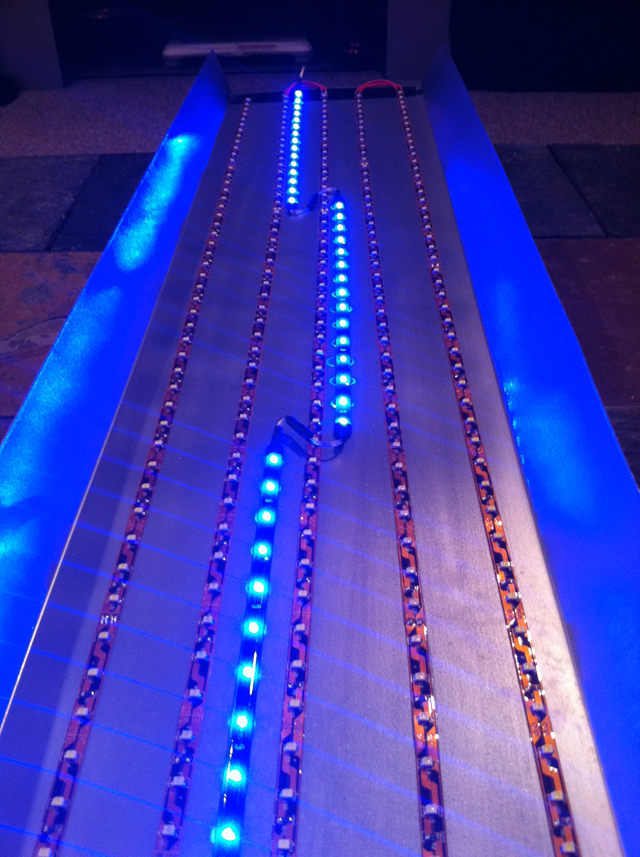
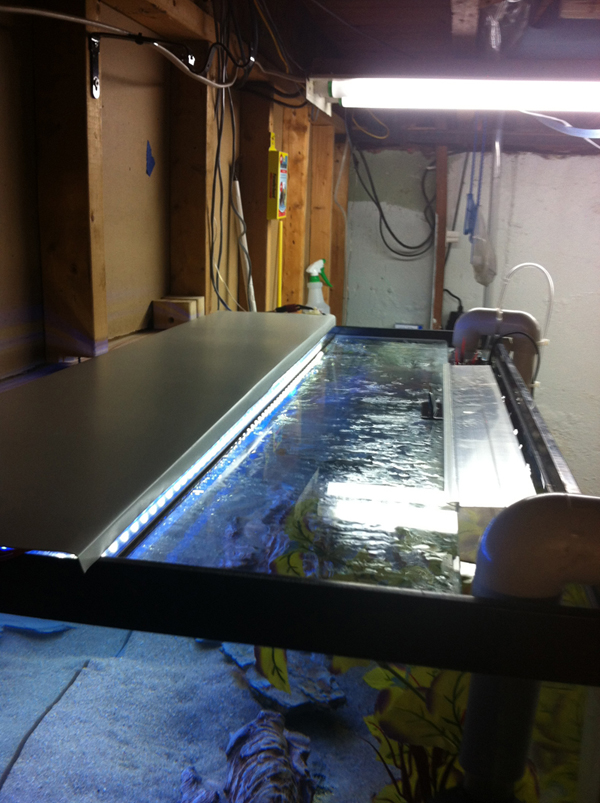
I have a 20 gallon freshwater aquarium that I am building my own hood for, I have 96 white waterproof LED's on order, they are 4 strips of 24 LED's each, the strips are 24cm long. I plan on taking a nice piece of wood and gluing 3 sides on it, maybe 1 inch tall. After that I'll spray the inside with a shiny silver (for reflection) and over that maybe a spray on polyurethane for some additional waterproofing, the outside I plan on staining espresso color to match the bookcase my aquarium is on.

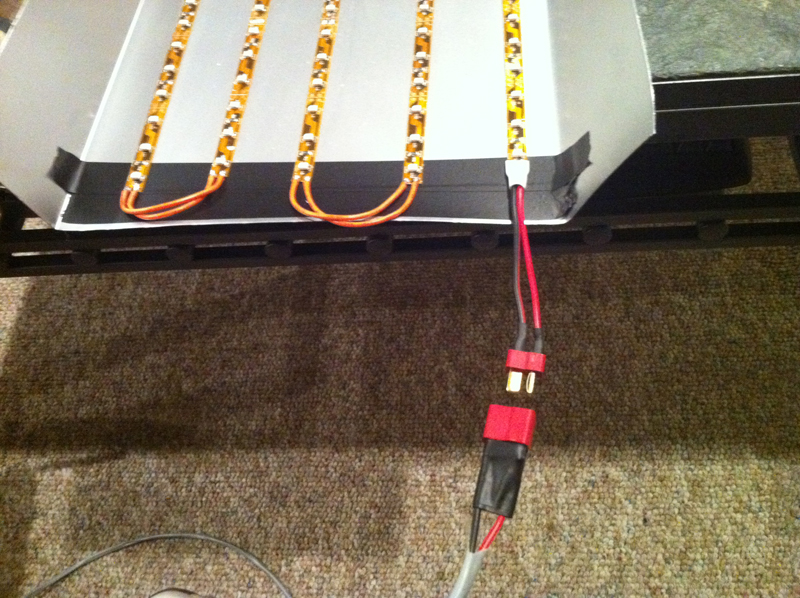
I am still working on how I will attach the strips to the wood and also how I will run the wiring, but that I will figure out as I go along.

I also may want to incorporate some sort of hinging mechanism so I can easily throw food in. Likely a piano style hinge.

This is the item list so far, I have most of it, except for a hinge.
- board 24" x 12"
- (3) sides 1" tall
- (4) 24-led strips
- wood glue
- wood screws
- power supply
- (need) piano hinge

Let me know what you guys think and if there is anything you think I should consider or change!

Edit: these are the LED's I have on order:
http://www.amazon.com/gp/product/B0056Z036A/ref=oh_details_o00_s00_i00
 
Sounds like a good plan. I would definitely go with poly all over the inside to prevent any rot of the wood. Post some pics of the build once you get going, we love pics! :)
 
Welcome to the site!

We love DIY stuff and pics here. Please keep us updated on your project. :)
 
Will do! Thanks guys. I am headed to Home Depot as soon as I get outta here! (work)

I will get some pictures as I work on it over the weekend.
 
Got started by cutting a board down to size and lining three edges with 3/4 inch cedar molding I think it was that I bought. Just waiting for the glue to dry so I can stain. Sadly I think it'll take about a week for the LED's to get to me.

As for a place to feed the fish, I've decided to borrow a hole-saw from work to make a feeding hole. The hole saw leaves a nice circular piece of wood that I can lay in the hole once I add some supports for it to rest on. That way there isn't a gaping hole.

I attached some pictures of what I've done so far. And also of the tank it is going on.
 

Attachments

  • IMG_1288.jpg
    IMG_1288.jpg
    167.7 KB · Views: 228
  • IMG_1289.jpg
    IMG_1289.jpg
    145.6 KB · Views: 227
  • IMG_1290.jpg
    IMG_1290.jpg
    125.2 KB · Views: 249
  • IMG_1292.jpg
    IMG_1292.jpg
    197.2 KB · Views: 304
Made some more progress. Got everything sanded down nice and smooth, then I spray-painted the bottom/inside with a textured silver spray paint I had leftover from another project after that I sprayed the inside with two coats of poly.

THe next day when all that dried I stained the outside with espresso stain followed by another two coats of poly.

Now it's waiting for the led's which I think I'll attach with silicone.
 

Attachments

  • IMG_1295.jpg
    IMG_1295.jpg
    167 KB · Views: 325
  • IMG_1298.jpg
    IMG_1298.jpg
    173.8 KB · Views: 248
  • IMG_1299.jpg
    IMG_1299.jpg
    122.6 KB · Views: 289
Looks great! I love the color of the stain! :) Keep us updated!
 
Today I went to Home Depot and picked up a tube of 100% silicone and siliconed all the seems on the inside of the hood.

After that I applied silicone to the bottom of each led strip and laid them out as you can see in the pictures (I used some tape to hold them in place while the silicone dried), then to hold the wires on I used gobs of silicone.

All the strips are hooked up to a 2 amp, 12 volt power supply from an old network switch I don't use anymore. This is powering all 96 leds.

I am very happy with the result, it provides ample light to the aquarium at very low power use.

In the end it cost me
10 bucks in led's (waterproof, amazon.com)
8 bucks in poly (home depot)
4 bucks in silicone (home depot)
some leftover wood, stain, paint and a little bit of time. Not bad, I say!

I still have to clean up the wiring, I have some nice sleeving in mind that I can "borrow" from work. Also at some point I hope to make a maybe 2 inch hole for feeding, once I get a hold of a holesaw.
 

Attachments

  • IMG_1304.jpg
    IMG_1304.jpg
    161.6 KB · Views: 254
  • IMG_1306.jpg
    IMG_1306.jpg
    154.4 KB · Views: 223
  • IMG_1310.jpg
    IMG_1310.jpg
    159.7 KB · Views: 260
  • IMG_1312.jpg
    IMG_1312.jpg
    118.9 KB · Views: 200
That's cool! Do you have a glass top over the tank, or are you going to use this right over the water?
 
I am using it right over the water, the led's are waterproof, you can submerge them without a problem. But they are just slightly above the waterline.
 
I see some people incorporate blue led's in their light setup, would there be a benefit for me to do that?
 
The Blue LEDs usually are for moonlighting. I sure am glad you made this thread, I want to do the same on my soon to be 20 gal tank!! Haha what a coincidence!
 
that's what i did to all my tanks, i made all diy LED hoods and they work great for a fraction of the cost.

first i make the housing
60421-albums10903-picture46798.jpg


add some LED strips and connect them up
60421-albums10903-picture46799.jpg


alternate blue and white to give a nice GLOW.
60421-albums10903-picture39237.jpg


i add a quick release for easy maintenance
60421-albums10903-picture46800.jpg


when i'm done, you don't even know the hood is there.
60421-albums10903-picture38884.jpg
 
Back
Top Bottom