DIY 40g breeder stand question

The friendliest place on the web for anyone with an interest in aquariums or fish keeping!
If you have answers, please help by responding to the unanswered posts.

Ceej

Aquarium Advice FINatic
Joined
Nov 6, 2011
Messages
567
Location
MI
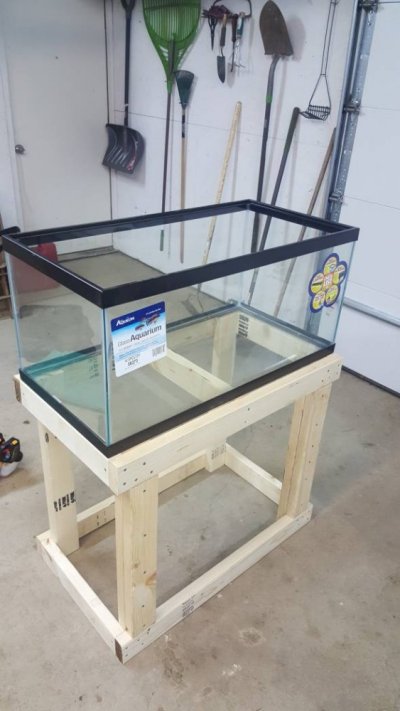
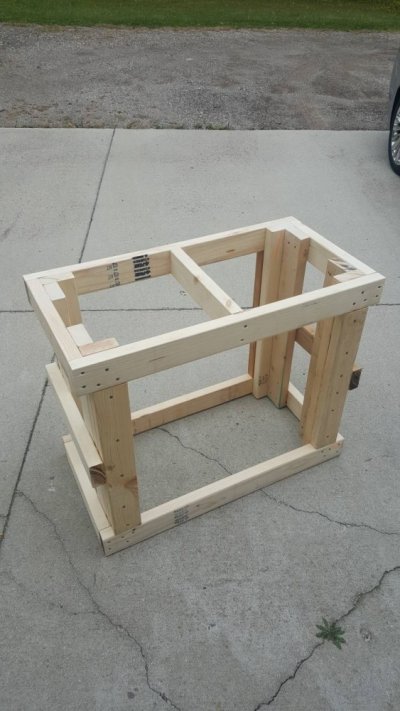
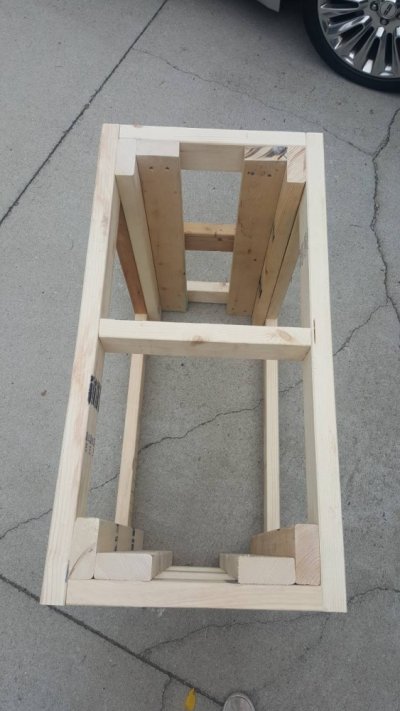
Alright, so I'm 95% done with my tank stand, just have to add 2 more verticle braces to the left and then 2 cross braces on either side. But before I got to that I realized I made a mistake! I cut the top center 2x4 to exactly 18 1/4 inches. Oops! Should've been 15 1/4. My question is (since I dont want to start over), is it fine how it is? Should I cut a piece of half inch plywood to fit and screw that down for added support? I really dont want the last hour or two to be wasted.

Let me know what you guys think. Thanks!20170901_223316.jpg
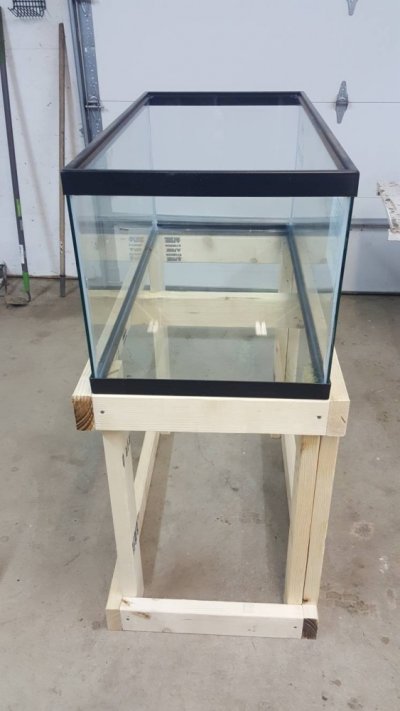
 
I guess worst case I can take the 5 pieces out that are running front to back, shorten them, then screw them back in. Just wanted to avoid back tracking.
 
Even if plywood helps, I'm not sure I'll like the lip. I'll shorten the pieces that need to be shortened. Anyway, here's a better picture. I definitely like the design. Found it on YouTube by a guy named Greg Jones. Probably going to put some tongue and grove-like boards on the side, then stain the whole thing. Or just drape a table cloth over it and call it good [emoji23] 20170901_224036~2.jpg
 
Corners of the tank? What about cutting plywood to fit and screwing that down to the top?


Ideally, you would want something nested between the top "rectangle" and the bottom "rectangle". Add another pair of 2x4s on the back vertical supports (similar to the pair on the front as in the last pic).
 
Make the front look like the back with the added 2x4 running top to bottom. A piece of plywood on top will add stability and reduce wobble factor. Use glue and 1 5/8" deck/construction screws. Screw every 6", 2 screws on each 2x4 joint on frame, I only see one on the picture.
 
When I finish it tomorrow, I'll have two more legs on the back side, two pieces on the sides to kind of tie it all together, and possibly plywood on top. But I've got polystyrene that will go under the tank to help self-level.
 
here's a good example for the corners stands built differently but it should show you corner support
just a nail into the 2 x4 like you have isn't going to support much but at least it can be easily corrected, just run 2x4s up on the ends to support the outer frame very simple fix
attachment.php
attachment.php


the second pict is easier to make out the framing ignore that the back of stand is in the front
it was just moved there till tank and stand were painted
 
Last edited:
Ive seen 3 tanks crack due to stress from polystyrene compacting causing like a twisting
once the tank is filled , you shouldn't need plywood or polystyrene on the top of stand if its level and supports the entire black frame of the tank
 
here's a good example for the corners stands built differently but it should show you corner support
just a nail into the 2 x4 like you have isn't going to support much but at least it can be easily corrected, just run 2x4s up on the ends to support the outer frame very simple fix
attachment.php
attachment.php


the second pict is easier to make out the framing ignore that the back of stand is in the front
it was just moved there till tank and stand were painted
"just a nail into the 2 x4 like you have isn't going to support much"

I've got all screws in this, not nails. But where are you talking about?
 
Oh, I see. On the side. There are two other screws into it on the front and back. I have 50 screws in this thing. However, there is no stress on any of the screws. I hammered in verticle pieces too for between the top and bottom horizontal pieces. Then I put 5 or 6 screws into that as you can see. The tank stand is strong. Look it up on YouTube. It's video number 133 by Greg Jones. My initial question is null and void. I fixed the stand to now fit the tank perfectly.
 
Ive seen 3 tanks crack due to stress from polystyrene compacting causing like a twisting
once the tank is filled , you shouldn't need plywood or polystyrene on the top of stand if its level and supports the entire black frame of the tank
Hmm, I haven't heard of tanks cracking while using polystyrene. I guess anything is possible though. This stand will be on carpet, and under the carpet is a floor from 1952. So I doubt it'll be level. The polystyrene is supposed to make any imperfections "okay". But, I can see if a section compacts/collapses, then that part of the tank would want to drop or twist. Good point!
 
you see how your out side rim has no support if you add a few pieces of 2x4 to each legs on each corner it will help better support sort of like a L. this will ensure your tank is well seated and strong with no sagging .

floor from 1954 that's new construction compared to my home built in the mid 30's
I keep a 90 a 40 and a 30g sump all on the same joist the floor joists in my home look like rail road ties they are huge

look forward to see your tank once everything is up and running
 
Last edited:
Dangggg! I wish my floor joists were that big!

I'll add more legs to create an L. Doesn't hurt to have more support. I'm not sure what I'll do for plants or stocking yet, but I'll browse around on here and get a good idea.
 
Doesn't matter if it's perfectly level as long as the entire rim sits flush to the stand with it empty. But of course your water fill lines all crooked and it looks bad. That's just what diy king said in video once. But the stand looks good, with the braces everyone's mentioned you should be fine
 
Thank you! Adding the extra legs was definitely a good idea. I still want to try the polystyrene, but I'll return it and get my $8 back :)
 
Back
Top Bottom