New Tank...Building the Stand

The friendliest place on the web for anyone with an interest in aquariums or fish keeping!
If you have answers, please help by responding to the unanswered posts.
Good eye Ziggy.

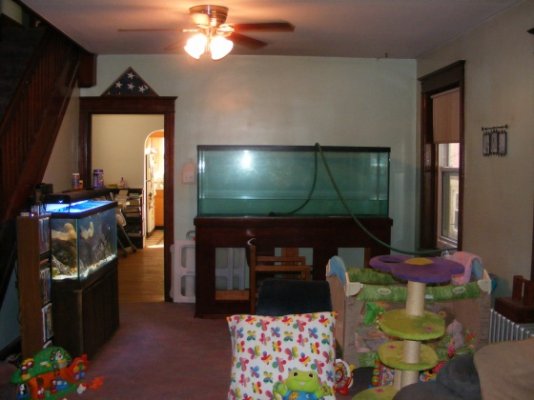
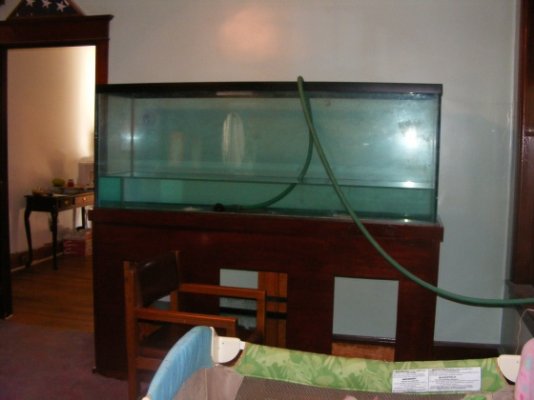
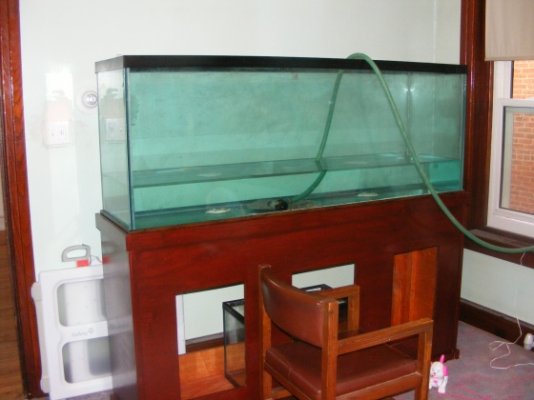
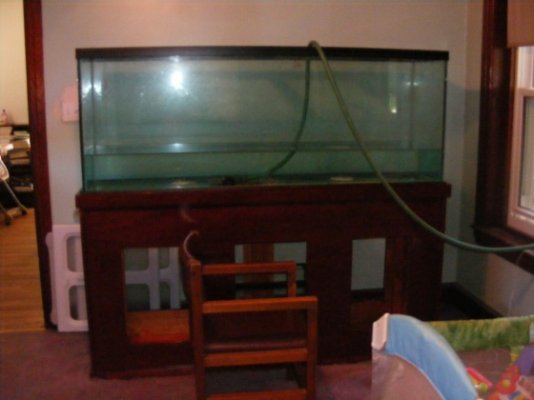
Looking at those pics even more, are both sides cut out? It looks like maybe the right side only has a section missing but the left side totally gone?

I've seen where people cut out their center cross brace and replace it with acrylic. The center brace has alot more stress on it than the side trim. I think if you got some Weld-On or a good epoxy, you can cut a strip of acrylic the entire length of the trim, probably about 18", and just glue it on the TOP the existing piece and the top of the front and back edge of the trim. I would not fill it before doing something first. Either try to repair it or contact the manufacturer for a replacement.

Looks great. Have a question though, why the 3 holes in the top and not just a solid panel for the tank to rest on? Will it be drilled through the bottom? Structurally not difference, just curious.
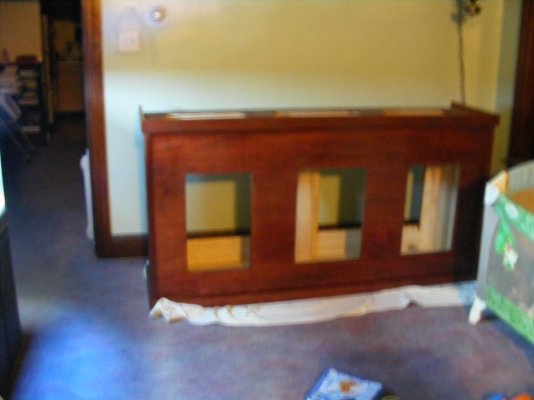
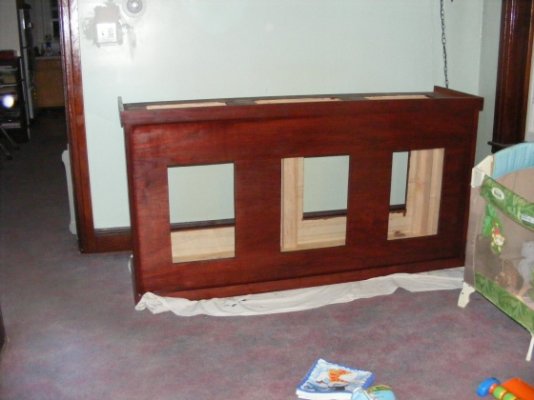
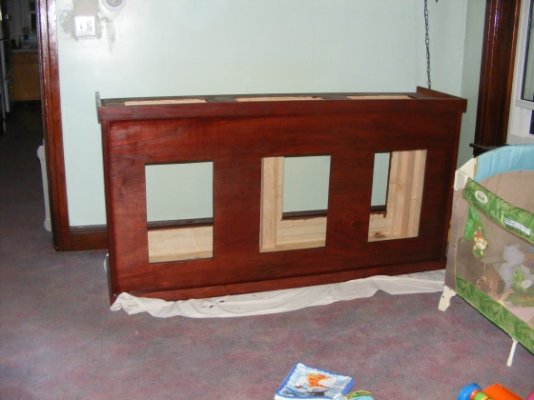
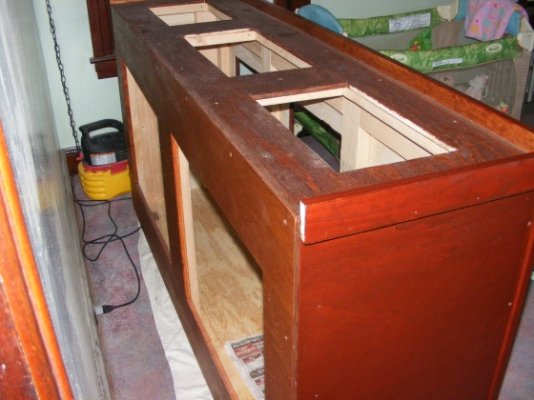
That is the 2x4 frame I believe, not holes cut in the plywood. I think the stand is upside down in a few of those pics where you see a solid top.
 
I'm talking about the pic on the left, the post before the invasion. If that's the bottom (which would/could make sense) then the trim extends beyond the cabinet no? But you're right further back up there is a shot of the solid top although he could have cut the openings out after the fact. Me, Iddda done 4x4 on the ends for a 150g. Just a personal preference.

I agree, it does appear to be missing on both sides

Cya on the high seas there Captain. Aaaaarrgghh
 
Now ya made me put my glasses on....lol.
Yep, I think your right. Looks like it was solid then holes were cut. Let's let the builder tell us for sure. ;)
 
Now ya made me put my glasses on....lol.
Yep, I think your right. Looks like it was solid then holes were cut. Let's let the builder tell us for sure. ;)

OK yes the holes have been cut into the ply ...I did this for several....(probably dumb) reasons.
1. Weight....This stand weights a ton(but definitly STRONG)
2. Moisture and dampness control . If for any reason water gets under the tank.....I do not want it to stay damp and cause problems to the stand by rotting the wood, even though the stand will be stained and water proofed.
3. The tank is drilled with 3 holes that are currently plugged. When I am ready for the Tank questions.....which I will be asking soon.....I may need these openings

Hope I am not wrong for doing it this way. I was just trying to do the best stand for my first DIY


Thanks for all your comments.....They are greatly appreciated!!!

Barry
 
All makes perfect sense. Well except for #2. Your tank will fully cover the openings sooo there won't be any circulation there to control any moisture.

Again, it looks great. Look forward to the canopy. I'm right down in south jersey/
 
Finding the frame

Seems I may have to do this myself out of wood. I have not found a distrubutor that makes a frame that large....Does anyone see a problem with making it from 2x4's I can use the broken piece as a template and make it the same size....with glue and nails....will it hold? was also looking into a steel corner piece as well to hold the corner in place as well....
what do you think????
 
I would not use wood. It can definitely bow and warp with stress on it in such damp conditions. I would use acrylic, maybe 2-3" wide, and glue it with Weld-On or epoxy to the top of the sides and top of the front and back trim pieces.
 
ok here is an update w/pics

OK the doors have been cut out of the front and the staining has begun. I am using a minwax mix of stains to match the woodwork in my house. I am still trying to work out the top frame problem....hmmmm I wonder if Ziggy still has the frame from his broke 150 tank???? I'll have to ask him!!
 

Attachments

  • Fish Tank 054.jpg
    Fish Tank 054.jpg
    61.3 KB · Views: 55
  • Fish Tank 057.jpg
    Fish Tank 057.jpg
    72.9 KB · Views: 79
  • Fish Tank 058.jpg
    Fish Tank 058.jpg
    75.4 KB · Views: 79
  • Fish Tank 059.jpg
    Fish Tank 059.jpg
    93.4 KB · Views: 39
I responded to your question. Even if I did have it still my 150 was 48x24x30 so it would not have worked for your tank.

I agree with cccapt, get some acrylic and make the trim with that. You will have far better results with the acrylic then wood.
 
ok!!!! Great news....I talked to the people at that fishy place in Lancaster,PA and they have the frame for me....after a couple of weeks of trying to find this....here it is in my backyard....just an hour away!!!! NOW I AM EXCITED!!!! I have also polyed the first coat on the stand....it now looks like a piece of furniture!!!!Wifey is even excited!!!!!
 
first leak test

ok first leak test......so far only 1 found.....drained and replace seal that was leaking!!
 
pics

pics of leak test
 

Attachments

  • Fish Tank 066.jpg
    Fish Tank 066.jpg
    80 KB · Views: 222
  • Fish Tank 065.jpg
    Fish Tank 065.jpg
    63.6 KB · Views: 216
  • Fish Tank 064.jpg
    Fish Tank 064.jpg
    69.8 KB · Views: 212
  • Fish Tank 062.jpg
    Fish Tank 062.jpg
    61.8 KB · Views: 184
Looking good.
When you go to That Fish Place, make sure to sign up for the Perferred Customer program. They send you flyers about upcoming sales plus you get a coupon every month for 30% off 1 item in the store on Wednesdays.
 
Tfp

Looking good.
When you go to That Fish Place, make sure to sign up for the Perferred Customer program. They send you flyers about upcoming sales plus you get a coupon every month for 30% off 1 item in the store on Wednesdays.


Thanks for the nice words ccCapt...I have had the card for awhile now...It does have some nice perks!!! Let me know if you are heading up there....I will try to meet you there and introduce myself!!

Barry
 
I might be there for the Customer Appreciation Sale on Sept 27-28. Our reef club, NCPARS, will have a table set up to try and recruit new members.
 
Back
Top Bottom