mrbee2828
Aquarium Advice FINatic
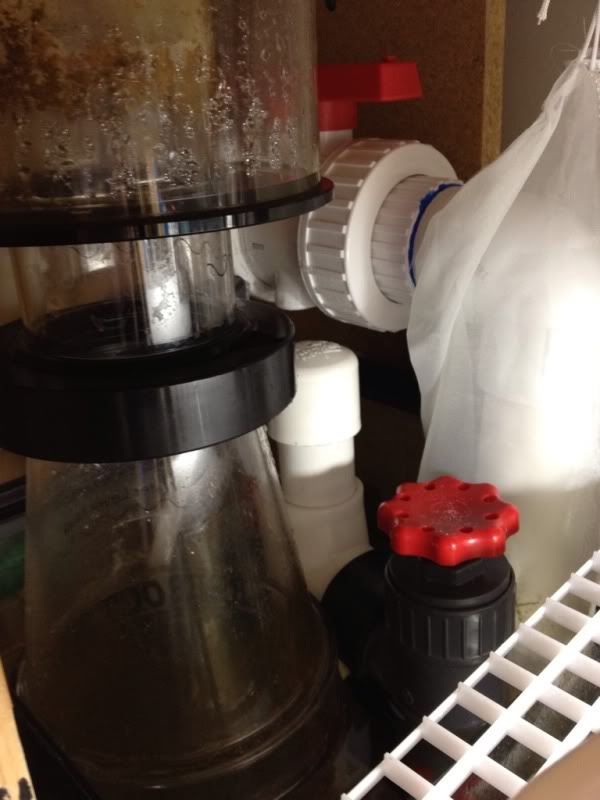
I saw this mod on Reef Central after recently purchasing the NW-150 and instantly being annoyed at the return noise. This is an amazing skimmer but you have to buy a $50 part from CoralVue if you want it to be the bee's knees so to speak. Here is a ~$15 mod give or take parts.
NOTE: The reason that the CoralVue part price is rather high is that the plumbing is metric which is next to impossible to get state side and when you can it's not cheap. Rather than increase the price of the skimmer and include this, it's an option. However, with a quick hack you can have this going for 1/4 the price. Depending on how many builds you've done before, you may have some of these parts already making it even cheaper. Here is the official part: Reef Octopus Protein Skimmer Output Vent Accessory | CoralVue
There are 2 possible ways to do this. I think both come out to the same price but I didn't want the heavier and bulkier 2" look. This build covers method A.
Part List (method A):


If you go with method B you are basically going to wrap the end of the 150's T in plumber's tape and then you are going to slide the 2" T over the outside of the T. Repeat the rest with 2" parts.
NOTE: The reason that the CoralVue part price is rather high is that the plumbing is metric which is next to impossible to get state side and when you can it's not cheap. Rather than increase the price of the skimmer and include this, it's an option. However, with a quick hack you can have this going for 1/4 the price. Depending on how many builds you've done before, you may have some of these parts already making it even cheaper. Here is the official part: Reef Octopus Protein Skimmer Output Vent Accessory | CoralVue
There are 2 possible ways to do this. I think both come out to the same price but I didn't want the heavier and bulkier 2" look. This build covers method A.
Part List (method A):
- 1.5" Flexible Coupling
- 1.25" T
- 1.25" PVC (8")
- 1.25" PVC Cap
- 2" T
- 2" PVC (8")
- 2" Cap
- Plumber's Thread Tape
- Miter saw (electric or hand)
- Razor blade (for method A)
- Clamp
- Sandpaper
- First you'll want to cut a 45° angle on the end of the 1.25" PVC.
- Then measure up 4" and cut a 90° angle for the lower portion.
- Measure up 4" more and cut a 2nd piece for the upper portion.
- Sand your cut ends and clean up the pipe.
- If you are going with method A you'll want to cut the flexible coupling down some. Put the metal clamps aside for a future project and trim it down to about 2".
- Now crack your knuckles a squeeze the coupling over the T and the gate valve from the 150.
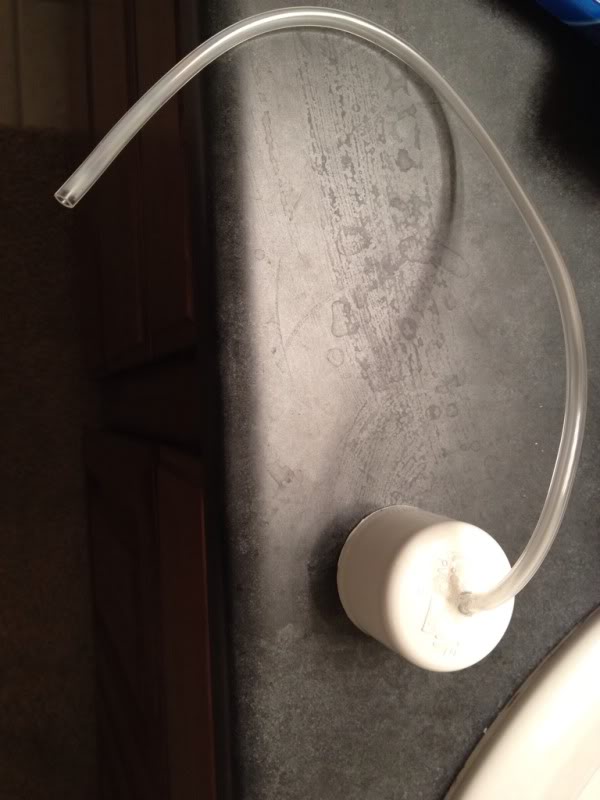
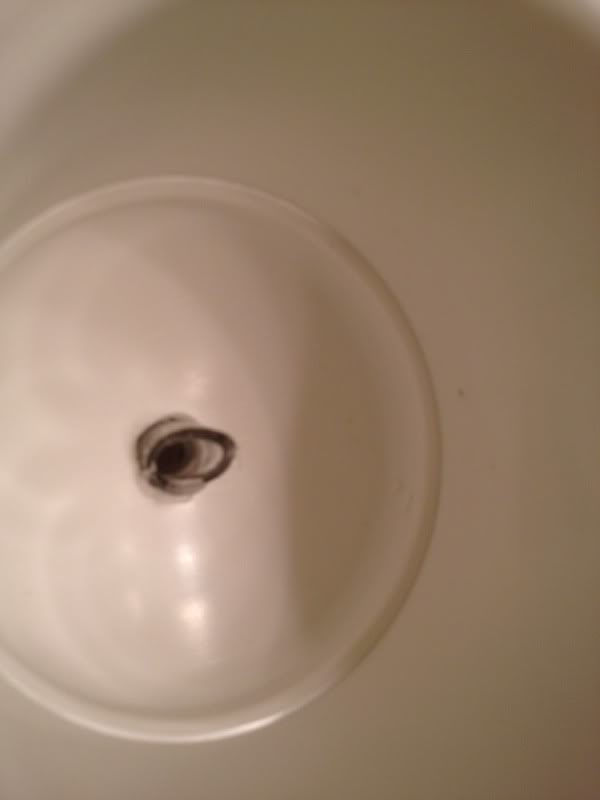
- Grab the 1.25" cap and drill a small hole at the top. I think I used a 1/8" bit. Start small and go up a bit or 2 if there is too much pressure.
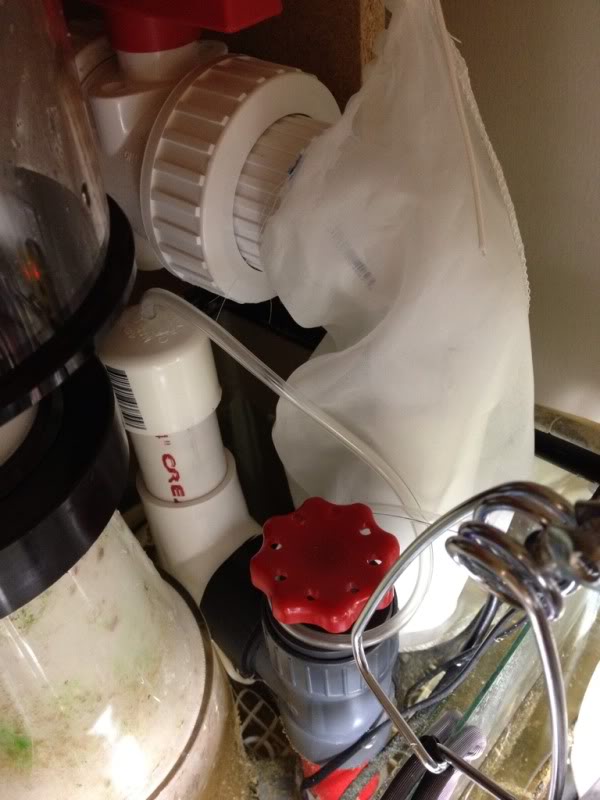
- Assemble the other parts with the 45° piece on the bottom and the cap on top.
- Stick it in the 150's elbow and shut that thing up!!!!!
If you go with method B you are basically going to wrap the end of the 150's T in plumber's tape and then you are going to slide the 2" T over the outside of the T. Repeat the rest with 2" parts.