125 gallon build log

The friendliest place on the web for anyone with an interest in aquariums or fish keeping!
If you have answers, please help by responding to the unanswered posts.

neilanh

Sliced Bread
Joined
Dec 25, 2006
Messages
8,482
Location
Northern Virginia
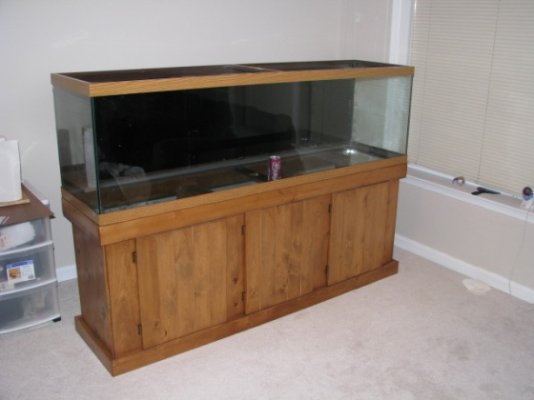
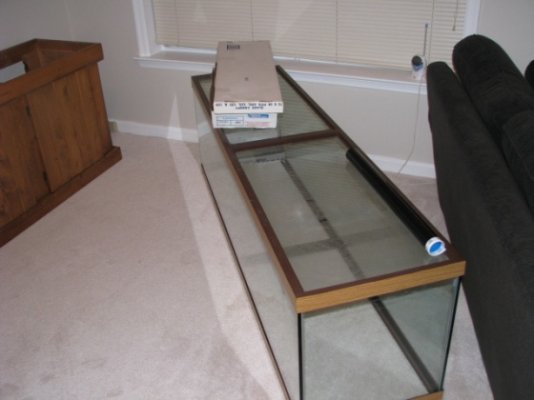
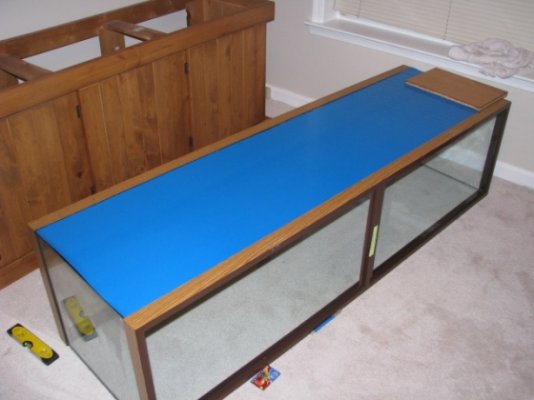
So, it's starting. 125 gallon ( 72 1/2 x 18 1/2 x 23 3/8 ) FW planted tank. I've been debating what to do with this tank for a while now, but it's time to finally get down to business.

I've decided on 2 36" TEK 4x39W fixtures for lighting, mixing the midday (6000K) bulbs and the 10000K bulbs for starters. That should put me at around 2.5WPG, which is probably more than enough.

I already have pressurized CO2, just may have to upgrade my 5# tank to accomodate the larger tank at some point.

For filtration, I'm debating whether a pair of XP4s will be too much. May drop that down to a pair of XP3s. I really like the Rena filters, currently running 3 of them for a year now with no issues.

Substrate is still on the table. I had convinced myself to go with the Schultz Aquatic Soil, I'm running that in my shrimp tank right now and have had huge success with it, plus you can't beat the price. But kind of wishing to go with a darker color, but don't want to spend the $$ on a full run of Eco, and I hear Turface MVP and SMS are no longer readily available. Any other ideas?

Probably going to start out with rainbowfish as the center, with the grand idea of going Discus ultimately with it. There will be a wide array of plants once I get the hardware up and running.

Off work for a week, parts going on order today, and hoping to get a bulk of the stuff underway next week.
 
Where did you hear that Turface MVP is no longer readily available? I just checked the manufacturer website and it's still listed with the rest of their products. I'd recommend contacting them for a list of retailers in your area before ruling out Turface as an option.
 
I just recall reading that somewhere recently. I'll doublecheck it. Never used it, do I need to mix peat or anything with it?

Lights are ordered, expect to be here on Wednesday the guy said. Called him up and he gave me a huge discount too. Thanks Seeds Etc.!

Also just won an XP4 on ebay for $125. Now I just need another. Maybe an XP3. But, the one is enough to get me started.
 
Last edited:
You don't need to mix anything with the Turface MVP. It can be used as is, though you'll of course want to rinse it some.

Sounds like you're making quite a bit of progress. I look forward to seeing pictures.
 
I think a 125 gal planted discus tank would be fantastic! Of course it is no secret that I love planted discus tanks.
 
Picked up the stand today from Centreville Aquariums. I chickened out on building my own, and they had them in stock.

Tomorrow I'll move the 29 up to my bedroom, as it's sitting in the place the 125 will go. I expect to start receiving equipment on Wednesday, so between now and then I'll get everything cleaned and prepped as much as I can. I'm going to hang the lighting over the tank, so I'll have to rig that up. Quick trip to Lowe's tomorrow should cover that rather easily.

Pics when I start to get everything in place.
 
So, it's the SMS that's being discontinued, not the Turface line. Noone, however, in my area carries the MVP, only the pro-league, which is a much smaller grain than I wanted.

So, I happened upon a place that had a few bags of SMS charcoal left, so I bought it up. Think that's what I'll use. Some have suggested mixing in some black fluorite to give it some added weight, but I'm not sure about that yet.
 
Some progress

Made some progress today.

Had to move my 29 gallon that was sitting where I wanted the 125 to go. That got moved to the other side of the room, where it will reside until the 125 is up and I can transfer the stuff I want out of it. Then it will be moved upstairs into my bedroom, on the wife's request. She's decided it's her turn to give aquascaping a go, so the tank will be torn apart and redone from the ground up later on.

Once everything was moved around my basement, got the stand in place and leveled off, ready to accept the tank.

The tank was cleaned, and I started the background process. Black background installed using the "oil method". I've had huge success with this method on multiple tanks so far. Well, on a 6' tank, it's much, MUCH more difficult. Work is still underway on getting out all the air bubbles, but it's getting there (hopefully).

The first of 2 XP4s arrived today as well. Watching ebay for another good deal on the second one. Got this one for $125, won the auction on Saturday, and even with the Monday Holiday it still got here today. Very impressive. Hoping that my lights will arrive tomorrow. Got all the stuff I need to DIY hang them using electrical conduit and chain last night at HD. Prepping that is tomorrow's project. F&S slacked a bit on shipping my order I put in over the weekend, but hopefully it'll be here this weekend - that includes my heaters and UV and miscellaneous parts I need.

Few pics to get things going.

LOL - looking at these pics it doesn't look that big, does it?
 

Attachments

  • IMG_1896.jpg
    IMG_1896.jpg
    48.5 KB · Views: 178
  • IMG_1897.jpg
    IMG_1897.jpg
    60.7 KB · Views: 158
  • IMG_1898.jpg
    IMG_1898.jpg
    70.4 KB · Views: 121
Last edited:
Looks good, I'm anxious to see how the substrate looks. I love the Discus and German Ram tank at my LFS. Its a cool combo and both look awesome in a planted tank. I still like the idea of a tank with 400 neons though. :)
 
Looking good, I can't wait to see how it goes along as you progress. Having 2 6' tanks I can empathize with backgrounds. I gave up and painted mine. :)
 
So, the secret to the background is lots of oil. Never realized that the oil not only adhered the background to the glass, but also lubed the air bubbles so they can get out easier. Go figure!

Background isn't 100% perfect yet, the edges are still lifting a bit, I'll finish those up later. Was anxious to get it up on the stand and start working the light hanging fixtures (thats why it's pulled away from the wall).

Size reference included in this one.
 

Attachments

  • IMG_1902.jpg
    IMG_1902.jpg
    58.5 KB · Views: 111
Light Hanging

So, UPS reports my lights are on the truck for delivery. Time to get busy today, as I've been taking my week off to be more lazy than productive.

I don't know who originally came up with this idea, but I got the idea from another member of GWAPA that shared with us how to do it, so I take no credit.

I'm hanging 2 36" TEK 4x39W lighting fixtures over this beast, and here's how I'm doing it.

Supplies (everything you can find at lowe's or home depot):
4 10' 1/2" electrical conduit tubing
8 "2 hole strap" (as they're called) to hold the conduit in place
Tube Cutter
1/2" aluminum Hand bender
Tape Measure
Sharpie
4 eye bolts
chain of choice
S-hooks

First, 1 piece of conduit and the tools needed. The large "thingy" is the hand bender (although you use your foot, shouldn't it be a foot bender?)

IMG_1903.JPG


Mark off where you want the bend. I want the conduit to run right around the 6' mark. So, I marked off 4' and set the edge of the bender to that point, and bent.

IMG_1904.JPG


Repeat for the remaining conduit

IMG_1905.JPG


Next, stand one up next to the tank and check the height. I ended up 6" higher than I wanted. So, I trimmed 6" off the bottoms of each of them. I wasn't sure the radius the curve was going to be, so I made sure there would be slack at each end to play with.

IMG_1907.JPG


Now, check the bend radii on all of them for consistency. As you can see, I have 1 piece that wasn't straight when I bought it. Lesson learned, check that at the store. I was able to manipulate it into place using my knee, however.

IMG_1908.JPG


Now, this left me very long on the top side, so I had to trim off 25". I targeted to have the end of the conduit match up with the front edge of the tank. I may adjust this later a few more inches to protect my eyes and forehead, but don't want to get too far ahead before the lights arrive.

So, here they are, ready for the lights. I can't attach them to the stand yet, again need to verify everything once I have the lights before I start drilling holes. Here you can also see the "2-hole straps" I'll be using to attach to the stand.

IMG_1909.JPG


Hopefully the lights get here soon. I'd love to have these hung tonight, but I doubt it. Weather isn't cooperating, as I plan to paint the conduit black to match the chain I selected and the color of the lighting fixtures. Lots of ice came last night, and I don't know that the wife would appreciate my painting in the garage. We'll have to see.

I'll finish this write up as I finish out the project showing how I'll actually set this up and hang the lighting from it. Just need the lights to arrive. Wait, did you hear that? Was that the UPS man? Oh, nope, not him.

Since I was waiting, I went ahead and cut eggcrate to mask the bottom of the tank. I plan on using some rocks, one of which is over 40 pounds, so this is just for my peace of mind that a point is going to get down to the glass.

IMG_1910.JPG
 
Last edited:
Completed the hanging, the conduit has been painted and is outside drying. Here's the first one that went up. Minor adjustment to do to the left side conduit, as you can see it's not perfectly straight. I'll correct that when it goes back on after painting is complete.

IMG_1914.JPG


Before paint I trimmed 6" off each of the fronts, and I'll pick up some black rubber caps to go over the ends. That should complete the project. Pics when it's all up. I'll also post pics of the attachments in the back.
 
Looks very nice. I like that idea for hanging the lights. How's it fasted to the stand/wall/etc? You could also add a couple of hooks that would allow you to quickly shorten the chains by creating a loop to get them out of the way for working in the aquarium.
 
Yup, just what I'm doing. Using S-hooks allows me to hang the lights high or low within seconds.

I'll post pics of the attachment points once they're in place.
 
Lights are Finished!

Finished up the lighting this afternoon. Here's the completion of the hanging story.

I knocked off 6" from the fronts after getting the first light hung. That'll give me some headroom. After painting with just regular flat black paint, reassembled everything and got the lights hung. I also found "leg tips" which are the rubber caps at the end of the conduit. This should also ensure no cuts or bruises on my forehead.

Here's how I attached the conduit to the back of the stand using the "2-hole straps".

IMG_1919.JPG


IMG_1921.JPG


IMG_1922.JPG


Attachment at the chain to conduit interface using S-hooks. Also the "Leg Tips" cap:

IMG_1923.JPG


And, just for reference, the attachment at the lighting fixture. These lights come this way, so I didn't need to make any modifications. The rear Eyebolt that you see unscrewed is to adjust the level front to back. I'll discuss that in a bit.

IMG_1924.JPG


The finished project:

IMG_1916.JPG

IMG_1917.JPG


And, as mentioned before, here's why S-hooks were used at the top. This raising of the light took me all of about 4.38 seconds:

IMG_1918.JPG


The only issue I didn't foresee was making the lights hang level and even with one another. The weight of the power cords causes them to push to one side or another, and not just hang naturally. I can't zip-tie the cords hard in place, because that would take away the ability to easily raise and lower the lights. Any suggestions here? I can tolerate it the way it is, but would like to find an easy solution. I'm thinking velcro straps possibly.

So, that completes the hanging of the lights. Again, wasn't my idea, I stole it, but I like it very much.
 
Substrate is in

So, got the tank moved back against the wall and starting washing and adding substrate. Soilmaster Select Charcoal. Opted to not mix anything in, we'll see how it does. 100 pounds of the stuff, put me at around 4" uniform accross the tank. I was aiming deep, based on my experience with the Schultz, which I expect this to be very similiar to. I'll plow this stuff around into some features after the hardscape is in.

IMG_1928.JPG
 
Very nicely done. Thanks for the extra detail shots on how everything is put together. As far as fastening the hooks, what about those zip strips with the hanger loop on the end. you could fasten them tight around the cords at key points, and then have a hook or some such that you attach the appropriate zip tie to depending on the height. Not sure I explained that at all well.
 
Back
Top Bottom