The slow 112G jungle tank build ...

The friendliest place on the web for anyone with an interest in aquariums or fish keeping!
If you have answers, please help by responding to the unanswered posts.
Yes, it was hard to tell with my depth perception but I can see what you mean. I think I would be tempted to trim depending on tank width. I must confess though that every visitor I've had look at the tank, just go "ooohhh, pretty". Nobody seems to care much except us :)
 
I spent some time today creating these supports that I'm going to attach to the back of the stand. These will have several PVC support brackets attached to them to support the plumbing behind the tank so that the bulkheads aren't carrying any weight.

img_3378570_0_77751b95158e4727dc57ee8bb2a6f14a.jpg


img_3378570_1_d7cd93694a7508adac236a26f0ce0357.jpg


They are made out of teak wood so that I don't have to worry about sealing them or them getting wet.

Thanks,
Harry
 
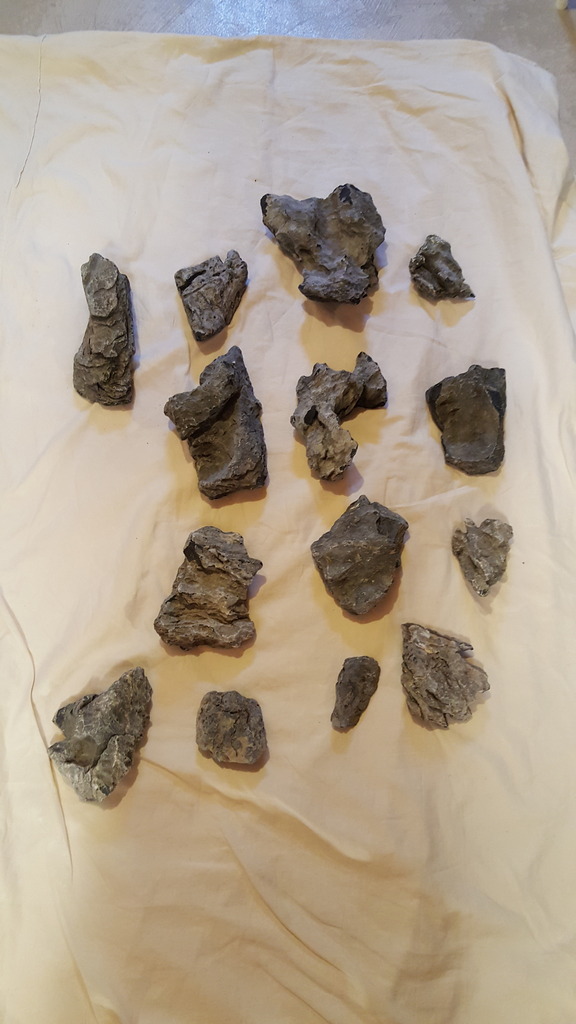
I was back to doing aquascaping stuff yesterday and decided to give my "seiryu" stones the muriatic acid treatment. Here's the before picture of all the rocks I got to work with.

img_3378841_0_d5b2c69c61a77844fe8a65e6760b9344.jpg


Muriatic acid can be quite dangerous so I took all the recommended precautions.

img_3378841_1_8f3d38ae9360955cfb1f83d13cbdbbed.jpg


Although in hindsight I should have used the carbon filters in addition to the particulate filters I had on my mask.

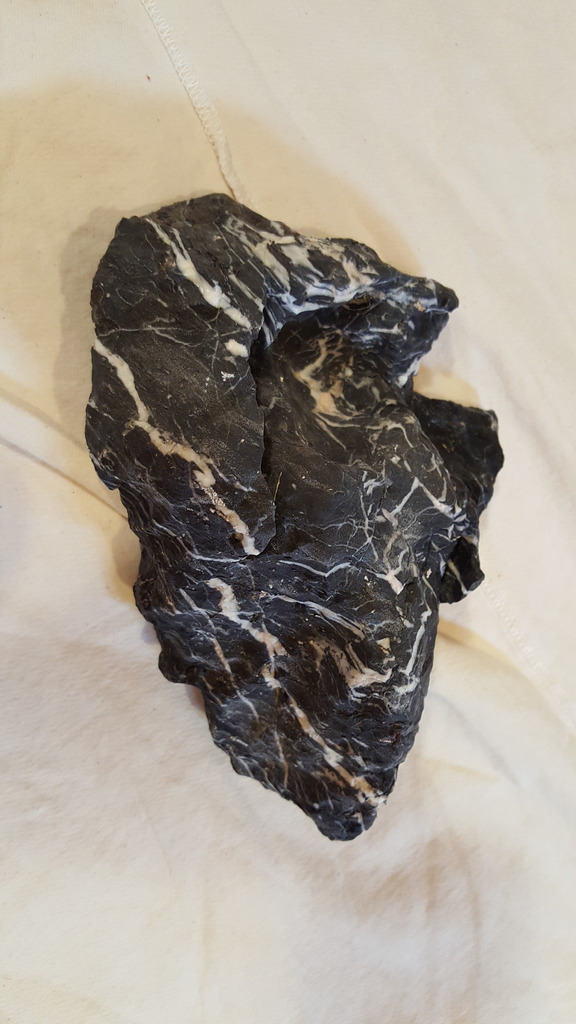
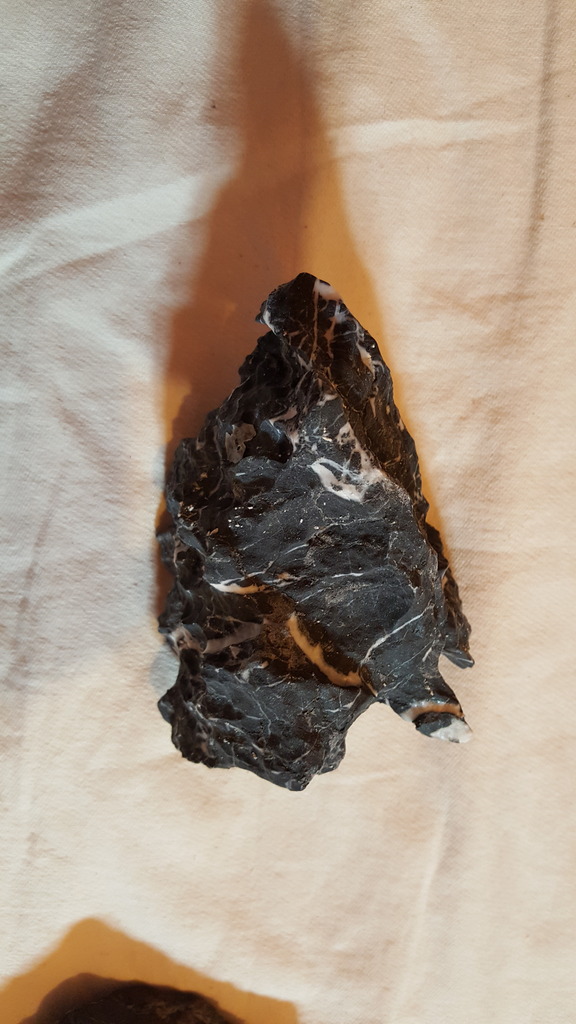
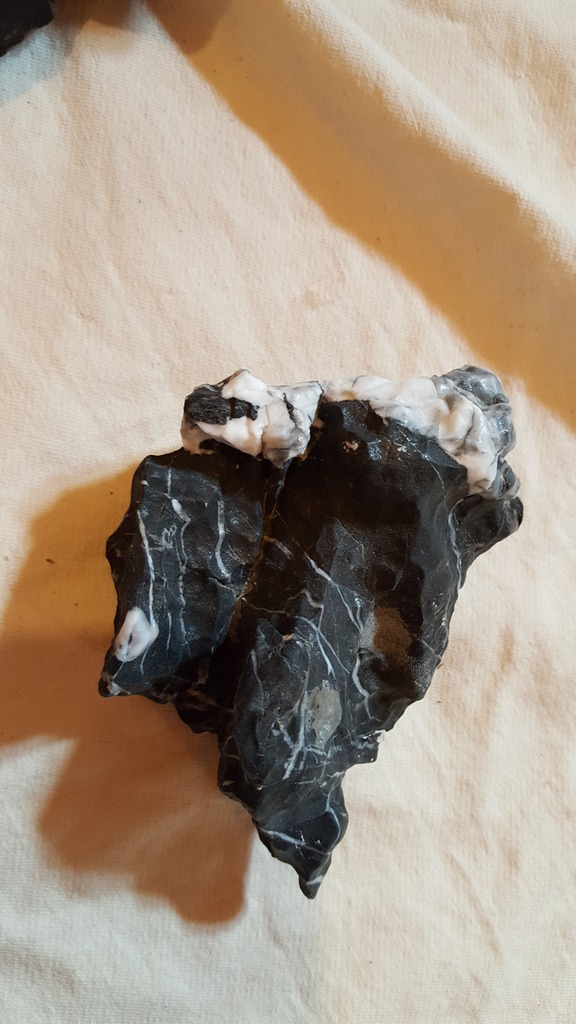
Here's the after shot of the rocks. They look wet but they are actually dry. The muriatic acid changes their look that much.

img_3378841_2_020e6140787097322be98b1f0ee4c9a7.jpg


I soaked the rocks for exactly 3 minutes each to get this effect. I've read of people soaking them for longer but the acid eats away at the rocks so I wanted to err on the short side.

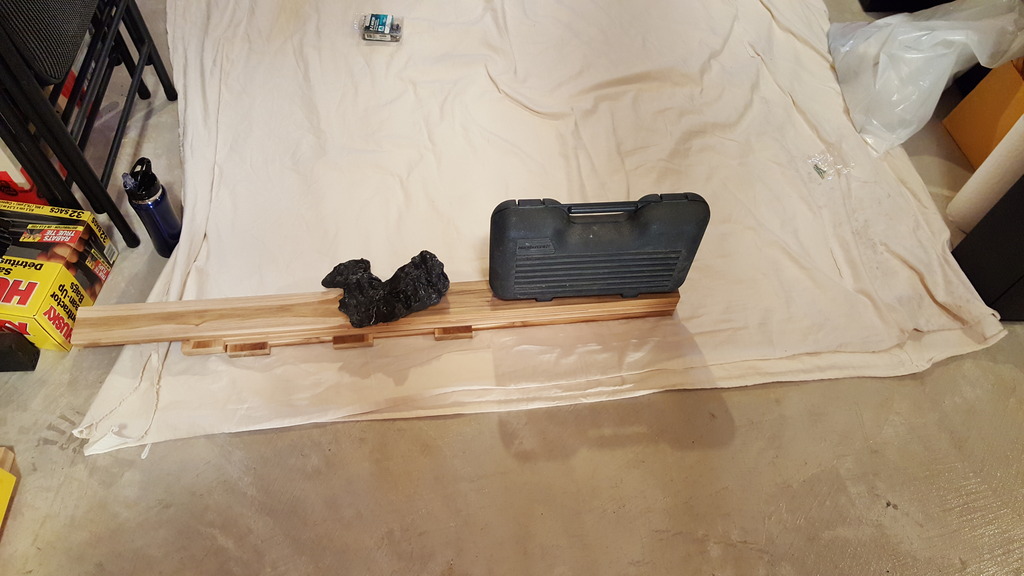
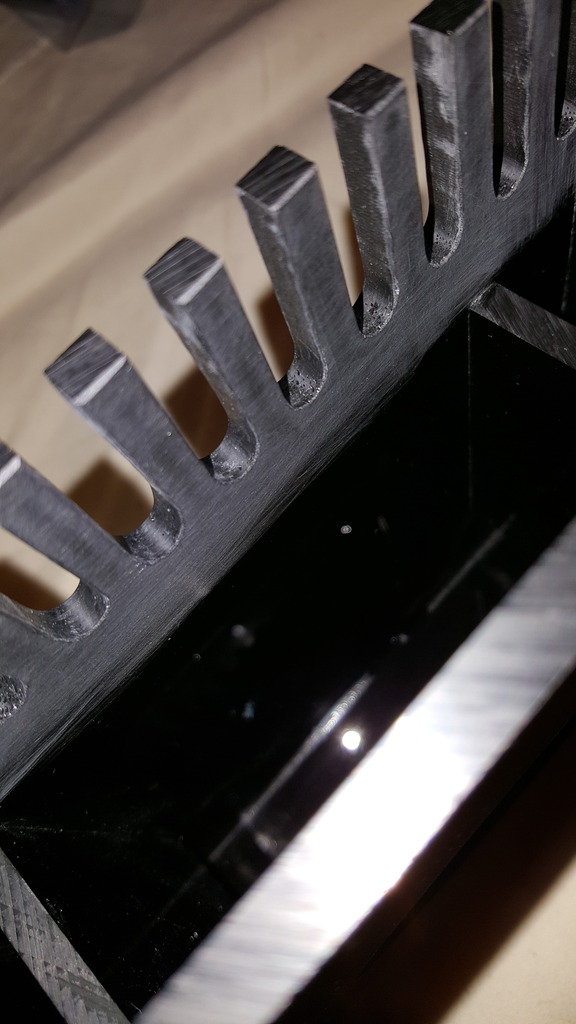
Here are some of the nicer rocks.

img_3378841_3_0154d44cca31313045169ad51213eb66.jpg


img_3378841_4_e472e1c8d917845f70bef9c26a284419.jpg


img_3378841_5_5b98e673510c5f43fc6af7944077355a.jpg


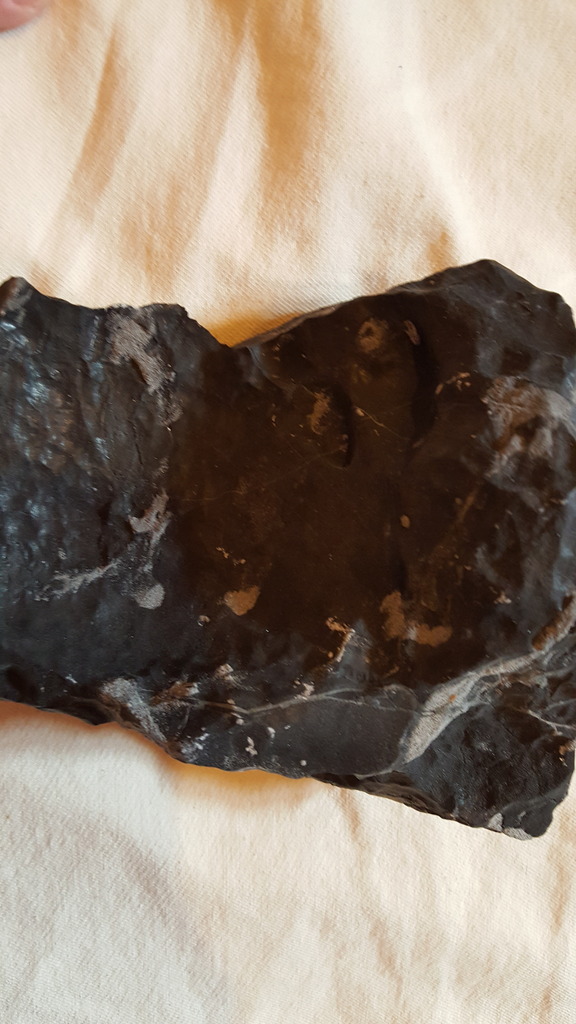
I noticed a few of the rocks were left with these gray patches. Not sure why, maybe I didn't soak them long enough in the acid or maybe it's a different mineral in these patches. Either way they blend in when the rock is wet.

img_3378841_6_837eda68fef9d16a4f7a71b7c2b00868.jpg


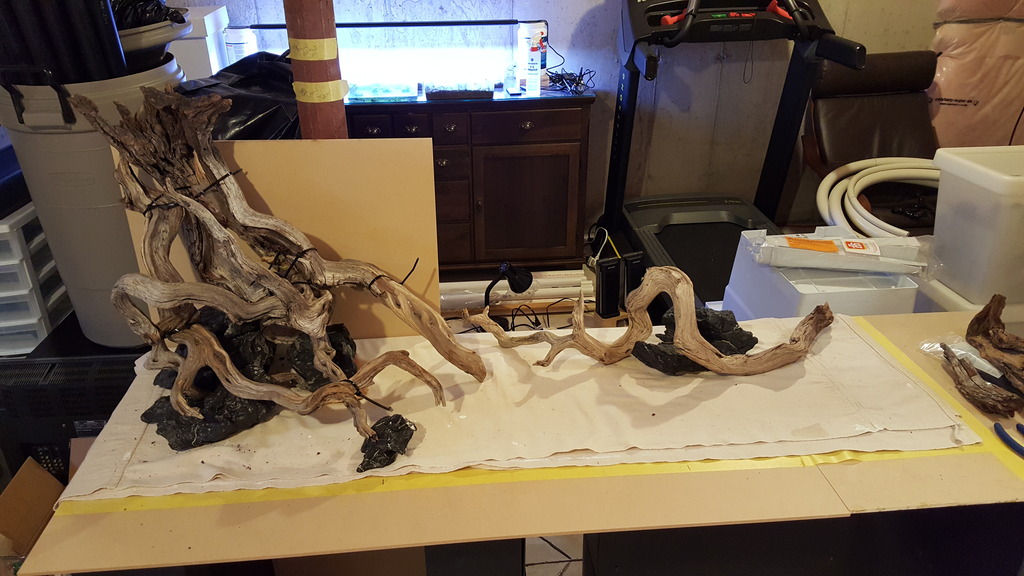
And here's an updated shot of my evolving aquascape idea with the "new" rocks.

img_3378841_7_013bf83859b0cf443511bb8d7910c665.jpg


Thanks,
Harry
 
I attached the plumbing supports to the back of the stand today. Wiped the teak supports with acetone to remove surface oils and applied 3M Extreme double sided tape.

img_3379036_0_c51fcb07c27ad0adc0fad36bd732e0ee.jpg


Applied a bit of pressure while I waited to make sure the bond was good.

img_3379036_1_ba57b8dab9927c8622e6cc18a8b247a5.jpg


Then I cleaned the back of the stand with isopropyl alcohol and applied the supports. I had previously measured exactly where the supports would go and marked the edges with masking tape.

img_3379036_2_531b9613b58f069640c8b36b118a1ed1.jpg


img_3379036_3_993593b87b50f29bfb36f52983650fef.jpg


Thanks,
Harry
 
I prepared the plumbing mounting brackets by gluing stainless steel washers to the overly large holes they have for screws.

img_3379066_0_d01dfa02aed09bbdead04c3e875722dd.jpg


Then I switched gears to the outlets. I had several joints in the Loc Line sections that were really loose so I got these clamps designed for that exact purpose. Swapped the screws out for stainless steel screws and attached them to the loose joints.

img_3379066_1_ab96c6e695a6d96099960cffaeaf584b.jpg


img_3379066_2_3c5d8911978246a56661cab729a5c2de.jpg


Lastly I started working on the flex pipe that will be the drain pipe. Did a rough measurement of how long it needs to be, cut and sanded one end to be square, and tried this to see if I can get the memory out of it in one section.

img_3379066_3_d4ad7e6476c03b086e08e61c1ed1b054.jpg


Thanks,
Harry
 
I was thinking about all the Seiryu stone I have to work with for the aquascape and the fact that it changes the KH, GH, and pH kept bugging me. So I ran some numbers based on data I found on Tom Barr's forum site.

img_3379190_0_6aafbd7197690d97d1aad2e9d7f715cd.jpg


img_3379190_1_3f4da50e57103ddd7fa482bdc251eb81.jpg


If I were to use all 45lbs of the rocks I have I would end up increasing my KH and GH about 1 degree per week. Definitely more than I was expecting when I originally choose these rocks. Since I'm hoping to keep German Rams and generally more difficult fish (which usually means they need softer more acidic water) I've decided to scrap the Seiryu stone and go with Ohko stone instead. Ironically the Ohko stone color will look more natural against the Flourite Dark gravel which has a brown color to it.

Curiously though it's pretty hard to find good examples of aquascapes that use Ohko stone and manzanita driftwood. Seiryu stone with manzanita seems to be more popular. If anyone has seen some nice aquascapes with Ohko and driftwood feel free to share, would love to see it.

Thanks,
Harry
 
I got the overflow box ready today for installation. It's a 700gph Glass Holes box. Nicely made, however, the edges were not flame polished, so I filed the inside edges of the teeth a bit to give it a slightly rounded profile. This should help slightly with keeping the water in contact with the box as it enters it, although not sure by how much since I only did a little bit of filing.

I've also read multiple times that overflows quite down once a biofilm gets established so I decided to help it by roughing up the top inch or two of the inside of the box so that the biofilm can better attach. This will also increase surface tension and/or wetting (not sure technically which term is correct in this case) due to more surface area being exposed which should also help the water cling to the box surface thus reducing noise. Again not sure by how much it will help in reality but I'm pretty sure it won't hurt so why not. Here's a shot of the inside side of the box teeth.

img_3379365_0_a1e6fa79614ac2b50ad904d52da908ed.jpg


I also measured and put together the drain line today so that everything is ready for installing the overflow box in the tank.

img_3379365_1_9030cb7aff8d116482b97000f0d1470f.jpg


Thanks,
Harry
 
The overflow and drain line got installed today. I was hoping to take pictures throughout the process but it got messy with all the silicone lubricant for all the gaskets and I didn't want to mess up the phone. I used lots of lubricant in part because of the large gasket that's the full size of the box. Also applied lots inside the glass hole around the bulkhead (where some people sometimes use silicone sealant/glue). It seems like most bulkhead leaks are quite slow and having thick non curing silicone lubricant in the way should help prevent any such leaks.

Here's the overflow.

img_3379477_0_2dba8005388e9e158607f61ca357e276.jpg


Tightening the bulkhead nut from inside the overflow box was quite the challenge. It's as tight as humanly possible without the use of a wrench.

img_3379477_1_85515e03d89fedf142213b41db1f1c68.jpg


I should probably also mention that I decided to go with a different bulkhead than the one supplied by Glass Holes. Theirs just seemed to cheap for my taste. I got a Lifegard bulkhead and cut it to the correct length. Definitely better quality bulkhead.

I also decided to smooth out the rough parts of the inside of the overflow a bit ... it was just bugging me. So I used some Novus 2 and elbow grease and made the area more semi smooth instead of rough.

Lastly here's the drain plumbing from behind.

img_3379477_2_d5f2b015fe666a71b7b4484c265553e4.jpg


Thanks,
Harry
 
I know, would love to see an overall layout plan of everything as the work looks superb.
Ironically I don't have one ... I do have notes on the various systems but their interconnectivity hasn't been written down ... just in my head. I'm not sure I could create an overall plan cause of everything involved without it being huge. Feel free to ask any specific questions you might have though.

Thanks,
Harry
 
I worked on getting the supply line ready for installation over the last few days.


And here's the memory removal process.


I also attached the Loc Line pieces to the bulkheads in preparation for the install.


Thanks,
Harry
 
I installed some backing in the fish room over the last few days. This way when I attach various equipment to the walls I won't have to use drywall plugs since there will be solid wood to screw into.


Thanks,
Harry
 
I finally got some time today to work a bit on the tank. I worked on a little thingy that the float switch would screw into and then it would fit perfectly in the Eshopps probe holder.

I started by cutting a short piece of 1/2" OD (3/8" ID) acrylic tube and tapping it using a 1/8" NPT tap.


Then I drilled a hole in the side and cut the piece to the correct length.


Here's what it looks like screwed onto the float switch.


And here's when it's in the probe holder.


After this was done I ran some tests on the float switch and it turned out that the magnets in the probe holder were interfering with the switch. Fortunately I had several of the probe holders and one of them had the magnetic poles opposite to the one I originally tried. For some reason when the poles are reversed they no longer interfere with the float switch.

Thanks,
Harry
 
The basement including the fish room got drywalled recently. Still needs to be mudded, but things are moving along ... slowly. I'll get pictures up soon.

I've been also doing some research on exactly which fish and shrimp I want to keep and have been going back and forth on whether to bother with an RO filter as part of the automated water change setup. I've posted more details and questions here if anyone cares to input: http://www.aquariumadvice.com/forums/showthread.php?t=353149. That post also includes the list of fish and shrimp I'm interested in if anyone's curious.

Thanks,
Harry
 
The first coat of mud went on the drywall in the fish room. Starting to look like an actual room ... feels so much tighter now though.


Great use of "wasted" under the stairs space.

Thanks,
Harry
 
Back
Top Bottom