Go Back   Aquarium Advice - Aquarium Forum Community > Saltwater and Reef > Members Saltwater Tanks Showcase
Click Here to Login

Join Aquarium Advice Today
Reply
 
Thread Tools Search this Thread Display Modes
Please support our sponsors and let them know you heard about them on AquariumAdvice.com
 
Old 02-11-2015, 12:38 AM   #1
Aquarium Advice Activist
 
dpruter's Avatar
 
Join Date: Jan 2015
Location: San Diego, California
Posts: 107
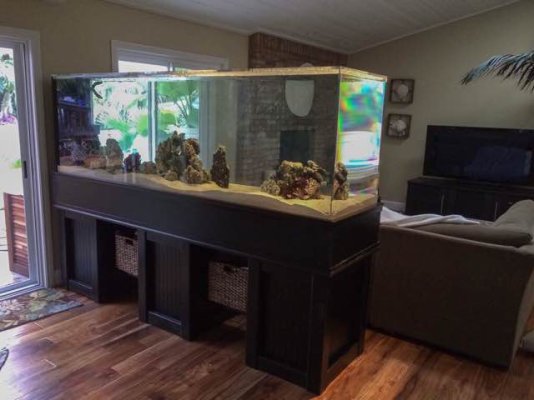
dp's 300 gallon build

I thought I'd share my new adventure here with our 300 gal mixed reef. Been over a decade since my last aquarium and I've been anxious to get back into it now that I'm a home owner. I've never done any coral before so I have a bunch to learn and I'm sure I'll make a ton of mistakes. But I'm stoked!

(one year ago...)
So the wife and I walked into a lfs down in San Diego and they had a 300 long sitting there. She fell in love! (Again) Not long after that we had one on order!

Looked around at stands and we just couldn't find one that fit the bill. We decided we would build ourselves.

Here we go!

Name:   ImageUploadedByAquarium Advice1423632201.153222.jpg
Views: 1003
Size:  10.6 KB


Name:   ImageUploadedByAquarium Advice1423632902.678463.jpg
Views: 1007
Size:  12.2 KB

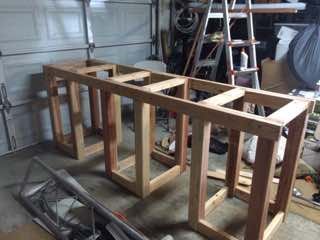
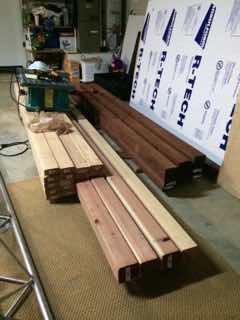
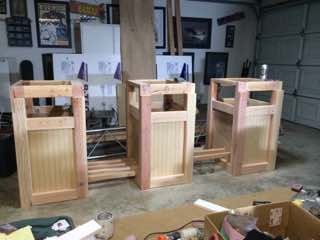
Because of its size we thought it might be cool to break up in three columns instead of one 8 foot box. 12 4x4's should probably hold the weight!

Name:   ImageUploadedByAquarium Advice1423632932.084401.jpg
Views: 979
Size:  10.9 KB

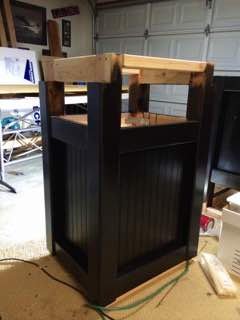
The wife did an amazing job with the espresso finish.

Name:   ImageUploadedByAquarium Advice1423632960.033252.jpg
Views: 996
Size:  9.7 KB

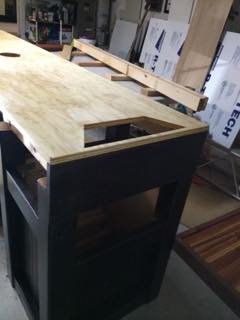
Went ahead and made cutouts for the overflow box and then in the middle and far end for a closed loop system.

Name:   ImageUploadedByAquarium Advice1423632980.349526.jpg
Views: 961
Size:  10.4 KB

__________________
dpruter is offline   Reply With Quote
Old 02-11-2015, 12:39 AM   #2
Aquarium Advice Activist
 
dpruter's Avatar
 
Join Date: Jan 2015
Location: San Diego, California
Posts: 107
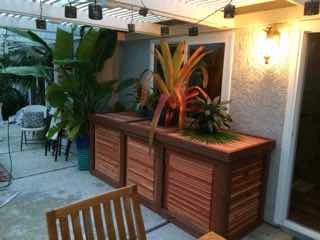
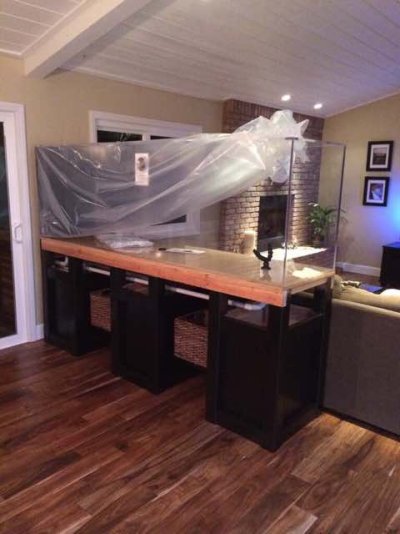
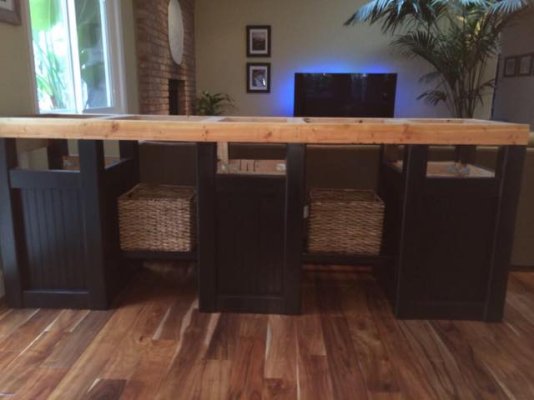
And the almost completed stand in its final resting place.

Click image for larger version

Name:	ImageUploadedByAquarium Advice1423633162.883903.jpg
Views:	667
Size:	27.9 KB
ID:	263972

Will close up the top third with a nice espresso finished trim piece once the tank is set and all the plumbing is solid. Baskets will be used for fish food, supplies, etc.
__________________
dpruter is offline   Reply With Quote
Old 02-11-2015, 12:44 AM   #3
Aquarium Advice Activist
 
dpruter's Avatar
 
Join Date: Jan 2015
Location: San Diego, California
Posts: 107
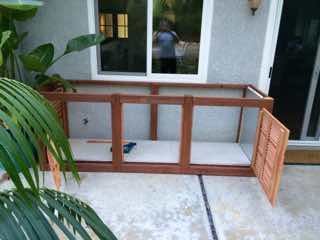
And where is all the plumbing going to go you might ask? Well it's San Diego, we'll just build a shed for it outside!


Name:   ImageUploadedByAquarium Advice1423633346.899891.jpg
Views: 953
Size:  9.9 KB


Name:   ImageUploadedByAquarium Advice1423633373.621007.jpg
Views: 914
Size:  10.3 KB

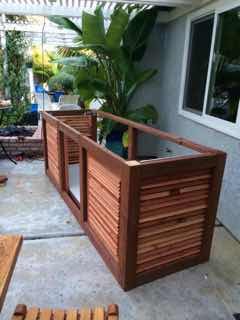
And the completed sump room to sit outside...


Name:   ImageUploadedByAquarium Advice1423633399.453668.jpg
Views: 858
Size:  10.1 KB

Three doors open in the front and three panels can be removed from the top making it SUPER accessible!
__________________
dpruter is offline   Reply With Quote
Old 02-11-2015, 02:51 AM   #4
Aquarium Advice Activist
 
dpruter's Avatar
 
Join Date: Jan 2015
Location: San Diego, California
Posts: 107
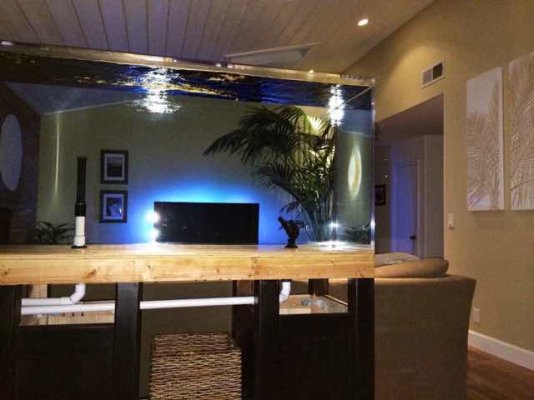
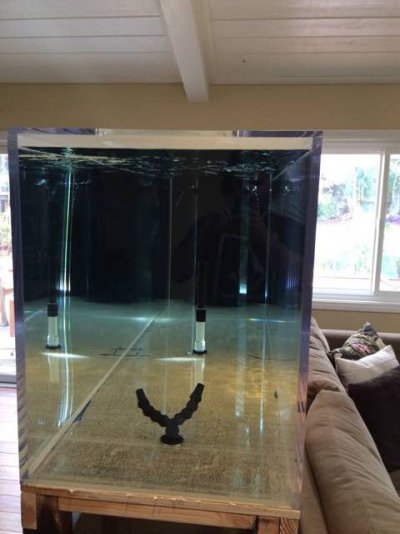
Tank set in place, some plumbing done and water going in for a leak test.

Click image for larger version

Name:	ImageUploadedByAquarium Advice1423641000.957874.jpg
Views:	663
Size:	26.5 KB
ID:	263981

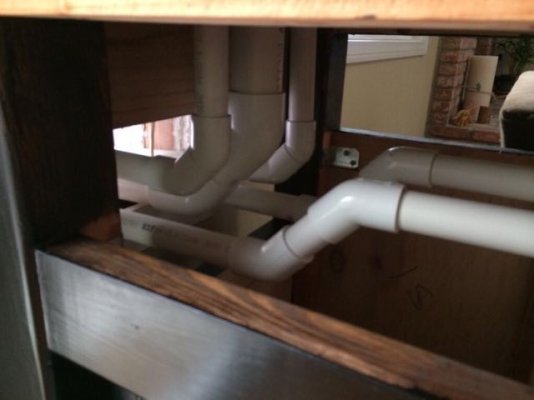
All the pipes go outside to the sump box through a hole I cut in the wall.

Click image for larger version

Name:	ImageUploadedByAquarium Advice1423641019.678499.jpg
Views:	656
Size:	27.6 KB
ID:	263982

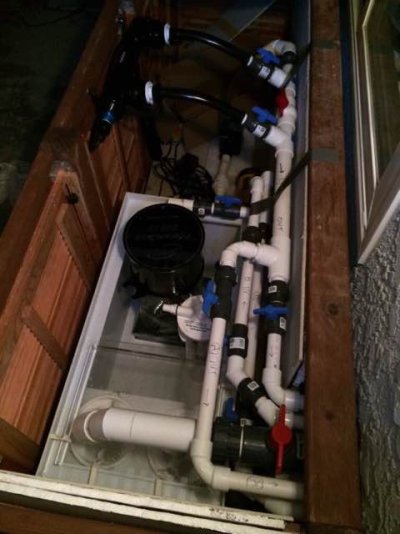
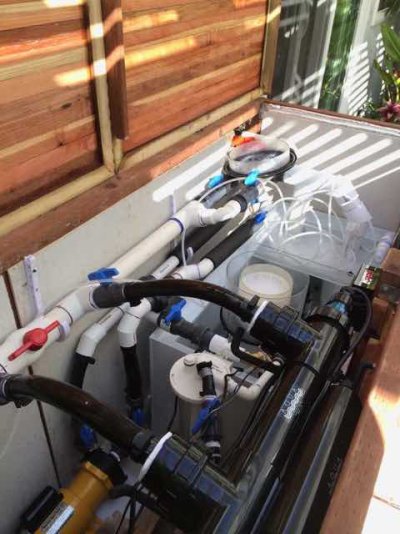
Sump box filled up quick with pipes, pumps, uv, skimmer, etc.

Click image for larger version

Name:	ImageUploadedByAquarium Advice1423641036.460068.jpg
Views:	628
Size:	32.5 KB
ID:	263983

Click image for larger version

Name:	ImageUploadedByAquarium Advice1423641057.028454.jpg
Views:	635
Size:	24.9 KB
ID:	263984

Decided to go with a closed loop system to get some water moving towards the end of the tank farthest from the overflow box. (in addition to)

Click image for larger version

Name:	ImageUploadedByAquarium Advice1423641073.063188.jpg
Views:	648
Size:	29.3 KB
ID:	263985

And it holds water without any leaks!
__________________
dpruter is offline   Reply With Quote
Old 02-11-2015, 03:07 AM   #5
Aquarium Advice Activist
 
dpruter's Avatar
 
Join Date: Jan 2015
Location: San Diego, California
Posts: 107
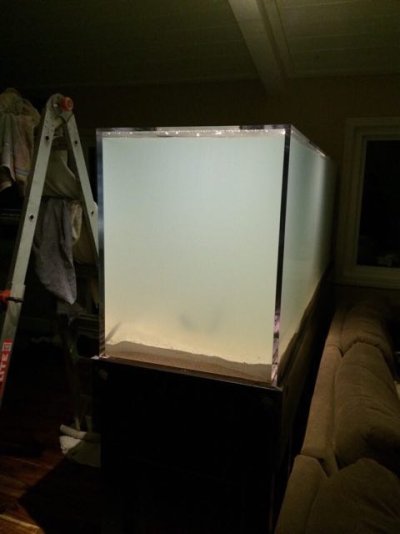
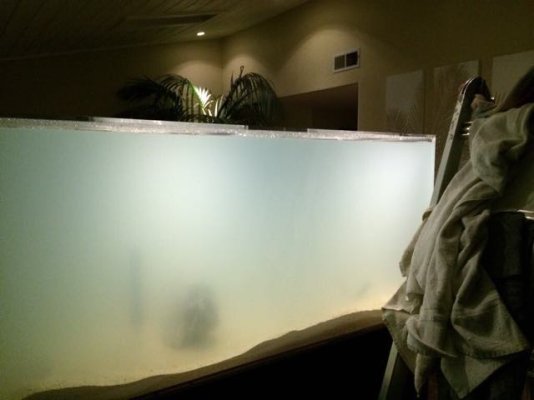
Time for a few hundred pounds of live sand and some saltwater. Used rodi as I heard it was the way to go from many in this forum.

Click image for larger version

Name:	ImageUploadedByAquarium Advice1423641873.374613.jpg
Views:	639
Size:	24.2 KB
ID:	263986

Dang it's cloudy! Guess I'll have to wait a few days.
Don't see that on "Tanked."

Click image for larger version

Name:	ImageUploadedByAquarium Advice1423641916.393673.jpg
Views:	624
Size:	24.1 KB
ID:	263987

And a bit more work done in the sump box.

Click image for larger version

Name:	ImageUploadedByAquarium Advice1423641959.399654.jpg
Views:	625
Size:	32.8 KB
ID:	263988

You'll notice I went with a 57w uv with wiper from Aqua UV (local So. Cal company and thus far impressed with the quality) as well as an ATI PowerCone 250IS skimmer (which I'm not sure I like) Also went ahead with a bio pellet reactor.
__________________
dpruter is offline   Reply With Quote
Old 02-11-2015, 03:53 AM   #6
Giant Clam Addict
Community Admin
 
Sniperhank's Avatar


POTM Champion
 
Join Date: Nov 2011
Location: Summerville, Pennsylvania
Posts: 20,648
That is a really nice job putting everything together into a really nice stand.
Sniperhank is offline   Reply With Quote
Old 02-11-2015, 04:50 AM   #7
Aquarium Advice Addict
 
SpaceFish42's Avatar
 
Join Date: Feb 2015
Location: Washington
Posts: 1,168
Wow! I never would have guessed someone just built that, except maybe a professional aquarium stand builder (if that even exists). I like that on the outside you can't tell what it is.


Sent from my iPhone
__________________
SpaceFish42 is offline   Reply With Quote
Old 02-11-2015, 06:19 AM   #8
Aquarium Advice Apprentice
 
sarahsteels83's Avatar
 
Join Date: Feb 2015
Location: Retford England
Posts: 25
That's lovely! Good job! Wish you was our neighbor!


Sent from my iPhone using Aquarium Advice
__________________
sarahsteels83 is offline   Reply With Quote
Old 02-11-2015, 06:27 AM   #9
Aquarium Advice Addict
 
ImACoolguy's Avatar
 
Join Date: Jan 2015
Location: Tennessee
Posts: 7,954
dp's 300 gallon build

My dream tank it's gorgeous! Amazing job with the stand and congrats on the beautiful house! I can only dream of setting up something like that one day. Following to see progress on this I'm sure it will be awesome.


Caleb

~10g tiger barbs
~45g ick is fixed!
~75g new community tank.
__________________
ImACoolguy is offline   Reply With Quote
Old 02-11-2015, 07:21 AM   #10
Aquarium Advice Addict
 
mr_X's Avatar


Join Date: Apr 2008
Location: Fairless Hills, Pa.
Posts: 17,895
Send a message via MSN to mr_X
Very nice design on the stand. What made you implement the UV sterilizer?
__________________
thanks,
Doug
mr_X is offline   Reply With Quote
Old 02-11-2015, 08:30 AM   #11
Aquarium Advice Addict
 
treemanone2003's Avatar
 
Join Date: May 2012
Location: Bridgeport, Ct.
Posts: 2,168
Now that's well planned and executed !!! Super job all over !!


Sent from my iPhone that doesn't like me. Or you !!
__________________
treemanone2003 is offline   Reply With Quote
Old 02-11-2015, 08:35 AM   #12
Aquarium Advice Addict
 
Macscale's Avatar
 
Join Date: Jan 2014
Location: Lakewood Ranch, Florida.
Posts: 2,850
Wow... That's absolutely stunning and looks great in your home!
I'll be following.
__________________
55g Reef Build
Macscale is offline   Reply With Quote
Old 02-11-2015, 11:27 AM   #13
Aquarium Advice Addict
 
Mattyfelts's Avatar
 
Join Date: Sep 2013
Location: Ontario, Canada
Posts: 2,111
i just fell over cause this is one of the best builds i have ever seen. so well done, well planned, well executed. very jealous...

only issue i can see is how are you gonna stop critters from getting through that whole in the wall? i doubt its a big issue haha, sucha awesome build thanks for sharing.
__________________
60G Freshwater || 10G Reef
Instagram: MATTYFELTS
Mattyfelts is offline   Reply With Quote
Old 02-11-2015, 12:15 PM   #14
Aquarium Advice Activist
 
dpruter's Avatar
 
Join Date: Jan 2015
Location: San Diego, California
Posts: 107
Quote:
Originally Posted by mr_X View Post
Very nice design on the stand. What made you implement the UV sterilizer?
Thanks all for the nice compliments. Appreciate that!

Doug, re: uv...I just figured why not? Could help with algae problems, could help lower disease/parasite problems, could help with water clarity AND I can always shut it off and or control the flow rate through it depending on what I want to do later down the road.

Mattyfelts, re: hole in the wall. I just sprayed some foam in there after all the plumbing was done. Pretty tight and no critters thus far!
__________________
dpruter is offline   Reply With Quote
Old 02-11-2015, 12:42 PM   #15
Aquarium Advice Activist
 
dpruter's Avatar
 
Join Date: Jan 2015
Location: San Diego, California
Posts: 107
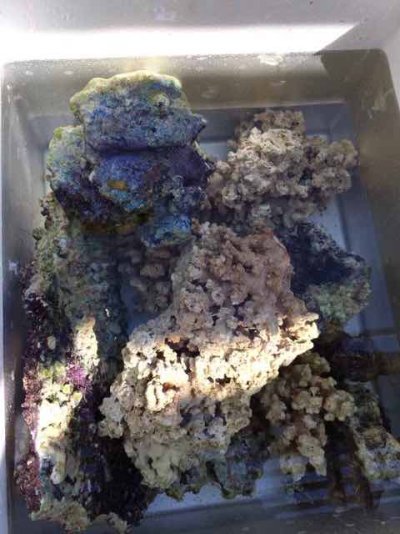
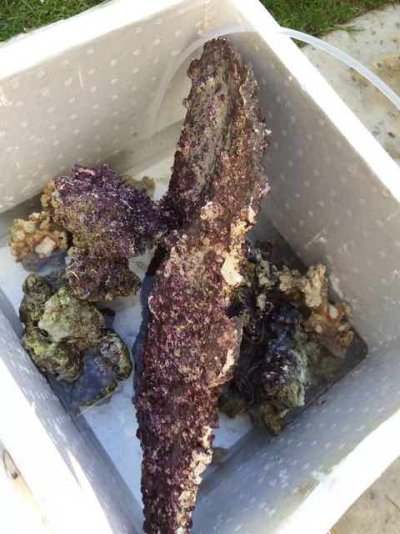
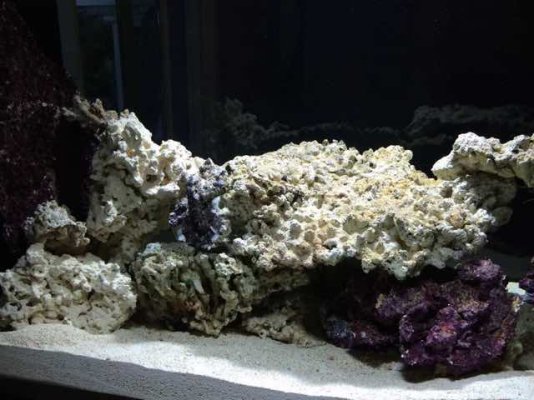
Time for some live rock. (A week after initial fill) Wow that's expensive for what it is! This will take some time to build up. Initial costs of tank and basic equipment killed us. The plumbing parts alone was a major shock! Those stupid valves add up!

Click image for larger version

Name:	ImageUploadedByAquarium Advice1423676274.009437.jpg
Views:	527
Size:	29.6 KB
ID:	264006

Click image for larger version

Name:	ImageUploadedByAquarium Advice1423676290.542735.jpg
Views:	516
Size:	30.7 KB
ID:	264007

Need a ton more rock! I think I'll mix in some of the dry base rock too.

Click image for larger version

Name:	ImageUploadedByAquarium Advice1423676328.898093.jpg
Views:	520
Size:	26.9 KB
ID:	264008

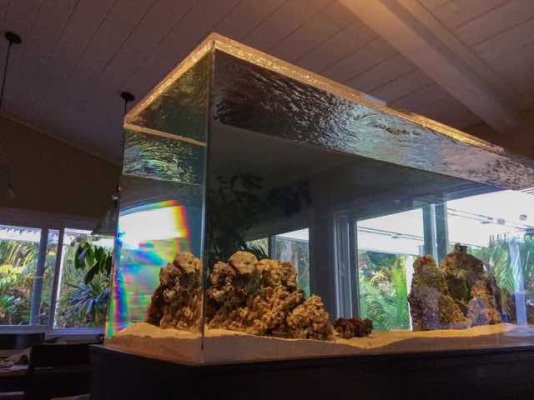
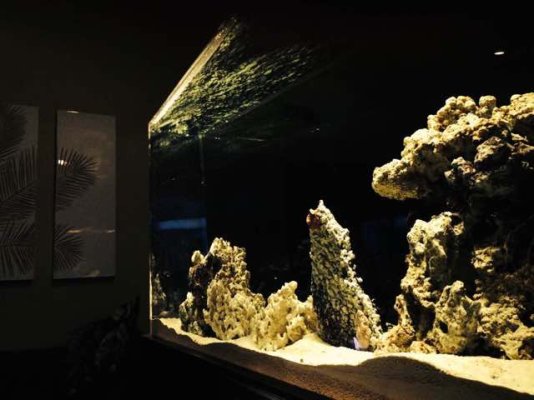
But it's getting there!

Click image for larger version

Name:	ImageUploadedByAquarium Advice1423676414.852757.jpg
Views:	520
Size:	30.9 KB
ID:	264009

Click image for larger version

Name:	ImageUploadedByAquarium Advice1423676428.687182.jpg
Views:	500
Size:	28.6 KB
ID:	264010
__________________
dpruter is offline   Reply With Quote
Old 02-11-2015, 01:42 PM   #16
Giant Clam Addict
Community Admin
 
Sniperhank's Avatar


POTM Champion
 
Join Date: Nov 2011
Location: Summerville, Pennsylvania
Posts: 20,648
Nice rock too. That really long piece would make an amazing bridge.
Sniperhank is offline   Reply With Quote
Old 02-11-2015, 03:04 PM   #17
Aquarium Advice Activist
 
dpruter's Avatar
 
Join Date: Jan 2015
Location: San Diego, California
Posts: 107
Added some microbacter7 from brightwell aquatics as recommended by lfs and some more rock.

Click image for larger version

Name:	ImageUploadedByAquarium Advice1423684601.934388.jpg
Views:	520
Size:	33.2 KB
ID:	264035

About a month of cycling and it's time for a few fish.

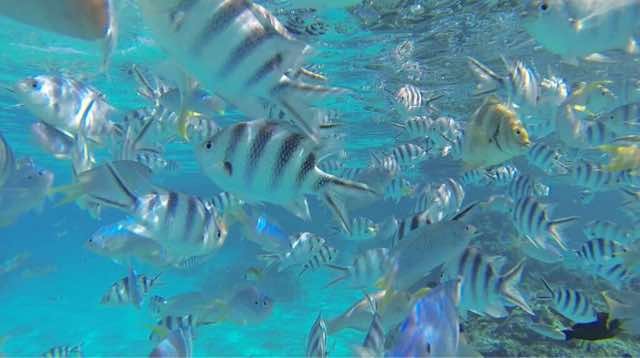
I know some will laugh and question our choice here but after spending our honeymoon in bora bora and snorkeling with thousands of damsels, we wanted to get a few of those for sentimental reasons. Also because they are a good hardy fish to start with.

From underwater in the South Pacific:

Click image for larger version

Name:	ImageUploadedByAquarium Advice1423685011.352983.jpg
Views:	516
Size:	24.2 KB
ID:	264036

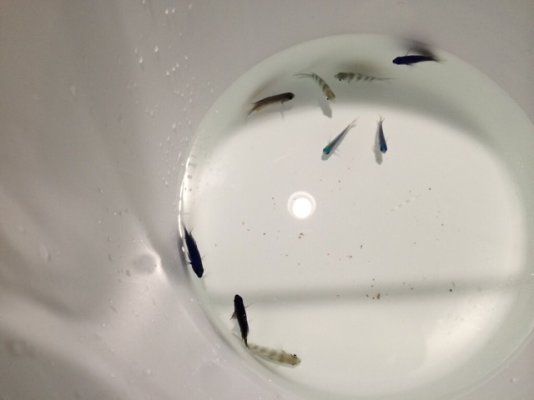
And our first new friends:

Click image for larger version

Name:	ImageUploadedByAquarium Advice1423684576.018289.jpg
Views:	513
Size:	30.9 KB
ID:	264033

3 Sergeant Major Damselfish
3 Sapphire Damselfish
3 Allen's Damselfish
__________________
dpruter is offline   Reply With Quote
Old 02-11-2015, 05:21 PM   #18
Aquarium Advice Addict
 
mr_X's Avatar


Join Date: Apr 2008
Location: Fairless Hills, Pa.
Posts: 17,895
Send a message via MSN to mr_X
Quote:
Originally Posted by dpruter View Post
Doug, re: uv...I just figured why not? Could help with algae problems, could help lower disease/parasite problems, could help with water clarity AND I can always shut it off and or control the flow rate through it depending on what I want to do later down the road.
The sterilizer will kill whatever goes through it, good and bad. Tiny planktonic creatures, copepods...etc.
__________________
thanks,
Doug
mr_X is offline   Reply With Quote
Old 02-11-2015, 05:59 PM   #19
Aquarium Advice Activist
 
dpruter's Avatar
 
Join Date: Jan 2015
Location: San Diego, California
Posts: 107
Quote:
Originally Posted by mr_X View Post
The sterilizer will kill whatever goes through it, good and bad. Tiny planktonic creatures, copepods...etc.
Good call Doug! And agree. My thought though was to run the uv before any coral and during my fish stocking time. I'm a huge tang fan and I know those can be disease prone no matter what. UV running during that phase of the build may help? Then switch to a higher flow rate when the corals are added or even shut it down after a year when everyone is happy. Perhaps I can use it later if I notice problems that a UV may help? Don't know. Learning here.
__________________
dpruter is offline   Reply With Quote
Old 02-11-2015, 06:39 PM   #20
Aquarium Advice Addict
 
mr_X's Avatar


Join Date: Apr 2008
Location: Fairless Hills, Pa.
Posts: 17,895
Send a message via MSN to mr_X
Well, just focus on making that tank a stress free environment. Stress is what lowers the immune systems of fish and allows them to succumb to disease.
__________________
thanks,
Doug
mr_X is offline   Reply With Quote
Reply

Tags
300 gallon, build, gallon

Please support our sponsors and let them know you heard about them on AquariumAdvice.com

Thread Tools Search this Thread
Search this Thread:

Advanced Search
Display Modes

Posting Rules
You may not post new threads
You may not post replies
You may not post attachments
You may not edit your posts

BB code is On
Smilies are On
[IMG] code is On
HTML code is Off
Trackbacks are Off
Pingbacks are Off
Refbacks are Off


» Photo Contest Winners


All times are GMT -4. The time now is 08:58 AM.


Powered by vBulletin® Version 3.8.8 Beta 1
Copyright ©2000 - 2023, vBulletin Solutions, Inc.