Brookster123
Aquarium Advice Addict
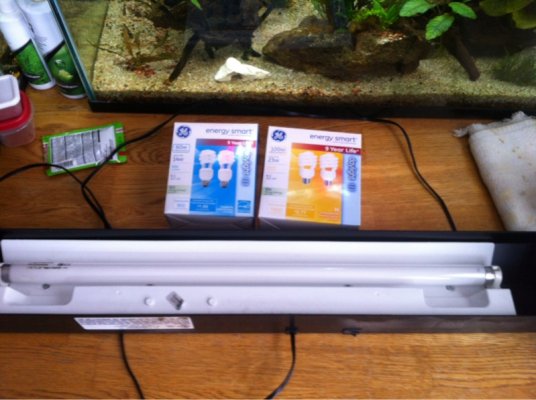
Got this idea from pitbully, seemed easy enough and it really was.. End result was night and day . What you'll need- 2 dual lamp sockets, foil tape, 3 wire nuts, electrical tape, power drill with bits, one toggle switch (can re-use existing switch depending on location) First step- take your light hood and remove everything but wiring.
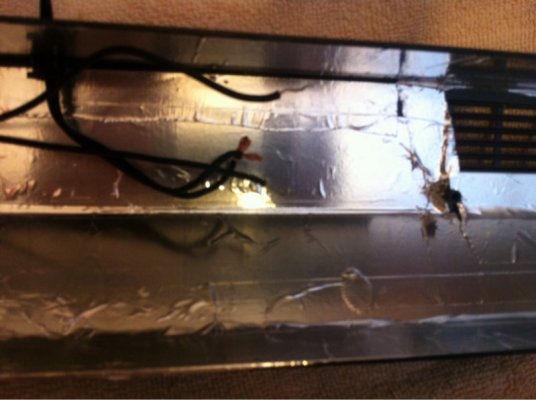
  Second step- using foil tape from the duct work section of your home good store, line the interior of the compartment.
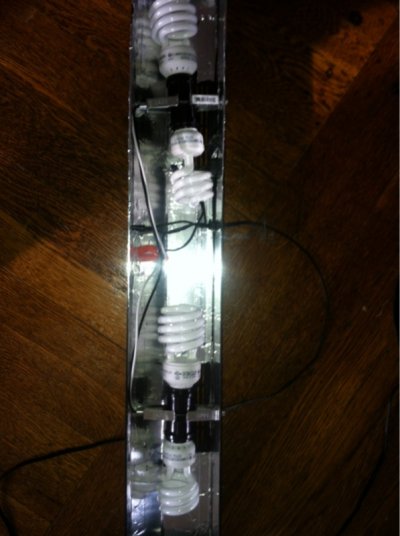
  Third step- drill holes for lamps and switch. You'll want to play with placements prior to drilling holes, take into account bulbs not touching wires or plastic..
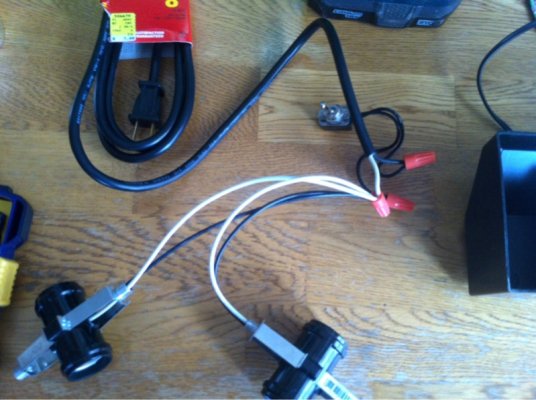
  Step four- wiring, this may seem tricky but it's really simple.. You have positive ( black) and negative (white) wires. Take the neg from the supply cord and the 2 lamps and twist them with a wire nut, take the pos from the supply and the pos from switch and twist them up and nut em, take the 2 pos from lamps and twist them up to pos from switch! Tape them all up nice nice and try it on a surge protector away from your tank.. If it lights up.. Hurray!! If it pops the surge protector try again
 Final steps- once all components are assembled in place tape up all wire connections with electrical tape, also consider foil tapping wiring to housing to clean it up a bit. You can also drill holes on the top to relieve heat, I did.. About 50 1/8" holes
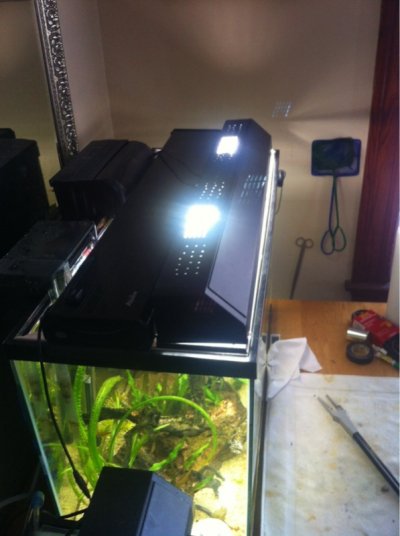
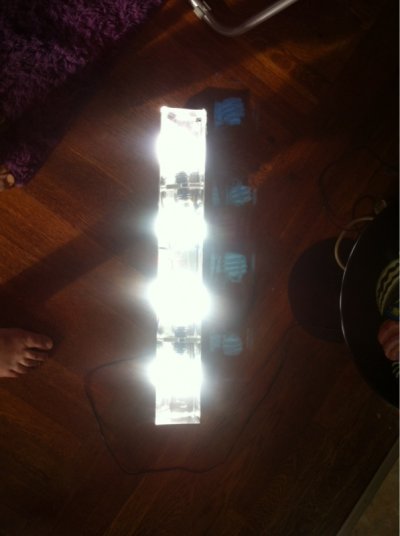 I used 4- 13 watt 6500k GE cfl's .............IMPORTANT NOTICE....... *****no exposed wiring******* anywhere!!!! Make sure there is a barrier between bulbs and water, splash guard, glass.. Something.. Bulbs can burst if they get splashed...
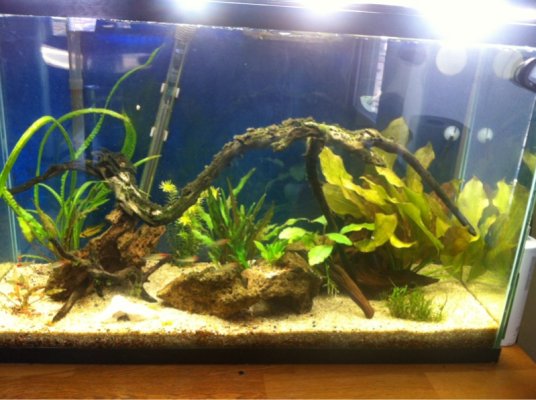
I didn't want to post this last pic because I knocked my heater crooked last night and it's embarrassing that I'm to OCD to reach in and fix it until I properly scrub my arm..
 Second step- using foil tape from the duct work section of your home good store, line the interior of the compartment.
  Third step- drill holes for lamps and switch. You'll want to play with placements prior to drilling holes, take into account bulbs not touching wires or plastic..
  Step four- wiring, this may seem tricky but it's really simple.. You have positive ( black) and negative (white) wires. Take the neg from the supply cord and the 2 lamps and twist them with a wire nut, take the pos from the supply and the pos from switch and twist them up and nut em, take the 2 pos from lamps and twist them up to pos from switch! Tape them all up nice nice and try it on a surge protector away from your tank.. If it lights up.. Hurray!! If it pops the surge protector try again
 Final steps- once all components are assembled in place tape up all wire connections with electrical tape, also consider foil tapping wiring to housing to clean it up a bit. You can also drill holes on the top to relieve heat, I did.. About 50 1/8" holes
 I used 4- 13 watt 6500k GE cfl's .............IMPORTANT NOTICE....... *****no exposed wiring******* anywhere!!!! Make sure there is a barrier between bulbs and water, splash guard, glass.. Something.. Bulbs can burst if they get splashed...
I didn't want to post this last pic because I knocked my heater crooked last night and it's embarrassing that I'm to OCD to reach in and fix it until I properly scrub my arm..
Last edited:
