Funken_A
Aquarium Advice Freak
Thought I'd share some of my projects with the forum.. Got a few.
My 1st would be my Cerges CO2 reactor
You will need lots of parts and few tools but overall this unit is way more effective than any of the ones you can buy and my design serves as a very effective biological filter / water polisher.
I run 2 filters on my 30 gallon a Hang on Back version where i removed the bio wheel and carbon and used filter socks and stuffed it and my Cerges reactor. This really keeps the tank clean and allows me to ensure my flow in the tanks reaches every corner. Lots of people underestimate proper flow in a planted aquariums.
Ok enough chit chat
Water Filter Housing like this
Check Valve to prevent back flow
Loc Line or Similar out flow nozzle system
Strainer basket or something similar for feeder line
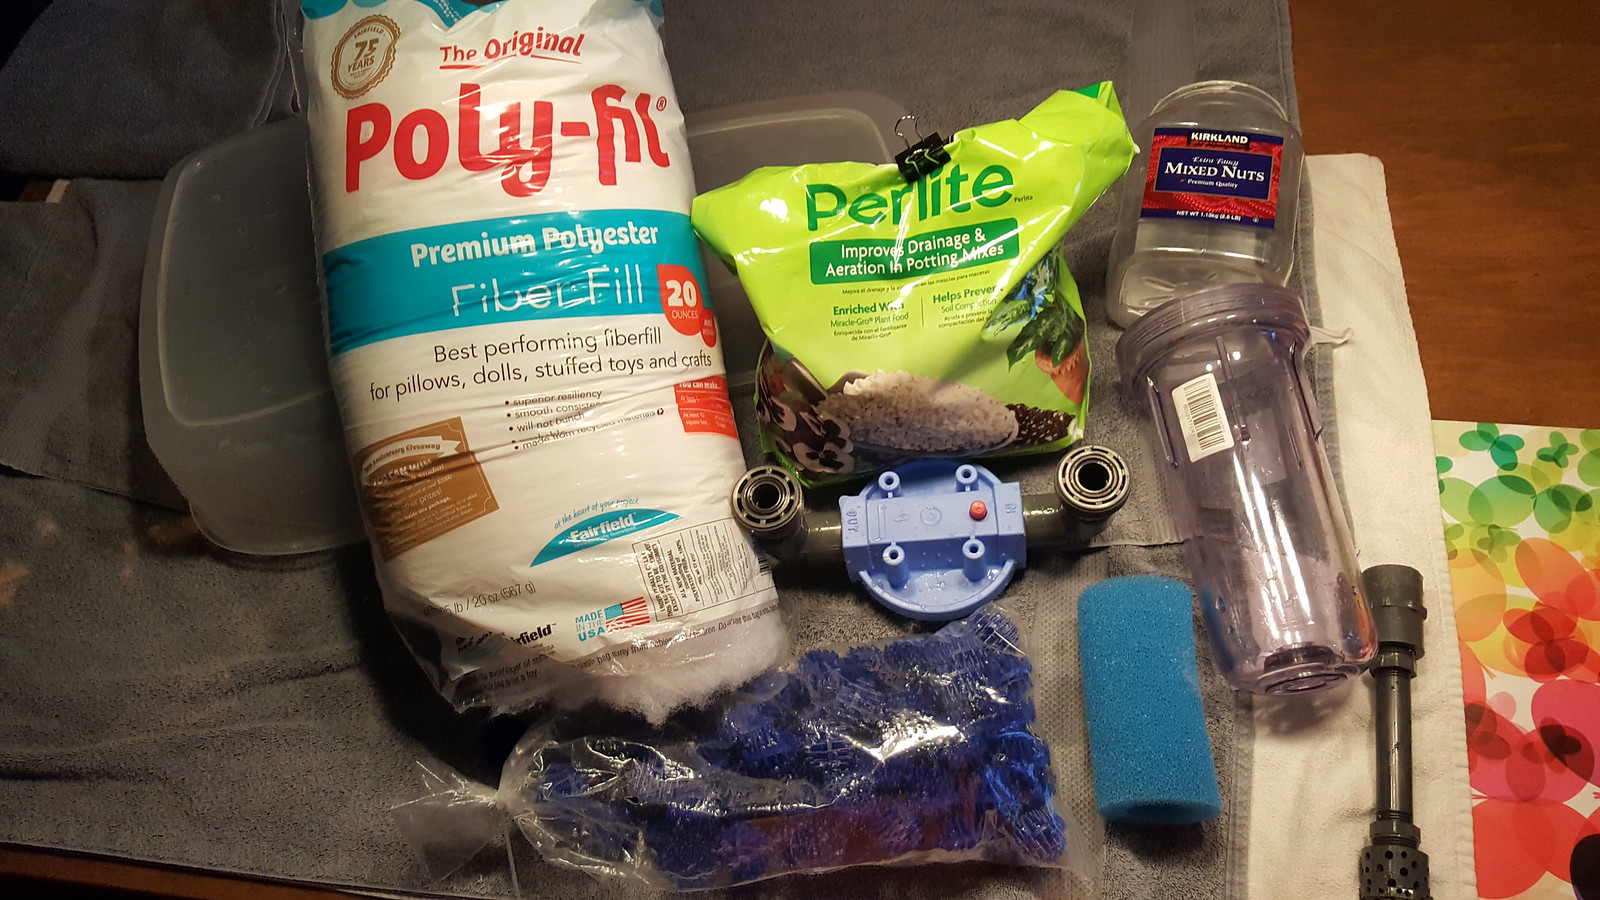
You will need filter medium. I recommend Perlite + Filter Floss. In my picture I used a filter sponge with a 3/4 diameter hole down the middle that I had laying around. Bio balls are an option, but they are bulky and I prefer the hard pack of perlite and filter floss. I just put Bio Balls in the picture to give the idea that there are options
Tubing is going to be under your control.
***NOTE*** YOU NEED TO KNOW THE THE THREAD/SIZE OF THE FILTER HOUSING AND BUY THE RIGHT FITTINGS. BEST THING IF YOU ARE NOT SURE IS TO BUY THE HOUSING AND TAKE IT TO YOUR LOCAL HARDWARE STORE AND START MATCHING FITTINGS AND HOSE ON THE SPOT.
I used 3/4 inch PVC fitting connected tot he cerges filter housing. I used 5/8 hose and proper barbed fitting to match.
2- 3/4 inch pvc schld 40 Unions
6 - 3/4 inch threaded close nipples
2- 3/4 inch 90 degree fitting
1- 3/4 Inch Shut off valve ( you can add one to both sides for easier disconnections. Mine is at tank level so I don't have much siphoning happen)
1- 3/16 inch hosed barb connection for co2 input
1- roll of plumbers taper.. Helps prevent leaks
6- worm screws to help with barb connections (optional)
2- 3/4 90 degree fitting
_______________
We will also need a feed and return line ( I switched to 1/2 inch here less bulk but this is a flow restriction so your choice) and a non submersible water pump. I have a 30 gallon tank and I am runninng a 400 GPH pump and with all the bends and filter medium I would not want to go any lower. I do create some back pressure but flow is not as strong as you think
Here is where I bought MY pump.
It is a dual purpose submersible or non submersible., and best of all affordable. You can put it in your aquarium but too bulky for me. I run mine out the back and have a small catch bucket for any small leaking.
*** APOLOGIZE FOR NOT HAVING BETTER PICTURES OF MY FEED AND RETURN SET UPS. I'LL TRY ADDING THAT IN NEXT OPPORTUNITY
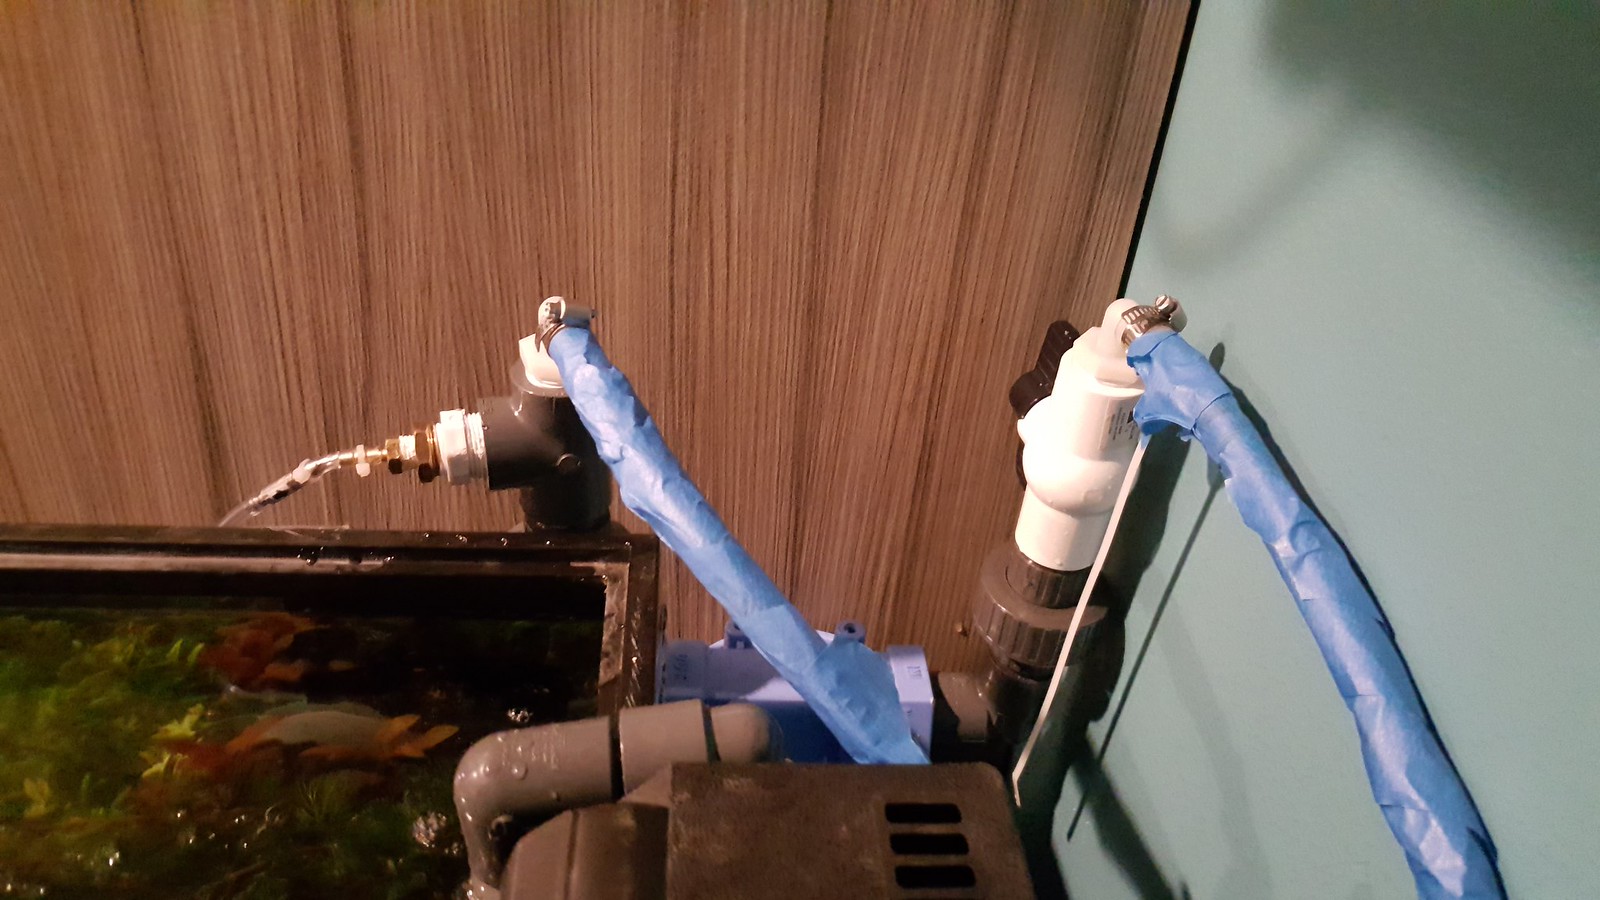
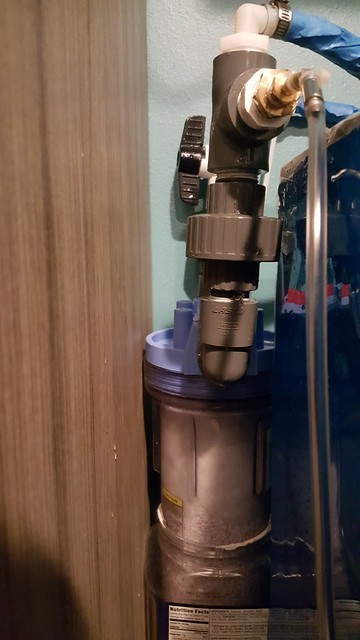
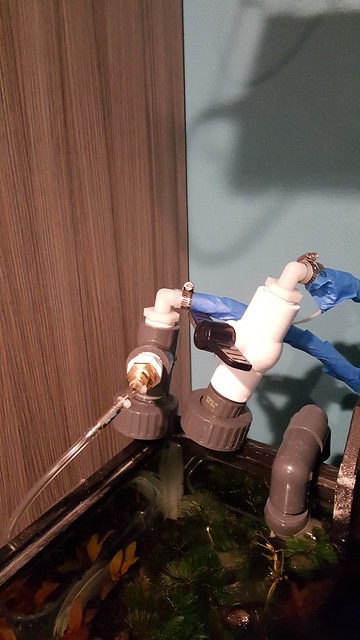
You will need to design your feed and return lines. Because i have a HOB filter I had to pipe extra 90 degrees angles in... However I highly recommend some loc line flow nozzles a strainer basket for inlet.. From there ensure you have fitting that match your hose connections to your Cerges unit.
ASSEMBLY OF THE STEM FOR THE FILTER UNIT
**** You will need to reverse plump the filtration unit. The side marked in will be your Out, the side marked out will be your in. The reason for this is to force the CO2 pubbles down tot he bottom of the reactor and let them forces there way back up being dissolved into the water flow. The perlite and filter floss captures the CO2 and hold it whiel water rushes past it and grabs the CO2 dissolving it. As your photo period goes on and plants start pearling its safe to think that Oxygen will also be captured and re released when the water needs O2. This is a conversation to have but something I believe is happening.

Look at this picture above and the stem I made. You have to measure you filter housing and properly assemble this as close to perfect as possible. I used
1 - 10 inches of 1/2 inch PVC threaded nipple
2- 1/2 inch couplings.
This worked perfectly for my situation. I DO NOT use any glue or silicone my down pipe sits perfectly and i can remove it for maintenance and put it back with ease
It is important to have some outlets at the bottom so I chose to drill a bunch of small holes
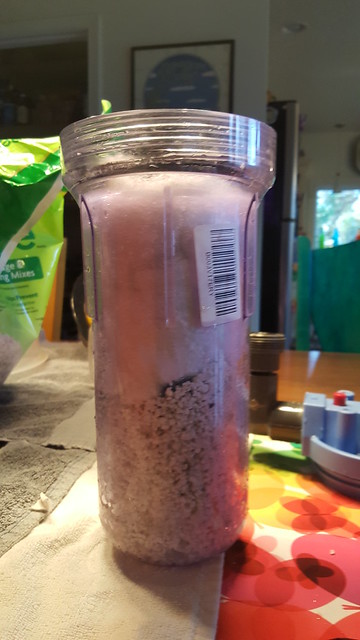
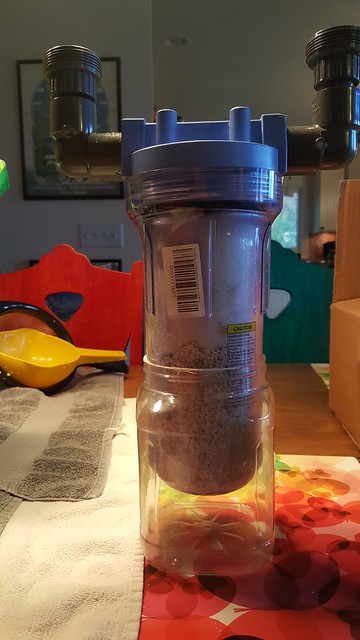
From this point I can now stuff my filtration mediums. I filled the lower 1/3 to 1/2 of the filter housing with washed perlite.
****WASH YOUR PERLITE THROUGH A SEMI FINE STRAINER. Lots of really small pieces that are too small to be any good. I just throw this excess washed Perlite in my outdoor flower beds / gardens
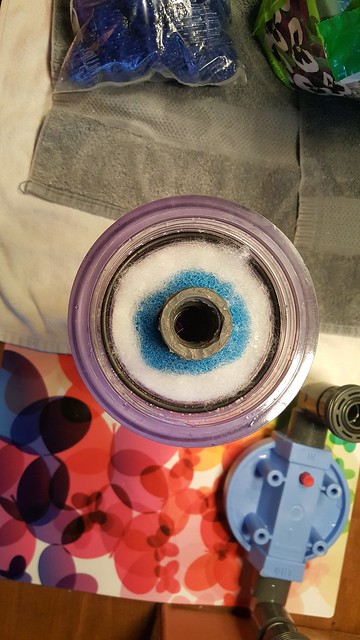
I then had this nice 6 inch long 3/4 inch diameter sponge strainer.
I was able to slip this over my down flow tube and this was just a nice addition.. Not necessary but why not its cheap.
I then filled up the rest of the canister with my poly fil filter floss.
Pack that is good. Not extreme but you can pack alot into a small space. We want to crate some back flow but not impede flow so much we get none. Again you can put more in then you probably think
*** I HIGHLY RECOMMEND YOUR 1ST TIME IS TO HOOK UP YOUR SYSTEM TO A BUCKET OF YOUR TANK WATER AND RUN THE WATER THROUGH IT TO SET UP BIOLOGICAL FILTRATION AND TO TEST FOR LEAKS
from this point setting it up in your tank or your test bucket of tank water should be a slam dunk.
plump your inlet to the inlet of your tank feed lines. you may need to prime you pump. I use another pump I use for water changes and just hold the pump outlet at the inlet line and that gets things flowing. If you have it under your tank a good siphon will prime it.
On the outlet side use those loc line nozzles and adjust them till you find your best tank flow.
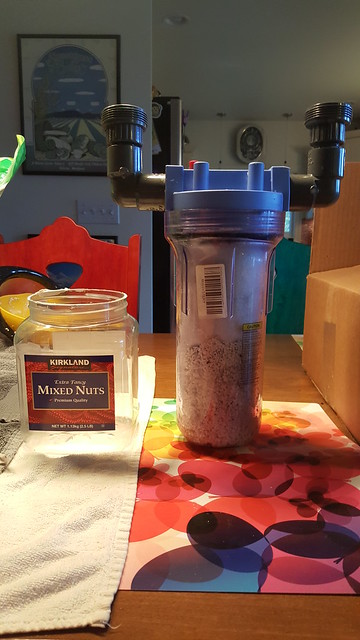
LAST BUT NOT LEAST I WAS ABLE TO ADD A CHEAP STAND INSTEAD OF BUYING A MOUNT USING A MIXED NUTS PLASTIC CONTAINER
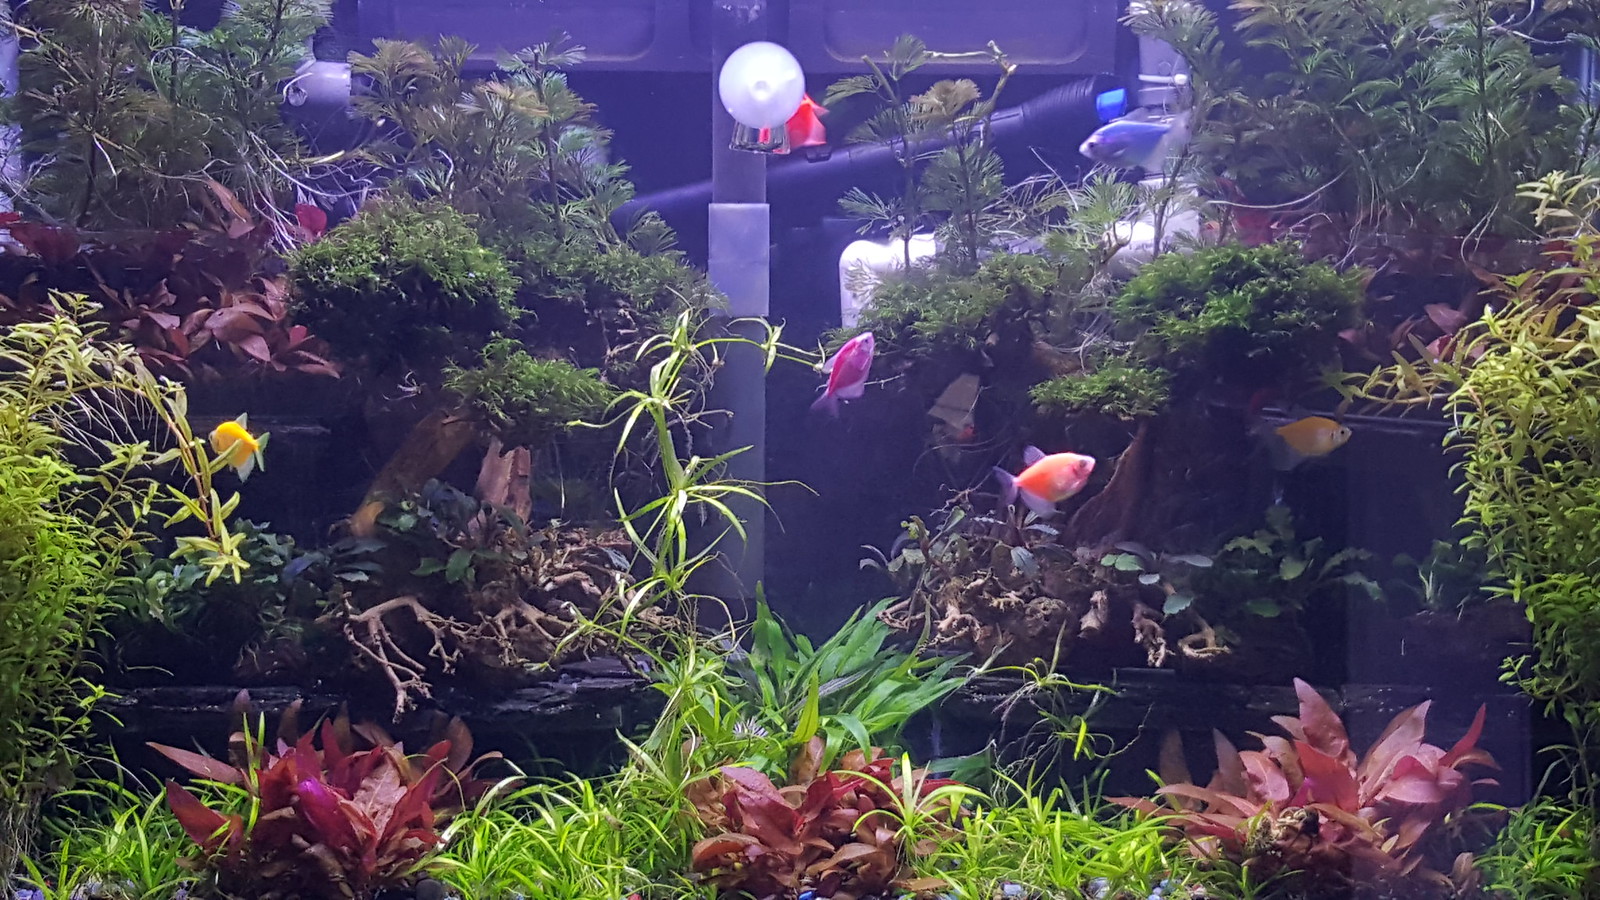
And of course my results. This is my tank at 9 weeks
My 1st would be my Cerges CO2 reactor
You will need lots of parts and few tools but overall this unit is way more effective than any of the ones you can buy and my design serves as a very effective biological filter / water polisher.
I run 2 filters on my 30 gallon a Hang on Back version where i removed the bio wheel and carbon and used filter socks and stuffed it and my Cerges reactor. This really keeps the tank clean and allows me to ensure my flow in the tanks reaches every corner. Lots of people underestimate proper flow in a planted aquariums.
Ok enough chit chat
Water Filter Housing like this
Check Valve to prevent back flow
Loc Line or Similar out flow nozzle system
Strainer basket or something similar for feeder line
You will need filter medium. I recommend Perlite + Filter Floss. In my picture I used a filter sponge with a 3/4 diameter hole down the middle that I had laying around. Bio balls are an option, but they are bulky and I prefer the hard pack of perlite and filter floss. I just put Bio Balls in the picture to give the idea that there are options
Tubing is going to be under your control.
***NOTE*** YOU NEED TO KNOW THE THE THREAD/SIZE OF THE FILTER HOUSING AND BUY THE RIGHT FITTINGS. BEST THING IF YOU ARE NOT SURE IS TO BUY THE HOUSING AND TAKE IT TO YOUR LOCAL HARDWARE STORE AND START MATCHING FITTINGS AND HOSE ON THE SPOT.
I used 3/4 inch PVC fitting connected tot he cerges filter housing. I used 5/8 hose and proper barbed fitting to match.
2- 3/4 inch pvc schld 40 Unions
6 - 3/4 inch threaded close nipples
2- 3/4 inch 90 degree fitting
1- 3/4 Inch Shut off valve ( you can add one to both sides for easier disconnections. Mine is at tank level so I don't have much siphoning happen)
1- 3/16 inch hosed barb connection for co2 input
1- roll of plumbers taper.. Helps prevent leaks
6- worm screws to help with barb connections (optional)
2- 3/4 90 degree fitting
_______________
We will also need a feed and return line ( I switched to 1/2 inch here less bulk but this is a flow restriction so your choice) and a non submersible water pump. I have a 30 gallon tank and I am runninng a 400 GPH pump and with all the bends and filter medium I would not want to go any lower. I do create some back pressure but flow is not as strong as you think
Here is where I bought MY pump.
It is a dual purpose submersible or non submersible., and best of all affordable. You can put it in your aquarium but too bulky for me. I run mine out the back and have a small catch bucket for any small leaking.
*** APOLOGIZE FOR NOT HAVING BETTER PICTURES OF MY FEED AND RETURN SET UPS. I'LL TRY ADDING THAT IN NEXT OPPORTUNITY
You will need to design your feed and return lines. Because i have a HOB filter I had to pipe extra 90 degrees angles in... However I highly recommend some loc line flow nozzles a strainer basket for inlet.. From there ensure you have fitting that match your hose connections to your Cerges unit.
ASSEMBLY OF THE STEM FOR THE FILTER UNIT
**** You will need to reverse plump the filtration unit. The side marked in will be your Out, the side marked out will be your in. The reason for this is to force the CO2 pubbles down tot he bottom of the reactor and let them forces there way back up being dissolved into the water flow. The perlite and filter floss captures the CO2 and hold it whiel water rushes past it and grabs the CO2 dissolving it. As your photo period goes on and plants start pearling its safe to think that Oxygen will also be captured and re released when the water needs O2. This is a conversation to have but something I believe is happening.
Look at this picture above and the stem I made. You have to measure you filter housing and properly assemble this as close to perfect as possible. I used
1 - 10 inches of 1/2 inch PVC threaded nipple
2- 1/2 inch couplings.
This worked perfectly for my situation. I DO NOT use any glue or silicone my down pipe sits perfectly and i can remove it for maintenance and put it back with ease
It is important to have some outlets at the bottom so I chose to drill a bunch of small holes
From this point I can now stuff my filtration mediums. I filled the lower 1/3 to 1/2 of the filter housing with washed perlite.
****WASH YOUR PERLITE THROUGH A SEMI FINE STRAINER. Lots of really small pieces that are too small to be any good. I just throw this excess washed Perlite in my outdoor flower beds / gardens
I then had this nice 6 inch long 3/4 inch diameter sponge strainer.
I was able to slip this over my down flow tube and this was just a nice addition.. Not necessary but why not its cheap.
I then filled up the rest of the canister with my poly fil filter floss.
Pack that is good. Not extreme but you can pack alot into a small space. We want to crate some back flow but not impede flow so much we get none. Again you can put more in then you probably think
*** I HIGHLY RECOMMEND YOUR 1ST TIME IS TO HOOK UP YOUR SYSTEM TO A BUCKET OF YOUR TANK WATER AND RUN THE WATER THROUGH IT TO SET UP BIOLOGICAL FILTRATION AND TO TEST FOR LEAKS
from this point setting it up in your tank or your test bucket of tank water should be a slam dunk.
plump your inlet to the inlet of your tank feed lines. you may need to prime you pump. I use another pump I use for water changes and just hold the pump outlet at the inlet line and that gets things flowing. If you have it under your tank a good siphon will prime it.
On the outlet side use those loc line nozzles and adjust them till you find your best tank flow.
LAST BUT NOT LEAST I WAS ABLE TO ADD A CHEAP STAND INSTEAD OF BUYING A MOUNT USING A MIXED NUTS PLASTIC CONTAINER
And of course my results. This is my tank at 9 weeks
") Thanks for posting this, I've always wondered how these were built and intending to read back through it more closely later on tonight.
Thanks for posting this, I've always wondered how these were built and intending to read back through it more closely later on tonight.