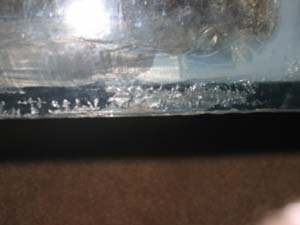
125 gal reseal. To completely tear down or not?

The friendliest place on the web for anyone with an interest in aquariums or fish keeping!
If you have answers, please help by responding to the unanswered posts.

fastforward

Aquarium Advice Newbie
Joined
Mar 4, 2007
Messages
4
Hello, I just picked up a used 125 gal the other day that had been sitting for a couple years. The seals were still blue and pliable but the resealing job that was done previously looked flat out horrible and it's better safe than sorry imo.

Anyway, I've scraped out most of the old silicone and will be at the very least resealing all the corners but after inspecting the actual joints a bit closer I'm wondering if, since I'm this far along, I shouldn't seperate all 5 panes and completely reseal it. Heres a picture of the joints in question. The joint seals pretty much look like this all over.


If I do completely rip it apart I have a few questions.

1) Currently, the tank is constructed with the bottom inside all 4 walls but flush with them. Should I raise it up a 1/4" or so when I reseal so it never takes any dirrect stress?

2) What's the easiest way to remove the tank trim?

3) From what I've read it looks like redoing the joint seals simply entails seperating the panes, thoroughly cleaning off old the old silicone, thoroughly cleaning the glass surface, and then laying thick new bead of silicone on the joint and clamping or taping the panes together. Do I have this about right? Also, is it possible to press too much of the silcone out when you rejoin the panes?

Anything else I'm forgetting? I'd like to get on this tomorrow if possible so any and all responses will be greatly appreciated.
 

Attachments

  • tank_seam_710.jpg
    tank_seam_710.jpg
    23.3 KB · Views: 477
Firstly, If you are going to reseal, remove all the silicone from the interior seams and redo the whole tank (all the seams). I can't tell from the picture if the tank should be dissambled. As far as raising the bottom goes, while some will advocate it, I wouldn't. I'm going to assume there is no bottom frame here. If you raise the bottom up so it is suspended, the entire weight of the tank will rest on the vertical pieces. With a 72" by 18" (1/2"glass) tank that would result in the entire weight being distributed over 90 square inches. If the bottom supports the weight, it is distributed over1286 sq inches. Your suspended bottom would rely on the silicone to carry all the weight, as well as hold the tank together. If the bottom is totaly supported, by a plywood stand top, and styrofoam to even any surface irregularities, the bottom piece becomes almost unbreakable, as the stand will support the weight rather than the glass and silicone. Glass is very strong and tough if it doesn't bend.
As far as a spacebetween panes, some sdvocate putting a very thin wire between the piece, and removing it when the silicone sets, but before it hardens. I have never done that, and my tanks have all held together, including the first one I built 40 years ago, and which is still in use. All the tanks I have built have the bottom piece underneath the sides. I understand why many commercial tanks are built with suspended bottoms, but I don't believe that it makes for a stronger tank. Being inside a rim/frame protects the edges that would be other wise exposed and fragile if the tank were rimless. Hope this is of help to you.
 
Thank you for the response. I'm definitely removing every last bit of silicone from the corners.

Is there any way I can post more pictures or give a more detailed description of the seams so that I can get some advice on whether to tear it apart or not? I'd really hate to reseal this whole tank and then have a leak or a pane failure that could have been avoided by going that little extra mile. Obviously I'd rather avoid doing that if I can but if I can't it would be nice to know. Again, thank you.
 
Unless you have a lot of voids, between the panes, it probably isn't necessary to disassemble. Was the tank holding water before you got it? I have never taken one apart (yet), although I have one i bought in 72, I think may need it. It is actually moving on the joint. I have 3 others beside that one, to reseal right now. All most all of my 20 tanks were bought or acquired as leakers.
 
Well, it's coming apart. While stripping out some of the last of the silicone this morning I found that a gap that starts about halfway along the bottom/front joint and slowly widens to about 1/16" on the side. The previous owner had pressed some silicone in there on his last reseal (I'm assuming) but it didn't make a complete seal everywhere. Even if I wanted to try and shove more material into that gap there's no way for me to prep the surface sufficiently. So that's the final straw :p

So, making sure the joint surfaces are clean enough to preform heart surgery on does anyone have any advice or things I need to be extra careful of? I've read duct tape is an acceptable way of holding the tank together while redoing the joints. Is this correct? This is my first reseal job and my first glass aquiarium so I want to make sure to get it right.

Thanks guys.
 
Yes duct tape, or masking tape will do, to hold it together. Your right about the cleaning, it is critical. Once you get the beads off the inside, you can use fine wire or monofilament fishing line to seperate the panes. You may need to wedge something like a razor blade at the start of the joint to get started. You need to be careful, as this is when pieces get broken. For a tank that size, you may need a helper. When you get them seperated, spend some time making sure all the silicone is removed. The edges can be sanded to be sure the silicone is gone. When you are satisfied, the glass should be totally cleaned, using windex or vinegar, or windex and then vinegar. Before assembly, use acetone or alcohol to clean the surfaces where the silicone will be applied and a little beyond. For sure, you will need a helper for the assmbly. If the bottom pane is to be flush with the bottom edges of the sides, you will need a very flat surface to work on. Alternatively, you can place the bottom on 3 or 4 wood slats covered with a sheet of plastic, with the wood strips longer than the width of the tank. This is to ensure everything lines up. The first bead goes along the back of the bottom. The back pane is placed against the bottom edge, and the helper holds it. A bead is then put on the side edge, and on the vertical edge of the back. The end is placed against the bottom and back and taped. Same with the other end. Now, the verticals and the front of the bottom are siliconed and the front pane placed and taped. Care needs to be taken to ensure everything stays lined up and snug. Clamps can be used but aren't necessary. After it has had a day or so to cure clean, the seam areas and run a bead on all the inside joints, as well as add any braces. If you want nice clean edge, you can mask the areas where you want the beads to stop. The masking tape must be removed before the silicone sets. A dry run is a good idea for this part as it needs to be done quickly. As far as silicone goes, GE Silicone I for windows and doors is what most people use, but if you can get Ge 1200 series, it is a little stronger. That is basically it. If you need more info, pm me, and I'll try to help.
 
I would go ahead and disassemble the tank. Thats alot water to come rushing out on your floor if it ever did give out. Like you said, its better to be safe than sorry!! I like BillD's suggestion about styrofoam under the glass to help support the weight. If I ever have my tank emptied for any reason I'm going to do that just to be safe. Also if you take the tank apart and get in a bind putting it back together, most glass shops and LFS can reassemble a tank in a day or two for a fee, which usually isn't that expensive. Good luck, Let us know how it turns out!
 
tropicfishman said:
I would go ahead and disassemble the tank. Thats alot water to come rushing out on your floor if it ever did give out. Like you said, its better to be safe than sorry!! I like BillD's suggestion about styrofoam under the glass to help support the weight. If I ever have my tank emptied for any reason I'm going to do that just to be safe. Also if you take the tank apart and get in a bind putting it back together, most glass shops and LFS can reassemble a tank in a day or two for a fee, which usually isn't that expensive. Good luck, Let us know how it turns out!

Well, all the silicone and trim is gone. I'll have to wait til tomorrow to get some fishing line or something similar to seperate the panes.

I also took bill's suggestion on the foam. I cut some 3/4" plywood to top my stand and a piece of 1/2 foam will be going on top of that.

I'll definitely post an update and some pics when I'm done. It'll be a couple weeks, though as I'm going to give the silicone at least a week to cure.
 
Back
Top Bottom