I started my 3D background tonight...

The friendliest place on the web for anyone with an interest in aquariums or fish keeping!
If you have answers, please help by responding to the unanswered posts.

Sigpi906

Aquarium Advice Apprentice
Joined
Dec 3, 2013
Messages
32
Location
Little Rock, AR
Well, I've been thinking about it for a couple of weeks now, and I decided I might as well just go for it.

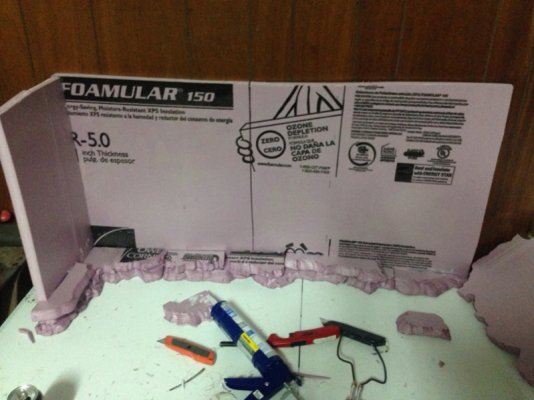
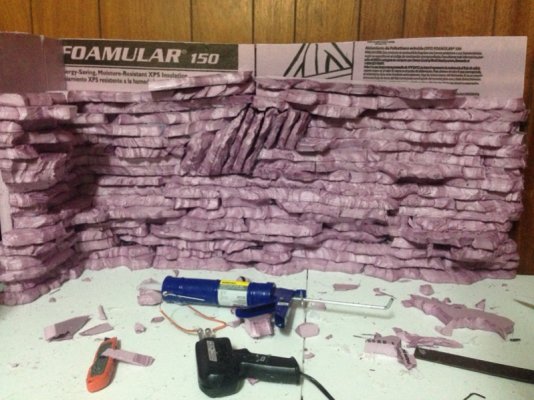
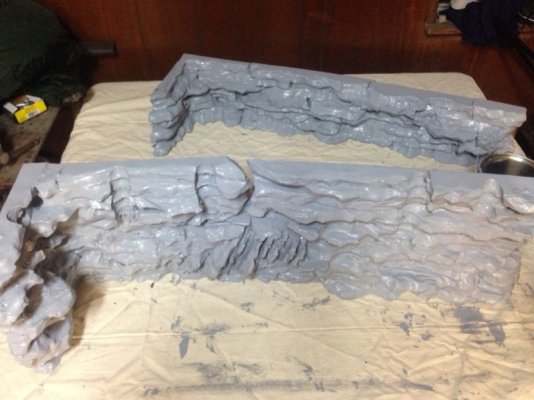
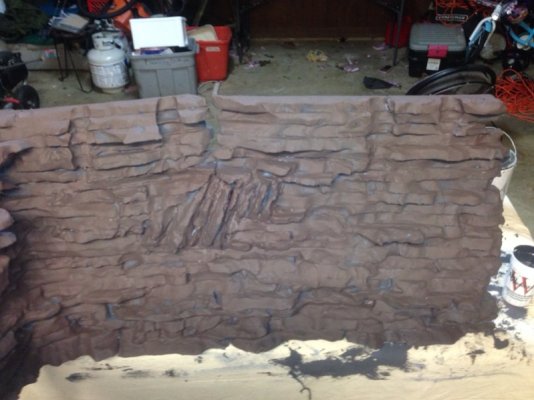
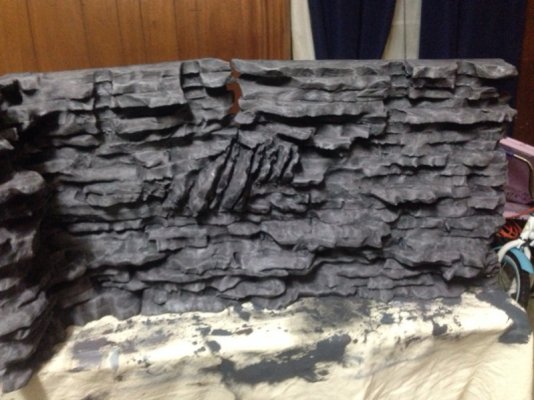
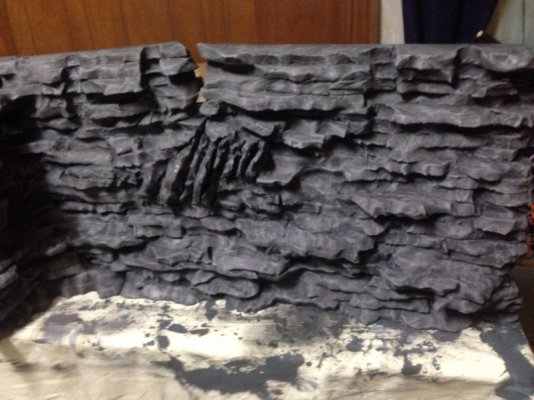
My designs going in a 48x24x18 tank. It will measure 43x22x11 with cutouts for the heater and 2 filters. I'm using 1" board and GE1 silicon.

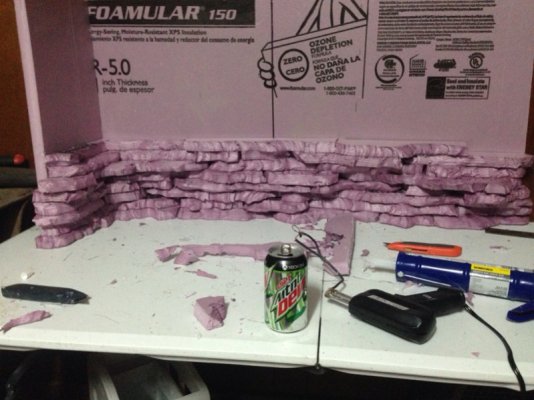
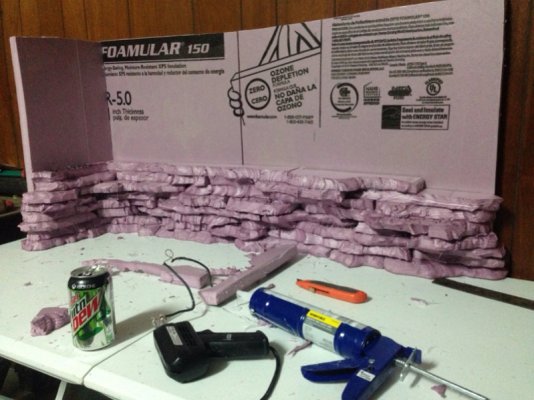
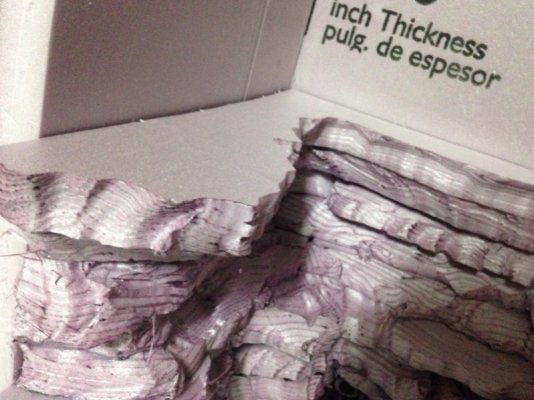
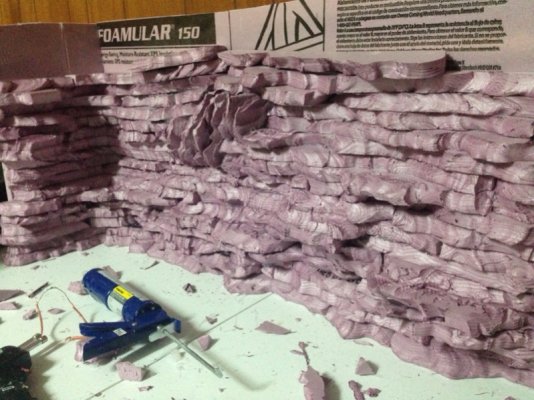
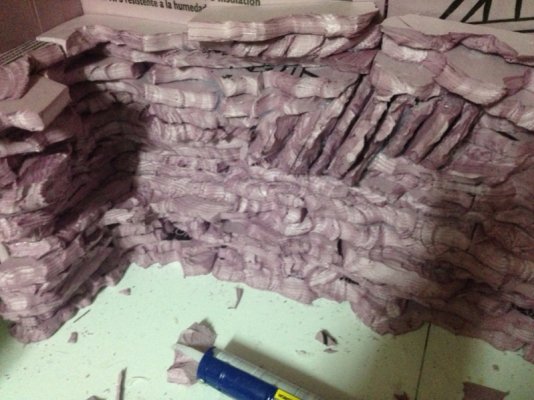
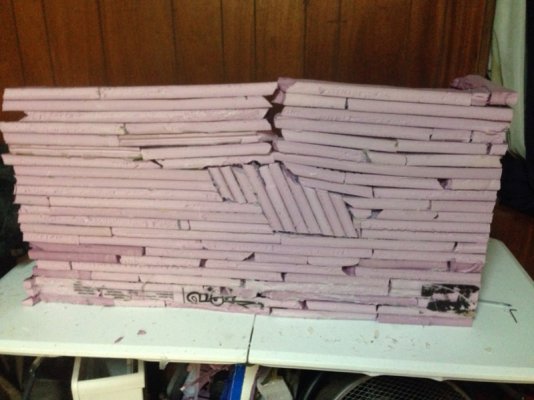
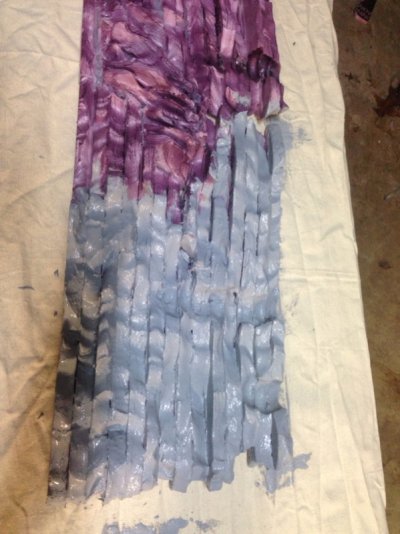
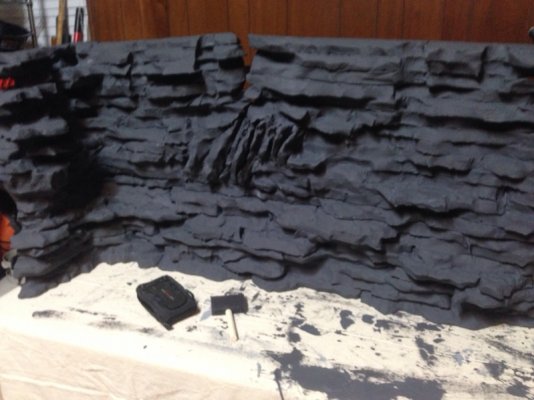
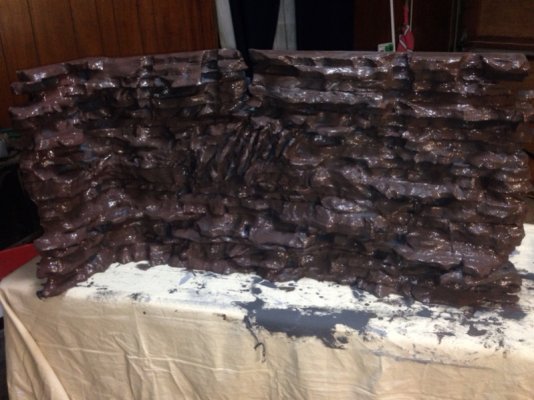
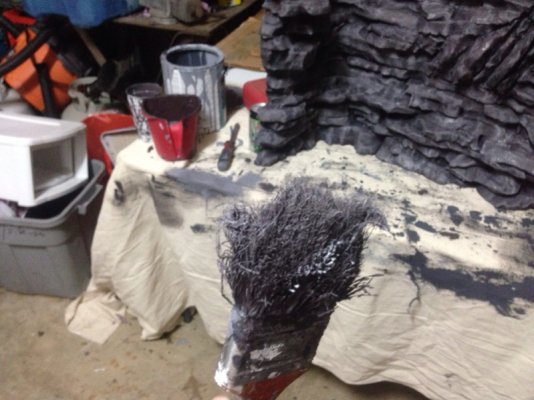
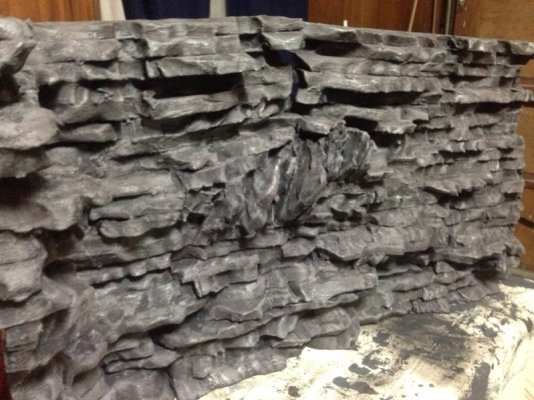
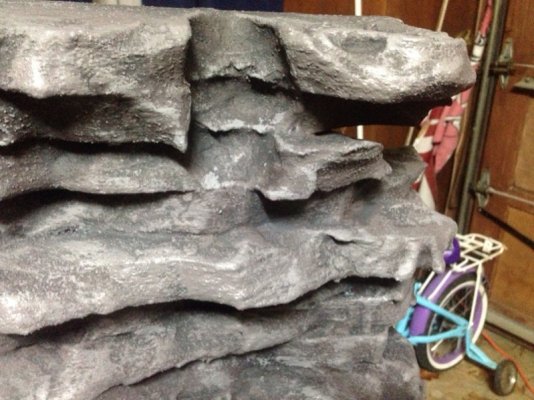
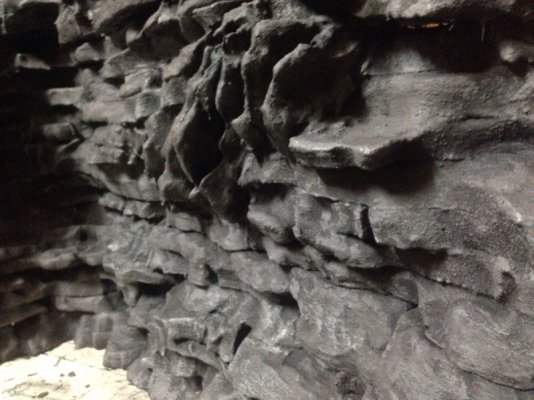
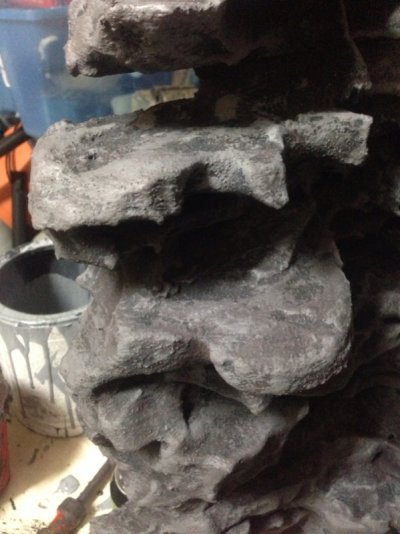
I'm going for a sharper shale-type layered look as opposed to the smooth river-rock look. I started out thinking that I'd build the wall on these back-boards and install the whole thing, but the more I think about it, I believe I'm just going to continue using the backboards as a guide to keep it straight and just install the to rocks without the backing boards.

I think I've got a couple off design tricks up my sleeve on the design to help set it off a little. More pics to come as i get the design updated. Thoughts and constructive criticism welcome.
 

Attachments

  • image-2859310833.jpg
    image-2859310833.jpg
    144.2 KB · Views: 1,935
  • image-3263986423.jpg
    image-3263986423.jpg
    162.1 KB · Views: 264
  • image-2154313232.jpg
    image-2154313232.jpg
    168.3 KB · Views: 8,549
That's going to look sweet.. Please keep us updated
 
that looks very time consuming hot knifing all those little pieces of foam to look like rock. but in the end that should look sweet!
 
Not much of an update, but it's coming along great. I'll post a pic of the progress thus far when I get home.
 

Attachments

  • image-2932578011.jpg
    image-2932578011.jpg
    160.8 KB · Views: 264
Status update: I'm getting close to being finished. I took a little detour on the original plan... I got the bright idea of adding a literal " rift" in the rock design after talking to a friend about my cichlids natural habitat rift lakes...I remember seeing these sort of upheavals on the shale rock cliffs they surround Greers Ferry lake. I'm a nerd. I'm ok with that.
 

Attachments

  • image-3620766185.jpg
    image-3620766185.jpg
    188.1 KB · Views: 1,923
  • image-4251996701.jpg
    image-4251996701.jpg
    196.1 KB · Views: 12,309
  • image-456151864.jpg
    image-456151864.jpg
    171.5 KB · Views: 277
So far I've gotten my 3rd coat of Drylok on. I had it tinted light grey at Home Depot. Did 1 coat of that, then did second with charcoal color added. I muddied this coat up with some buff and red to make a brown. Probably do one more big coat before start detailing is with a destroyed dry brush.
 

Attachments

  • image-3038375898.jpg
    image-3038375898.jpg
    146.8 KB · Views: 2,000
  • image-2962539058.jpg
    image-2962539058.jpg
    160.9 KB · Views: 1,346
  • image-3038091174.jpg
    image-3038091174.jpg
    152.2 KB · Views: 4,872
  • image-51229166.jpg
    image-51229166.jpg
    141.6 KB · Views: 5,626
  • image-3410650547.jpg
    image-3410650547.jpg
    165.3 KB · Views: 1,328
I put another 8/10 of a full coat of charcoal over the muddy color. I then began using a destroyed brush to dry brush coats of Drylok on there that changed shades and got lighter each time. I'd say i probably put 7 layers of dry brush on there to get the texture I was looking for. Some random pictures of progress and the final product:
 

Attachments

  • image-2075013865.jpg
    image-2075013865.jpg
    146 KB · Views: 1,442
  • image-3900415597.jpg
    image-3900415597.jpg
    122 KB · Views: 1,295
  • image-1335456013.jpg
    image-1335456013.jpg
    137.9 KB · Views: 1,375
  • image-2707787799.jpg
    image-2707787799.jpg
    186.9 KB · Views: 4,780
  • image-3161889952.jpg
    image-3161889952.jpg
    159.7 KB · Views: 1,315
  • image-221643421.jpg
    image-221643421.jpg
    193.7 KB · Views: 1,336
  • image-28942397.jpg
    image-28942397.jpg
    196.8 KB · Views: 1,266
  • image-2585651887.jpg
    image-2585651887.jpg
    172.2 KB · Views: 4,280
  • image-34069432.jpg
    image-34069432.jpg
    154 KB · Views: 4,167
  • image-1778942019.jpg
    image-1778942019.jpg
    164.2 KB · Views: 1,269
  • image-2339422676.jpg
    image-2339422676.jpg
    162.4 KB · Views: 4,246
Looks great! I'm not sure if ill be following your way of stacking horizontal pieces or carving actual stones. I've watched just about every YouTube video on the subject for inspiration. I was wondering how you allowed for the filter and heater? I've seen people carve out a slot in the back but it really doesn't seem as tho either would function properly. Also yours seems to be large and in one piece. I'm making one for a 75 but ill have to have it cut into two or three pieces to fit it in because of my top brace. Do u have a rimless aquarium?
 
Kimmysparks, If you'll look back at post #8, you can see where my background is split into 2 pieces. It is still in 2 pieces, I just stacked them for the texture painting and for the pictures I took. It still comes apart into 2 pieces to make it be able to install past my center brace.

If you'll look at the background up at the top, you'll notice 4 cutouts that are part of the rock. These will allow my Intake and Return to be in front of the background and still function, while at the same time being recessed and not sticking out too far in front of the rock.
 
The closeup picture with the bicycle in the background shows what one of the cutouts for the filter return looks like.
 
How are you planning to attach it to your tank? I am building a similar background using Drylok. Tonight will be my 3rd coat. I keep coming back to worrying about it floating out.
 
Silicone is what I'm planning on using but I'm not overly impressed with how well it holds two pieces of styrofoam together. I was wondering Sigpi906's intention. I went back and drilled 1" shafts in mine that I plan on filling with sand to help hold it down.
 
ImageUploadedByAquarium Advice1387832451.862682.jpg
This is what my intention is :)

I'm with you on not being impressed with how well the silicon does with holding the styro together by itself, however I think the Drylok will help keep things together pretty well. I actually put one thin coat of Drylok on the back side of the BG to cover the pink and in my mind I think the silicon will adhere to that better than the styro.

I plan on using every bit of that 6 tubes on the back. I'm relying on strength in numbers for the background to stick.

Also, the physics of how it will work in my mind relate to the special snow/ice tires used up north in Alaska (instead of studs) it's called "siping" and it's basically a bunch of little cuts in the tread block that increase the number of rubber edges that contact the surface of the ice to give a car traction that it wouldn't otherwise have. When I look at the back of my BG and see all those edges of the boards that will be in contact with the glass and silicon, I reason that it will work using the same principals as the siping. (Look up Blizzak tires for a better idea)

Of course this is all just BS theory in my mind and I'm really just doing it based on blind faith in the internet community that did it before me and had only a FEW horror stories about not using enough silicon and having adhesion failure. I have yet to read anyone using massive amounts of silicon and have adhesion failure.
 
I think it's a good theory. Because the more surface area the better chance for the silicone can adhere too. Isnt that the reason why sand holds more beneficial bacteria because there's more surface area. I'm just a new though, so most likely I still don't know what I'm talking about lol

Sent from my SPH-L710 using Aquarium Advice mobile app
 
Long ago we would just dissolve the styro and leave the shell. We generally incorporated fiberglass mesh into the build to give support. Without the styro it won't float. We just sealed around the edges.

(Acetone)
 
Back
Top Bottom