Hey that is good progress!! Love that you will use the understairs space for something too!
You are using an out of date browser. It may not display this or other websites correctly.
You should upgrade or use an alternative browser.
You should upgrade or use an alternative browser.
The slow 112G jungle tank build ...
- Thread starter Harry Muscle
- Start date
The friendliest place on the web for anyone with an interest in aquariums or fish keeping!
If you have answers, please help by responding to the unanswered posts.
If you have answers, please help by responding to the unanswered posts.
Harry Muscle
Aquarium Advice Activist
- Joined
- Jun 22, 2015
- Messages
- 160
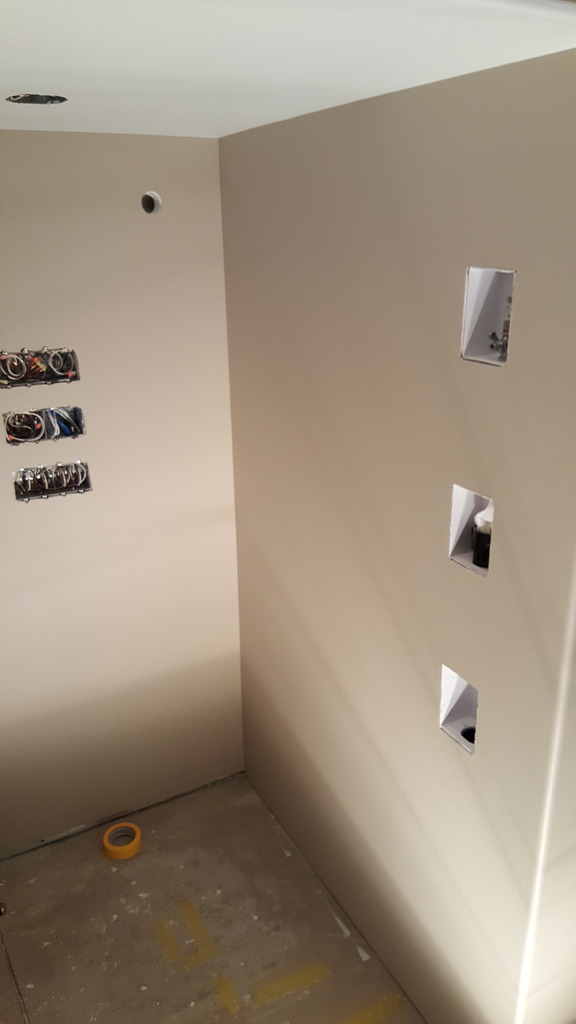
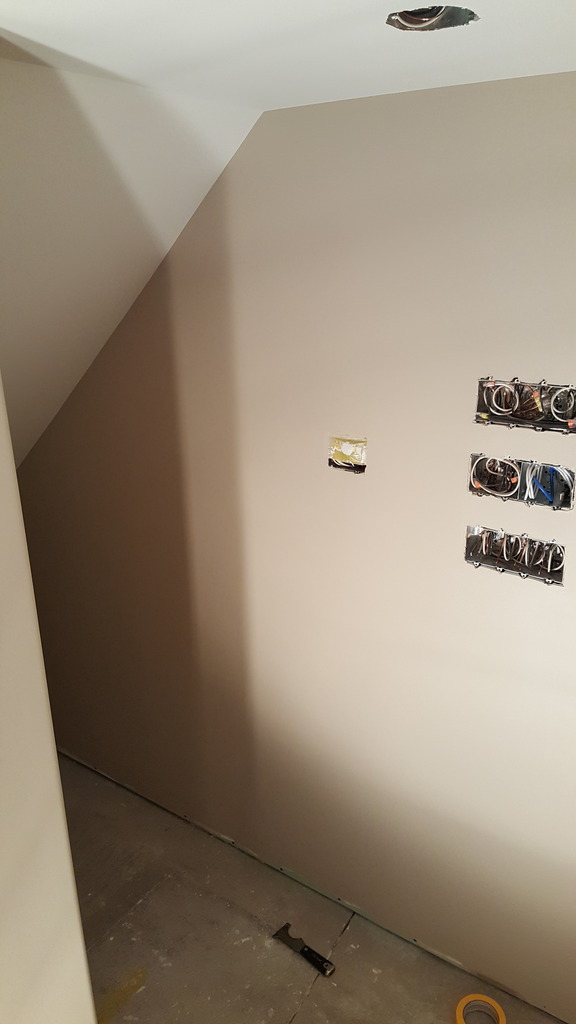
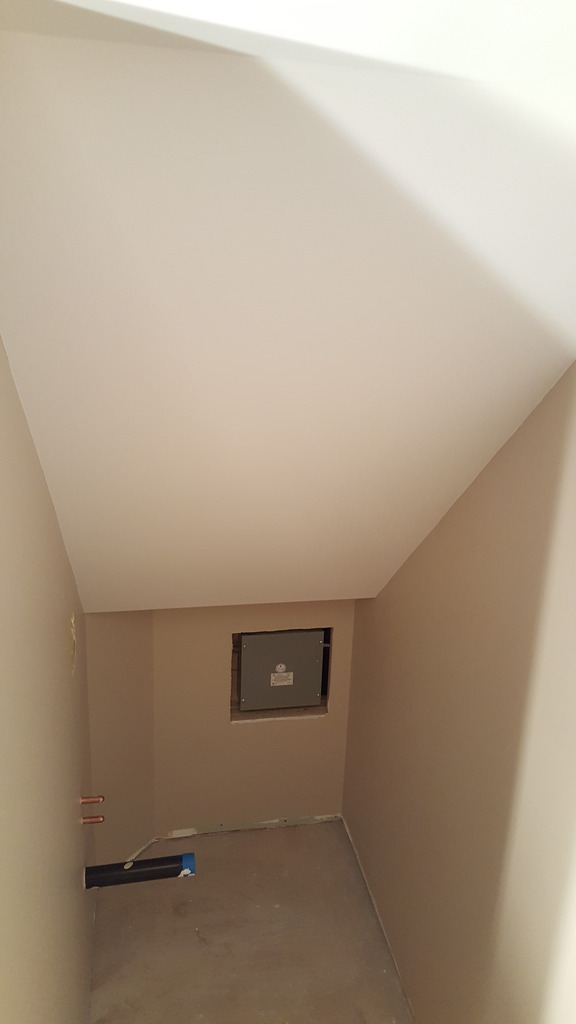
Fish room is all painted. Floor tile will be coming next. Things are finally coming together in the fish room ... well almost.
Thanks,
Harry


Thanks,
Harry
Painted! This is the best fish room I have seen and looks so well laid out. Frankly jealous lol.
There was one here of an old wash room (nice old bricks) getting converted but don't know if got finished.
There was one here of an old wash room (nice old bricks) getting converted but don't know if got finished.
Looks excellent. Good looking work you put in there!
Harry Muscle
Aquarium Advice Activist
- Joined
- Jun 22, 2015
- Messages
- 160
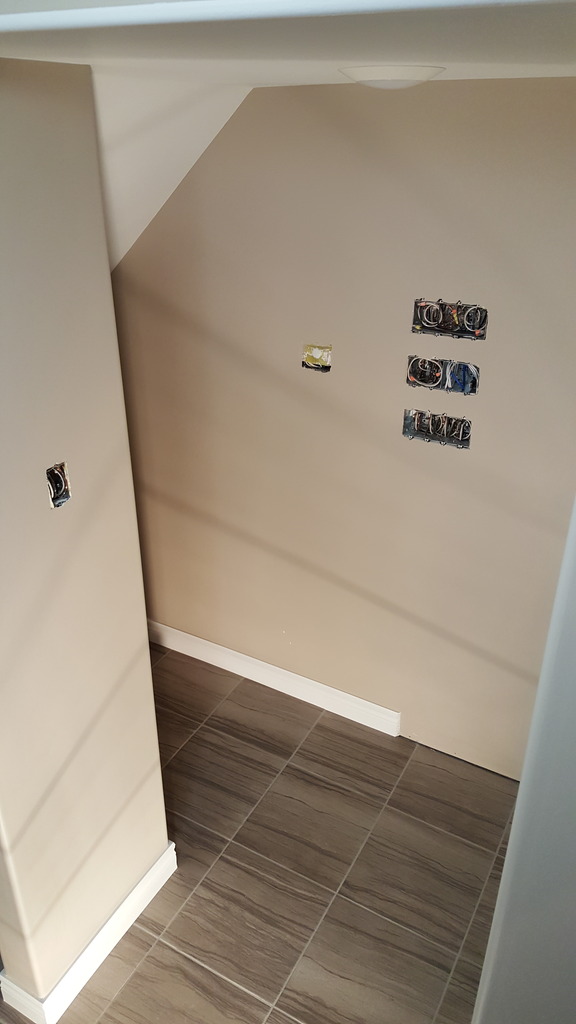
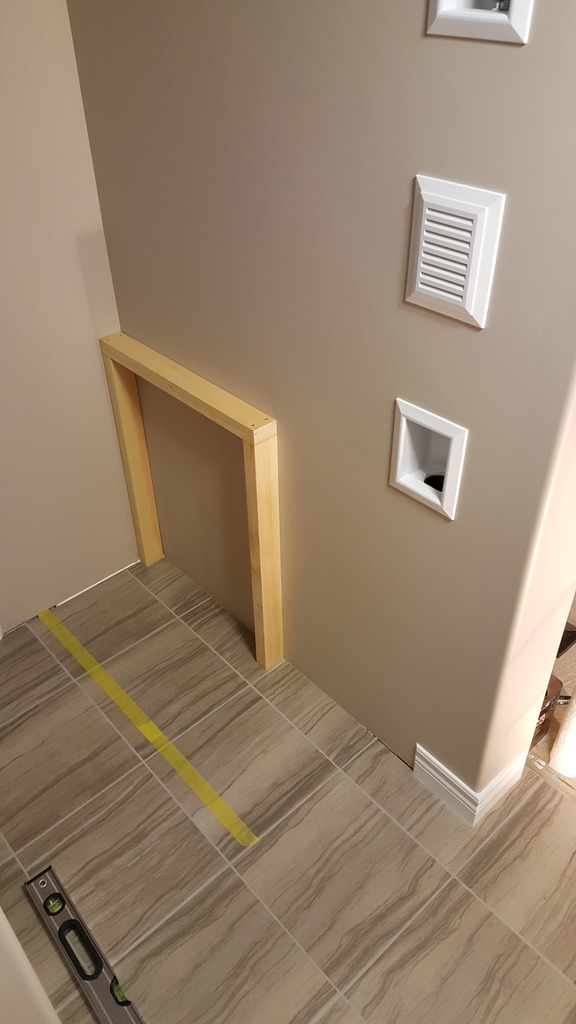
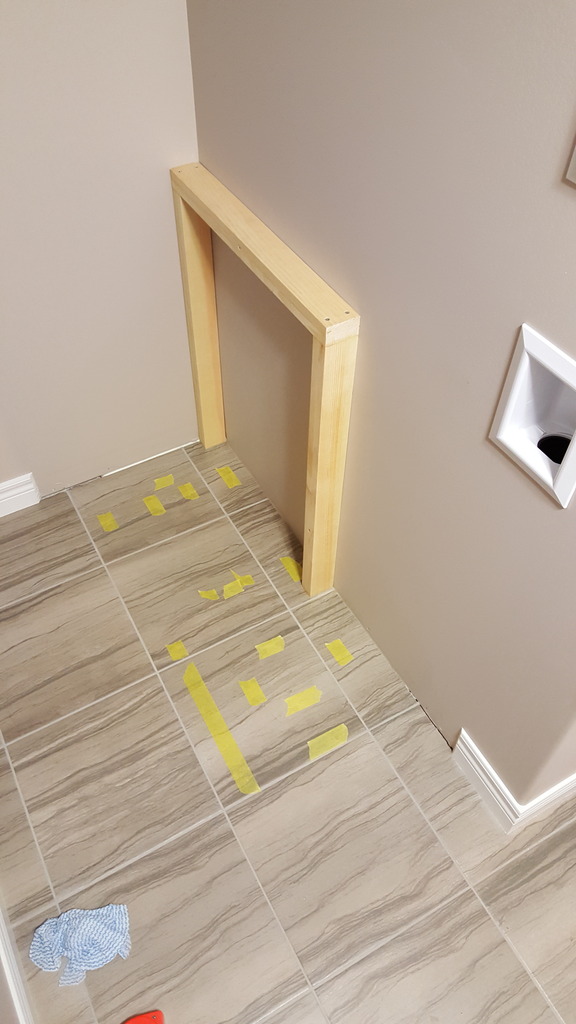
The tile is down and the baseboards have been installed and painted. The rest of the basement work is now also done so I can focus on fish stuff only from here on. Here's what the fish room looks like now:

Next steps will be to install the sink and build and install the cabinets that the sump will sit on.
Thanks,
Harry


Next steps will be to install the sink and build and install the cabinets that the sump will sit on.
Thanks,
Harry
TMaier
Aquarium Advice Addict
Your fish room is a room under the stairs? Harry Potter lived in a cupboard under the stairs. We expect great things from you.
Very nice, a lovely job you are doing! That is a lot of work right there!!!
Harry Muscle
Aquarium Advice Activist
- Joined
- Jun 22, 2015
- Messages
- 160
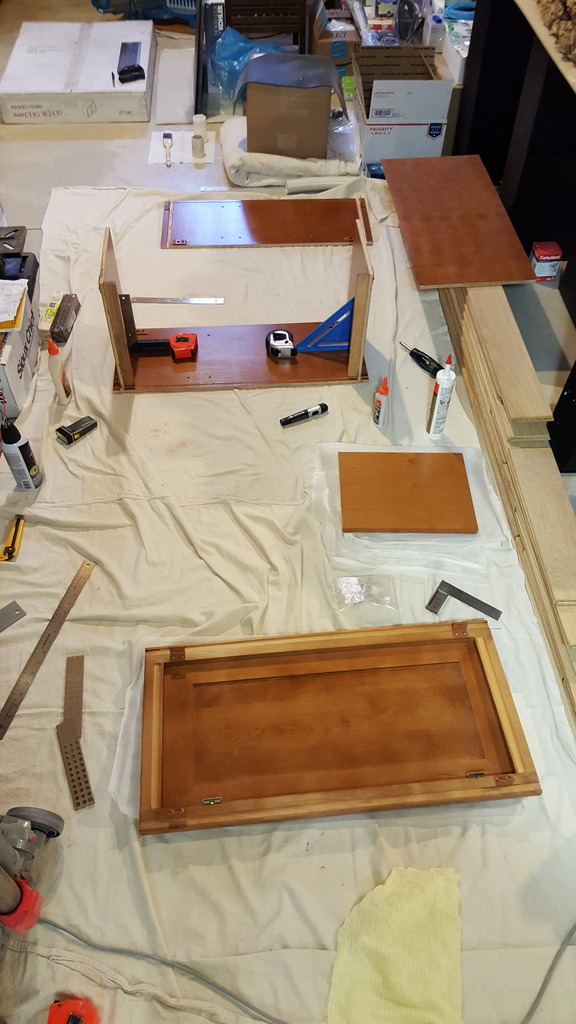
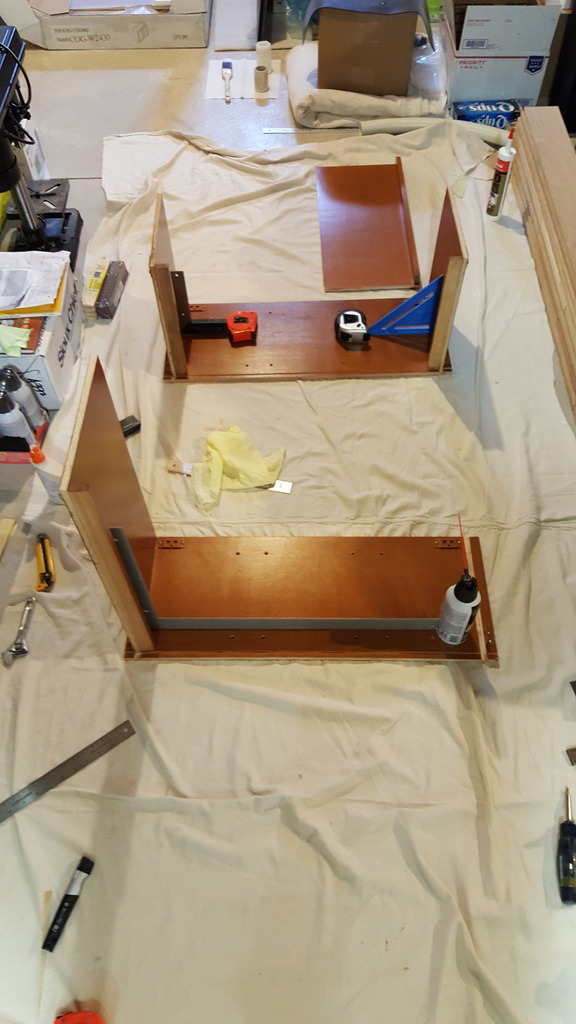
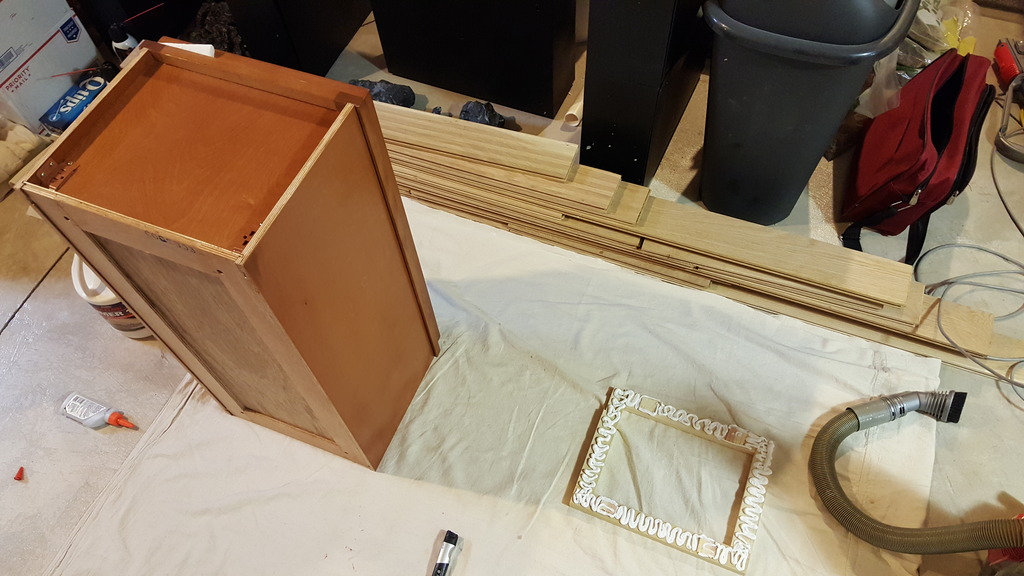
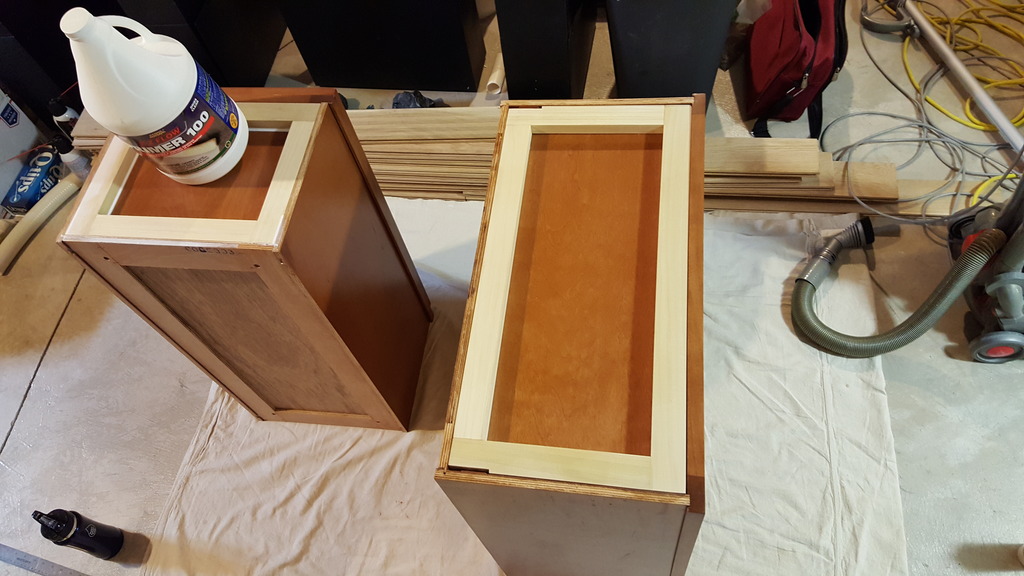
Cabinet assembly has begun. These two cabinets are going in the fish room. The larger cabinet will house the quarantine tank and the smaller cabinet will be for storing stuff. On top of these two cabinets will sit the sump.
I'm gluing all the cabinet joints. It's an all plywood cabinet but it's fairly cheap so gluing the joints should help with sturdiness.
Thanks,
Harry
I'm gluing all the cabinet joints. It's an all plywood cabinet but it's fairly cheap so gluing the joints should help with sturdiness.


Thanks,
Harry
Harry Muscle
Aquarium Advice Activist
- Joined
- Jun 22, 2015
- Messages
- 160
The cabinets are coming along. Glueing the joints really helped with making things sturdy. I used Elmer's ProBond Max glue for raw wood to raw wood joints and Elmer's ProBond Advanced for joints where one or both surfaces weren't raw wood. Worked really well. Both glues are water cleanup but are water proof once dry. When attaching the front of the cabinets I needed a glue with gap filling ability so I went with No More Nails ... it's a water cleanup construction adhesive.
Here's a trial fit of the cabinets in the fish room:
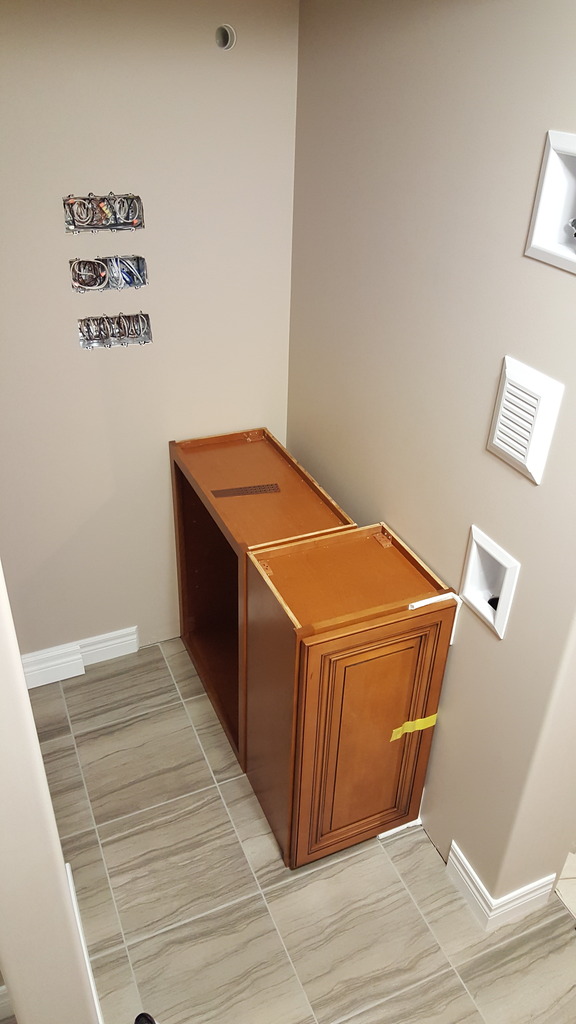
I was a little worried about the low surface area of the cabinets for transferring the weight of the large sump that will sit on top so I decided to build some reinforcements:
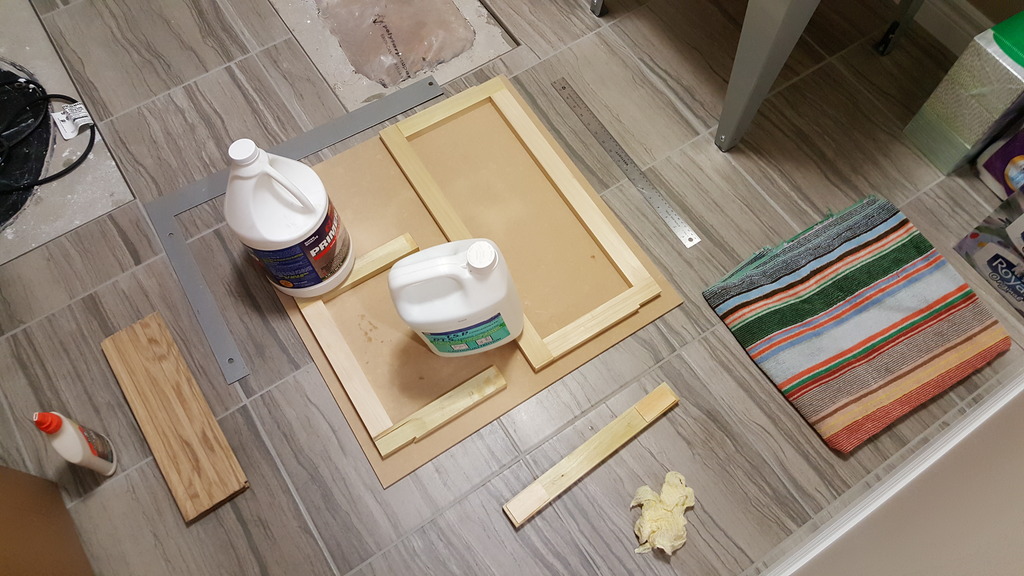
They will fit on the top and bottom of the cabinets to provide more surface area. They are a little too thin so a nice layer of glue was needed:
It's not a perfect solution for weight transfer since the loads still have to travel through the 1/2" plywood of the cabinets but at least it reinforces the joints and spreads the load out a bit.
Thanks,
Harry
Here's a trial fit of the cabinets in the fish room:

I was a little worried about the low surface area of the cabinets for transferring the weight of the large sump that will sit on top so I decided to build some reinforcements:

They will fit on the top and bottom of the cabinets to provide more surface area. They are a little too thin so a nice layer of glue was needed:


It's not a perfect solution for weight transfer since the loads still have to travel through the 1/2" plywood of the cabinets but at least it reinforces the joints and spreads the load out a bit.
Thanks,
Harry
Good info on the gluing options. The reinforcement seems like it will do what you say.
I like getting good info to store for use when needed!
I like getting good info to store for use when needed!
Harry Muscle
Aquarium Advice Activist
- Joined
- Jun 22, 2015
- Messages
- 160
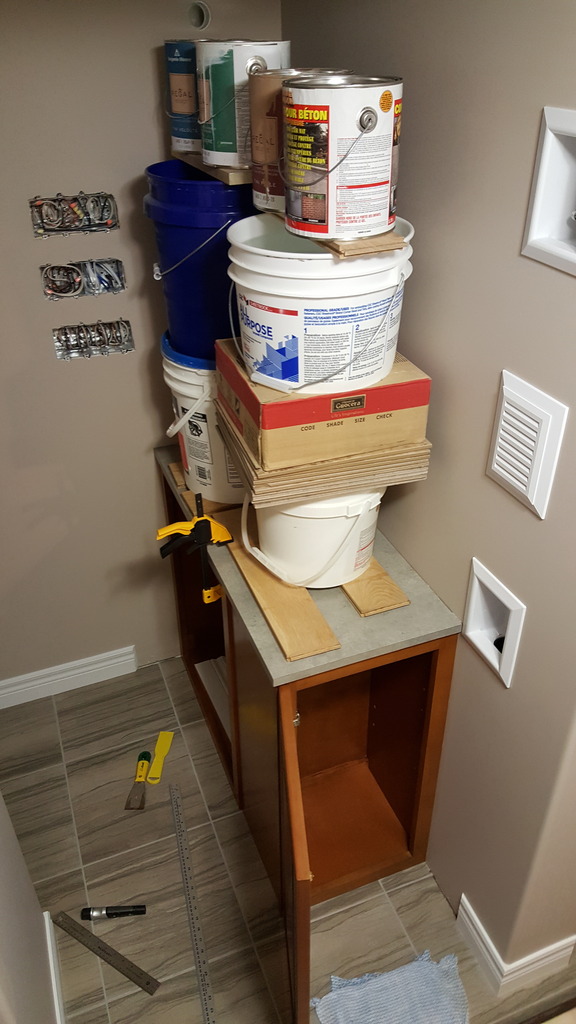
After a long delay dealing with life I finally had time to put the cabinets in in the fish room.
First I installed a filler piece in behind the cabinets since they form an L shape and I want full support everywhere for the large sump that will be sitting on top.
Next I measured out where the bottom of the cabinets will end up.
Then I applied a nice layer of Mono Ultra caulking. Since the cabinets will be sitting on tile and tile is almost never absolutely perfectly level or flat I wanted a layer that would better transfer the load to the tile. Usually this is done with foam or something similar but since this is a permanent installation caulking seemed like a good choice.
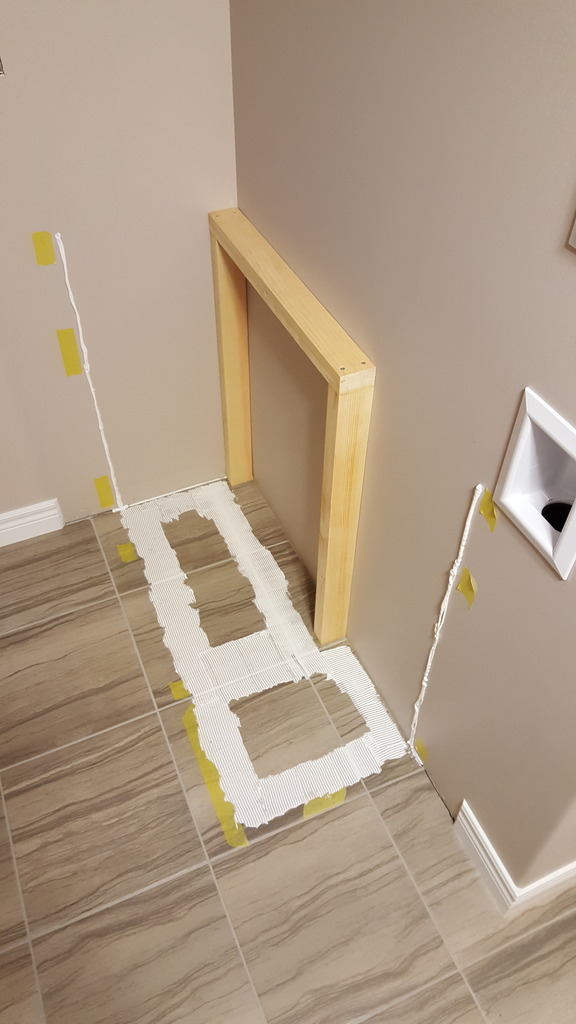
And finally in went the cabinets with lots of weight on top to squeeze the caulking.
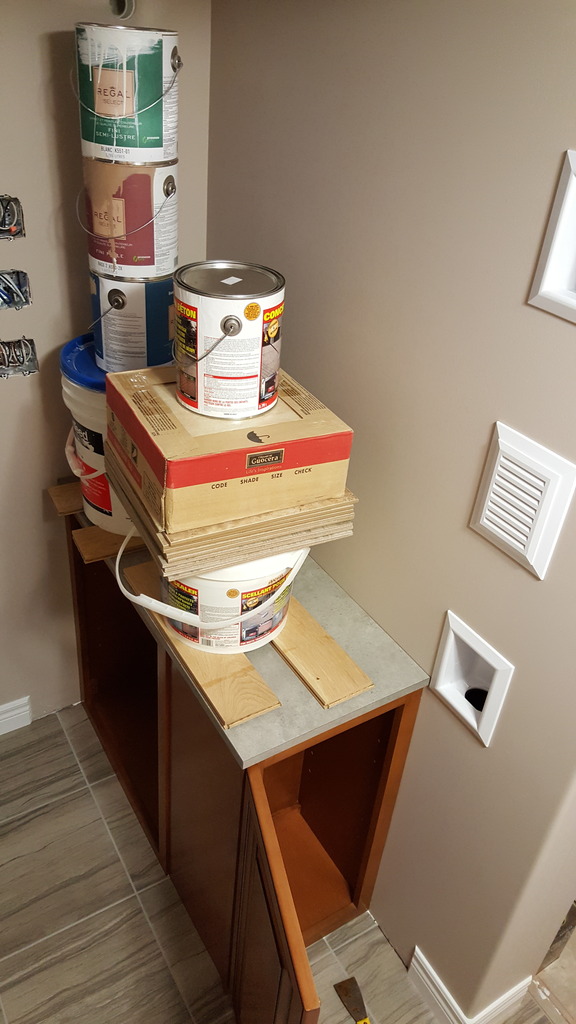
The countertop is not yet secured but that will be next once everything dries.
Thanks,
Harry
First I installed a filler piece in behind the cabinets since they form an L shape and I want full support everywhere for the large sump that will be sitting on top.

Next I measured out where the bottom of the cabinets will end up.

Then I applied a nice layer of Mono Ultra caulking. Since the cabinets will be sitting on tile and tile is almost never absolutely perfectly level or flat I wanted a layer that would better transfer the load to the tile. Usually this is done with foam or something similar but since this is a permanent installation caulking seemed like a good choice.

And finally in went the cabinets with lots of weight on top to squeeze the caulking.

The countertop is not yet secured but that will be next once everything dries.
Thanks,
Harry
Cool! Enjoyable to watch the progress.
.... and learning a lot! ")
Harry Muscle
Aquarium Advice Activist
- Joined
- Jun 22, 2015
- Messages
- 160
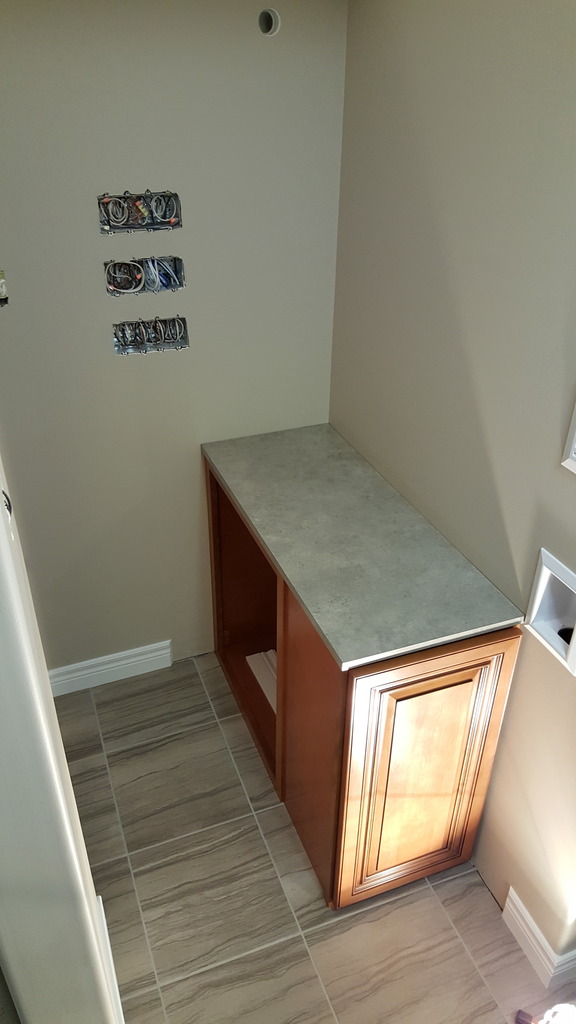
Countertop went in today. Very similar process to the cabinet install.
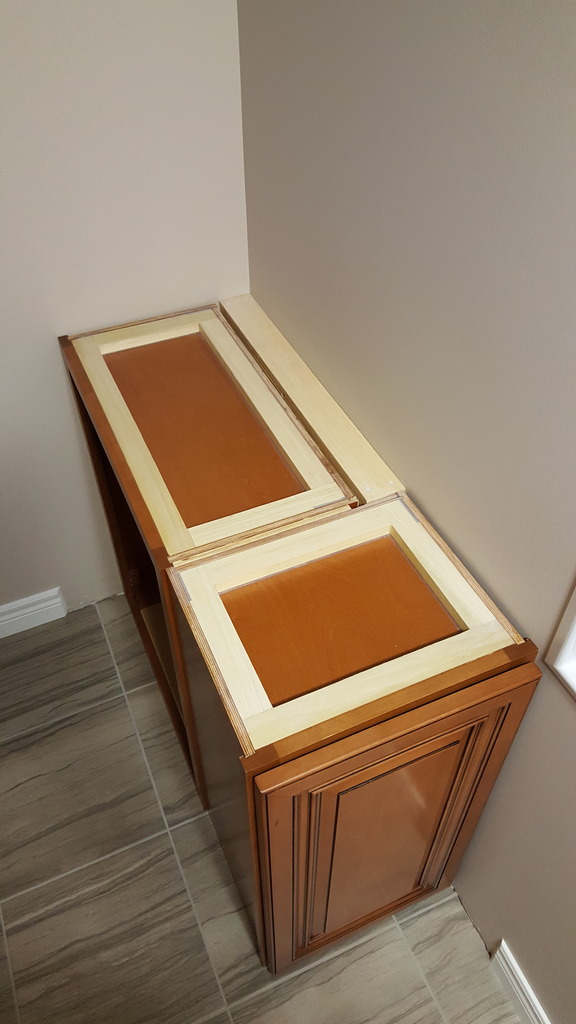
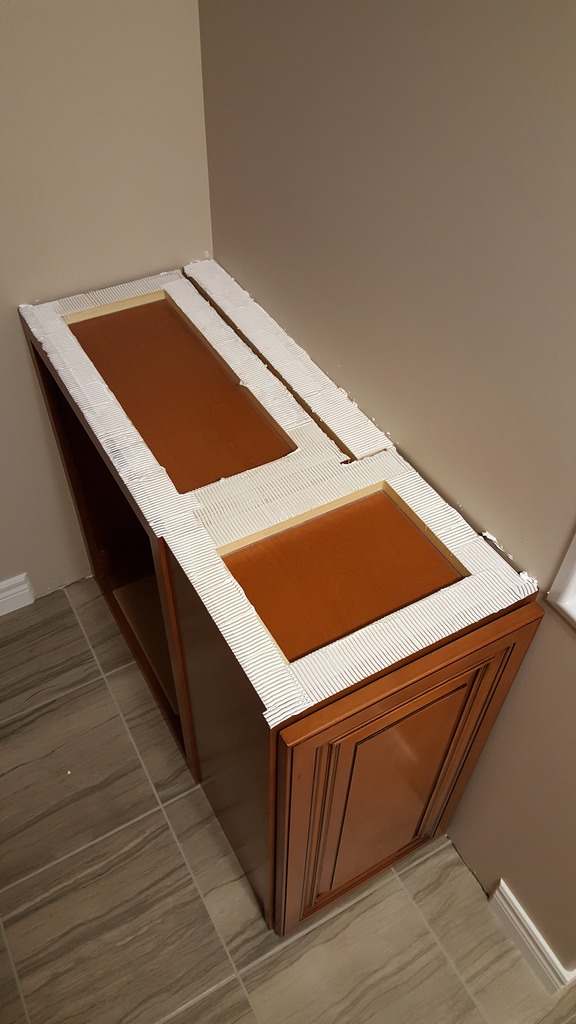
The countertop has a plywood core instead of the usual particleboard to avoid issues with water. I got it cheap but the plywood was a bit warped so a bit more weight was needed and some clamping to get everything perfectly flat.
Thanks,
Harry


The countertop has a plywood core instead of the usual particleboard to avoid issues with water. I got it cheap but the plywood was a bit warped so a bit more weight was needed and some clamping to get everything perfectly flat.
Thanks,
Harry
Harry Muscle
Aquarium Advice Activist
- Joined
- Jun 22, 2015
- Messages
- 160
The cabinets and countertop are all done.
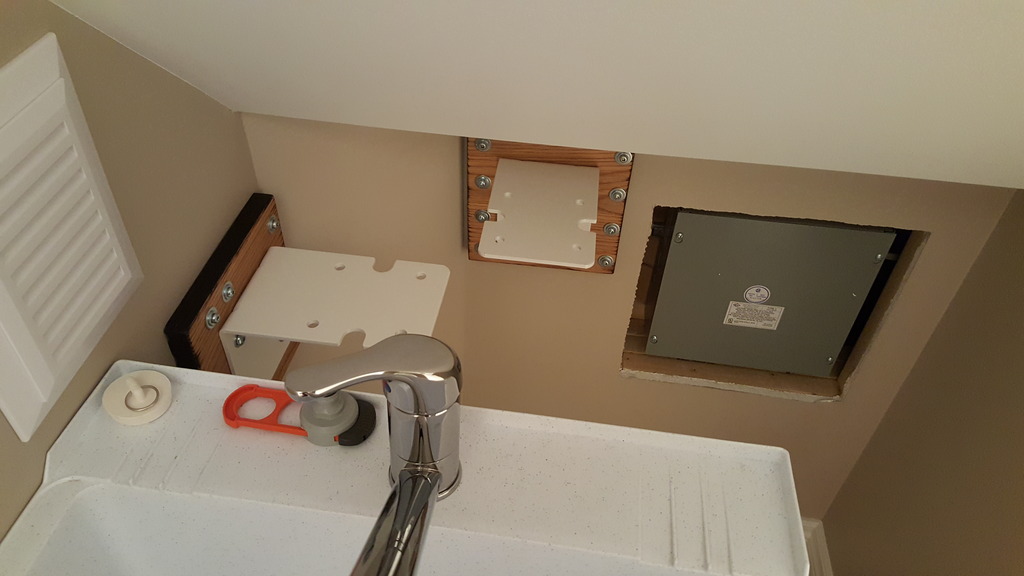
I also had the chance to install the fish room sink finally. The faucet is from Ikea, cheap but totally adequate for my needs. I installed a Gardena adapter in the faucet so that I can attach the various hose connectors if/when needed.
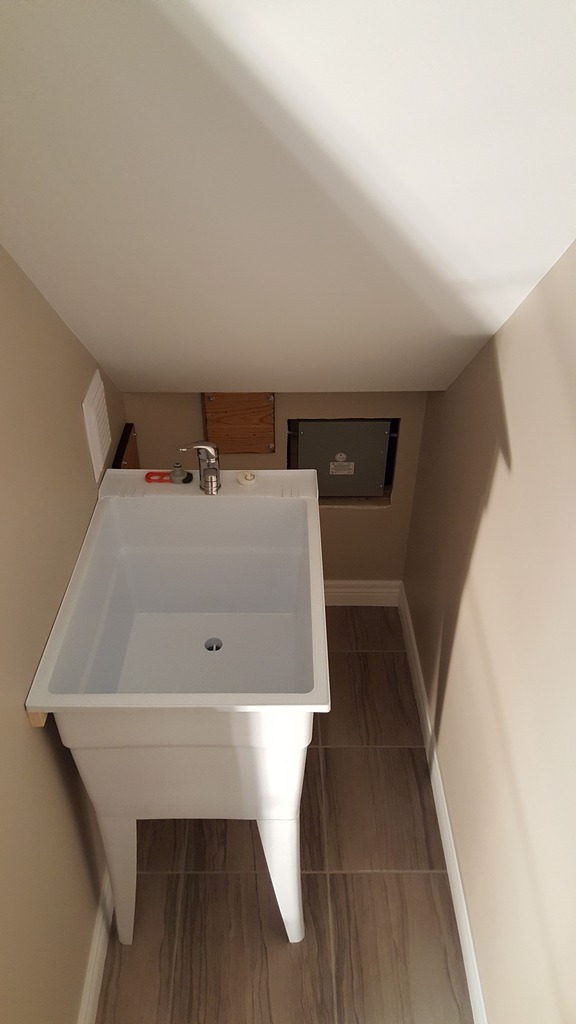
Lastly, I also installed the brackets that will hold the big blue water filter canisters. There will be two and the will live behind the sink. Not exactly easy to get to but they will only need changing once every year or two.
Thanks,
Harry

I also had the chance to install the fish room sink finally. The faucet is from Ikea, cheap but totally adequate for my needs. I installed a Gardena adapter in the faucet so that I can attach the various hose connectors if/when needed.

Lastly, I also installed the brackets that will hold the big blue water filter canisters. There will be two and the will live behind the sink. Not exactly easy to get to but they will only need changing once every year or two.

Thanks,
Harry
I have some new inspiration on maybe trying a bank of cabinets instead of a bunch of stands or a table for the various tanks. More will need to be thought of for that idea. I have a back room/home office to create out of a old bedroom/ now a "storage" space for stuff I don't know what to do with... hmmmm???
Harry Muscle
Aquarium Advice Activist
- Joined
- Jun 22, 2015
- Messages
- 160
Over the last week or so I've been spending some time creating a few items I will need for the tank.
First item was a jig to hold an optical water level sensor. I will be using an Eshopps Probe Holder to hold various things. Some of these will be a float switch and an optical sensor. I needed to create something that would allow both the float switch and optical sensor to be at the same triggering height while both being attached to the same probe holder. Here's what I created:
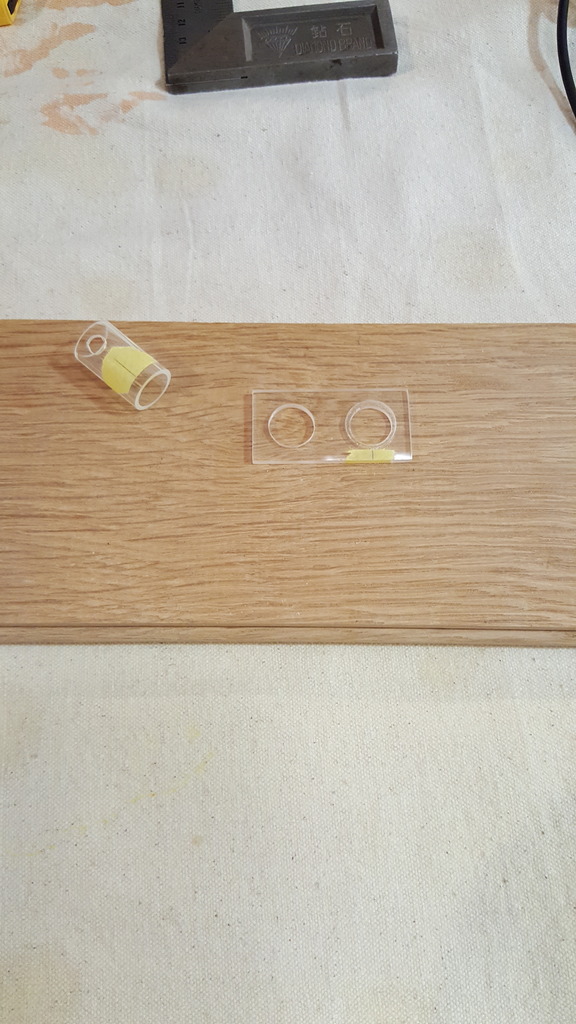
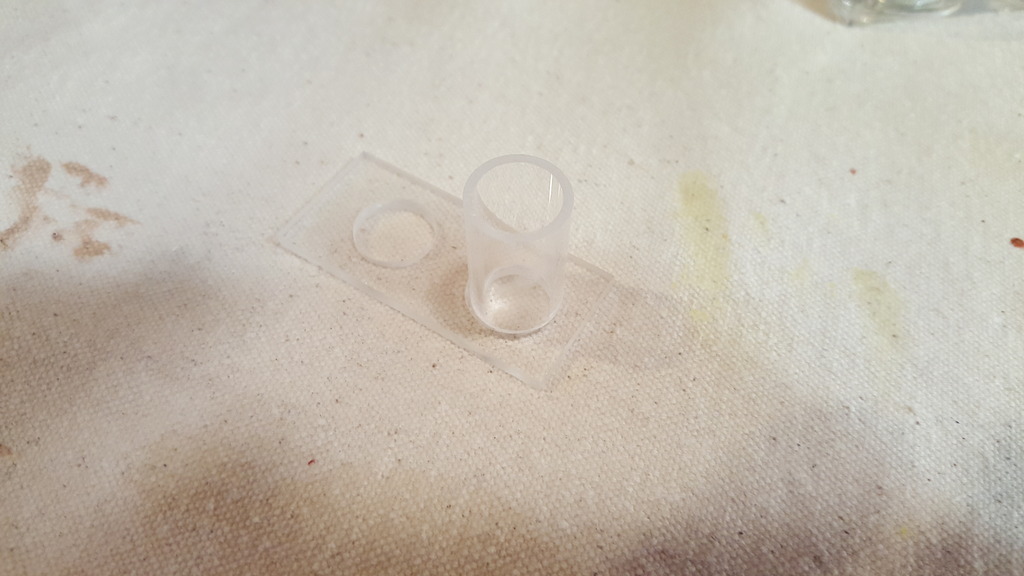
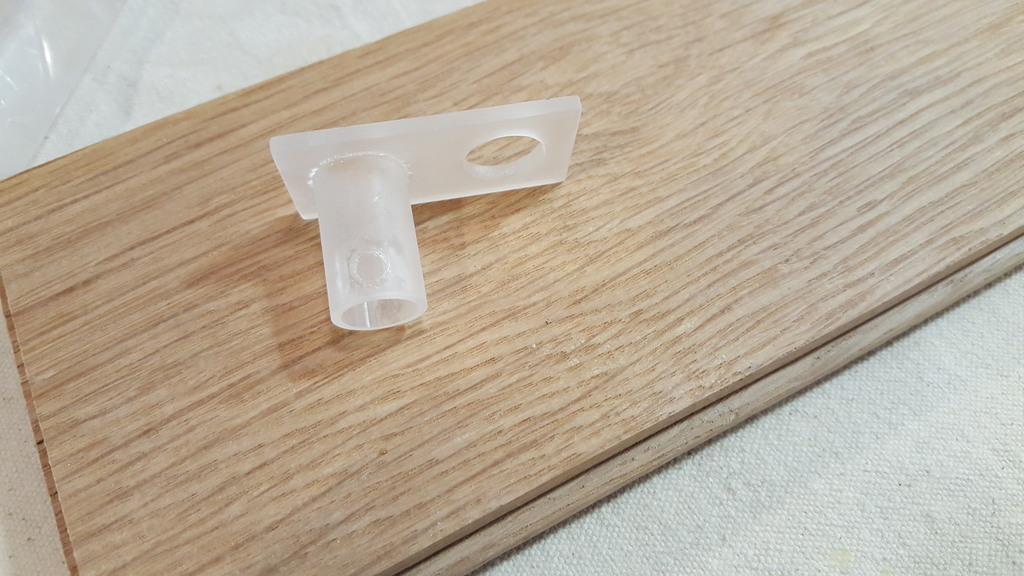
The tube will fit into the probe holder and the hole will hold the optical sensor. Since I'm not so good at gluing acrylic I decided to give the item a sand blasted look to mask the glue that went were it wasn't supposed to:
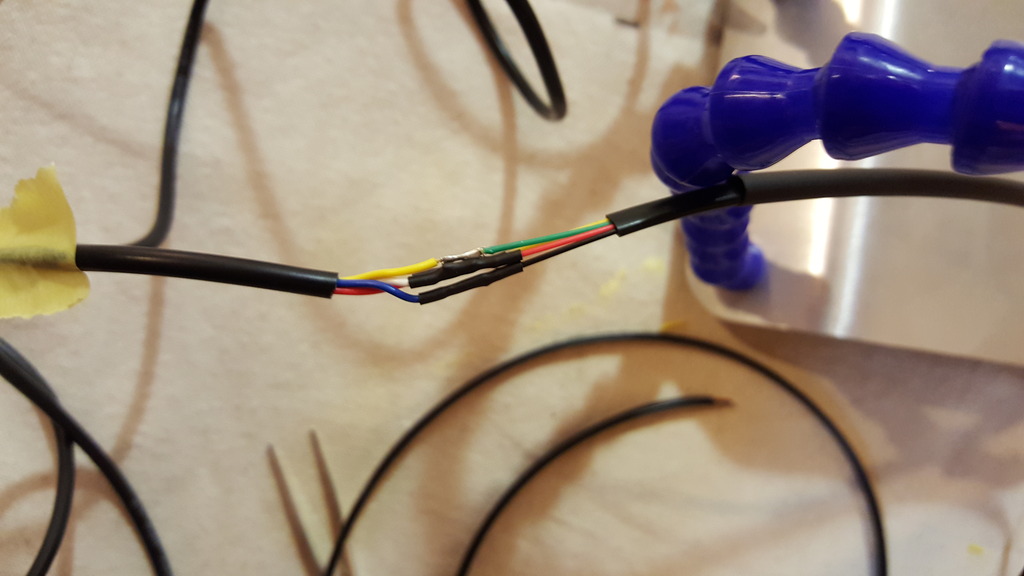
I also soldered up some extensions to the float switch and optical sensor:
Lastly, I've been working on creating some sort of shrimp proof cover for my Koralia Nano powerhead. I wasn't originally planning on using it but I think I will need more flow than just the sump and two Maxi Jets will provide. Here's one of the designs I played with:
I didn't love this one so I'm working on a slightly larger design that should be better able to protect baby shrimp from getting sucked in.
Thanks,
Harry
First item was a jig to hold an optical water level sensor. I will be using an Eshopps Probe Holder to hold various things. Some of these will be a float switch and an optical sensor. I needed to create something that would allow both the float switch and optical sensor to be at the same triggering height while both being attached to the same probe holder. Here's what I created:


The tube will fit into the probe holder and the hole will hold the optical sensor. Since I'm not so good at gluing acrylic I decided to give the item a sand blasted look to mask the glue that went were it wasn't supposed to:

I also soldered up some extensions to the float switch and optical sensor:

Lastly, I've been working on creating some sort of shrimp proof cover for my Koralia Nano powerhead. I wasn't originally planning on using it but I think I will need more flow than just the sump and two Maxi Jets will provide. Here's one of the designs I played with:


I didn't love this one so I'm working on a slightly larger design that should be better able to protect baby shrimp from getting sucked in.
Thanks,
Harry
Harry Muscle
Aquarium Advice Activist
- Joined
- Jun 22, 2015
- Messages
- 160
After several prototypes I finally came up with a really good solution for covering the Koralia Nano powerhead. I've documented the steps with lots of pictures in case anyone wants to create one for themselves. All you need is #7 needlepoint plastic canvas, a whole bunch of small zip ties, and the Fluval U3 filter foam.
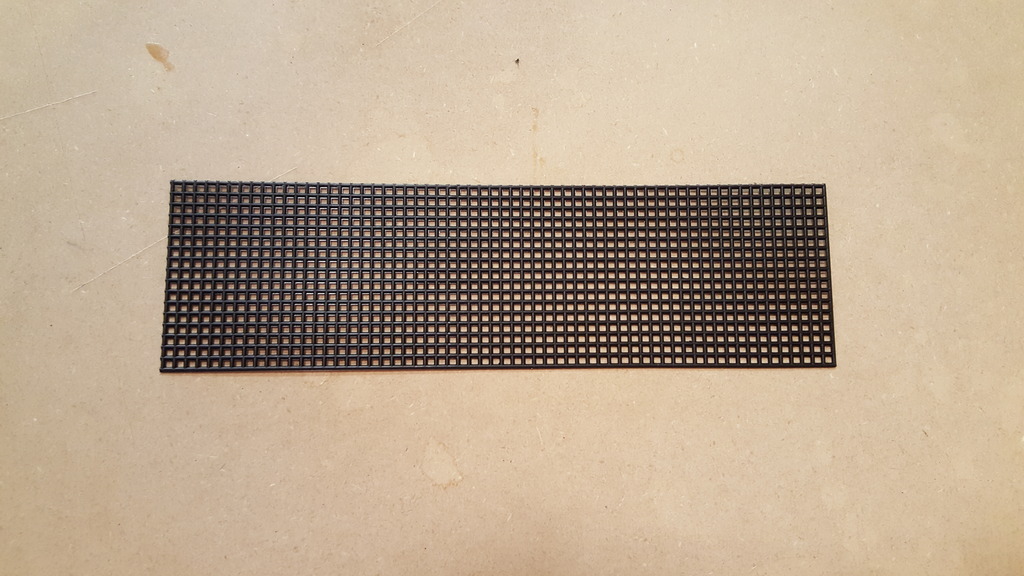
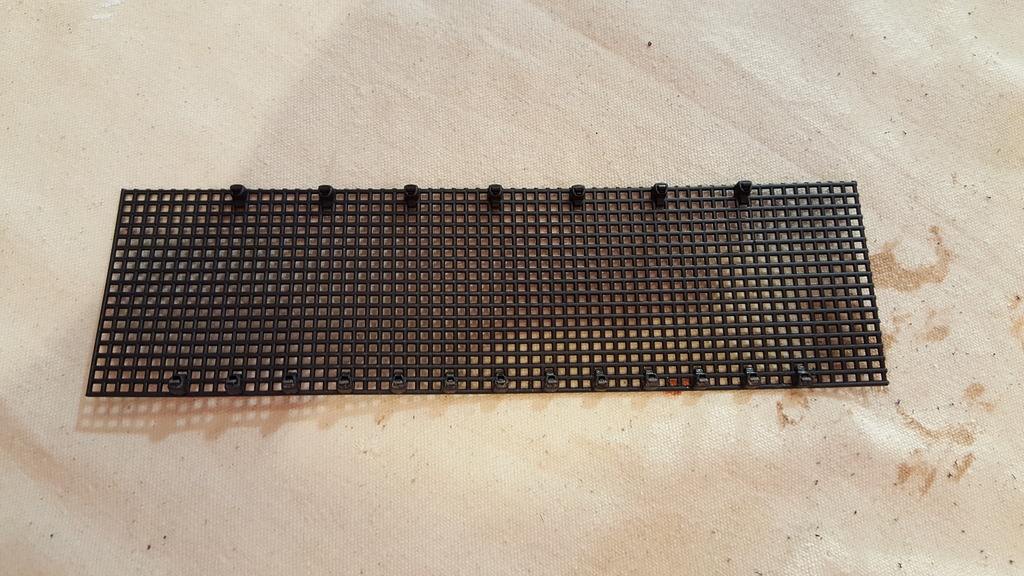
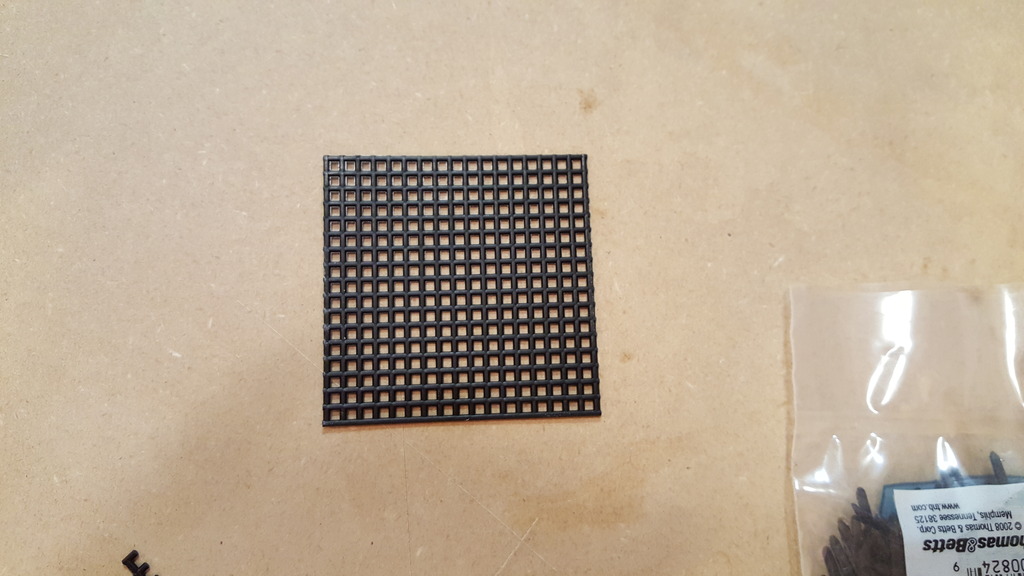
First cut a rectangle out of the canvas matching the size shown in the picture.
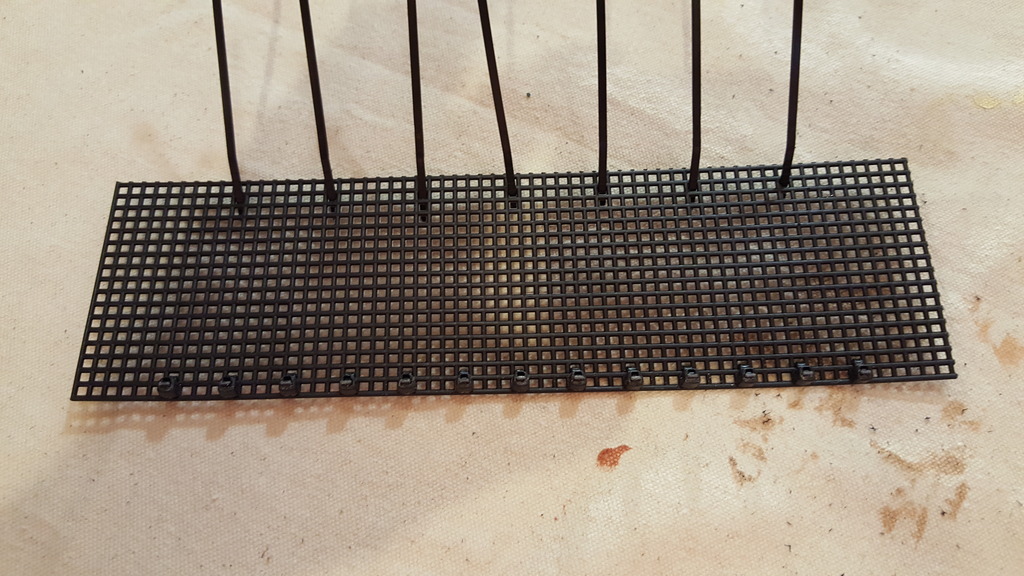
Insert zip ties as shown. Zip them up and trim them.
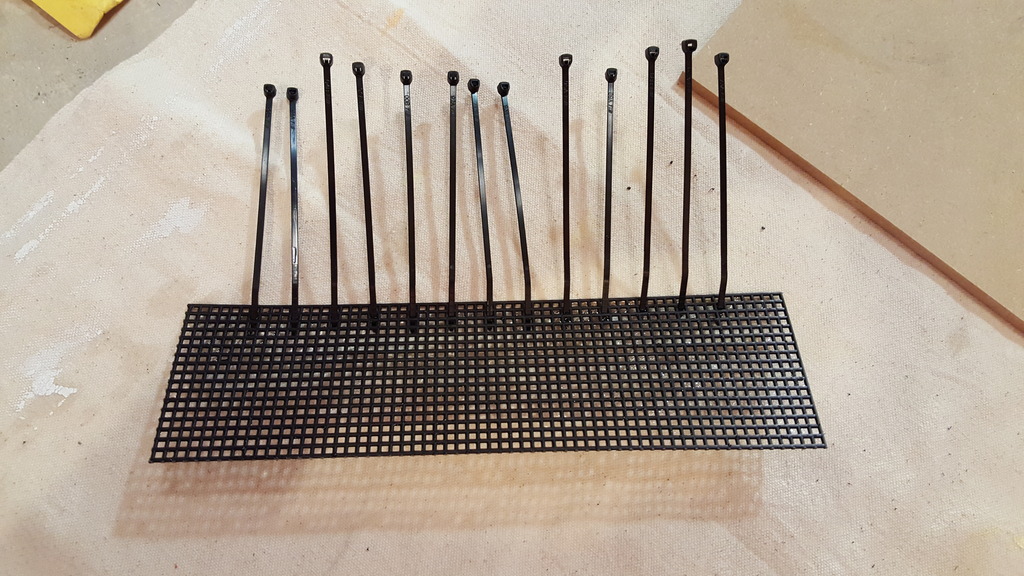
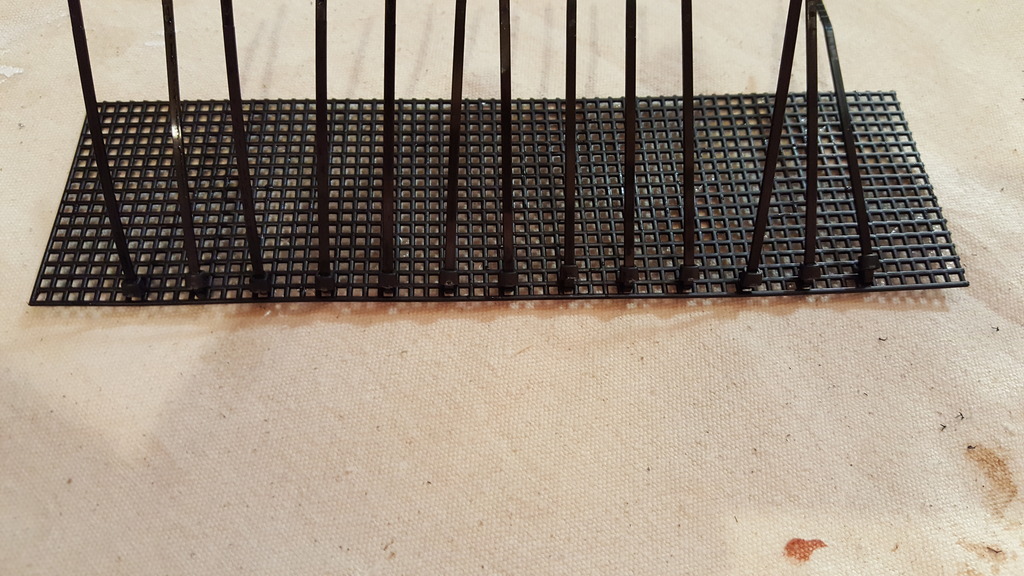

Do almost the same to the other side of the canvas rectangle but spacing the zip ties a little differently.
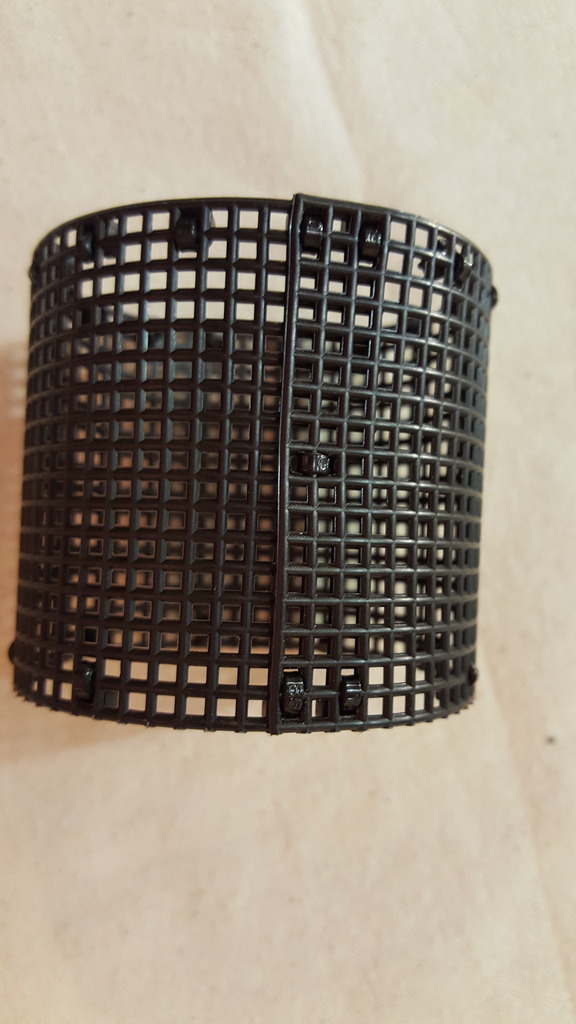
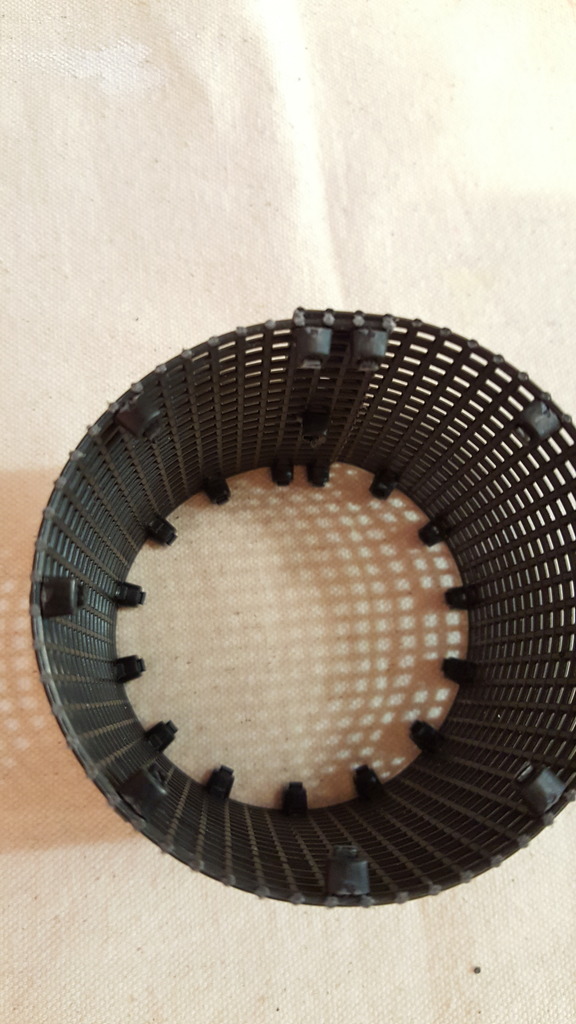
Fold the rectangle to form a cylinder, overlapping by three holes, and add zip ties.
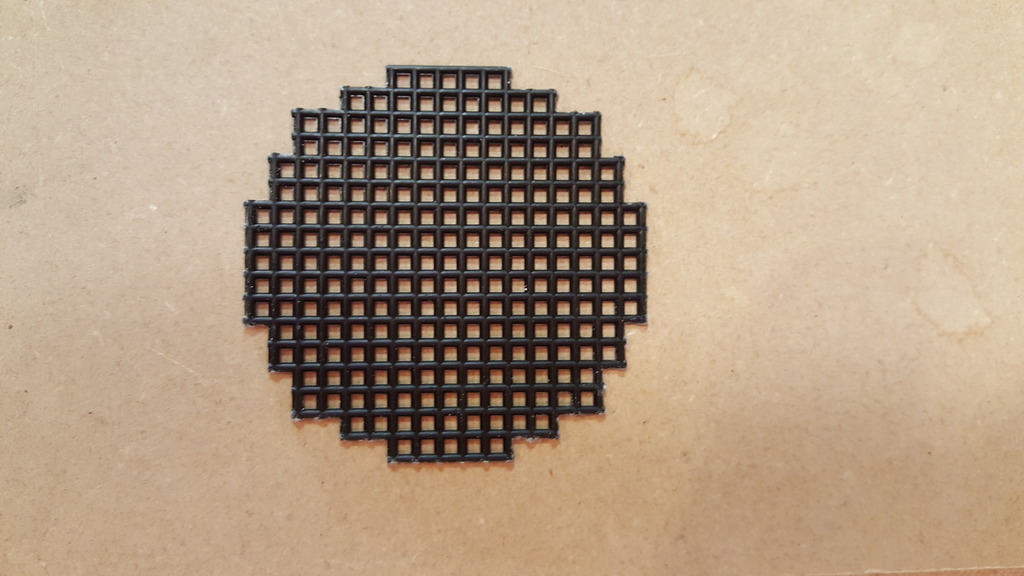
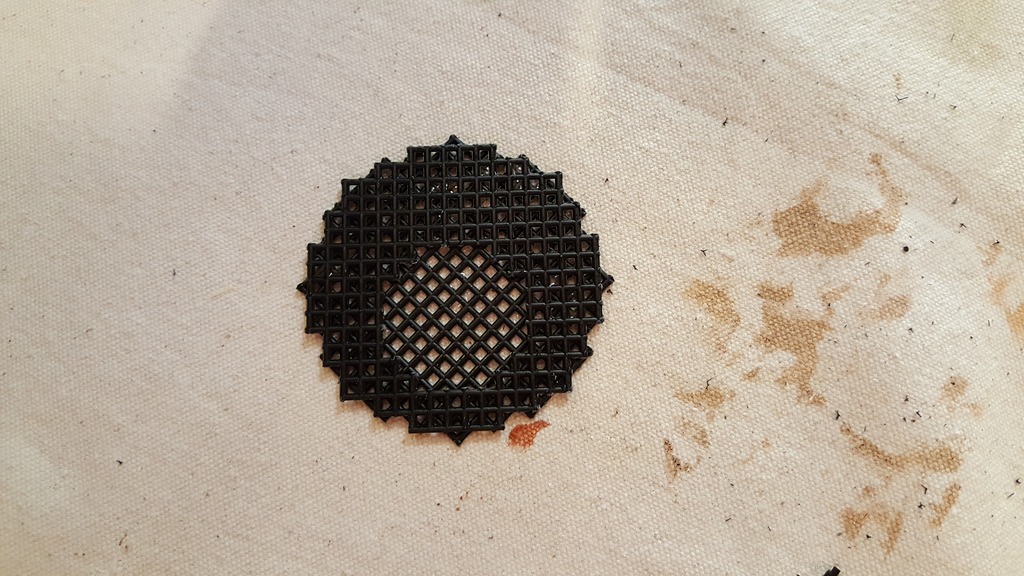
Cut a square piece and then cut it down to a circle.
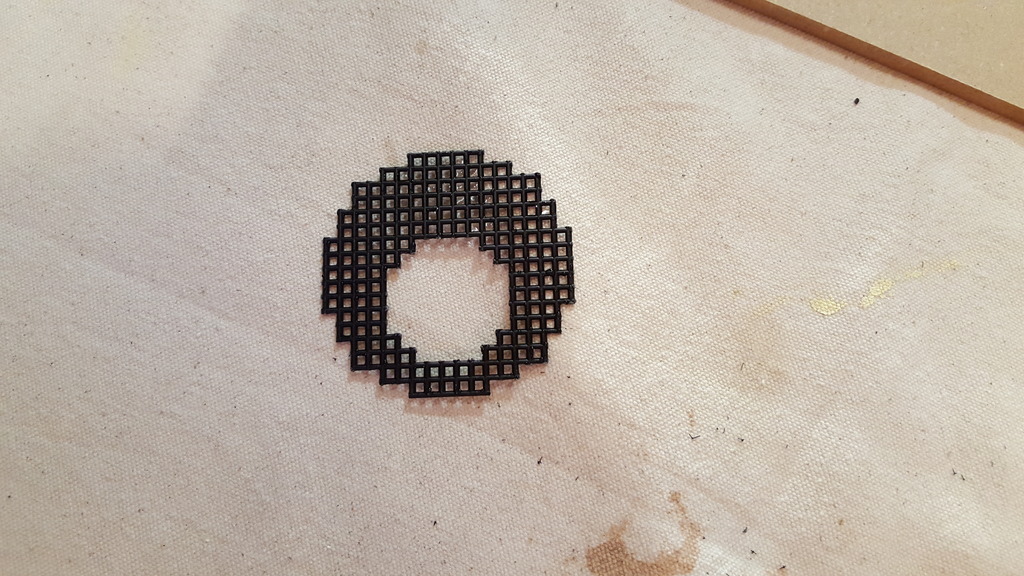
Cut another square, cut it down to a circle, and cut out an opening as shown.
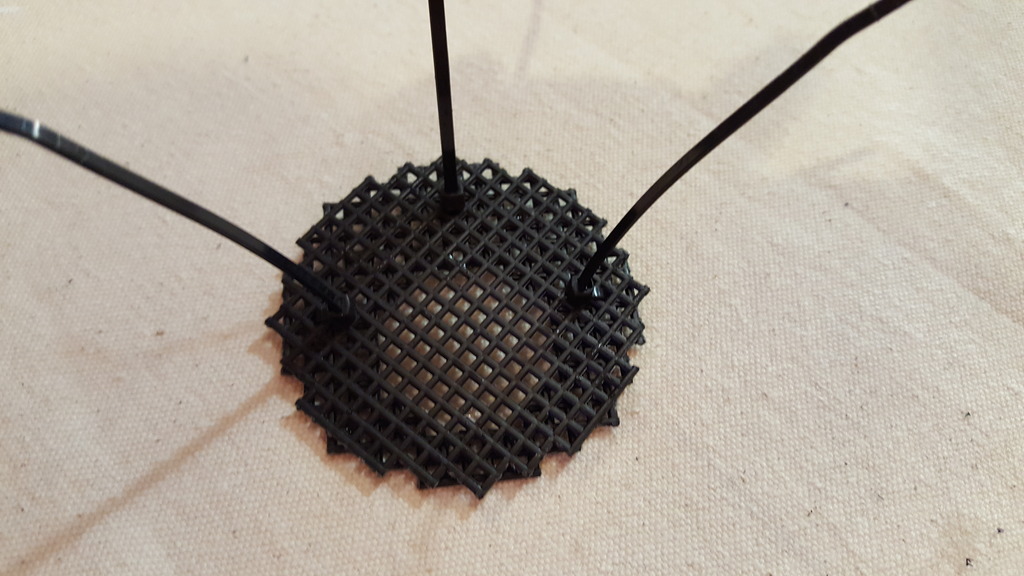
Lay the two circles 45 degrees rotated from each other and join them with zip ties.
Thanks,
Harry
First cut a rectangle out of the canvas matching the size shown in the picture.

Insert zip ties as shown. Zip them up and trim them.


Do almost the same to the other side of the canvas rectangle but spacing the zip ties a little differently.


Fold the rectangle to form a cylinder, overlapping by three holes, and add zip ties.


Cut a square piece and then cut it down to a circle.


Cut another square, cut it down to a circle, and cut out an opening as shown.

Lay the two circles 45 degrees rotated from each other and join them with zip ties.


Thanks,
Harry
Harry Muscle
Aquarium Advice Activist
- Joined
- Jun 22, 2015
- Messages
- 160
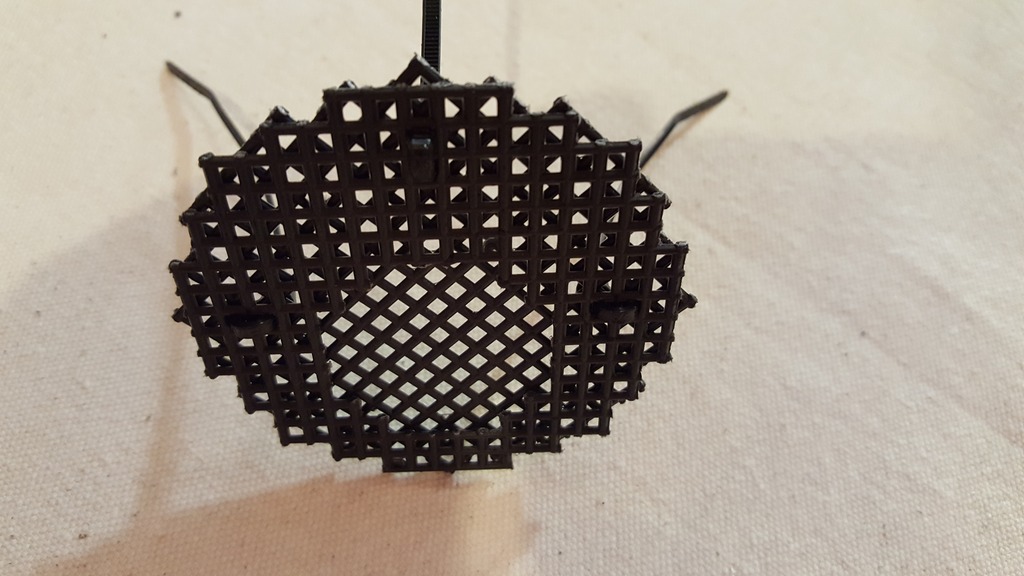
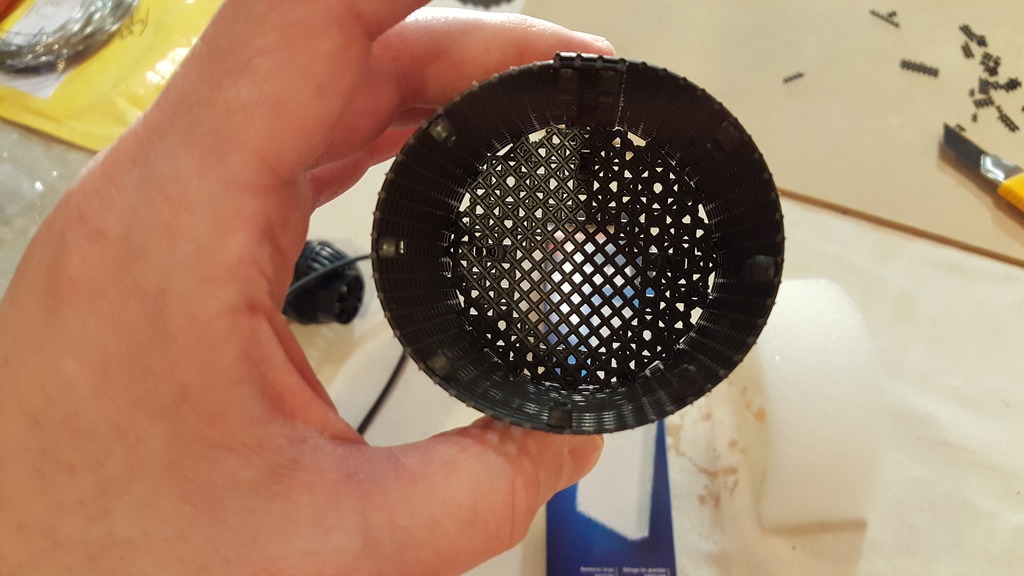
Insert the joined circles into the cylinder and push it up against the side with more zip ties.
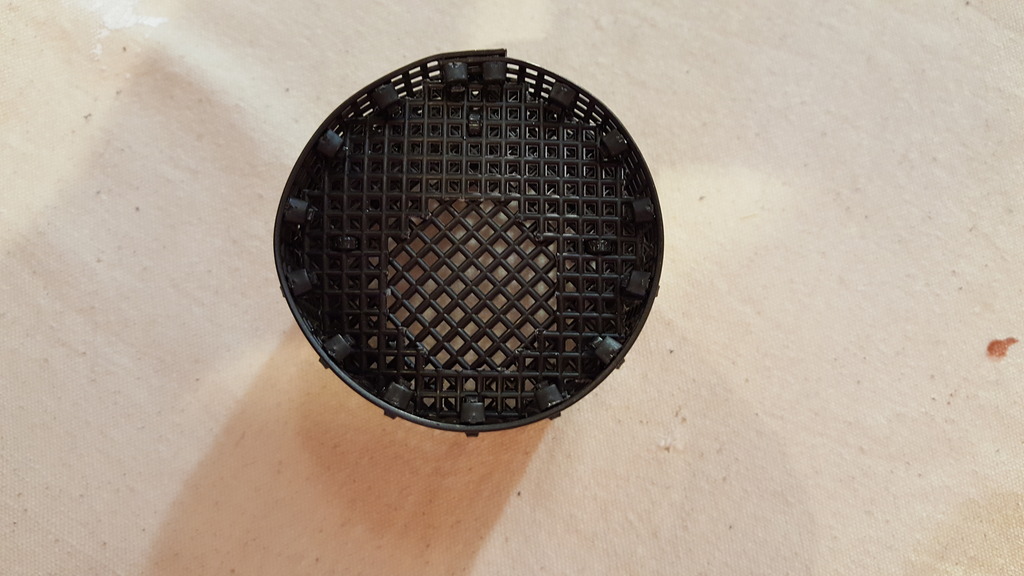
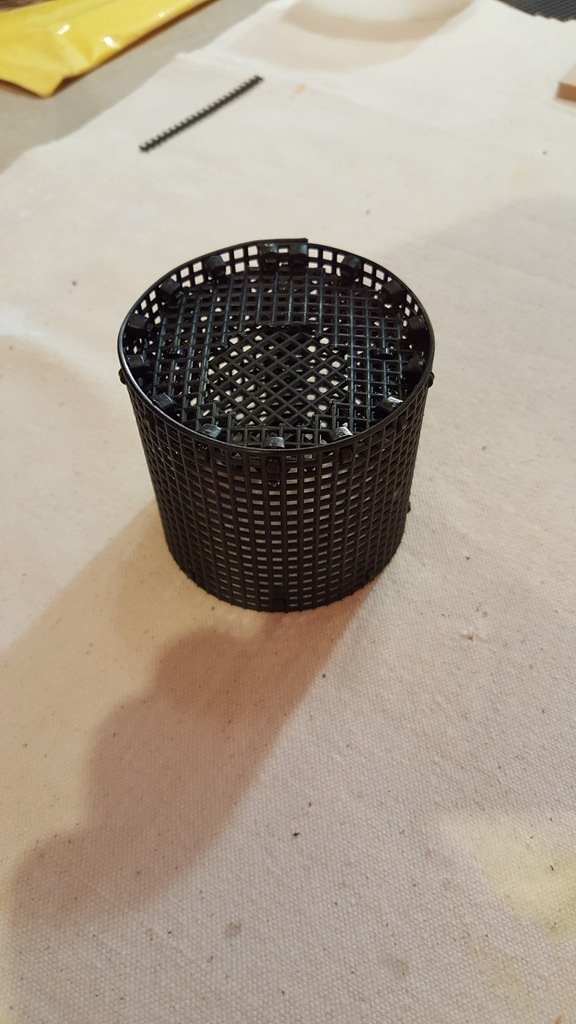
Insert the foam into the cylinder.
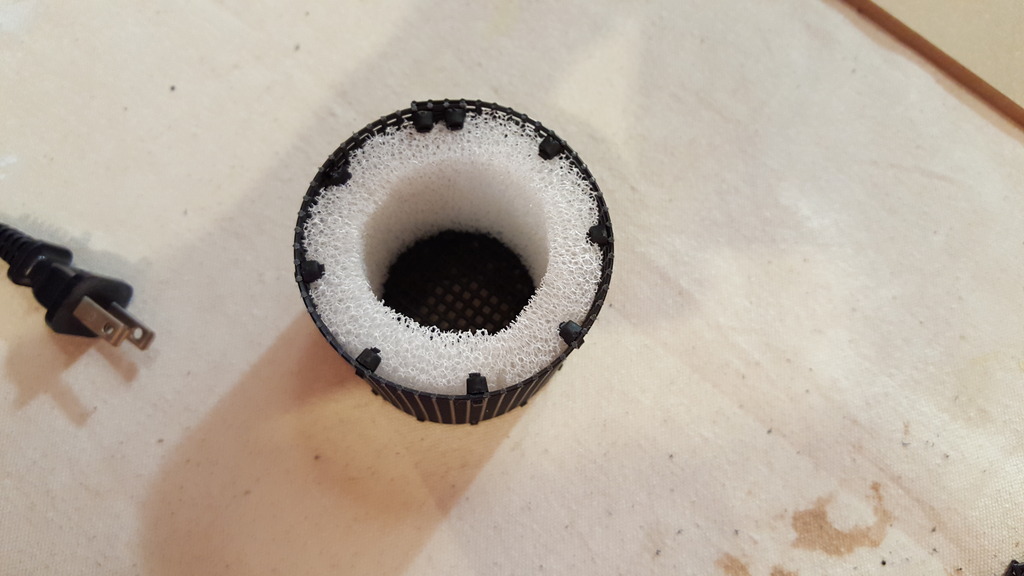
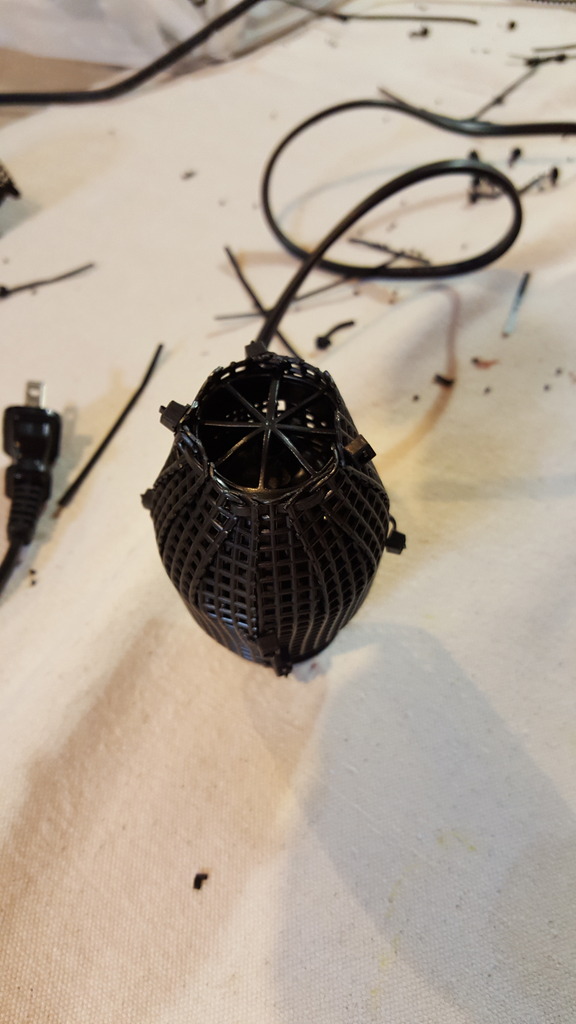
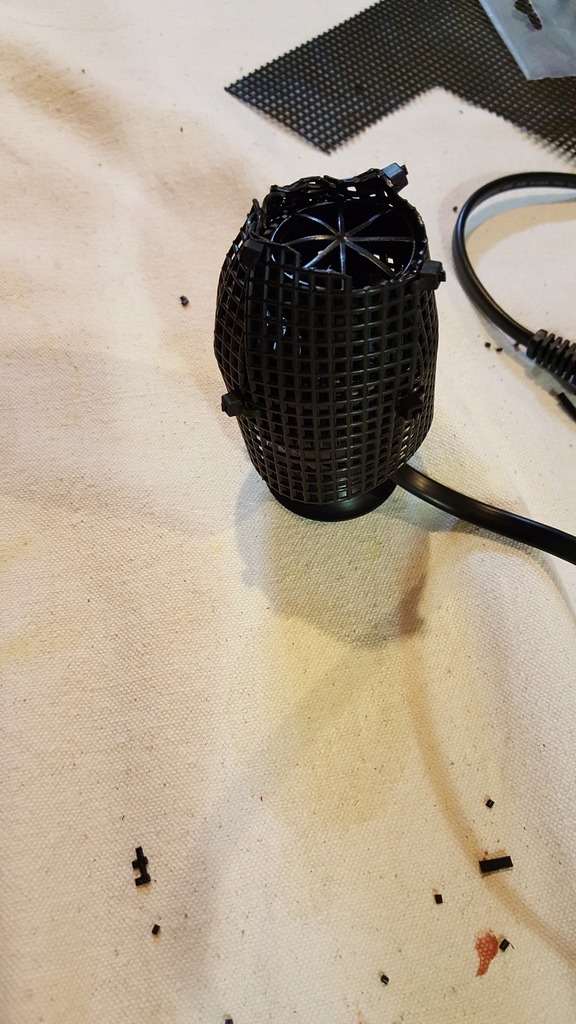
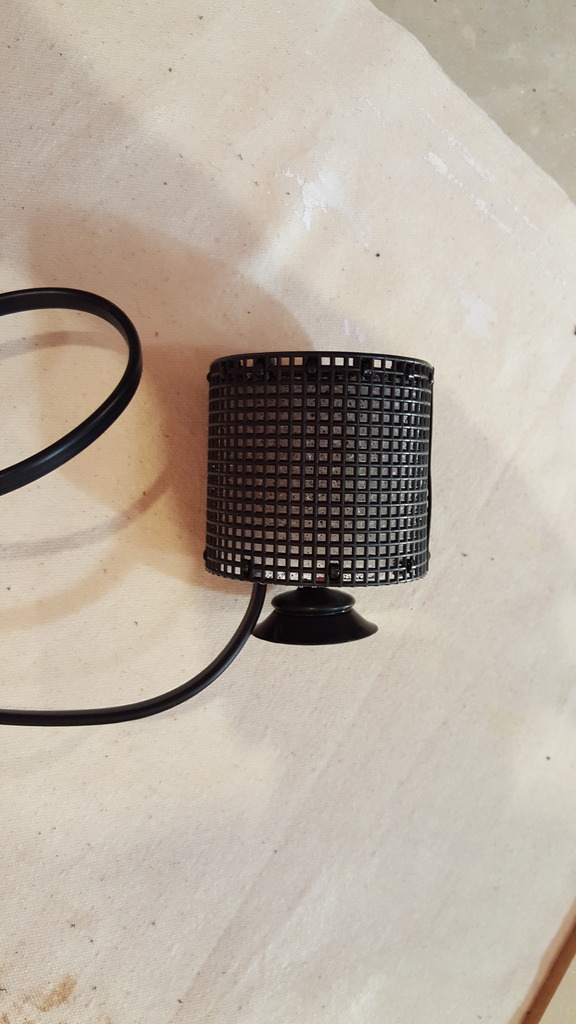
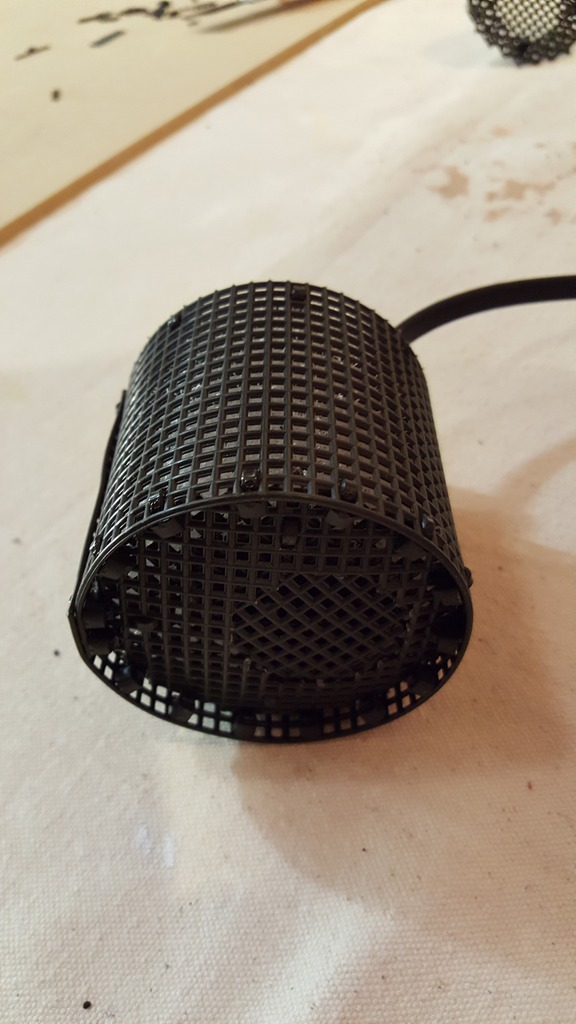
Push the cylinder over the powerhead and you get this.
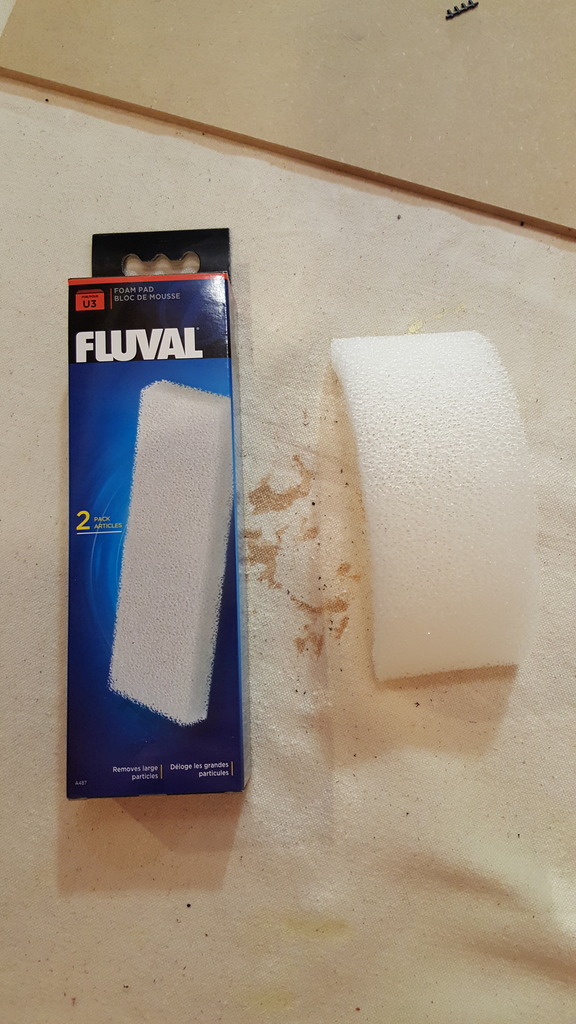
Here's a picture of the exact foam that was used. It's a perfect fit with no cutting required.
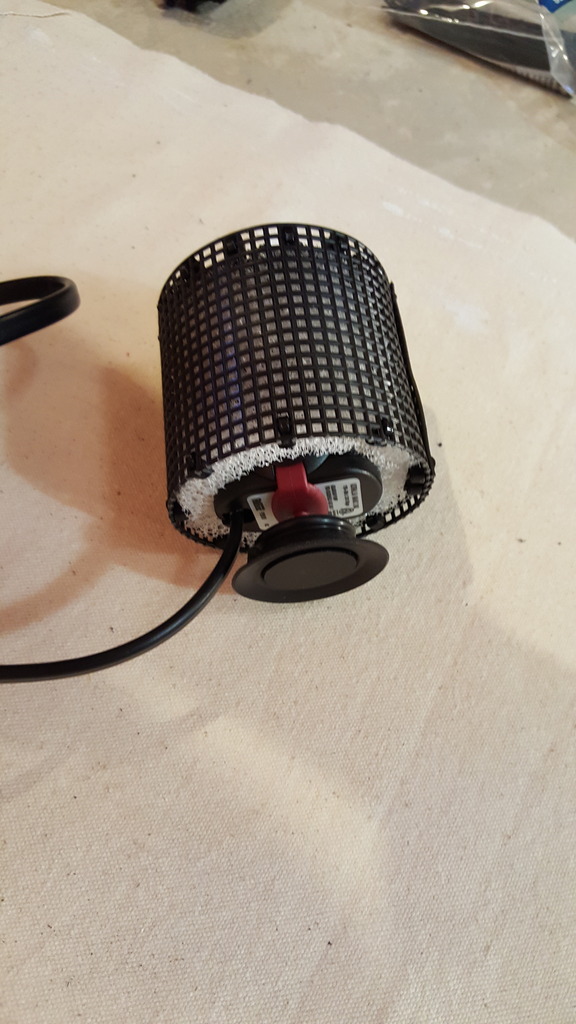
Lastly when inserting the powerhead make sure the powerhead opening lines up with the cylinder opening.
This should work for all the Koralia Nano powerheads since they are all the same size. Enjoy.
Thanks,
Harry


Insert the foam into the cylinder.

Push the cylinder over the powerhead and you get this.


Here's a picture of the exact foam that was used. It's a perfect fit with no cutting required.

Lastly when inserting the powerhead make sure the powerhead opening lines up with the cylinder opening.

This should work for all the Koralia Nano powerheads since they are all the same size. Enjoy.
Thanks,
Harry
Similar threads
- Replies
- 22
- Views
- 993
- Replies
- 5
- Views
- 668
- Replies
- 3
- Views
- 477