20 Gallon Vivarium Build

The friendliest place on the web for anyone with an interest in aquariums or fish keeping!
If you have answers, please help by responding to the unanswered posts.

Talvari

Aquarium Advice FINatic
Joined
Sep 7, 2011
Messages
732
So I figured I'd catalog my first ever attempt at building a vivarium for a leopard frog that I "rescued" from being a feeder at work. I received a free 20 gallon high aquarium and was originally going to use it as a fish tank, but after cleaning it, I found a rather large crack in the upper portion of the tank. Oh well.

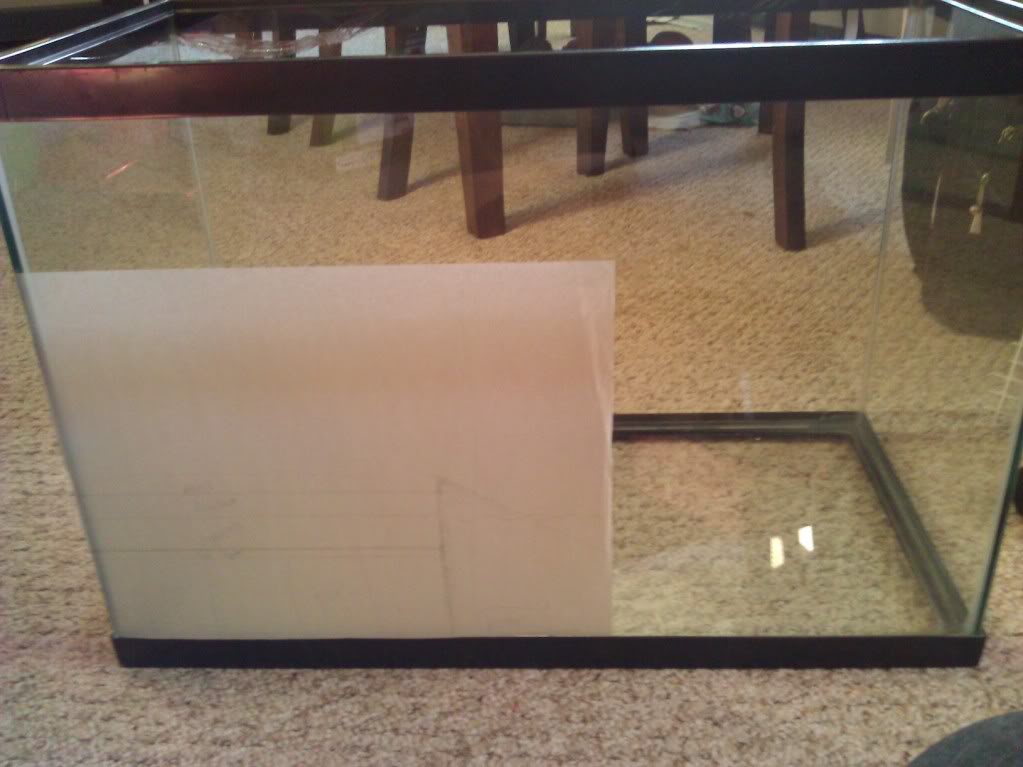
I scrubbed the tank really well with a mild vinegar/warm water mixture to get the mud and hard water stains off of it. After rinsing repeatedly to get the horrid smell of vinegar out of it, I dried it off. I taped a bit of tracing paper on it and began to sketch out about how I want it to look, height, length, etc of the false bottom.

img_2013223_0_f252632166b04b489e3b6b6cb5ebb893.jpg


I went out to home depot last night and purchased (or, rather, conned my hubby into purchasing since I didn't get paid until this morning) some basic supplies.

-6 pieces of PVC connectors
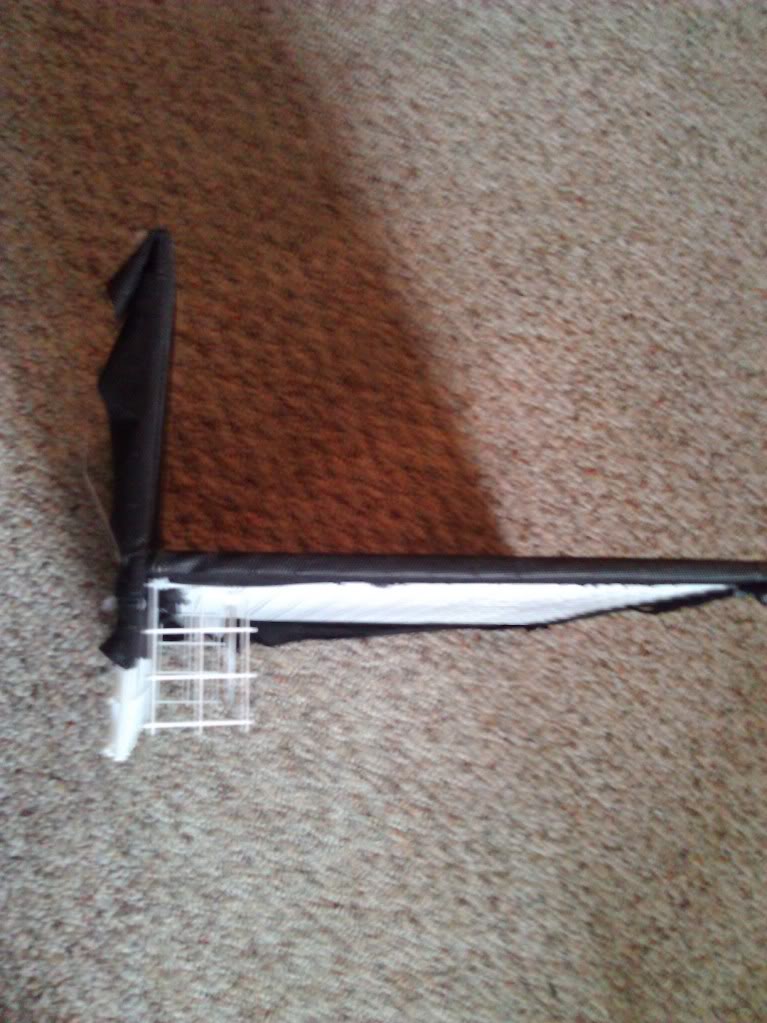
-"Weed Block" mesh
-Egg Crate, also known as a light diffuser
-Zip ties

In addition, I needed a few tools lying around the house.

-Wire snips: they seem to work best to 'cut' the egg crate. When I say cut, I really mean shatter, break, and generally cause a mess.
-Scissors to cut the zip ties/weed block
-Dremel tool to drill drainage holes in the PVC pipe
-Aquarium sealant to adhere décor/ etc, though that will come a little later.

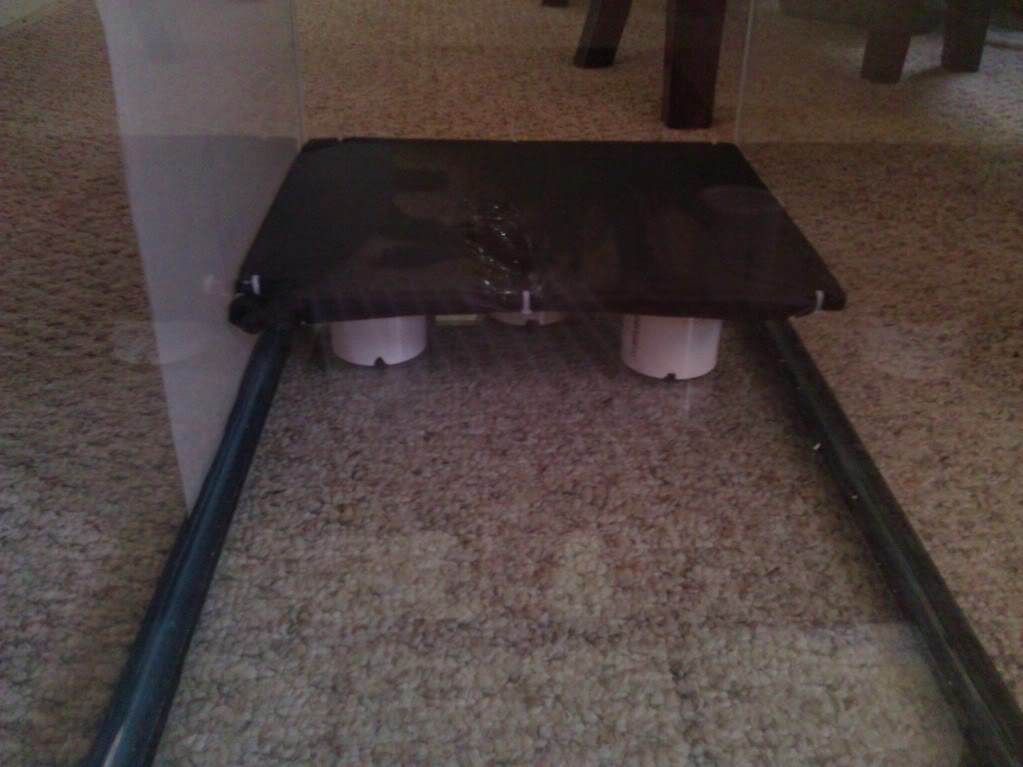
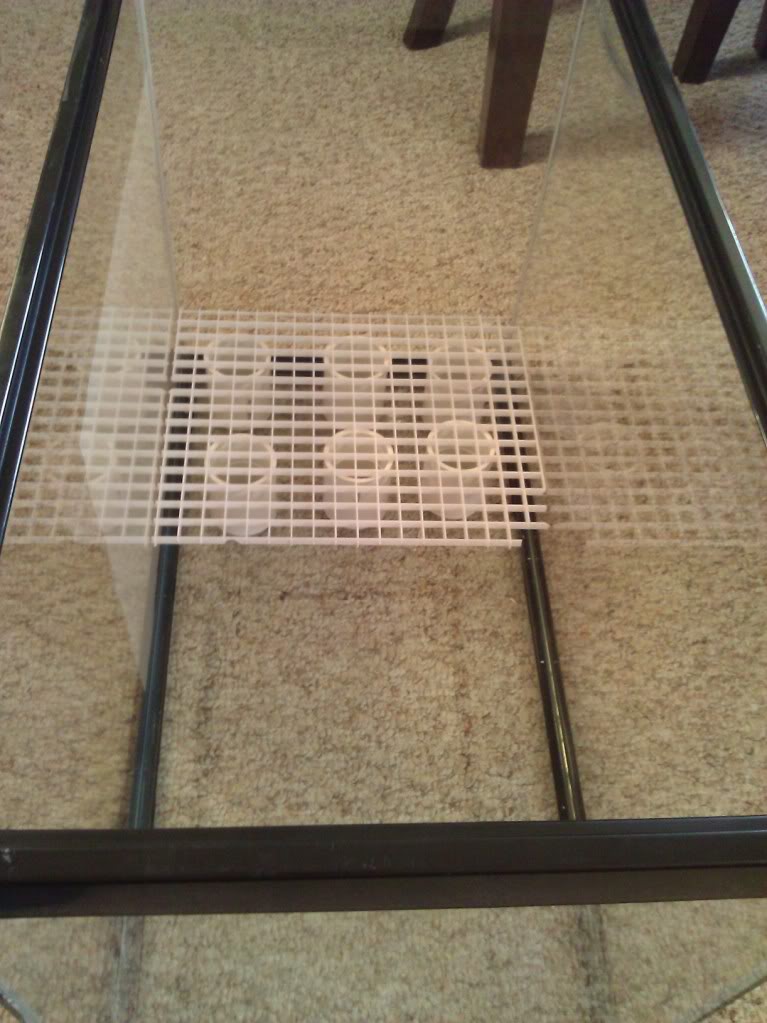
My next step was to painstakingly drill the drainage holes in the PVC "legs". They are not symmetrical by any means, but it doesn't really matter too much since you wont be seeing them in the final product. There are six holes, two on either side towards the middle, and one on each side of the bottom.

img_2013223_1_c0c15ecb0bfa3ca35c83de82e2e58606.jpg


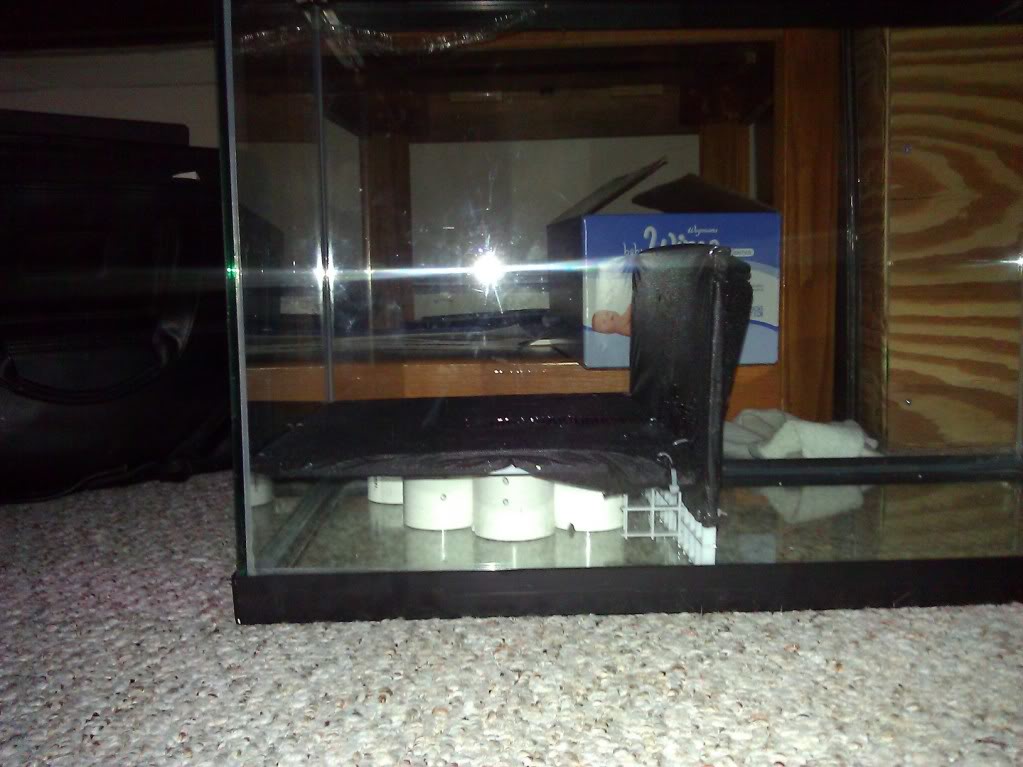
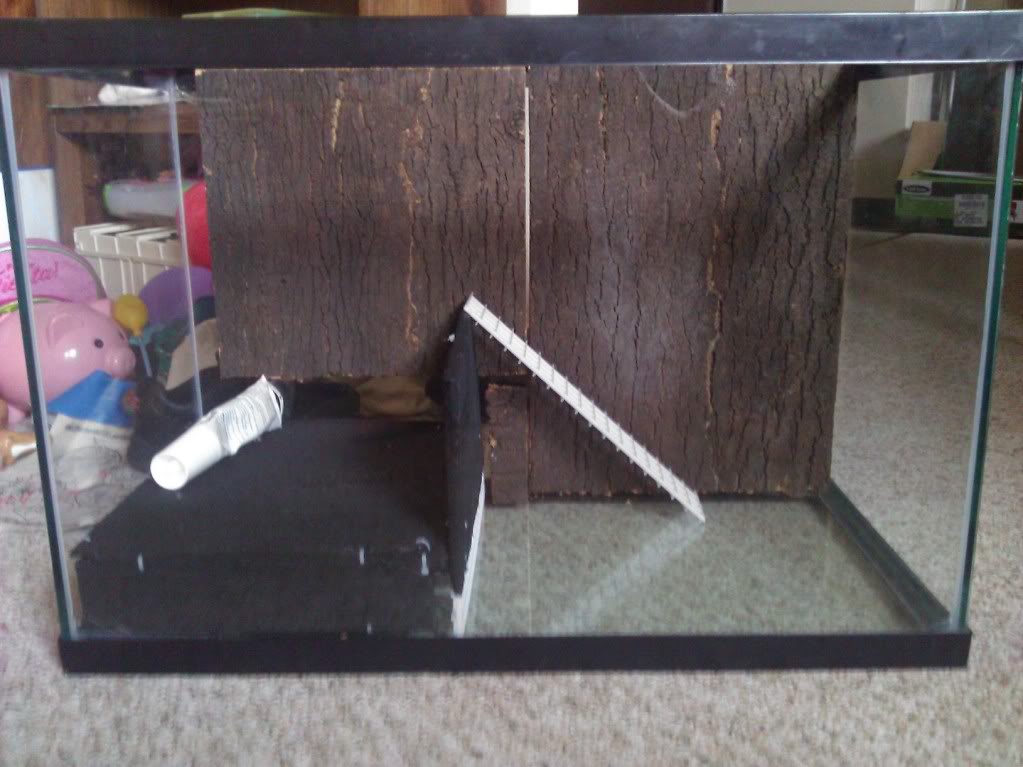
I laid out all of the PVC about where I wanted it. Since I've never done this sort of setup before, I want everything to be a removable fixture just in case something goes wrong. Hopefully, I will not have to adhere the PVC to the tank and the simple weight of all the soil and stuff will keep it in place.

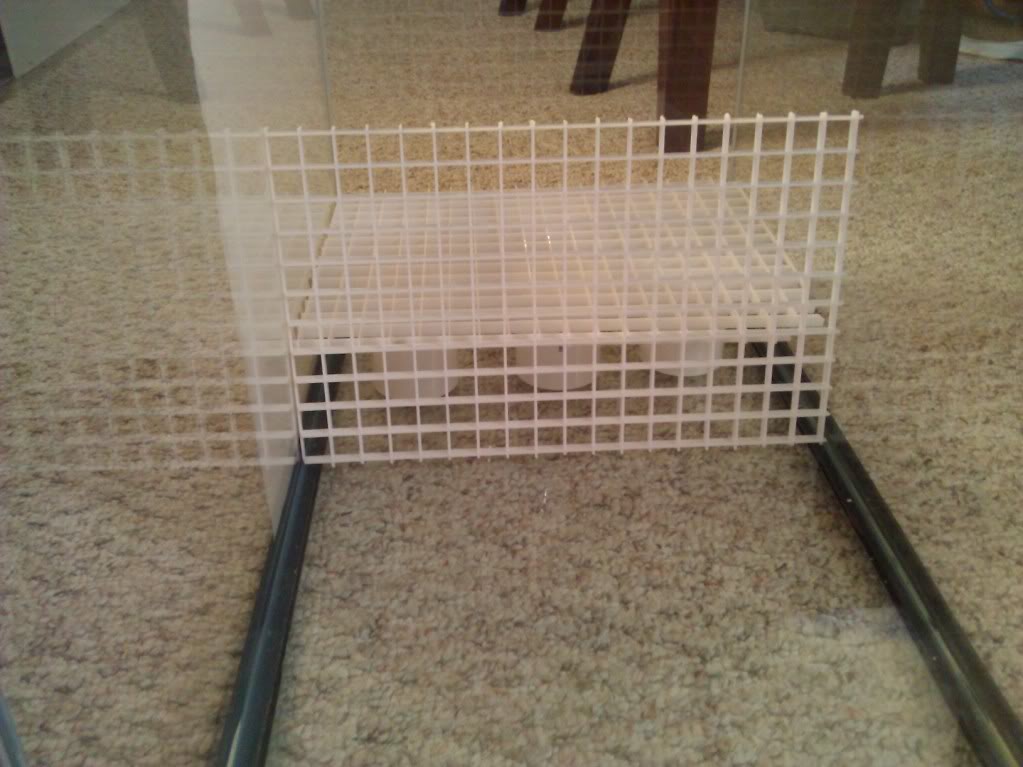
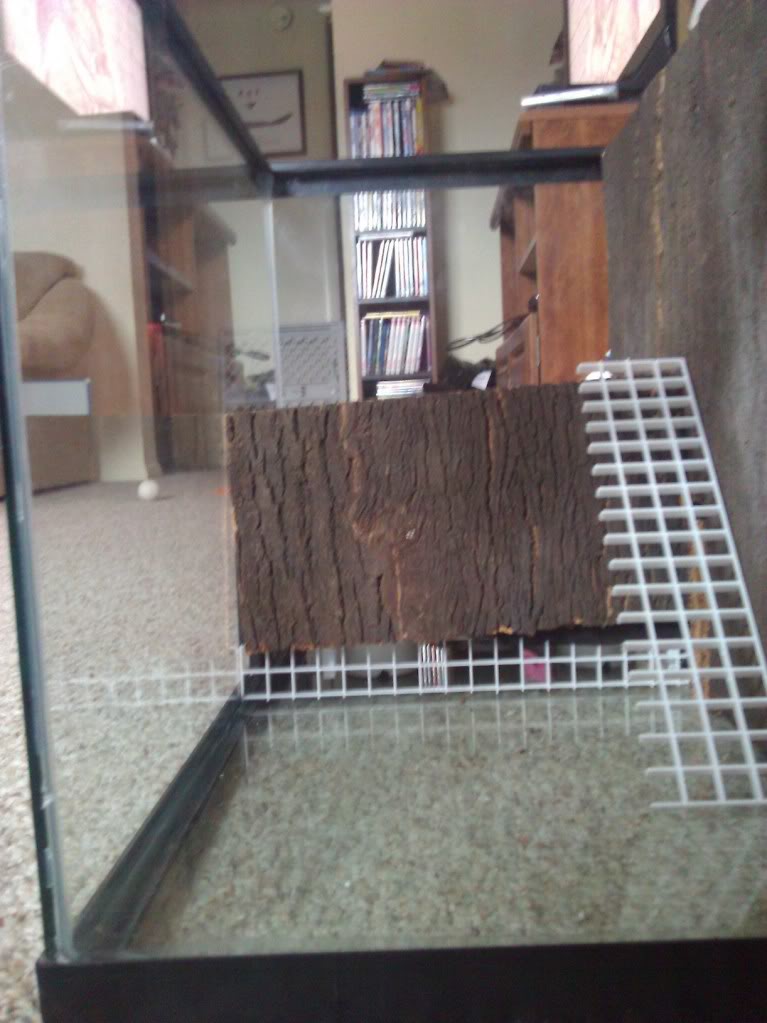
The next step was to measure and cut the Egg Crate. I caution you to wear some sort of eye protection... Those little plastic pieces really get some air on them when you snip them off. I also suggest NOT doing it in a carpeted area... Those little pieces are also masters of disguise. You WILL step on a piece, and you will get a piece of acrylic lodged in the bottom of your foot... But I digress.

The egg crate is pretty delicate, too, so you have to work slowly and carefully so you don't break off any corners like I did. That's ok... I'll just cut another small piece and fit it later. This piece is just about 10 inches long, and it is a snug twelve inches across.

img_2013223_2_8b50c638e67fa67fd395d1e945661602.jpg
 
Next step.... More egg crate! The next piece I cut will serve as the retaining wall to allow me to pack in hydroballs, soils, moss, etc. It is the same width across - 12 inches- but only about eight inches high.

img_2013240_0_64e876a8b63c02c1b67c229f72ad88de.jpg


On to adding the weed blocker... While doing some research on how to build false bottoms, this seemed to be the most highly suggest material to use. It is environmentally friendly, it allows water to pass quite easily, and the mesh is fine enough that it will prevent the soil from passing into the water area. I used the zip ties to fix the mesh onto the egg crate.

The mesh covers the top part and folds over the sides, but that's about it. I did not want the bottom covered because I did not want anything to get caught between the two layers.

img_2013240_1_a0cb5f642cf165b1a83c3182fa565244.jpg


I covered the 'retaining' wall too, except for the bottom two rows to allow for better circulation.

The next challenge was how to fix the retaining wall to the false bottom. In the end, I decided to hinge it with two zip ties. Only issue with that was when you set it in the tank, the retaining wall tended to swing in a bit. It would have been even more of an issue once the soil and stuff was actually placed because of the weight. To counteract that, I decided to cut two by six egg crate pieces and zip tie them on either end of the false bottom. It would brace the retaining wall and keep it from folding in.

img_2013240_2_e2b5ef5cc7717c95f2d77569d84c5874.jpg


img_2013240_3_f138d2c6c825e1b584f0afb68c659a64.jpg


I placed the whole fixture into the tank and was quite pleased with how snugly it fit. I'd for anything to get wedged between the glass and the false bottom, but it seems like the weed blocker is doing a fantastic job of sealing the sides.

img_2013240_4_a74a2352e16822120aad26e06880bad6.jpg


That's the progress so far. I still need to buy the background - I am doing cork board for the back wall, and I am using pieces of corkboard and sphagnum moss to decorate the front of the retaining wall. Once the background is in place, I will be adding a ramp in that will lead from land to water. I will wrap the top part with weed blocker and then use aquarium sealant to adhere gravel and sand on it to make it look more natural.

So, my shopping list, hopefully, for tonight

-Two pieces of cork background
-Two cork "rounds" to break up and use on the retaining wall.
-Small filter (Probably the Zoo Med turtle clean filter. I will be placing this under the ramp)
-Possibly hydroballs

The front view is pretty ugly right now, so I may either just use some acrylic paint to cover it up, or just add another short piece of egg crate covered in weed blocker.
 
Looks like you are off to a good start. Be sure and add some large rocks that stick up out of the water in the water part, as your frog will appreciate the opportunity to hang off of or sit on top of the tock.
 
Definietly! One of the ideas I was actually playing around with was making a little island in the back right corner out of egg crate and weed blocker. It'd be almost level with the water line and I could hide the filter in it. I have to see how well that would work tho.
 
Yay for more progress!

Last night I brought home the cork background, hydroballs, and some eco complete. Still have to get the filter, moss, plants, and eventually, a good light for the plants.

Anyways.. On to the actual work. Last night, as soon as I got home at 930, I started measuring and cutting the cork board. It wasn't easy. First, I measured out where I wanted them cut with a ruler and a sharpie marker. The board on the right, where the water area will be, goes from top to bottom. The board on the left was cut nearly in half so that it stops just under the soil level. The extra piece was set off to the side.

We had to carefully etch, with a knife, along the sharpie line, to ensure that the cork didn't splinter or crack. It took a couple of runs with the knife to get it to go through all the way with minimal splintering.

I had to notch the retaining wall to fit the board on the left, which wasn't a big deal. I just nipped of three squares and it fit to a "T".

The biggest issue I came across was that the boards are not quite wide enough, meaning I have about an inch and a half of glass on the left hand side that is uncovered. I have to figure out how to cover that. If anyone has any ideas, other than piecing corkboard in there (its a pain to cut to an exact size and I don't have enough left overs to do much with.)

Anyways, here it is with the background leaning where it will eventually go. Nothing is permanent yet.

img_2015093_0_d10f008c1984e4b5e98f9e0533e5c40e.jpg


If you notice, too, I added in the front "wall" on the bottom so that you can't see the bottom any more. I think it looks a lot better. I also covered the retaining wall the rest of the way.

The extra piece of corkboard I found a perfect use for.

img_2015093_1_905c8fd7ab46b8f601c4d511e14ddb1c.jpg


Talk about a perfect fit! It covers the exact area I wanted it to, and even leaves space open on the bottom for water to flow through!

So that's the progress so far... Next steps I'll hopefully be taking in the next few days.

-Figure out how to cover the spaces in the background
-Attach the background
-Figure out where the filter is going to go
-Figure out where the heater is going to go
 
This is coming together nicely. Keep up the good work and take your time. Measure twice and cut once lol.
 
Looks good. Out of curiousity, how does the cork board do underwater? I ask because I usually see them in the reptile section, so curious as to how they will hold up.
 
Looks good. Out of curiousity, how does the cork board do underwater? I ask because I usually see them in the reptile section, so curious as to how they will hold up.

I am not entirely sure as of yet, since I've never used it myself. But, a friend of mine used it as a background in his 30 gallon fish tank for 6+ months before her tore it down and sold it when he moved, and it never gave him an issue.

Worse comes to worse, I can just trim it just above the water line.
 
Not much new to report. I figured out a way to hide the glass bit in the left corner. I cut a piece of egg crate that is one and a half squares. It wedges in really nicely without too much pressure, so I'm thinking I'll just cover it in weed blocker to help blend in with the background. Eventually the live plants should help hide it.

Right now I am trying to decide which filter I want. I am looking at a couple different ones.

Marina I25- Cheap. Goes up to 6 gallons. Small. I am not sure how well its works, though, and I am sure I will have a bit more than 6 gallons in the tank by the time its done, but I am not sure how much waste frogs produce anyway...

Tetra Whisper 10i - A little bit more expensive. Rated for up to 10 gallons. A little bit bigger than the marina. Never used it before.

Zoo Med Turtle Clean 318- Most expensive of the three. Rated for up to 30 gallons, so its a bit of over kill. Not sure how it works.

I am definitely leaning towards the marina or whisper. Any suggestions?
 
You might want to consider covering the weed barrier with a light layer of silicone and some coco bark fiber - it will help give it a more natural look till the plants/moss overgrows it. It also give the plants and moss something more to attach to than just the weed barrier. You also might want to look into fiberglass screen rather than weed blocker as that would allow more water to run through than the weed barrier will.

In regards the filters, I have one of the zoomed canisters on my paludarium;
http://www.aquariumadvice.com/forums/f72/wy-renegades-30gal-paludarium-192117.html

and I'm very impressed with it. If you can swing it, I would definitely recommend it over the other two. You don't have to set it up with a closed-loop like I did, it comes with the tubing to pull water over the top of the tank and return it back. Very powerful and very nice filter. Might be overkill, but worth it IMO.
 
Unfortunately, I don't think the canister filter will be doable at the moment. Maybe later down the line when I have some extra cash. Or I will save up for it, not really sure. Its not like I have to move the frog over immediately, lol, he is still only the size of a half dollar.

The more I look over your builds, Wy, the shabbier my build looks. I love how much more natural your builds look.
 
Talvari said:
Not much new to report. I figured out a way to hide the glass bit in the left corner. I cut a piece of egg crate that is one and a half squares. It wedges in really nicely without too much pressure, so I'm thinking I'll just cover it in weed blocker to help blend in with the background. Eventually the live plants should help hide it.

Right now I am trying to decide which filter I want. I am looking at a couple different ones.

Marina I25- Cheap. Goes up to 6 gallons. Small. I am not sure how well its works, though, and I am sure I will have a bit more than 6 gallons in the tank by the time its done, but I am not sure how much waste frogs produce anyway...

Tetra Whisper 10i - A little bit more expensive. Rated for up to 10 gallons. A little bit bigger than the marina. Never used it before.

Zoo Med Turtle Clean 318- Most expensive of the three. Rated for up to 30 gallons, so its a bit of over kill. Not sure how it works.

I am definitely leaning towards the marina or whisper. Any suggestions?

My whisper is silent but big and can overflow.
Doesn't have much space for media
Doesn't have consistent flow
Small fish get in easily because of the lip
Suction cups are impossible to get in
Slides up and down a lot
Filters well enough
You can't fill up the tank all the way or else it covers the filter
 
Unfortunately, I don't think the canister filter will be doable at the moment. Maybe later down the line when I have some extra cash. Or I will save up for it, not really sure. Its not like I have to move the frog over immediately, lol, he is still only the size of a half dollar.

The more I look over your builds, Wy, the shabbier my build looks. I love how much more natural your builds look.

IMO it is well worth saving the cash for down the road, and going with a cheaper on for now is doable, you just have to monitor water chemistry more and stay up on PWC as needed. One small frog isn't going to create a huge amount of biowaste unless you overfeed it massively.

Don't discredit yourself. I've seen some very natural looking and gorgeous builds come out of the same method that you are using. In fact I was watching a U-tube last night on vivarium construction using the same basic method you are using and it came out really nice. The main thing I would suggest is do some looking at some of those videos or other vivarium builds and taking it a little further than you are currently. the silicone and coconut fiber is very popular, as is the foam with some type of paint. If you need some links I can see if I can find some of them for you. But if you go into U-tube and search paludarium builds, you will see several paludarium and vivarium options come up.

Personally I'm looking forward to seeing what you come up with, so keep it up!


I took your advice and have been watching many different builds on youtube... And now I have like three or four different ideas, a few of which have nothing to do with the original design. How do you guys do this?! lol

I absolutely love the idea of doing the Great Stuff background, particularly since the foam and silicone are only like 4 or 5 dollars at the home depot right near me. So now, one of the ideas is to shred the cork background and put it at intervals in the Great Stuff background. I also want to cut a waterfall into the background and have it doing from the top left down into the bottom right, and have some pots stuck in there too, so I can have hanging plants, like vines, coming over the top of the water fall and covering up any imperfections.

I love the look of your build, too, and a few others that look like it. I like the idea of not having to build up the false bottom so high, and in my current design, I worry about the soil getting water logged. Plus it just looks so natural and beautiful!

Ugh. What do you guys think?

LOL, lots of different tanks, lots of time, and ultimately lots of money! Sounds like you're on the right track to me. What I would do if I were you and I was limited on the number of tanks I could have, would be to decide which methodology and look I personally like the best. Then, once I have determined that, I would begin the process of converting my system into what I desire. Often times this requires baby steps. As you can tell from my builds, I haven't done any of them quickly or overnight. All of the successfully ones that look nice have taken lots of planning and work, and all of them are in a continual state of change. That, IMO, is one of the pleasures of the hobby. Never ever yet have I built a tank or system and looked at it and said "done", now all I have to do is maintain it over the long run. I'm constantly adding things, changing things around, or upgrading.
 
Back
Top Bottom