DIY CO2 is a bit different in effectiveness from the pressurized bottled gas through a regulator, even though it's the same gas. DIY is harder to regulate in terms of just how much gas you are adding at any one time, and you cannot turn it off at night either.
If you add up the cost of sugar and yeast to maintain CO2 year round, you'll find it's not all that cheap. If you want to do CO2 for more than one tank or a big tank, certainly the least costly method over the course of a few years is to buy the CO2 in the metal cylinders and the regulator, etc. to run it.
But, to start with, DIY is a great way to get the same basic effect with almost no up front costs. There is even a way to do it using a couple of simple chemicals, and if I can find the post I saw on this, I'll post it.
The main disadvantage to it is simply that you have to start new bottles every couple of weeks, give or take, because as the yeast ferments, it produces alcohol. {yes, some folks have tasted it and apparently it's pretty disgusting
")
}. Once the alcohol level rises past a certain percentage, it kills the yeast and that's why bottles stop producing.
They also produce less and less CO2 as the alcohol level rises, so the output does drop off toward the end of the bottle's life. Some use two bottles or more, started in staggered times, second one a week after the first and so on, to help keep the gas levels in the tank more even. Using a drop checker will help a lot, you'll be able to see whether you've got enough gas in the tank to do the job.
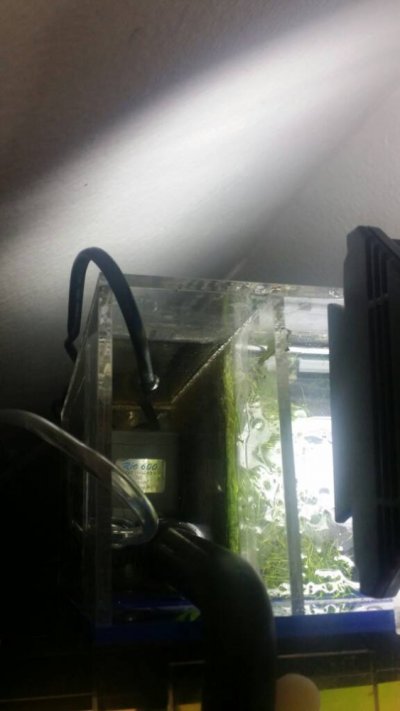
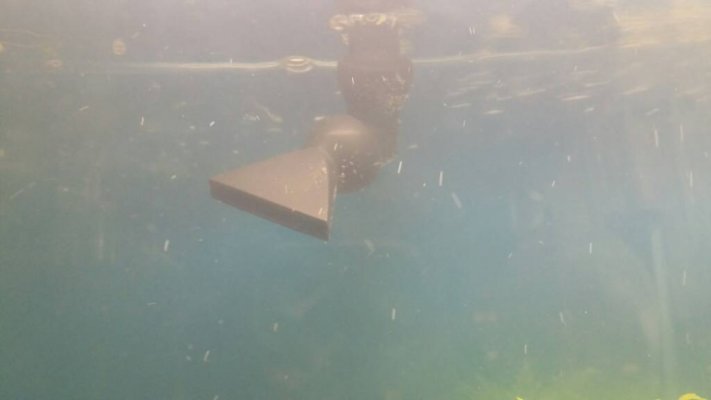
Btw, DIY bottles won't work with commercial diffusers that are designed to work with pressurized gas cylinders. Those need more pressure than a DIY bottle can generate. But you can help them be more efficient by making sure the seal around the tubing is air tight.
Leakage is a common problem with DIY bottles. There are tiny bulkhead fittings you can get from hobby shops that work really well for this. They're not terribly expensive, come in pairs either 1/8" or 3/16". They are normally used to attach gas line tubing to fuel tanks on model airplanes and such. Model's fuel tubing is identical to our air line tubing, only it's all silicone and comes in a some nifty colours. Of course you can get silicone air tubing and it's nice, more flexible and long lasting, but regular air hose works too.
These little bulkheads give you an air tight seal for your tubing that is hard to beat. But silicone sealant, as is used for tanks, will also work. Use plenty of it for an air tight seal around the air tubing.
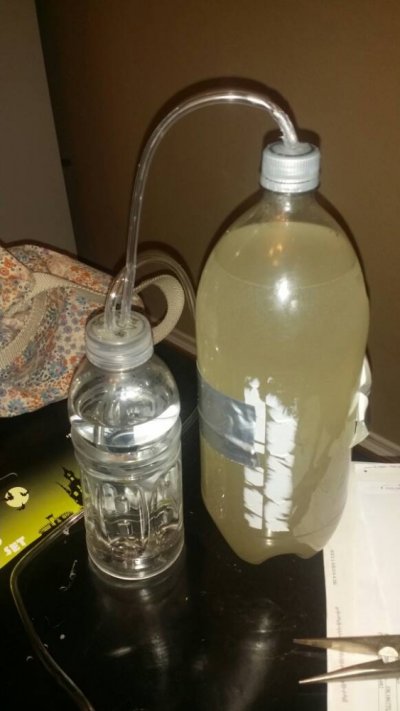
It's also helpful to run the gas from a DIY bottle into another, smaller bottle, part full of water, and then from the second bottle into the tank. This intermediate bottle of water helps prevent buildup of a sort of slime that sometimes shows up with DIY yeast.
So you'd have a bottle of yeast/sugar, with a tube in the cap running to a second small bottle, with two tubes in the cap, one of which is the input from the yeast bottle, the second is the tube going to the tank and diffuser setup. I'll see if I can find a pic of this, if you haven't seen it. I know some guys who have used DIY with and without this second bottle in between, and they all said the bottle in between was worth having. It also prevents any chance of accidentally discharging any of the yeast mixture or alcohol into the tank.
I'd have to look to remember the name of the little bulkheads.. but they are not hard to find Seen them online a few times, got mine from a local hobby store that ordered them for me.