180-Gallon Upgrade Starts NOW!!!

The friendliest place on the web for anyone with an interest in aquariums or fish keeping!
If you have answers, please help by responding to the unanswered posts.
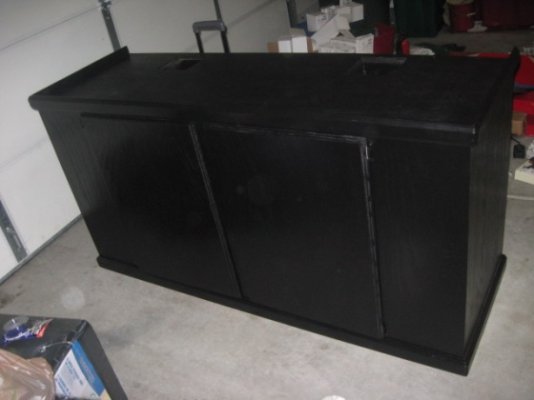
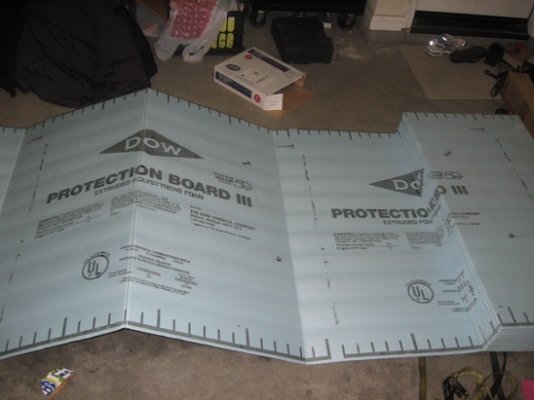
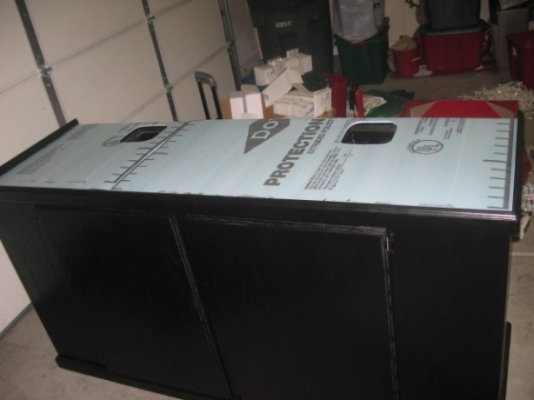
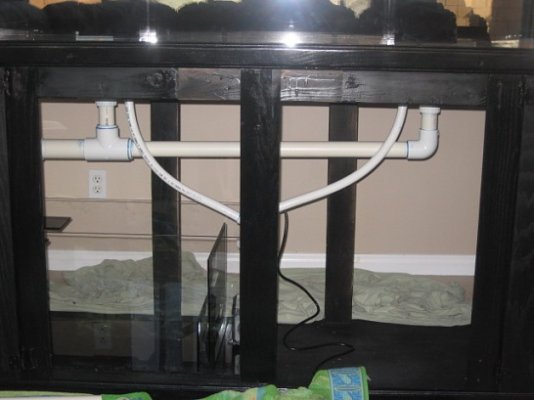
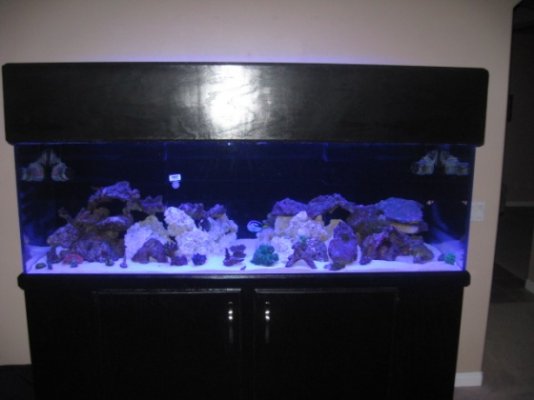
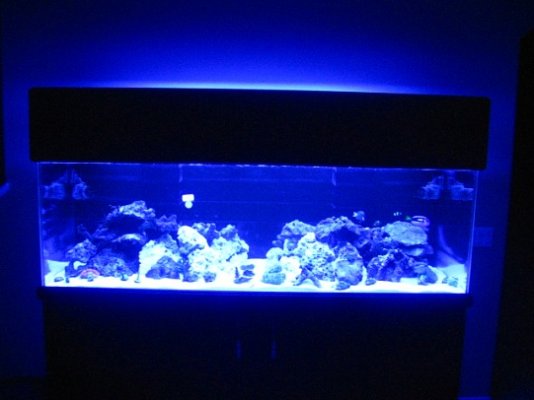
My stand finally came in, again. This time is was much closer to the way I ordered it so I am going to keep it this time. I also picked up some foam for my stand today, it is 1/4" thick purchased from Lowes.
 

Attachments

  • IMG_1794.jpg
    IMG_1794.jpg
    51.6 KB · Views: 176
  • IMG_1795.jpg
    IMG_1795.jpg
    68.2 KB · Views: 160
  • IMG_1796.jpg
    IMG_1796.jpg
    54.8 KB · Views: 156
Got the plumbing done today with my brother in law. It is a 1.5" drain and then a 3/4" return with a true wye fitting then flexible pvc up to the bulkheads. We had the two drains join up and go upsize into 2" and then down to the sump.
 

Attachments

  • IMG_1799.jpg
    IMG_1799.jpg
    56.1 KB · Views: 173
  • IMG_1800.jpg
    IMG_1800.jpg
    67.9 KB · Views: 146
  • IMG_1801.jpg
    IMG_1801.jpg
    59.4 KB · Views: 170
No they said that "no padding is necessary, however, there must be no pressure points on the bottom panel." I used 1/4" foam and it is an acrylic tank. I do remember your nightmare, and it scares me. However, reading around on wetwebmedia etc it seems like it is good to use foam on acrylic tanks incase there is a small high or low area on the bottom panel.
It is not too late to take it out, now you have me worried.
 
If it is acrylic you will be fine. You just don't want to use foam under a glass tank unless the manufacture suggests it.
 
Got the plumbing done today with my brother in law. It is a 1.5" drain and then a 3/4" return with a true wye fitting then flexible pvc up to the bulkheads. We had the two drains join up and go upsize into 2" and then down to the sump.

I'm nowhere near ready to have a SW tank (financially or space capacity wise) but someday I plan on having one and I've been trying to figure out the whole sump/fuge plumbing thing. I have to admit that for me it's the most confusing part of the SW world. Your pictures, however, help clear up a lot of confusion for me. It's one of the first times I've been able to clearly see how it all connects up. Thanks for posting these.

If you get a chance could you post how the plumbing inside the tank works? Are you using overflows?

Thanks again for the clear, straightforward pics of the plumbing.

Here is a great explanation of a sump and how it works. Lots of good info on this site!!!

Melevsreef.com - What is a Sump?
 
I'm nowhere near ready to have a SW tank (financially or space capacity wise) but someday I plan on having one and I've been trying to figure out the whole sump/fuge plumbing thing. I have to admit that for me it's the most confusing part of the SW world. Your pictures, however, help clear up a lot of confusion for me. It's one of the first times I've been able to clearly see how it all connects up. Thanks for posting these.

If you get a chance could you post how the plumbing inside the tank works? Are you using overflows?

Thanks again for the clear, straightforward pics of the plumbing.

Thanks for the reply. When I first started looking into a saltwater tank, I was always intimidated whenever I opened up the cabinet at the LFS and looked underneath at this "sump" thing. It always looked so confusing to me too and I didn't uderstand it. Needless to say the LFS sold me on a wet/dry canister filter which was fine for a fish only tank but not good for a reef tank. Once you have somebody explain a sump/return pump/drain to you it all makes perfect sence and it is not all that confusing. I didn't read the link that Ziggy listed but I am sure it is a good one.
Thanks again for the reply, it motivates me to keep this thread going and to keep posting pics :p
 
I'm nowhere near ready to have a SW tank (financially or space capacity wise) but someday I plan on having one and I've been trying to figure out the whole sump/fuge plumbing thing. I have to admit that for me it's the most confusing part of the SW world. Your pictures, however, help clear up a lot of confusion for me. It's one of the first times I've been able to clearly see how it all connects up. Thanks for posting these.

If you get a chance could you post how the plumbing inside the tank works? Are you using overflows?

Thanks again for the clear, straightforward pics of the plumbing.

To answer your questions in this post, yes I can take more pictures that show how the pumbing inside the tank works... I should be able to post them tomorrow.
I am using 2-overflows. My overflows are reef-ready which means that they are built in, inside of my tank and the bottom of my tank has two holes in each overflow. One hole for the big drain pipe and the other hole is for the smaller return pipe. Basically the water spills into the overflow then goes down the big drain pipe you can see in my pics. I joined both of the drains together and upsized the pipe and then it spills into the sump. The last chamber in my sump has the return pump that pumps the water back into the tank above through the Y shaped smaller pipe you can see in my pictures. Hope that helps.
 
Cool, thanks to both you ryshark and Ziggy for helping steer me down the path of understanding sumps and plumbing. I'm sure by the time I'm ready to get into a SW tank of my own I'll have the knowledge I need to make my own sump. AA rocks!
 
It is hard for me to take a picture of the plumbing inside the tank because the back acrylic panel is black. Here is a picture where you can kind of see how the return comes out of my overflows and then 90s over the top of the tank and back in then I used 3" locline. I had the returns come up through my overflows this way there is no plumbing behind the tank at all, it looks clean.
In the other picture you can see my new Lumenarc reflectors and I am in the process of adding 2x 60" VHO bulbs for supplemental actinic. I have to lower the VHO lamps down off the canopy even with the Lumenarcs. I will be putting the VHO lamps one in front of the reflectors and then one behind the reflectors.
 

Attachments

  • IMG_1807.jpg
    IMG_1807.jpg
    67 KB · Views: 129
  • IMG_1808.jpg
    IMG_1808.jpg
    42.5 KB · Views: 129
  • IMG_1809.jpg
    IMG_1809.jpg
    72.6 KB · Views: 129
I want to order a 180 gal Acrylic tank same size as you 72x24x24, but what is the thickness of the tank? They told me 0.6 inch as thickness, is that enough?
 
I want to order a 180 gal Acrylic tank same size as you 72x24x24, but what is the thickness of the tank? They told me 0.6 inch as thickness, is that enough?

That is just over 1/2" thick. I would think that is enough for a tank that size.

Your project seems to becoming along nicely!! Can't wait to see how it looks with the canopy on and lit up!
 
I want to order a 180 gal Acrylic tank same size as you 72x24x24, but what is the thickness of the tank? They told me 0.6 inch as thickness, is that enough?

Yes that is enough. 1/2" all the way around is ok for those demensions. Mine is 1/2" on the sides and bottom and 3/4" on the top. I did this so they could make bigger access openings.
 
That is just over 1/2" thick. I would think that is enough for a tank that size.

Your project seems to becoming along nicely!! Can't wait to see how it looks with the canopy on and lit up!


Thanks Ziggy, I can't wait too. I added another 20-amp circuit right there to the wall where my fish tank is. The only other thing on that 20-amp is my refrigerator. I should be able to get an additional 400-500 watts out of this which should be just enough.
The other circuit I am using is a 15-amp shared with my tv and a couple lights in the room, so I went to home depot and got those CF bulbs that run at way less watts just to save more electricity for my tank. I got a 60-watt equivalent bulb that runs at 13-watts. I am really scraping the bottom of the barrel here. Tonight I'm going back to Home depot to get 20-watt bulbs to replace the series of 40-watt bulbs that is in my fan (which is also on that 15amp);)
Hopefully they make those in CF too then they would be even less than 20-watts each.
 
I got my lighting done tonight. 2-Lumenarc mini reflectors, 2-Ushio 10k on a dual electronic Galaxy ballast. 2-140 watt super actinic VHO and 2-4" fans in the canopy.
This is my first time with halides, I knew halides got hot, but I didn't realize they got THAT HOT. I am a little worried now that I need to buy a chiller:-| Not too happy about that. I was planning on putting my base rock/ sand in the tank and getting started, but now I am wodering if I should do a dry ahhh wet... run first with freshwater to see how much the temperature rises.
 

Attachments

  • IMG_1811.jpg
    IMG_1811.jpg
    71.9 KB · Views: 110
  • IMG_1810.jpg
    IMG_1810.jpg
    65.5 KB · Views: 130
Are the fans blowing air into or out of the canopy?

I have a lot of light on my tank and with the use of fans I don't need a chiller. My tank temp rarely gets over 82.5 and that's with a wood stove heating the house. I think you should be fine with the fans.
 
I have one blowing in and one blowing out. I am thinking of pointing them both in and then drilling a bunch of small holes on top of the canopy for heat to get out. However, I dont want it to look stupid with light beams shooting straight out the top.
My reflectors block half of the fan, so hopefully that won't be an issue, I guess the air has got to go somewhere.:confused:
 
The back of the canopy doesn't go all the way down to the top of the tank so you should have more then enough open area in the back to pull air in.

I have my fans mounted in the top of my canopy. 2 are blowing into the canopy and 1 is blowing out. I've been toying with the idea of having them all blow out since the back of my canopy is open.
 
I took most of yesterday to take everything (except for substrate) out of my 75-gallon and put it into my new 180-gallon. I did not place any of the corals yet, I have them spread out on the sand for now. I will probably keep the coral down there for awhile since they are going from all VHO lighting to 250-watt halides with lumenarc reflectors. That should be a huge difference for them, so I will keep them on the bottom and start off by only running my halides for about 2-hours a day and slowly increase the time up to 8-hours a day. Finally my little sps frags have the chance to GROW beyond snail speed.
I also have not completely finished my aquascaping but at least the foundation is laid. You can see my rock is a mixture of base rock and live rock. Eventually the base rock will match the color of the LR and look better. This picture is with the flash on and full lights on. The other picture is with no flash and actinic only.
So far I have an instant cycle as I planned, but I'm still keeping my fingers crossed.
 

Attachments

  • IMG_1814.jpg
    IMG_1814.jpg
    56.5 KB · Views: 142
  • IMG_1815.jpg
    IMG_1815.jpg
    56 KB · Views: 128
  • IMG_1816.jpg
    IMG_1816.jpg
    68.9 KB · Views: 134
Back
Top Bottom