SparKy697
Aquarium Advice Addict
This is a fairly simple project that I first tried when I was setting up my 55 gallon planted tank. I was going for a less cluttered look, the only things I really wanted in the tank were the suction and discharge tubing.
Since this was going to be a planted tank with CO2, some sort of reactor was needed. There are versions on line that can be obtained for what I considered a lot of money. So as is my nature, I decided to try a DIY. The process is documented below:
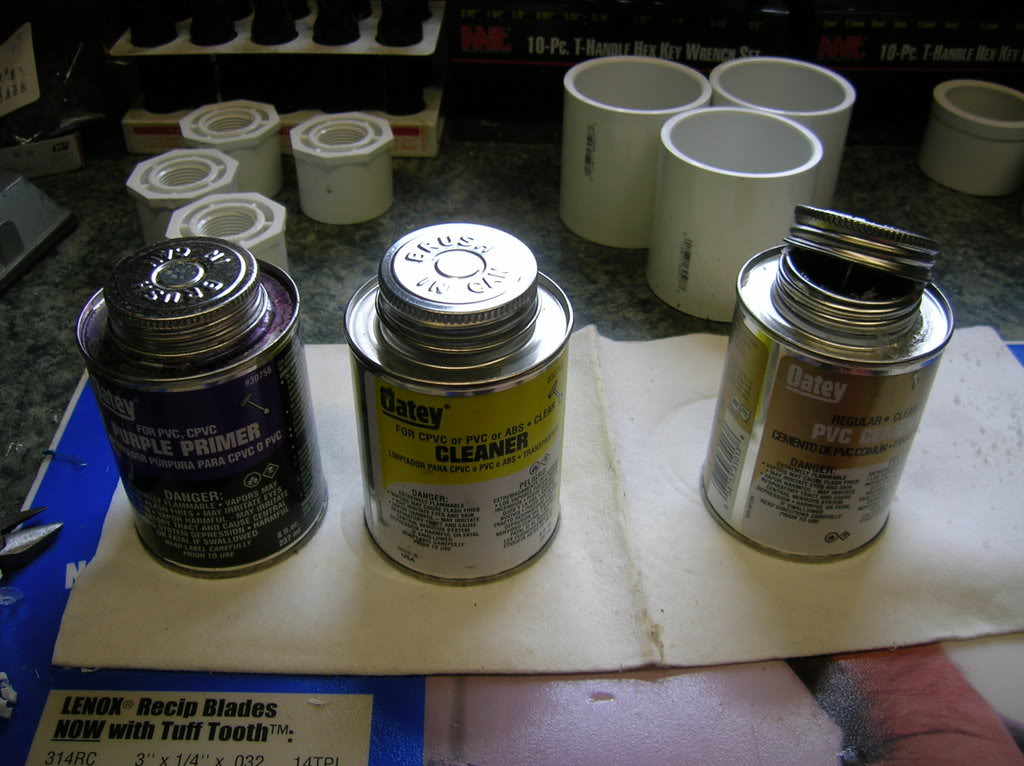
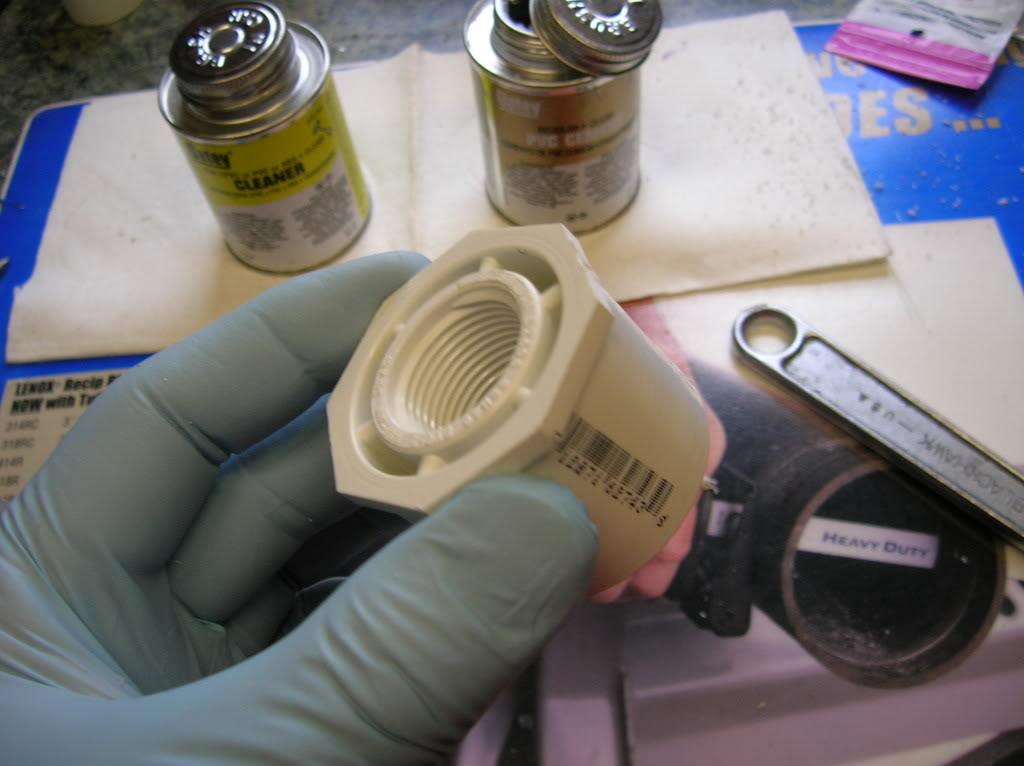
You can get PVC primer in two forms, Purple and Clear. I would advise against the purple because this stuff is thinner than water and tends to run all over the place and you probably don't want purple streaks on your new fancy reactor.
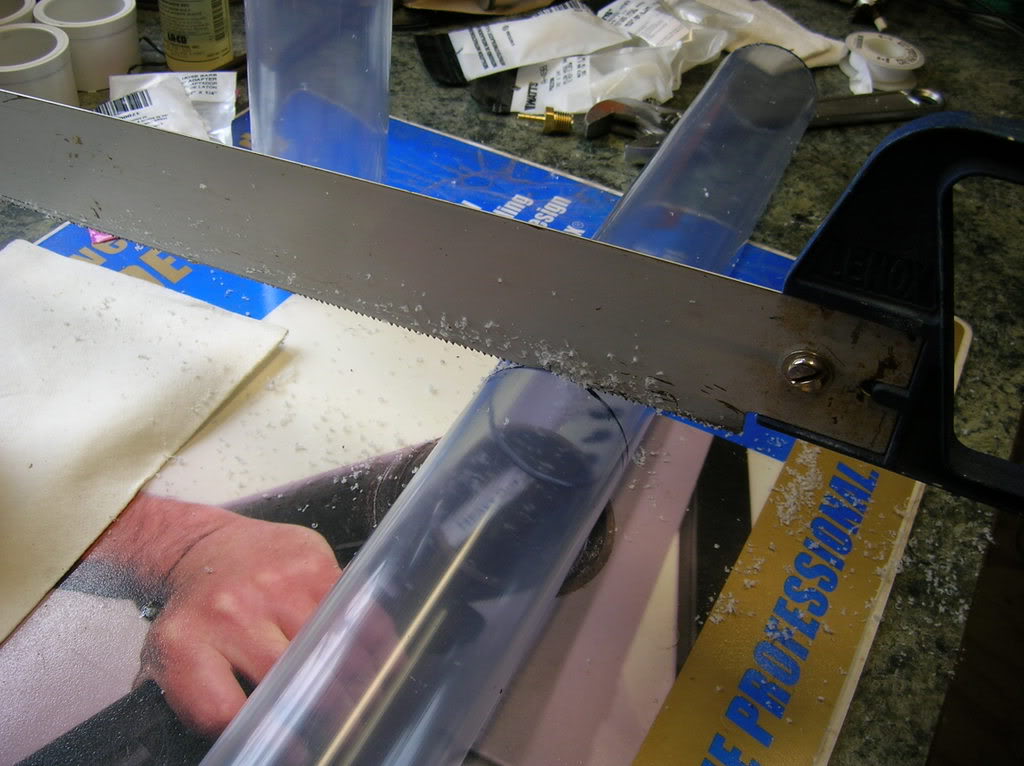
The prototype used the standard white 2" PVC and worked quite well. I just found that I was not happy with not being able to see what is going on inside. The latest version uses clear PVC that is cut to +/- 12".
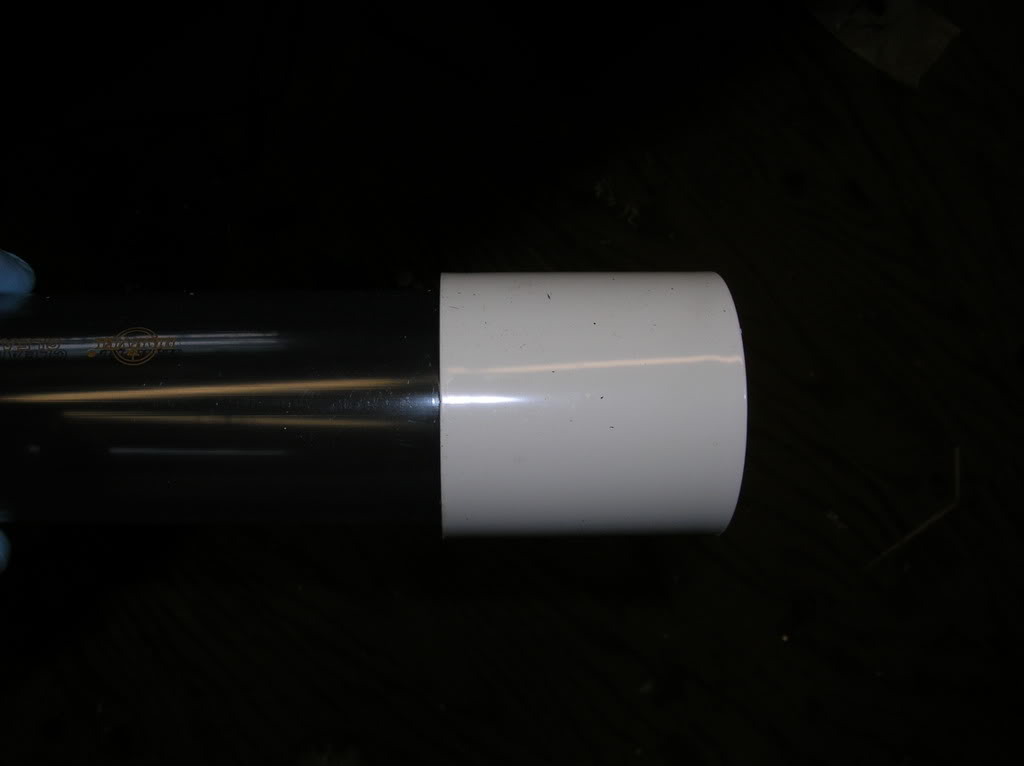
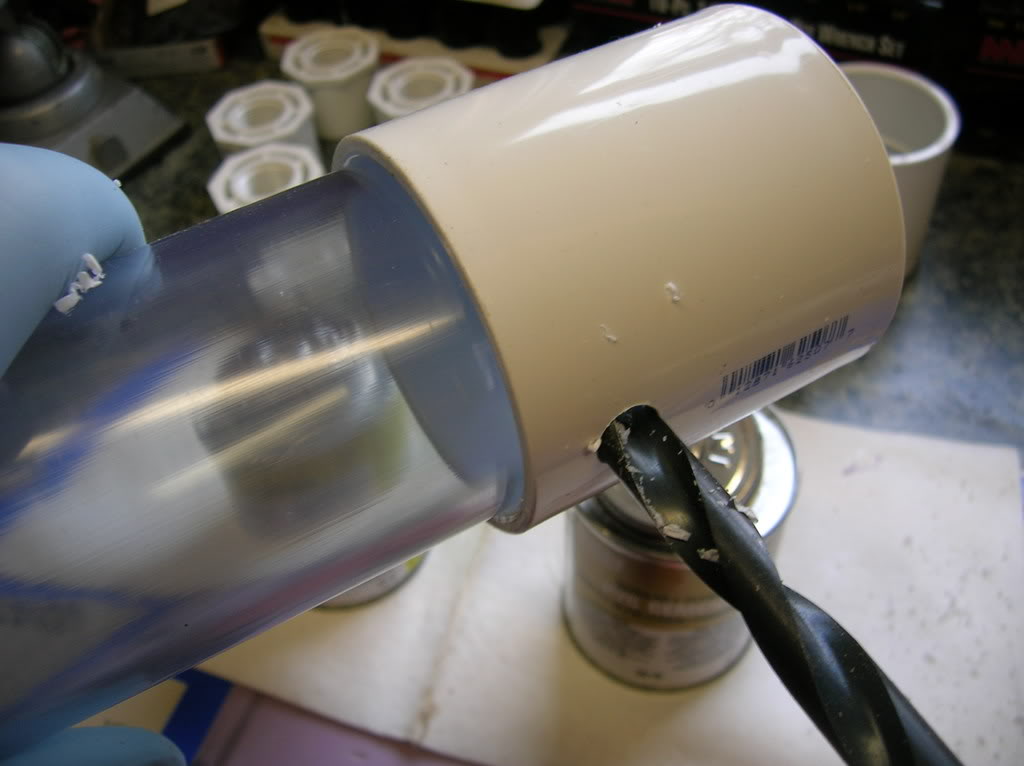
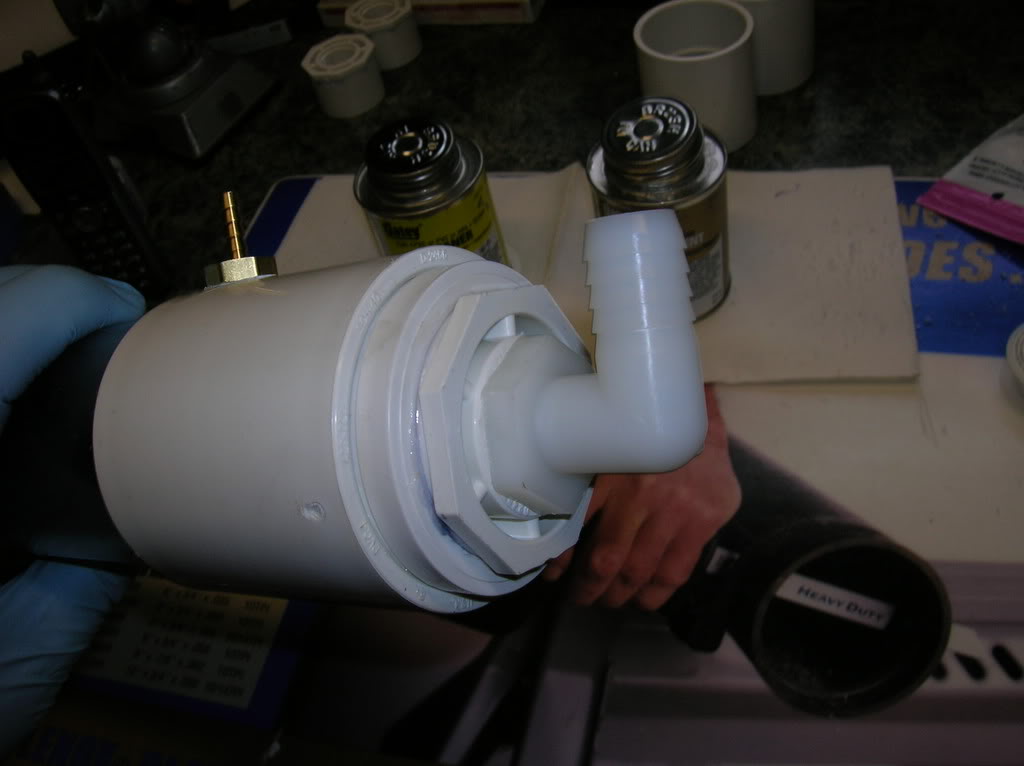
Ideally I would have used a 2" threaded female adapter with a 2"x3/4" bushing on the ends of the pipe, but I was unable to find them readily. Instead I used a 2" coupling, 2"x1-1/2" glued bushing, 1-1/2" glue - 3/4" threaded female adapter combination. Start by glueing the couplings on the end of the pipe.
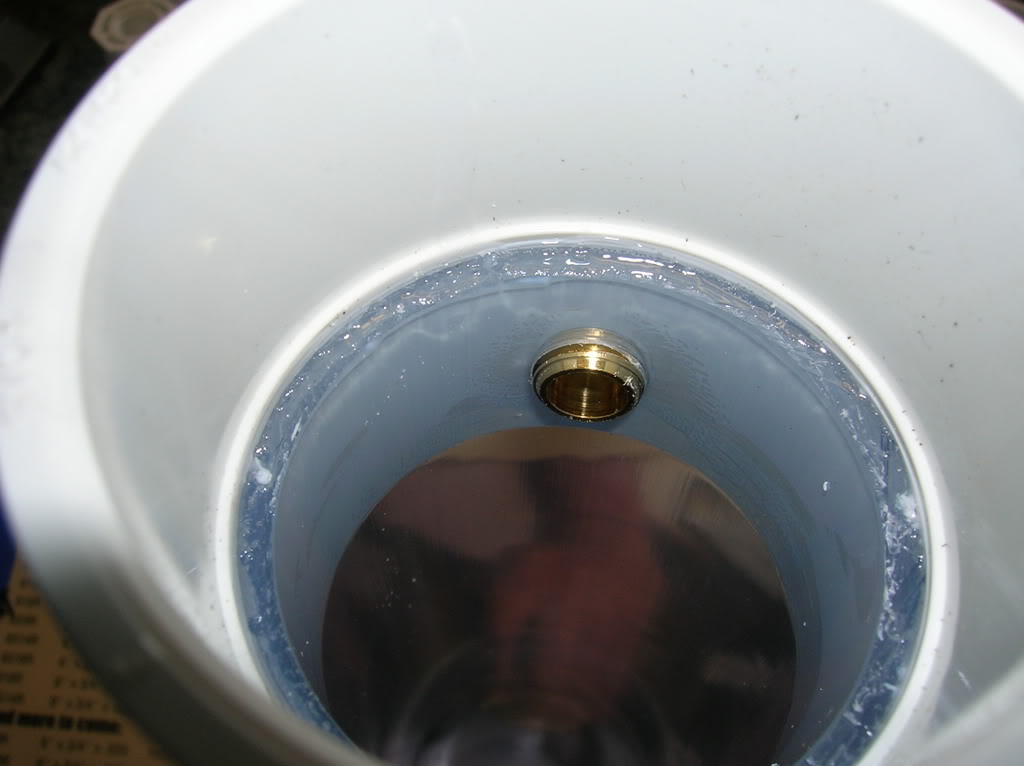
With the couplings in place, it's a good time to drill the hole for the hose barb that is going to be used to add the CO2 to the water stream. By drilling it now you will be able to get all of the shavings out of the pipe, instead of letting them get inside the completed reactor where you have to look at them for the rest of the reactor's life. I learned this the hard way.
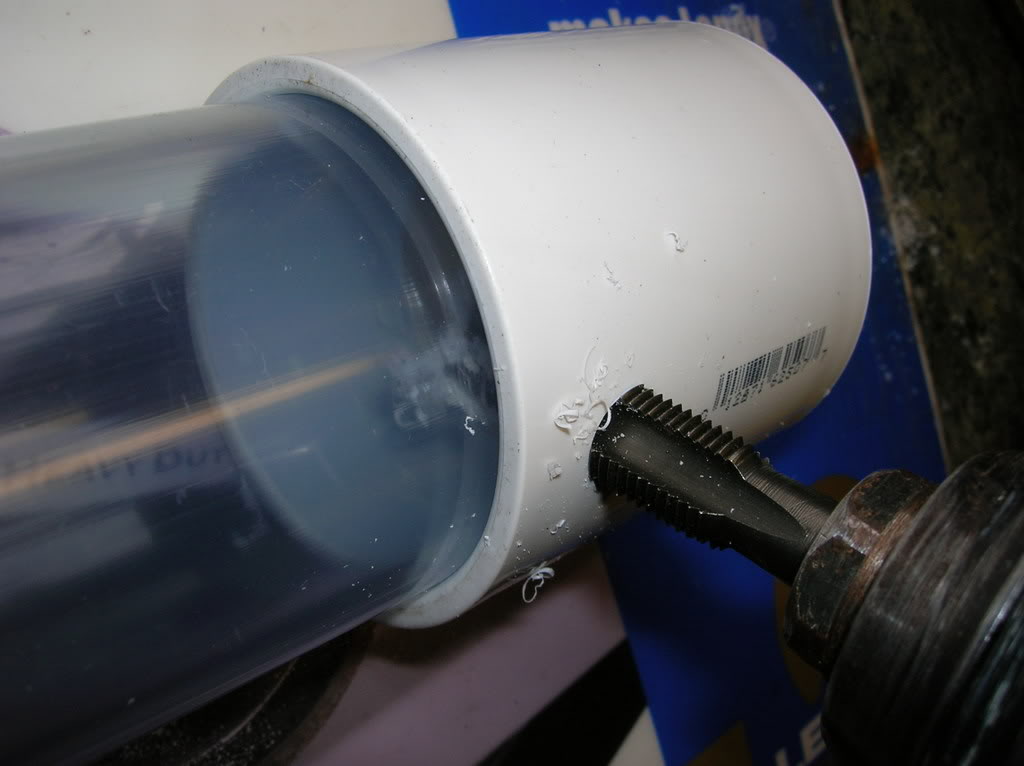
By drilling through the coupling and the pipe where the two are glued together, you have enough material to tap threads and get a good seal around the barb without the use of any glue.
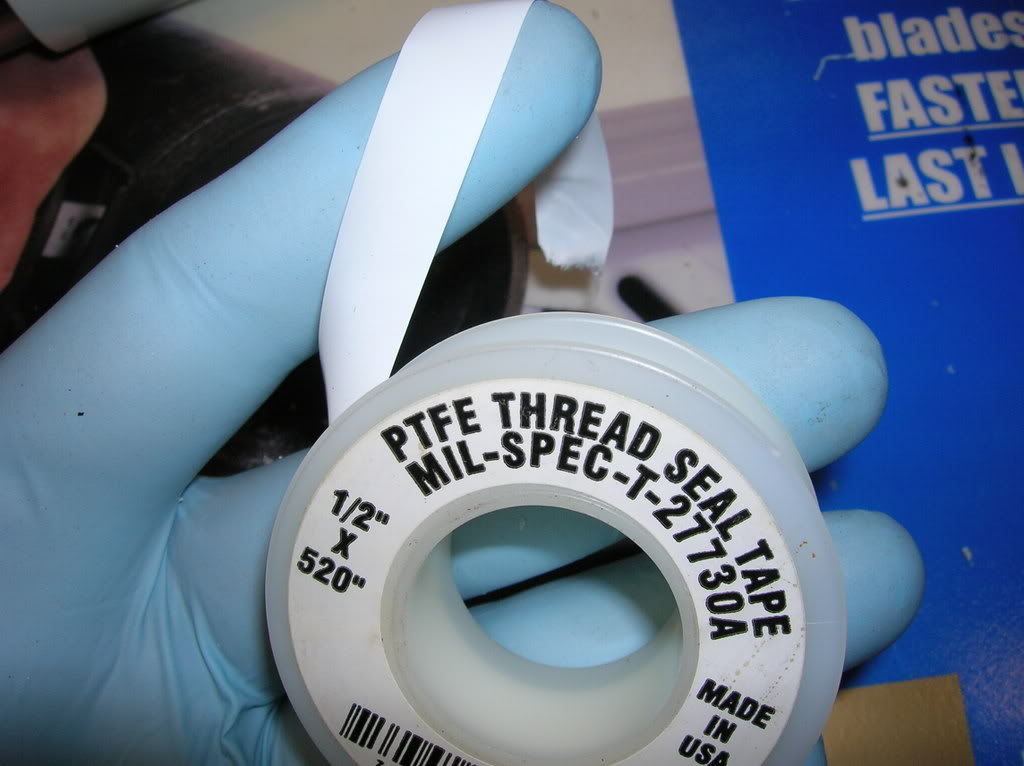
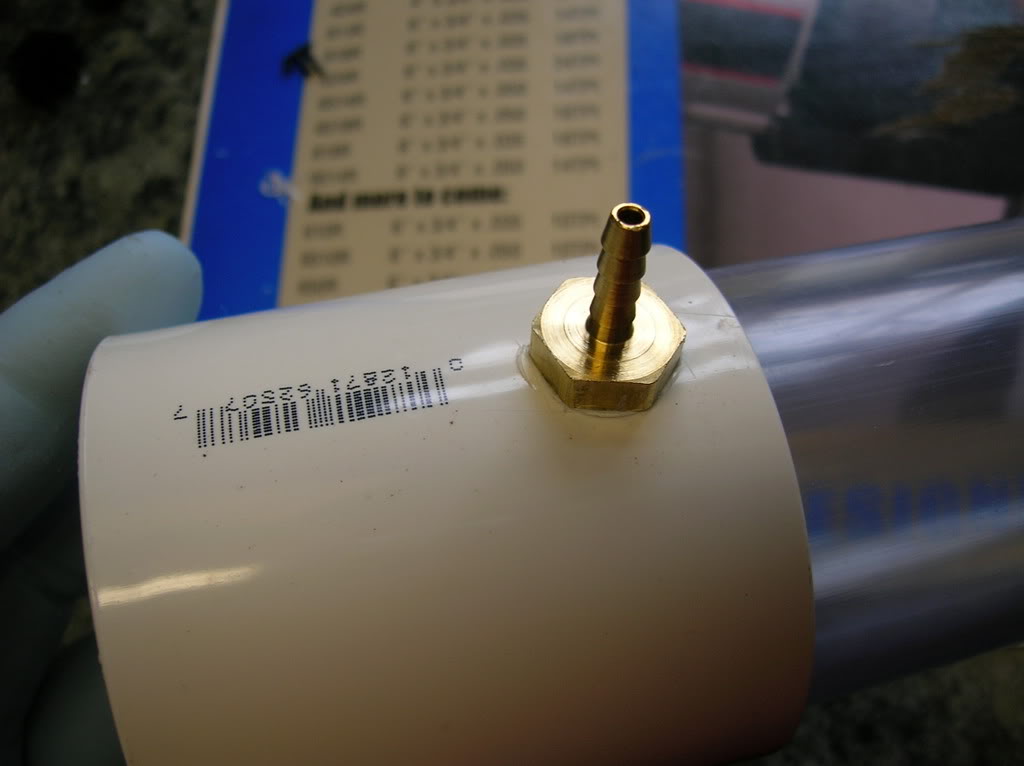
I chose to use a brass hose barb for strength. Remember to use teflon tape on all pipe threads. And yes I am wearing Nitrile gloves. I really hate to deal with PVC glue on my hands.
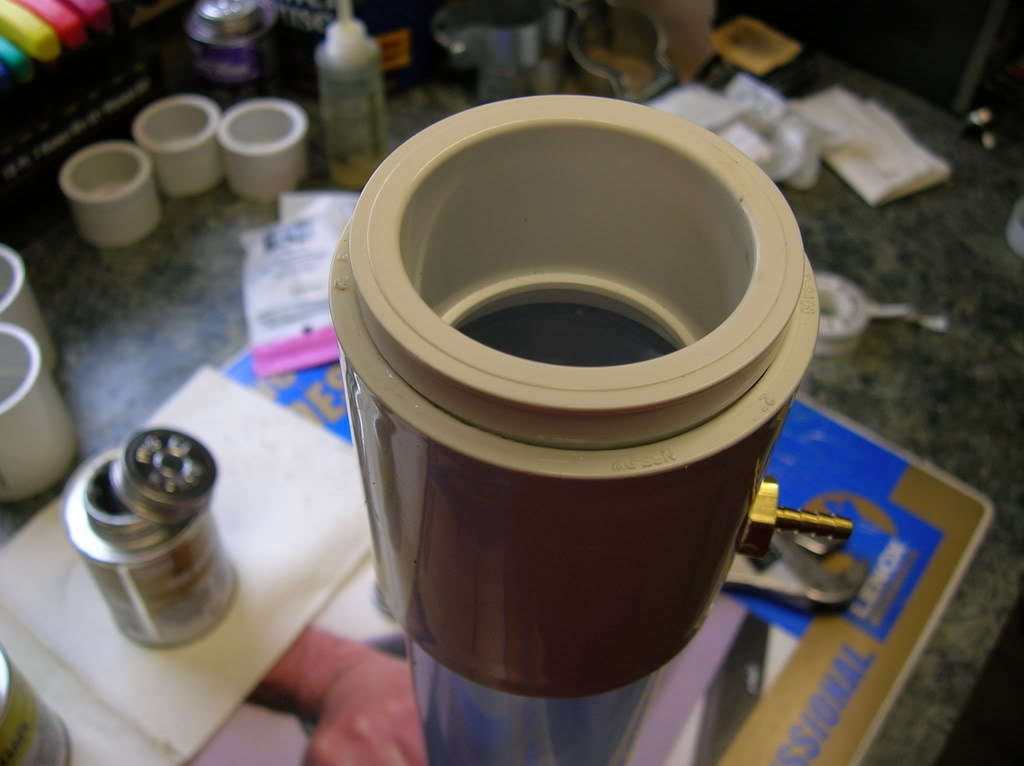
The next step was to continue glueing the rest of the adapters on one end of the pipe.
It is so very important that you only do this to one end. If you get in a hurry and glue up both ends, you will be left with a nice hollow pipe with no Bio-Balls inside. (Life experience #2)
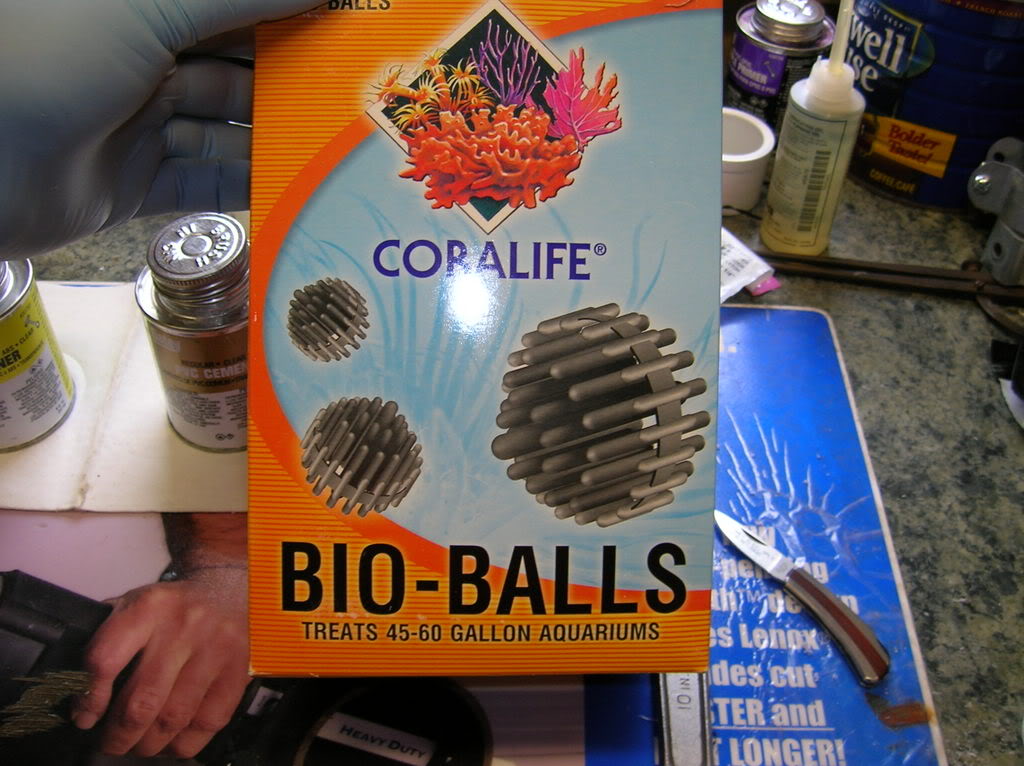
I chose the Coralife Bio-balls because of their small size. I think the main role of the bio-balls is to create some turbulence inside the reactor to help keep the bubbles in contact with the water for a longer time.
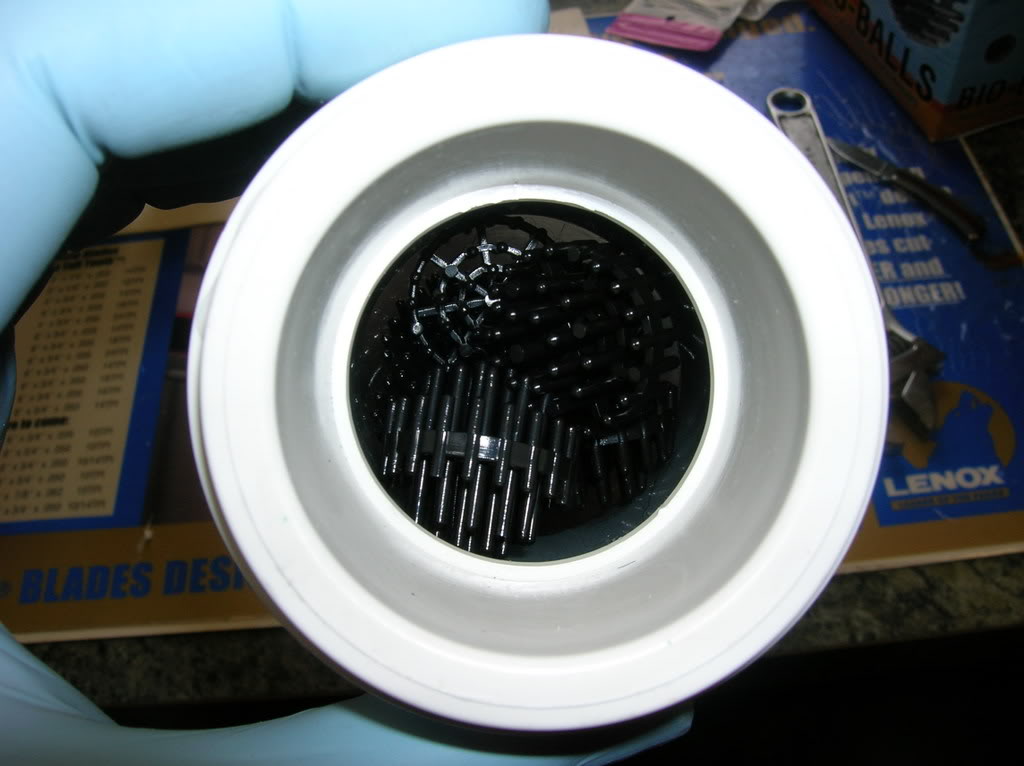
Only fill to the bottom of the glued in bushing. You still have to glue in the threaded adapter and need to leave room for it.
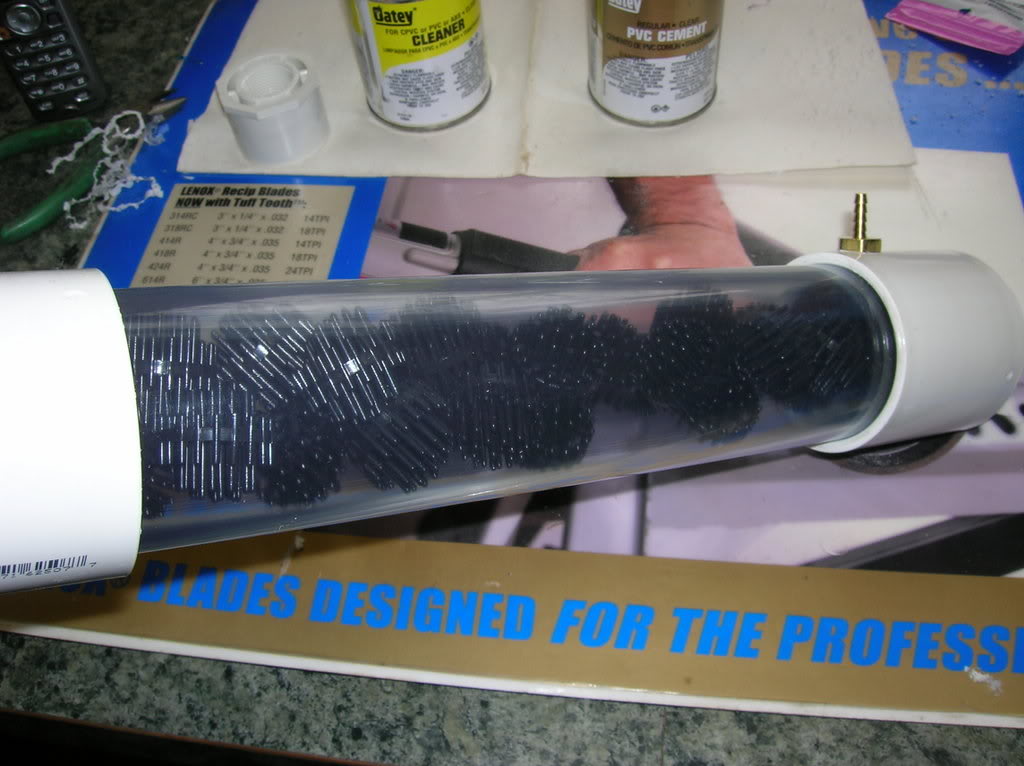
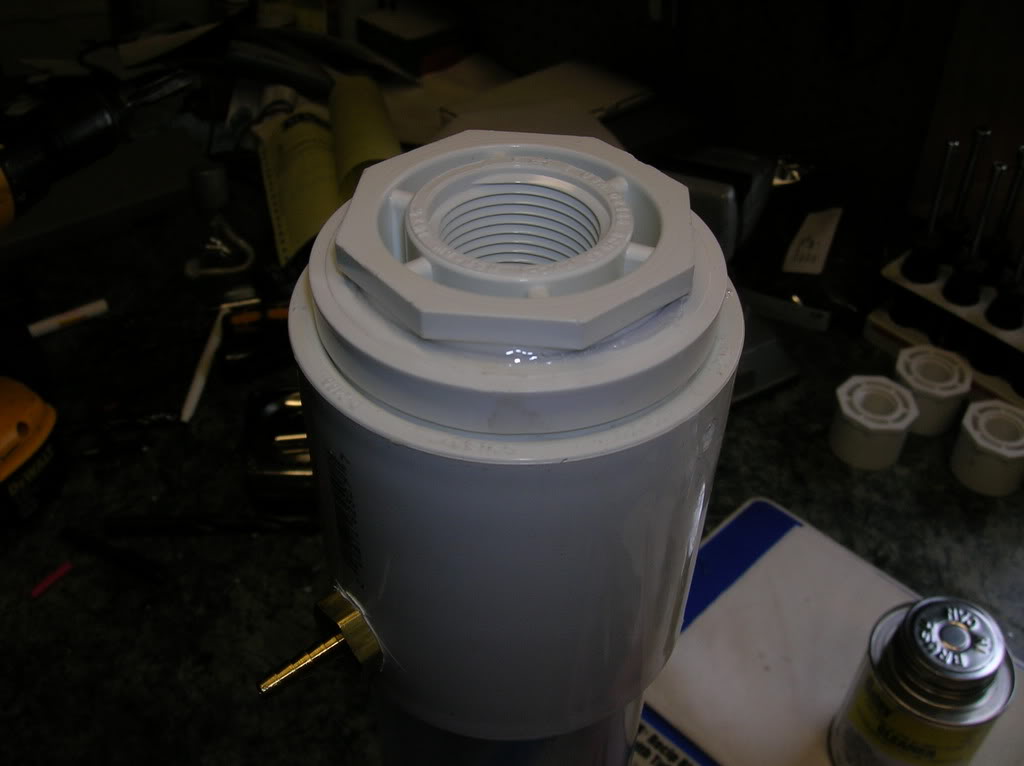
Once you have your reactor filled with Bio-Balls, go ahead and glue up the remaining end.
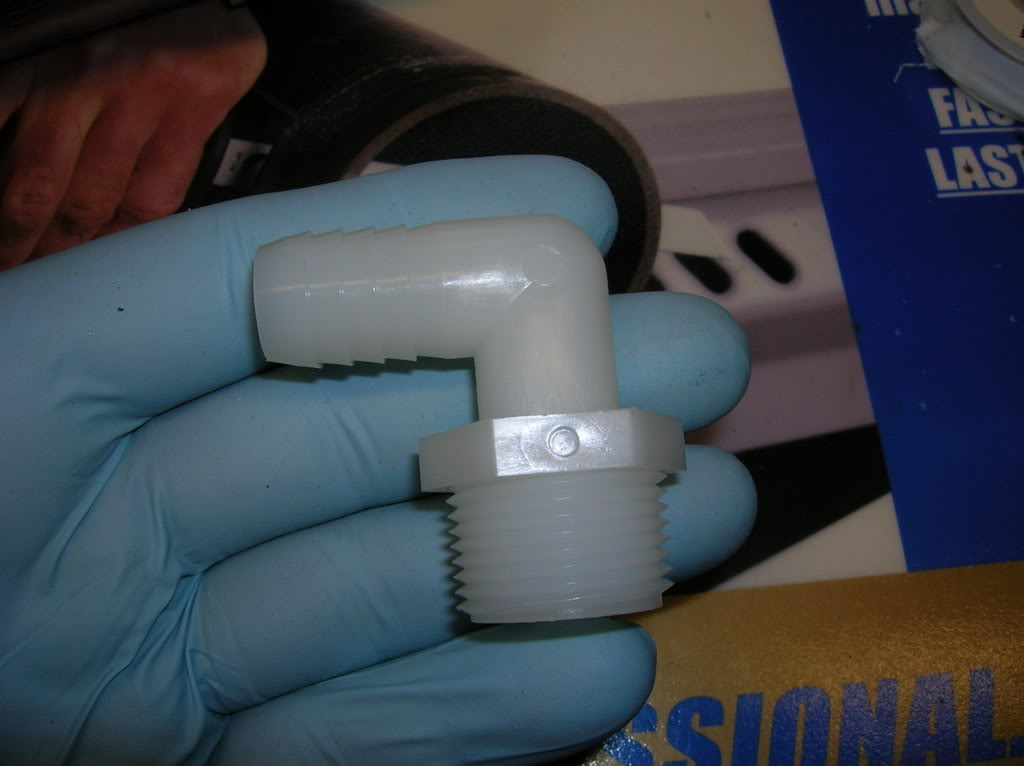
Because of the length of the reactor, I chose to use 90 deg. hose barbs. this helps to keep the hoses from kinking. They have a 3/4" thread and are made for a 5/8" id hose. In my case this is what I need for the XP2, and XP3 filters.
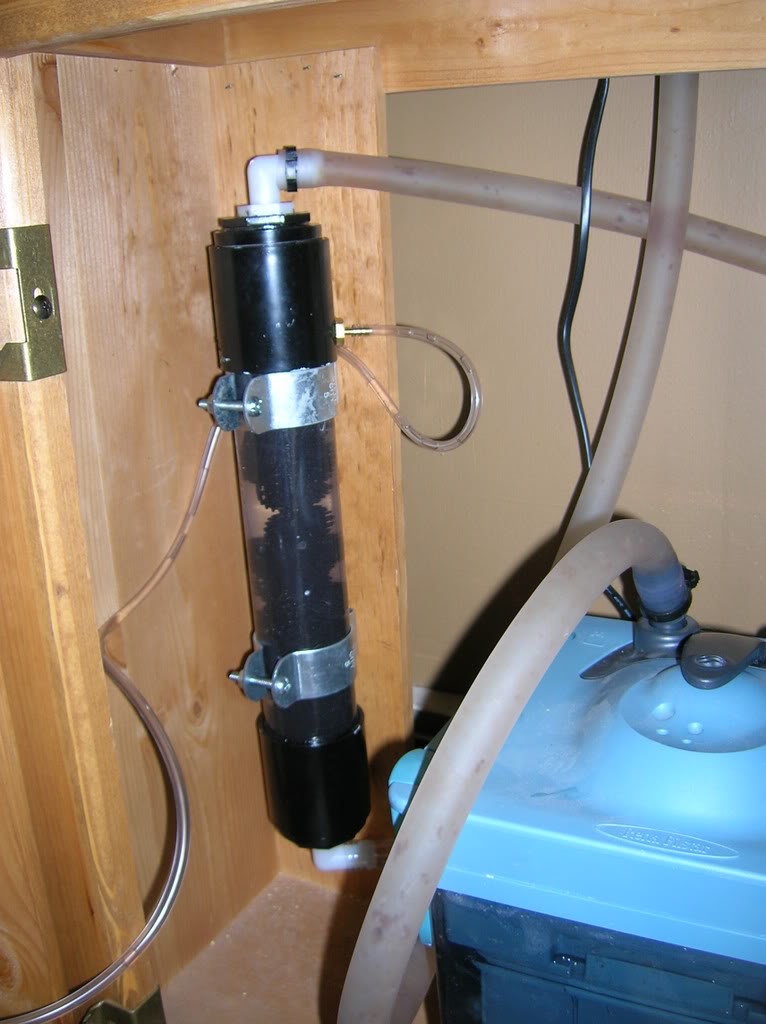
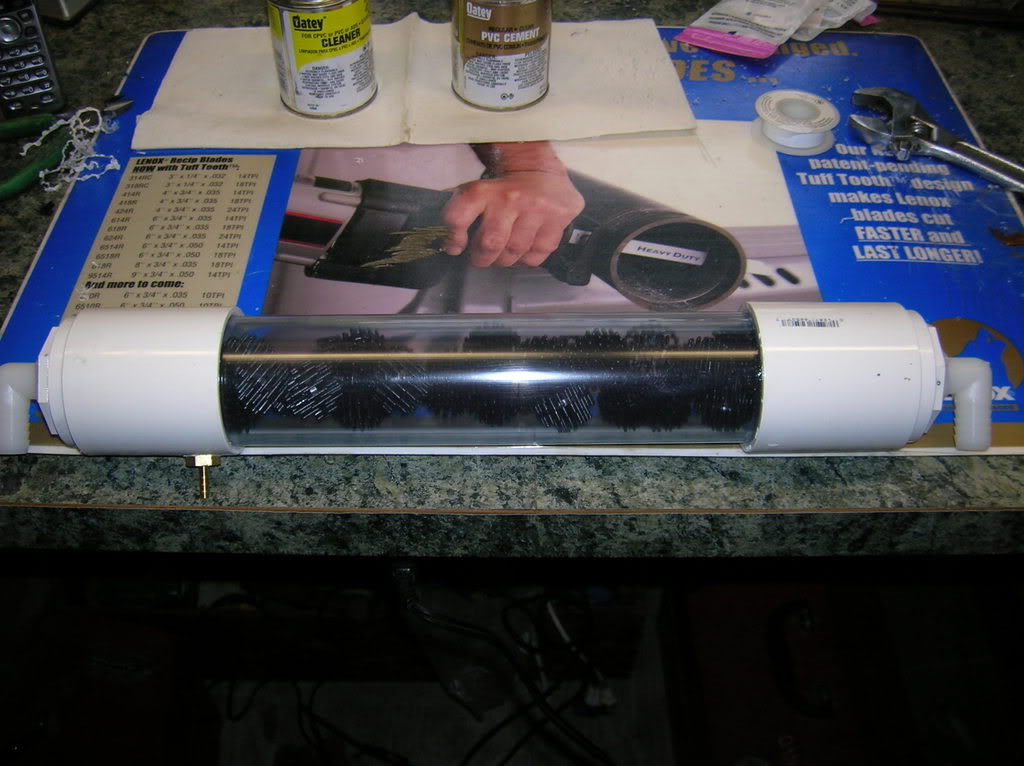
That is basically it. Here is a pic of the completed reactor:
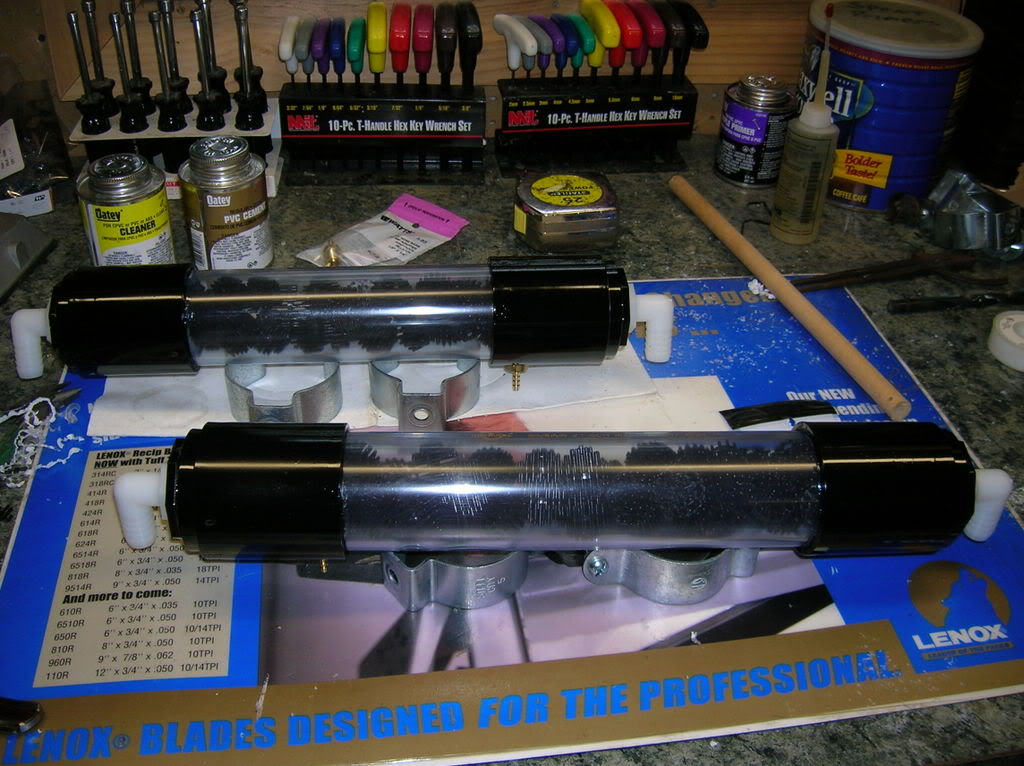
Or so I thought. It was suggested to me that the fancy store models have black fittings on the end of the clear reactor tube....
Now I know that every filter manufacturer says that you re not supposed to have a loop in your hoses. I don't share their concern and have chosen to place my reactor in the stand under the tank. This will cause a loop in the hose that you must be aware of but it is totally workable.
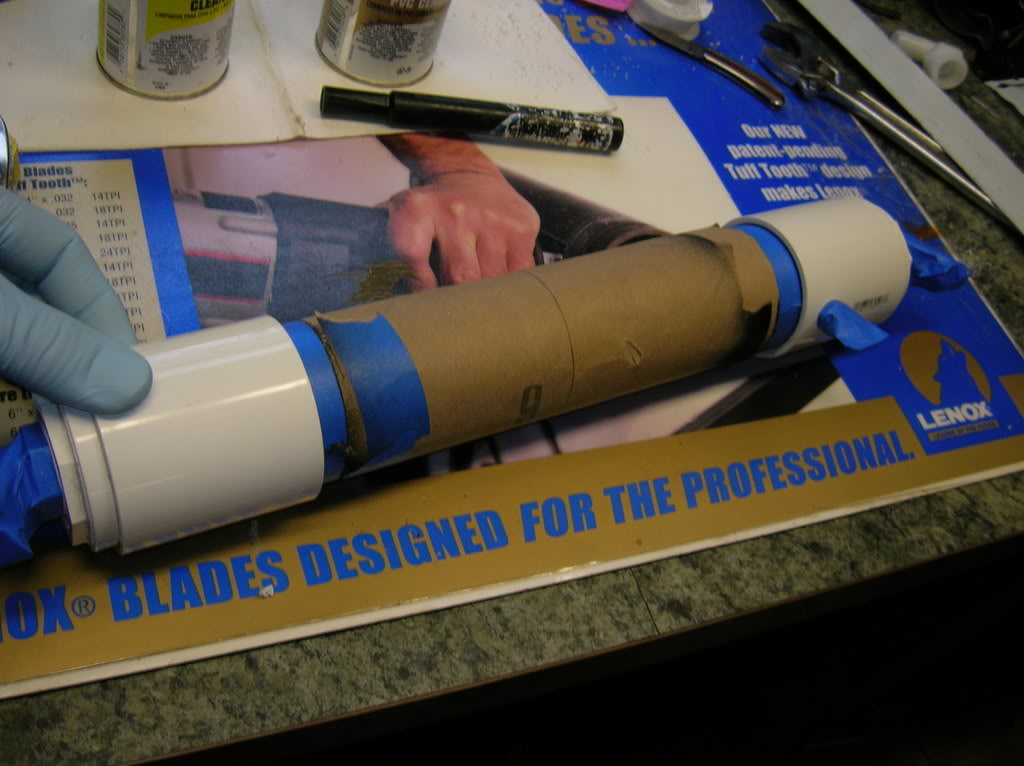
I have not installed these new reactors yet because I choose to let the glue cure to the point where I can no longer smell it. Once that happens I will take pics of how it is mounted.
Hope this helps anybody that is thinking of making their own reactor. The finished project cost was +/- $25.00 which is quite a savings. There is also a great satisfaction from making your own equipment.
Have fun.
Since this was going to be a planted tank with CO2, some sort of reactor was needed. There are versions on line that can be obtained for what I considered a lot of money. So as is my nature, I decided to try a DIY. The process is documented below:
You can get PVC primer in two forms, Purple and Clear. I would advise against the purple because this stuff is thinner than water and tends to run all over the place and you probably don't want purple streaks on your new fancy reactor.
The prototype used the standard white 2" PVC and worked quite well. I just found that I was not happy with not being able to see what is going on inside. The latest version uses clear PVC that is cut to +/- 12".
Ideally I would have used a 2" threaded female adapter with a 2"x3/4" bushing on the ends of the pipe, but I was unable to find them readily. Instead I used a 2" coupling, 2"x1-1/2" glued bushing, 1-1/2" glue - 3/4" threaded female adapter combination. Start by glueing the couplings on the end of the pipe.
With the couplings in place, it's a good time to drill the hole for the hose barb that is going to be used to add the CO2 to the water stream. By drilling it now you will be able to get all of the shavings out of the pipe, instead of letting them get inside the completed reactor where you have to look at them for the rest of the reactor's life. I learned this the hard way.
By drilling through the coupling and the pipe where the two are glued together, you have enough material to tap threads and get a good seal around the barb without the use of any glue.
I chose to use a brass hose barb for strength. Remember to use teflon tape on all pipe threads. And yes I am wearing Nitrile gloves. I really hate to deal with PVC glue on my hands.
The next step was to continue glueing the rest of the adapters on one end of the pipe.
It is so very important that you only do this to one end. If you get in a hurry and glue up both ends, you will be left with a nice hollow pipe with no Bio-Balls inside. (Life experience #2)
I chose the Coralife Bio-balls because of their small size. I think the main role of the bio-balls is to create some turbulence inside the reactor to help keep the bubbles in contact with the water for a longer time.
Only fill to the bottom of the glued in bushing. You still have to glue in the threaded adapter and need to leave room for it.
Once you have your reactor filled with Bio-Balls, go ahead and glue up the remaining end.
Because of the length of the reactor, I chose to use 90 deg. hose barbs. this helps to keep the hoses from kinking. They have a 3/4" thread and are made for a 5/8" id hose. In my case this is what I need for the XP2, and XP3 filters.
That is basically it. Here is a pic of the completed reactor:
Or so I thought. It was suggested to me that the fancy store models have black fittings on the end of the clear reactor tube....
Now I know that every filter manufacturer says that you re not supposed to have a loop in your hoses. I don't share their concern and have chosen to place my reactor in the stand under the tank. This will cause a loop in the hose that you must be aware of but it is totally workable.
I have not installed these new reactors yet because I choose to let the glue cure to the point where I can no longer smell it. Once that happens I will take pics of how it is mounted.
Hope this helps anybody that is thinking of making their own reactor. The finished project cost was +/- $25.00 which is quite a savings. There is also a great satisfaction from making your own equipment.
Have fun.