You are using an out of date browser. It may not display this or other websites correctly.
You should upgrade or use an alternative browser.
You should upgrade or use an alternative browser.
Tank build - newbie again... need thoughts
- Thread starter Idaho-Tank
- Start date
The friendliest place on the web for anyone with an interest in aquariums or fish keeping!
If you have answers, please help by responding to the unanswered posts.
If you have answers, please help by responding to the unanswered posts.
OP
OP
Idaho-Tank
Aquarium Advice Activist
Good point... need to enjoy the weather more while I can... problem is when I start a project it consumes me...
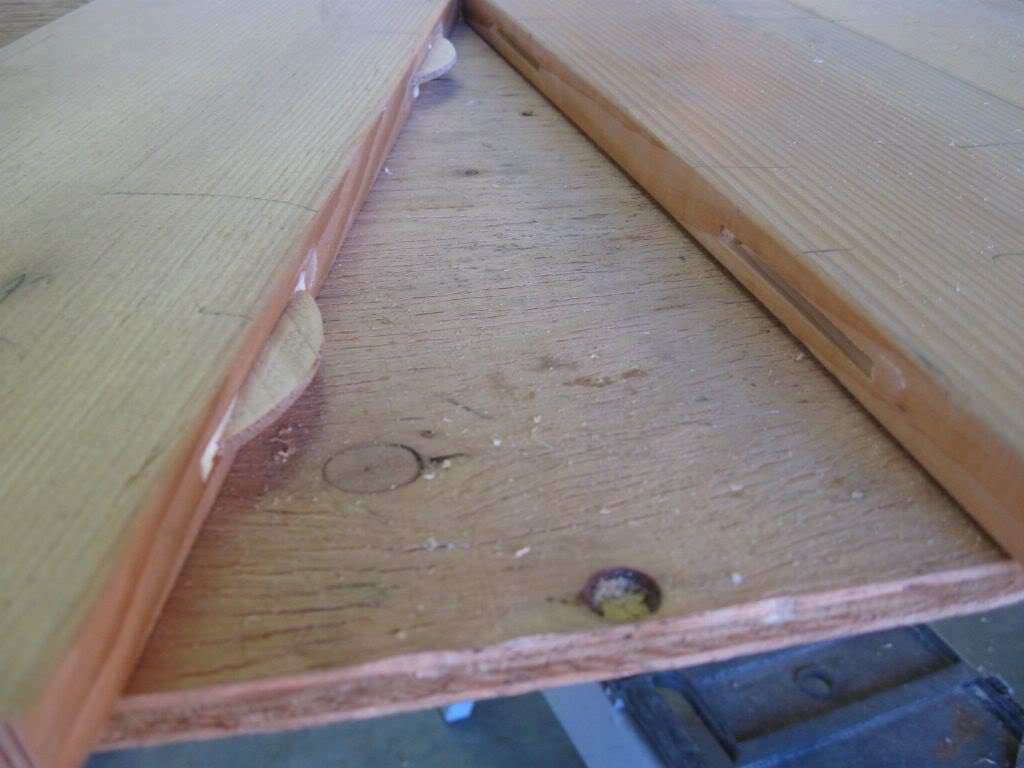
Those gaps you are referring to are below the front two corners right? Those are just two 2xs I screwed on to give me something to anchor the corner trim to.. there is structure behind it that runs full height...
Those gaps you are referring to are below the front two corners right? Those are just two 2xs I screwed on to give me something to anchor the corner trim to.. there is structure behind it that runs full height...
capj64
Aquarium Advice FINatic
Videos are great....do lots of them. Lots to learn for my build.
OP
OP
Idaho-Tank
Aquarium Advice Activist
Pat,
regarding your siphon break comment. I decided to go with a check valve... there are lots around but liked the look of this one since it was removable as a union too.
D&T Aquarium Supplies-Aquarium Supplies For Saltwater And Freshwater Aquariums, And Ponds
Question for everyone... can anyone recommend a good and fairly complete test kit for me? The ones I have are several years old and I think I want to start with a newer kit... I am partially color blind and have to ask my wife to look at the colors and charts - I assume there are no other ways for these kits to work? Anyway - please recommend a good kit. Was just going to get a Red Sea or the Seachem kit.. one of these: Saltwater Multi-Test Kits - D&T Aquarium Supplies-Aquarium Supplies For Saltwater And Freshwater Aquariums, And Ponds
Thanks
Jimbo7
Aquarium Advice Addict
I have always just used the cheap API kits for the basic ammonia, trites and trates. then buy a couple nice kits for alk, calc, pH and mg. you should look into the Hanna phosphate meter, they just released a model for $50 bucks, supposed to be awesome. I'm thinking of picking one up myself.
CEverii
Aquarium Advice Freak
Let me just say, I've read a lot of build threads. A LOT. With my job, I sit on my butt and do nothing all day so I read and do research. I must say, this is the most interesting bulild thread I have ever read. Tons of pictures, your designs are amazing, and everything is (so far) going so smooth.
What do you do for a living? Your drafts on your sump and tank are so well laid out.
Keep up the amazing work. I cant wait to see this all come together.
What do you do for a living? Your drafts on your sump and tank are so well laid out.
Keep up the amazing work. I cant wait to see this all come together.
Jimbo7
Aquarium Advice Addict
Architect.
You should make some old school D size hand drafts for the entire setup and frame it above the tank. A little nerdy, but it would be pretty cool.
You should make some old school D size hand drafts for the entire setup and frame it above the tank. A little nerdy, but it would be pretty cool.
OP
OP
Idaho-Tank
Aquarium Advice Activist
Let me just say, I've read a lot of build threads. A LOT. With my job, I sit on my butt and do nothing all day so I read and do research. I must say, this is the most interesting bulild thread I have ever read. Tons of pictures, your designs are amazing, and everything is (so far) going so smooth.
What do you do for a living? Your drafts on your sump and tank are so well laid out.
Keep up the amazing work. I cant wait to see this all come together.
Wow... Thanks for the great compliment! I also sit on my butt most of the day too...
") And as Jimbo said I am an Architect.
And as Jimbo said I am an Architect.You should make some old school D size hand drafts for the entire setup and frame it above the tank. A little nerdy, but it would be pretty cool.
Not sure it would go with the decor of the house.. but an interesting idea.
OP
OP
Idaho-Tank
Aquarium Advice Activist
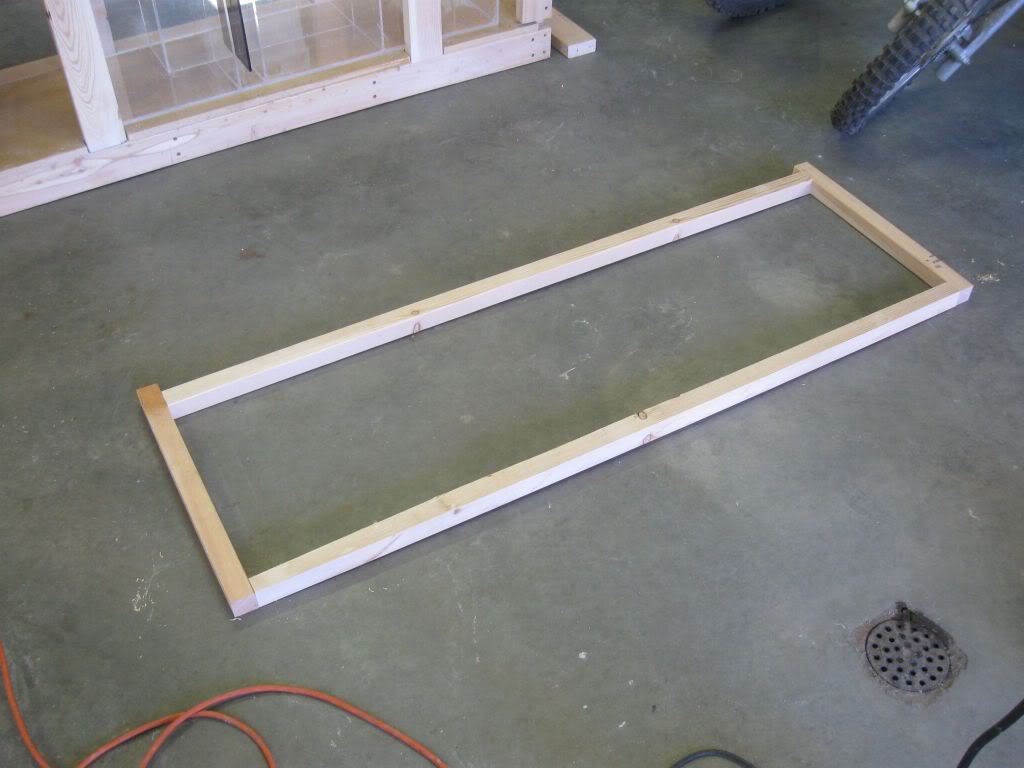
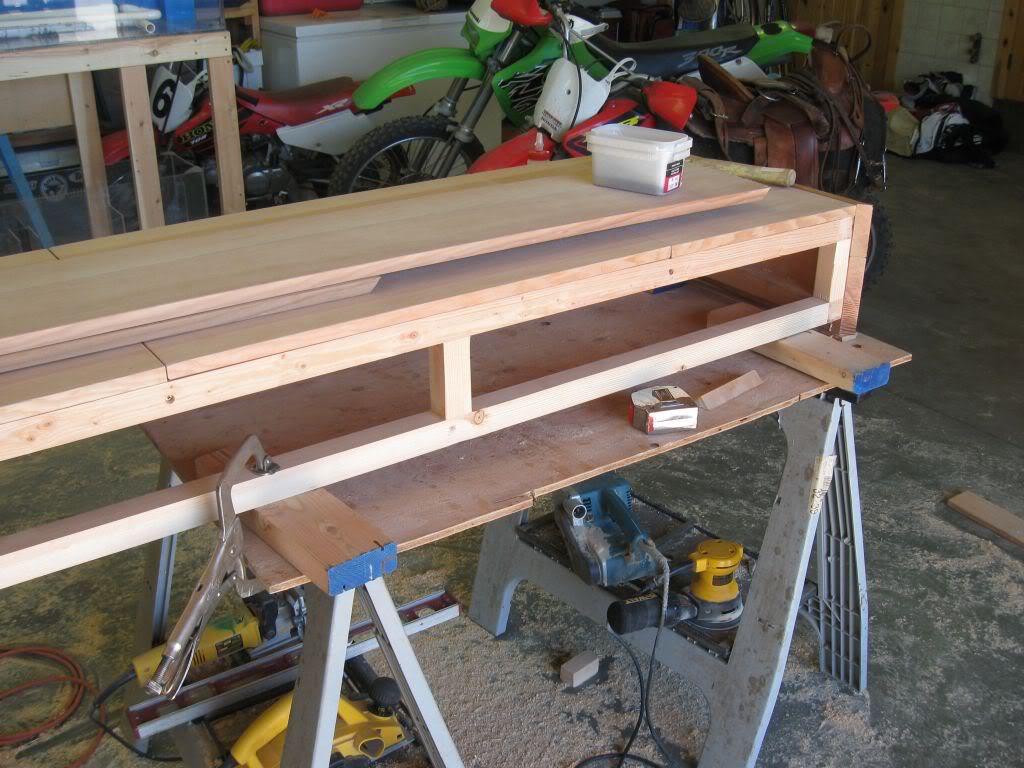
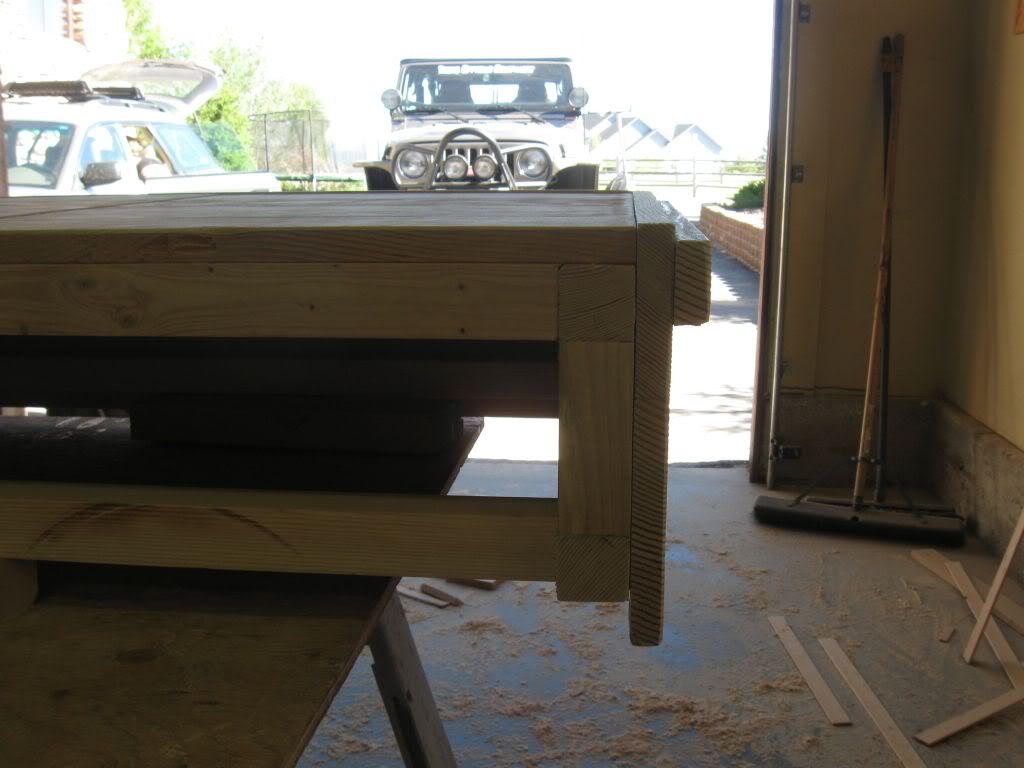
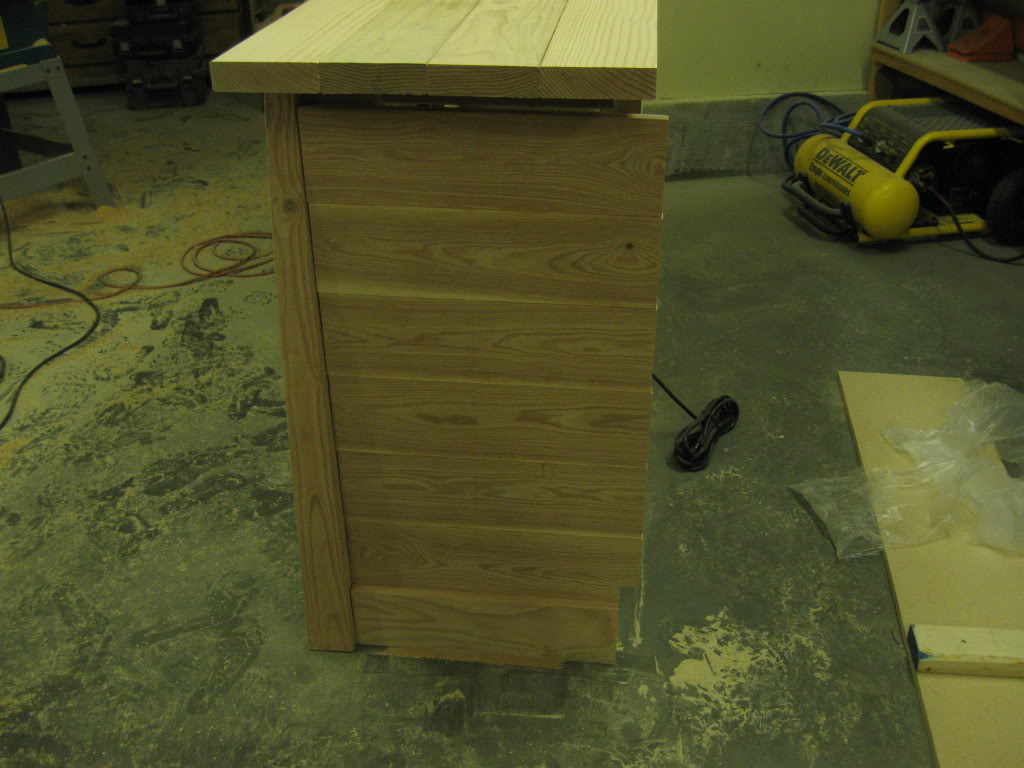
Friday afternoon I started the Hood portion of the project - I finished it yesterday afternoon. I had the specs on the lights I ordered and from that was able to build the hood around it. Fortunately the light fixture is low profile and the hood didn't need to be really tall - I am trying to keep the weight down so its easier to take on and off.
To start I just ripped down some 2x4 to make 2x2 (1.5x1.5). The last hood I made I primarily just used 1x with no frame... over time it moved slightly which I didn't like... I think a frame will help it keep its shape and integrity better.
The bottom of the frame - basically follows the shape of he tank. Screwed and glued each corner.
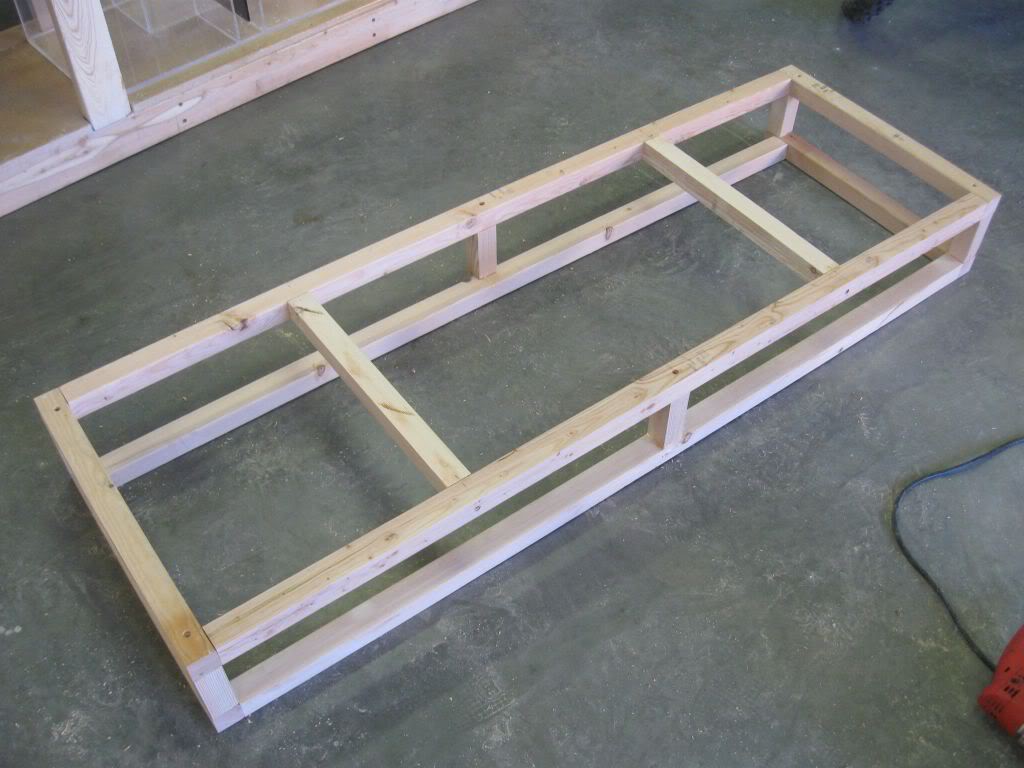
Added corners and the top part of the frame.
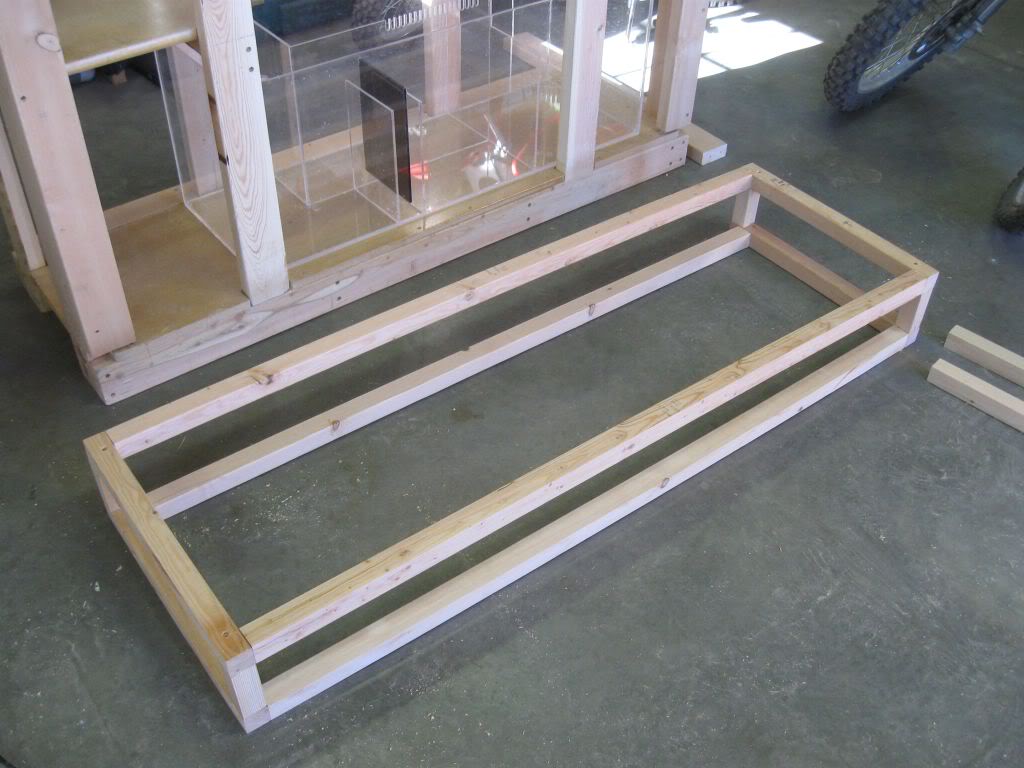

Added some intermediate members.
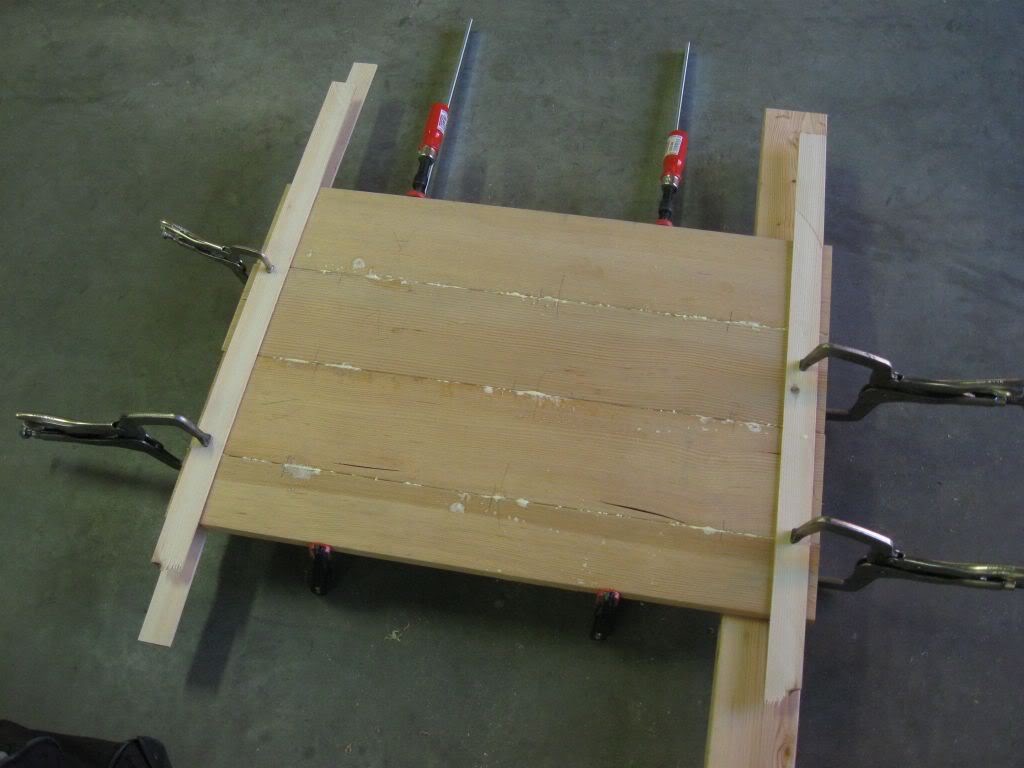
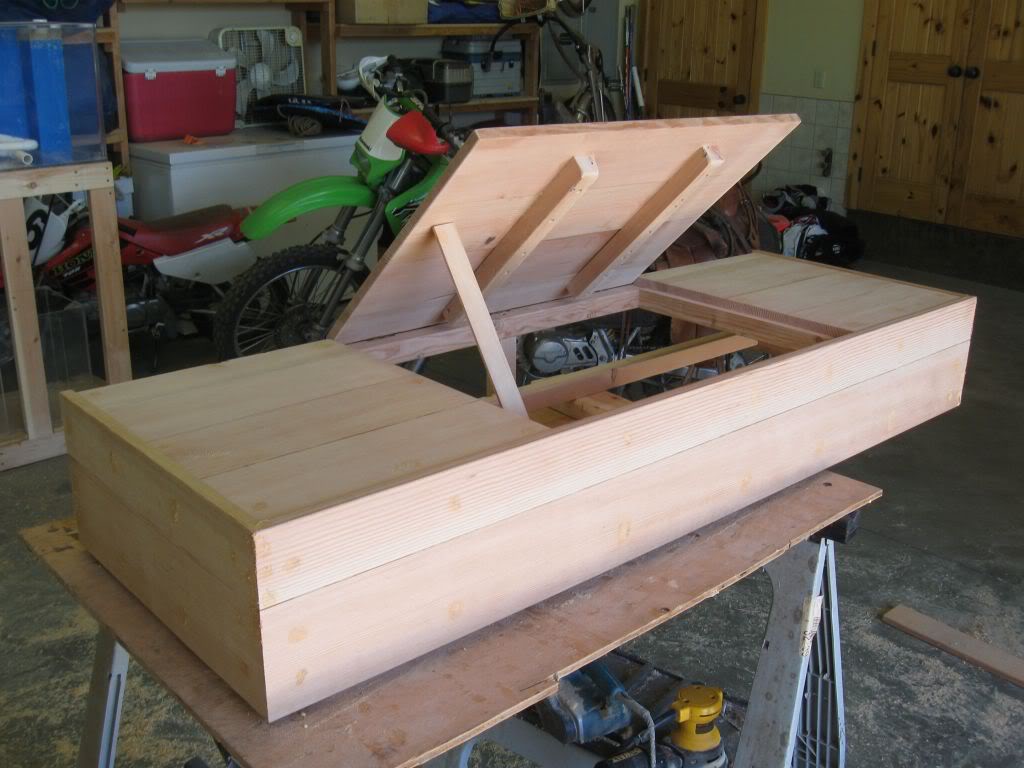
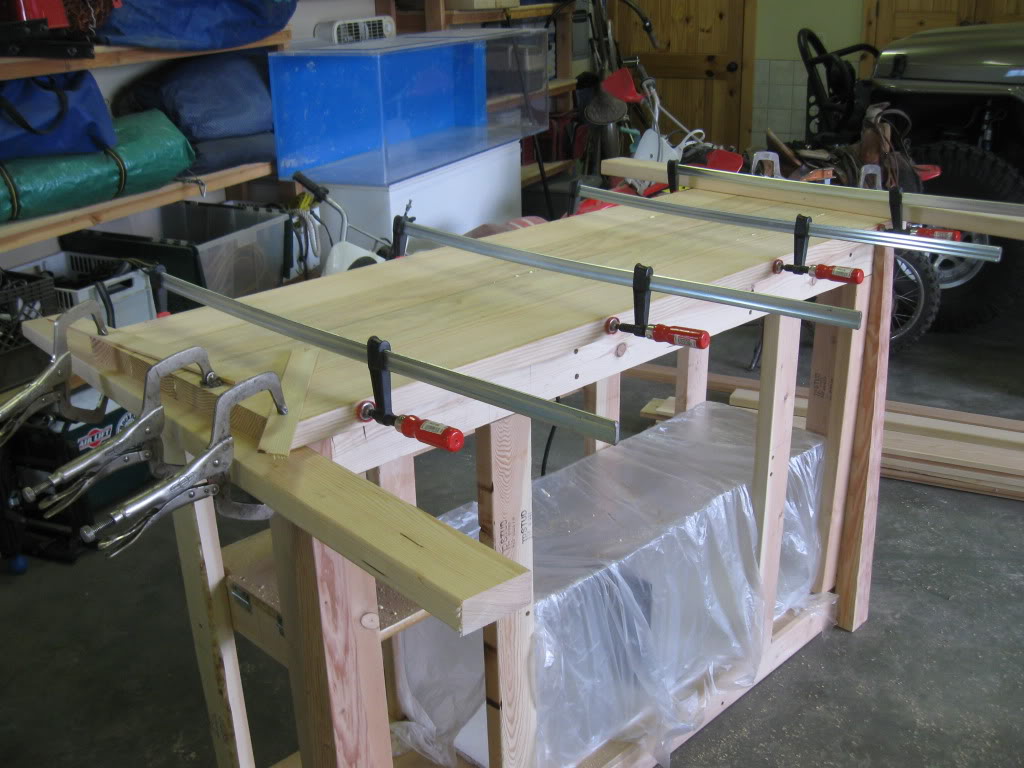
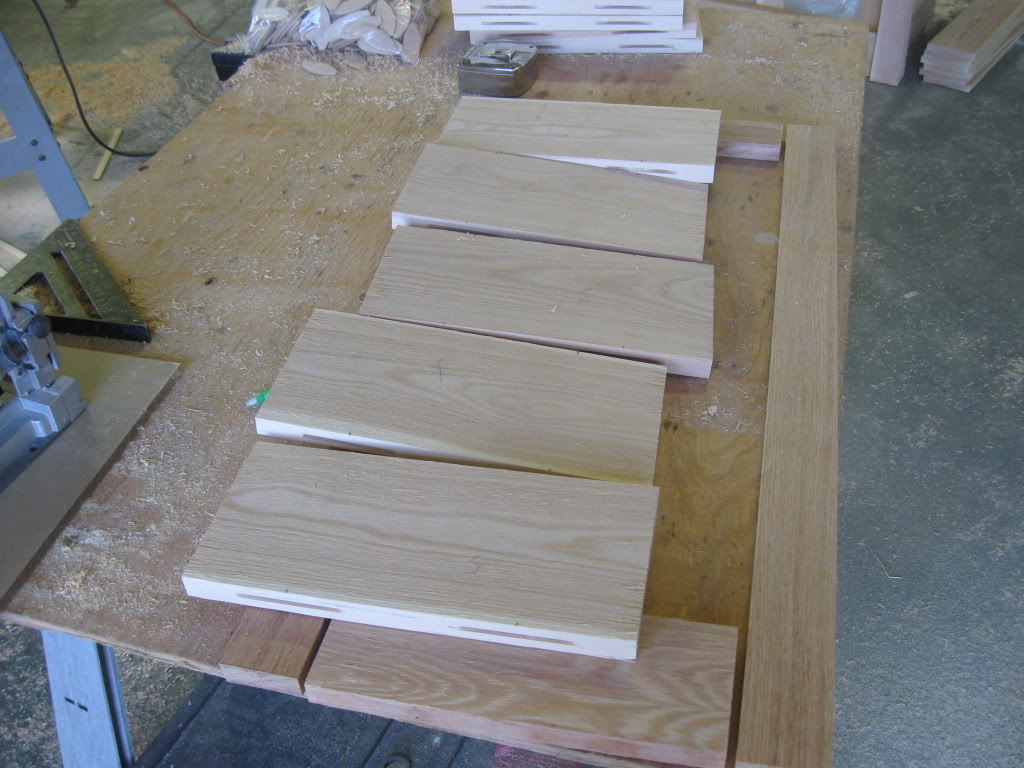
Then I started to focus on the finish material... I am still waiting on my shipment of wire brushed fir to arrive so I decided to do it myself for the hood... Bought some CVG Fir (stuff is pricy!) and started cutting. Last time when I built my stand I basically just attached the finish material right to the stand piece by piece - over time the boards separated slightly.. The stuff I am using now has a lower moisture content than that material did and I am also glueing and putting biscuits in. This will help keep everything tight - also gives me a reason to use the biscuit jointer.
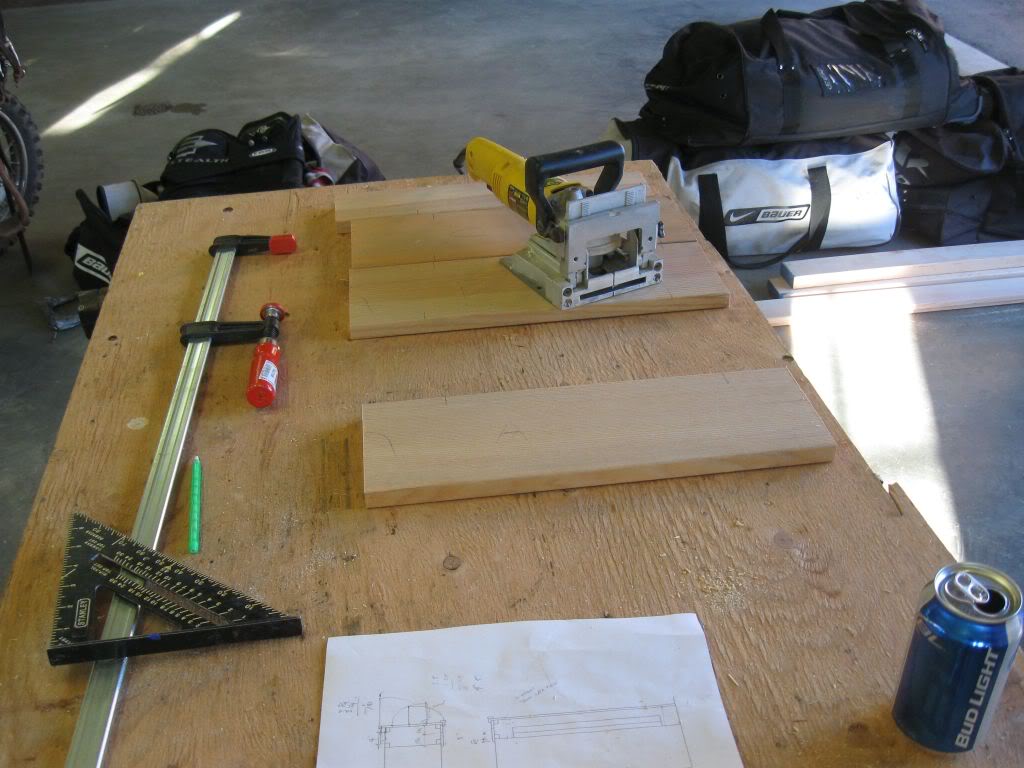
I then put the individual panels together and clamped everything up and let sit for the night.
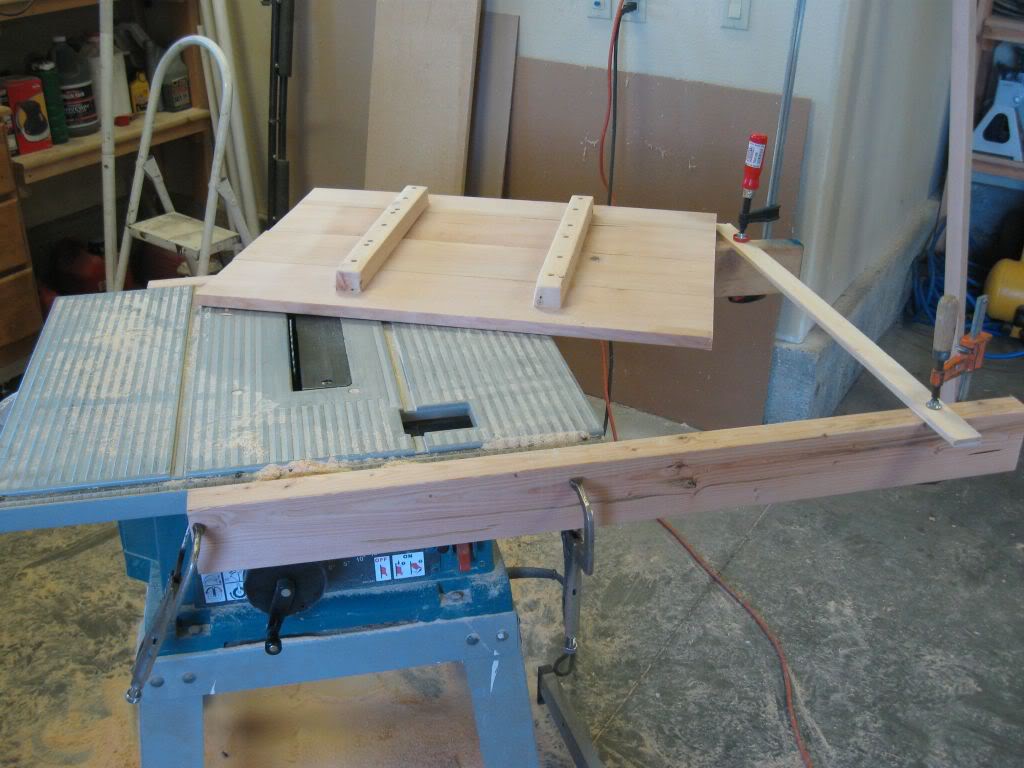
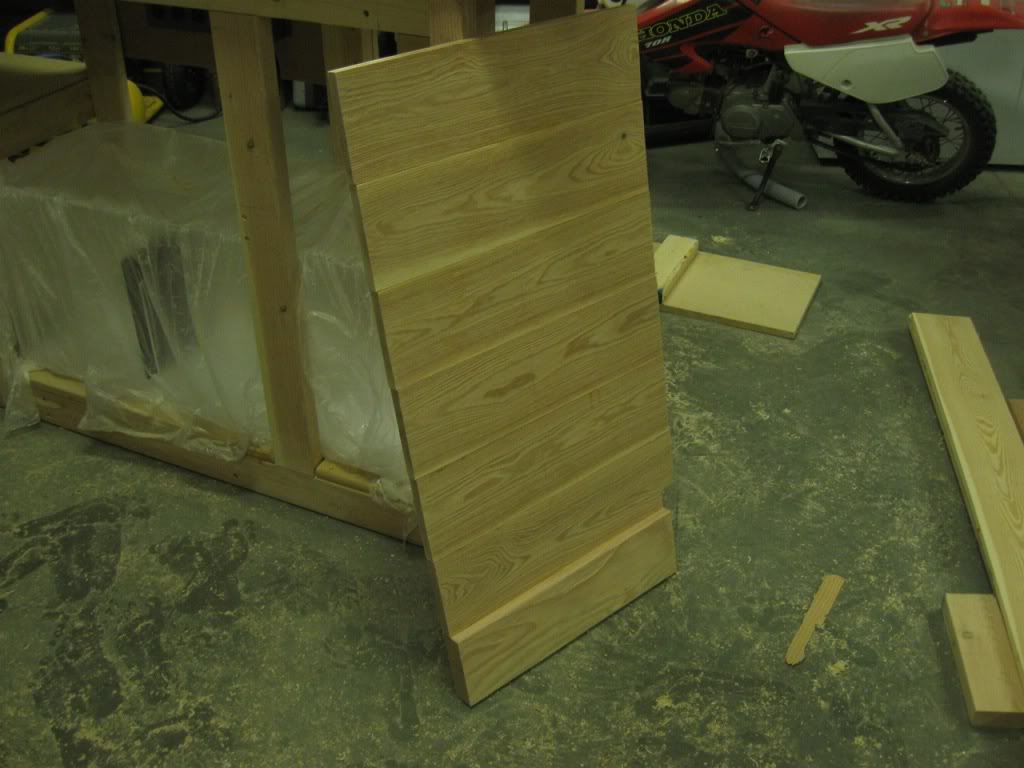
Next day I pulled off all the clamps and had some nice panels to work with. They were all intentionally longer so I could cut perfect on the table saw.
To start I just ripped down some 2x4 to make 2x2 (1.5x1.5). The last hood I made I primarily just used 1x with no frame... over time it moved slightly which I didn't like... I think a frame will help it keep its shape and integrity better.
The bottom of the frame - basically follows the shape of he tank. Screwed and glued each corner.
Added corners and the top part of the frame.
Added some intermediate members.
Then I started to focus on the finish material... I am still waiting on my shipment of wire brushed fir to arrive so I decided to do it myself for the hood... Bought some CVG Fir (stuff is pricy!) and started cutting. Last time when I built my stand I basically just attached the finish material right to the stand piece by piece - over time the boards separated slightly.. The stuff I am using now has a lower moisture content than that material did and I am also glueing and putting biscuits in. This will help keep everything tight - also gives me a reason to use the biscuit jointer.
I then put the individual panels together and clamped everything up and let sit for the night.
Next day I pulled off all the clamps and had some nice panels to work with. They were all intentionally longer so I could cut perfect on the table saw.
OP
OP
Idaho-Tank
Aquarium Advice Activist
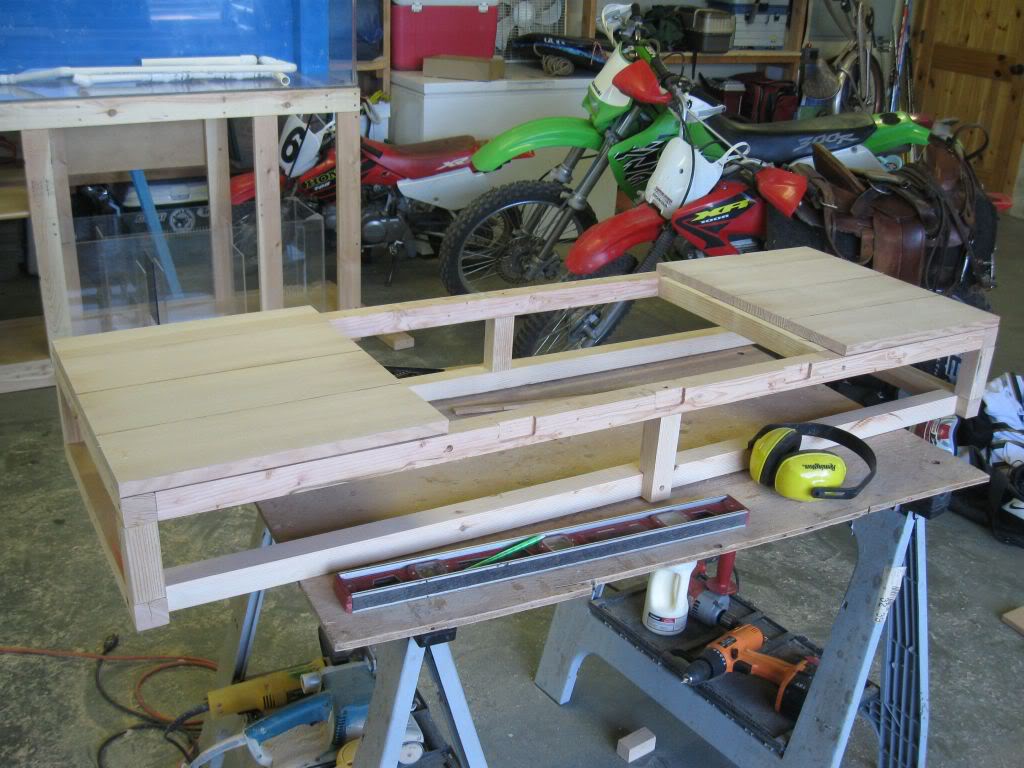
Now I began to attach the panels to the frame. Glue and finish nail.
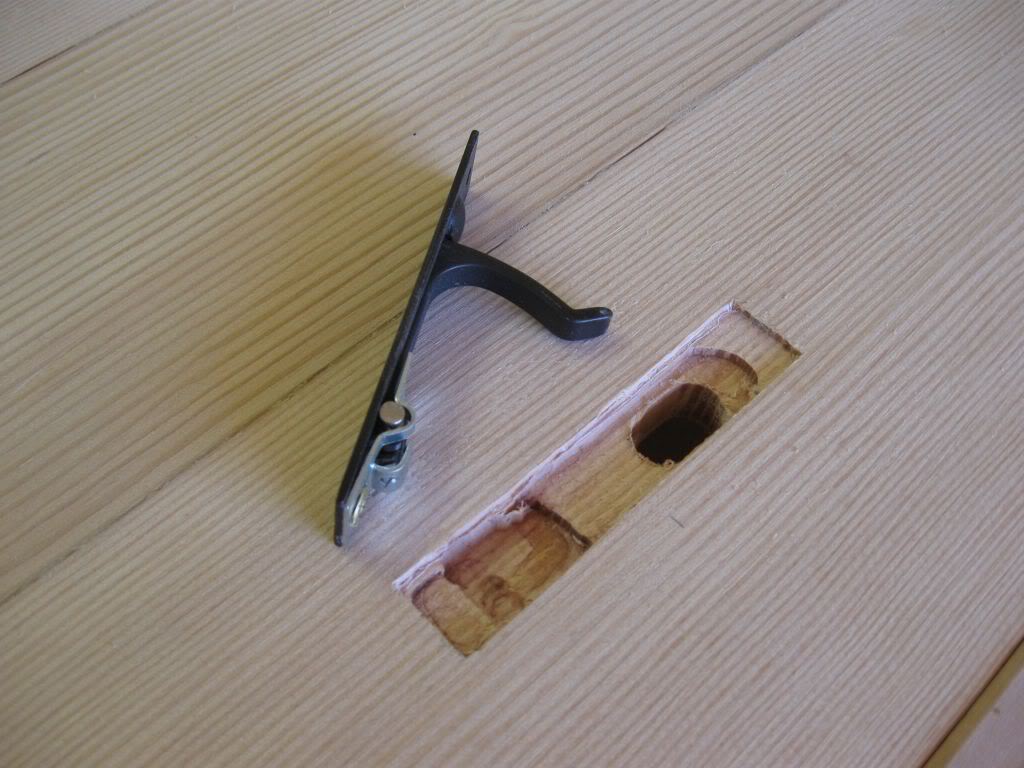
I added a door to the top of the hood so I would have some access without taking the hood off.
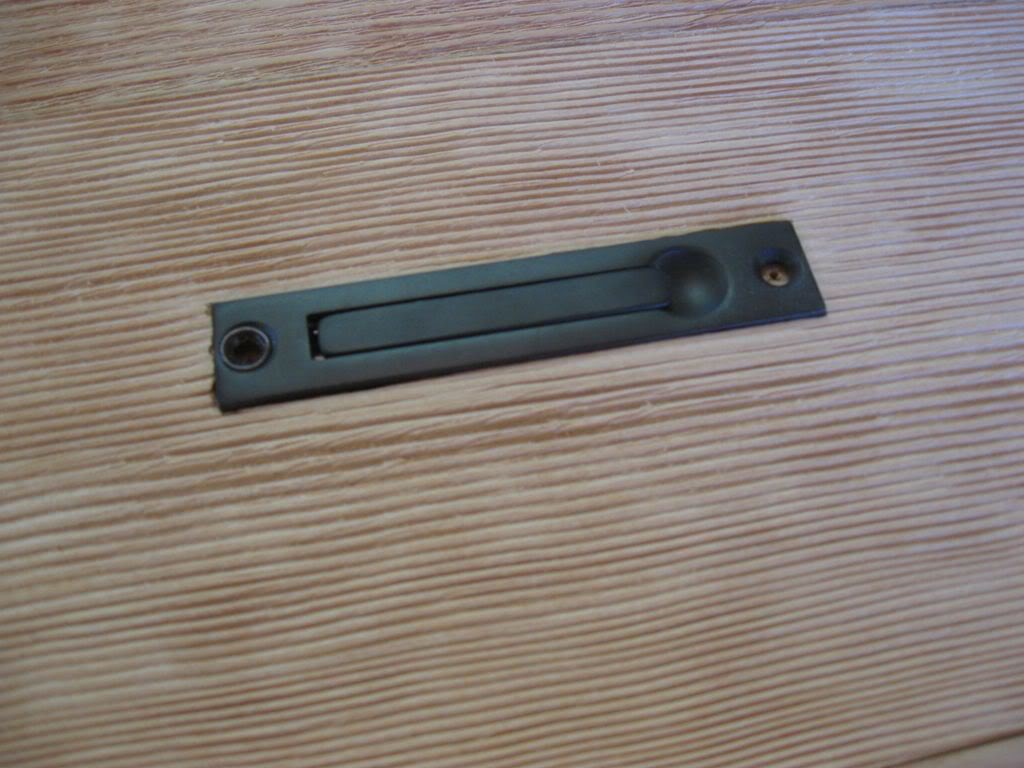
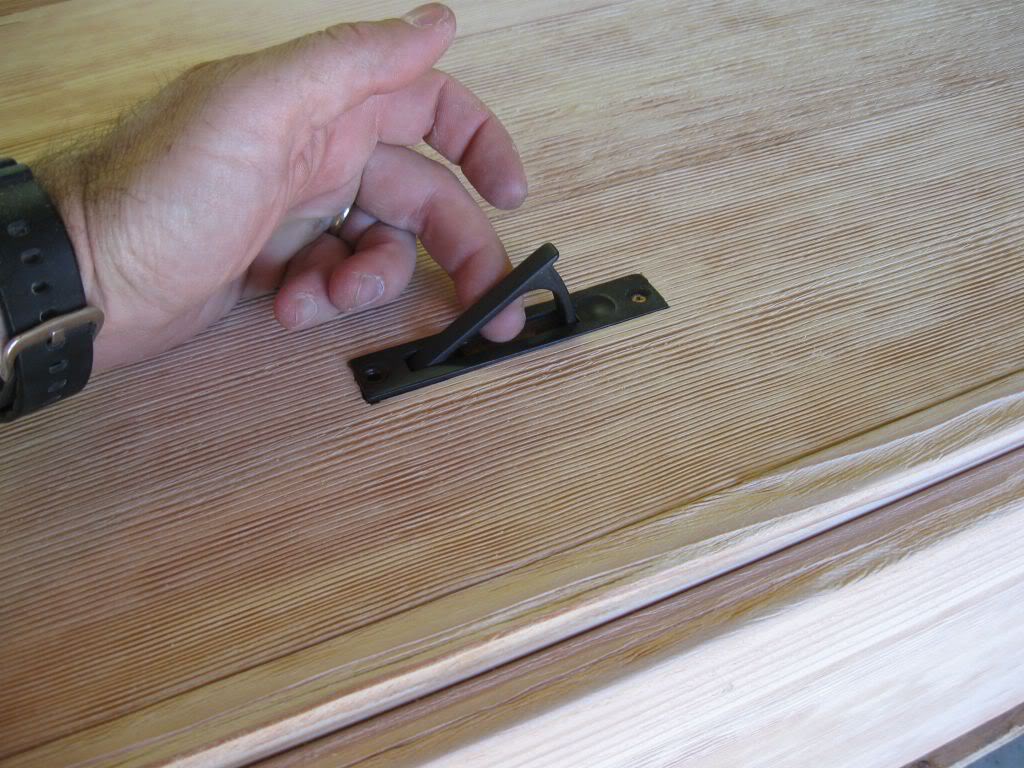
I had a nice oil rubbed bronze door pull that I never used - thought this might be a nice concealed handle for the hood door. I used a router to cut the recesses required for the handle.
I added a piece of trip so the shape was not so boxy. I mitered the corners.
I added a door to the top of the hood so I would have some access without taking the hood off.
I had a nice oil rubbed bronze door pull that I never used - thought this might be a nice concealed handle for the hood door. I used a router to cut the recesses required for the handle.
I added a piece of trip so the shape was not so boxy. I mitered the corners.
OP
OP
Idaho-Tank
Aquarium Advice Activist
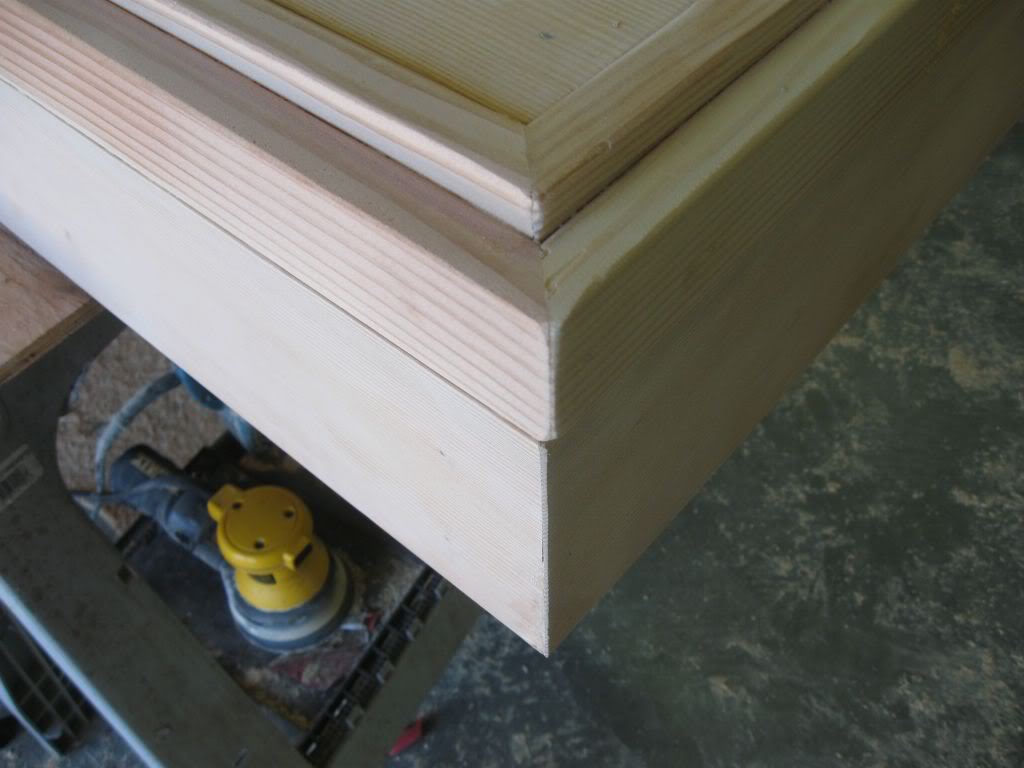
Then I got to work with the wire brush... Ugh - what a pain that was. Takes a lot of time even with power tools. But the finish looks really good and after I oil this it will look great. Here is the corner after brushing the wood.
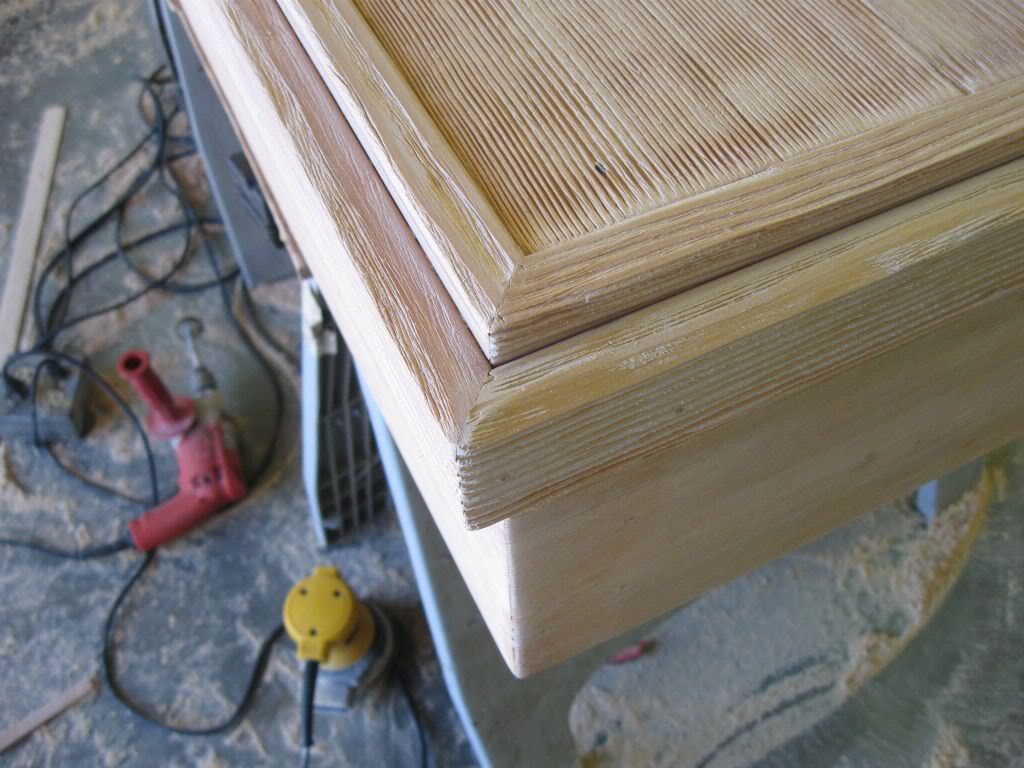
Here is that handle and how it will look. I will screw it in after I oil and put poly on everything. You can also see the texture of the wood in these photos.
A profile photo taken from the back. I have about a 1 1/8" lip that will overhang the edge of the tank to conceal the water line.
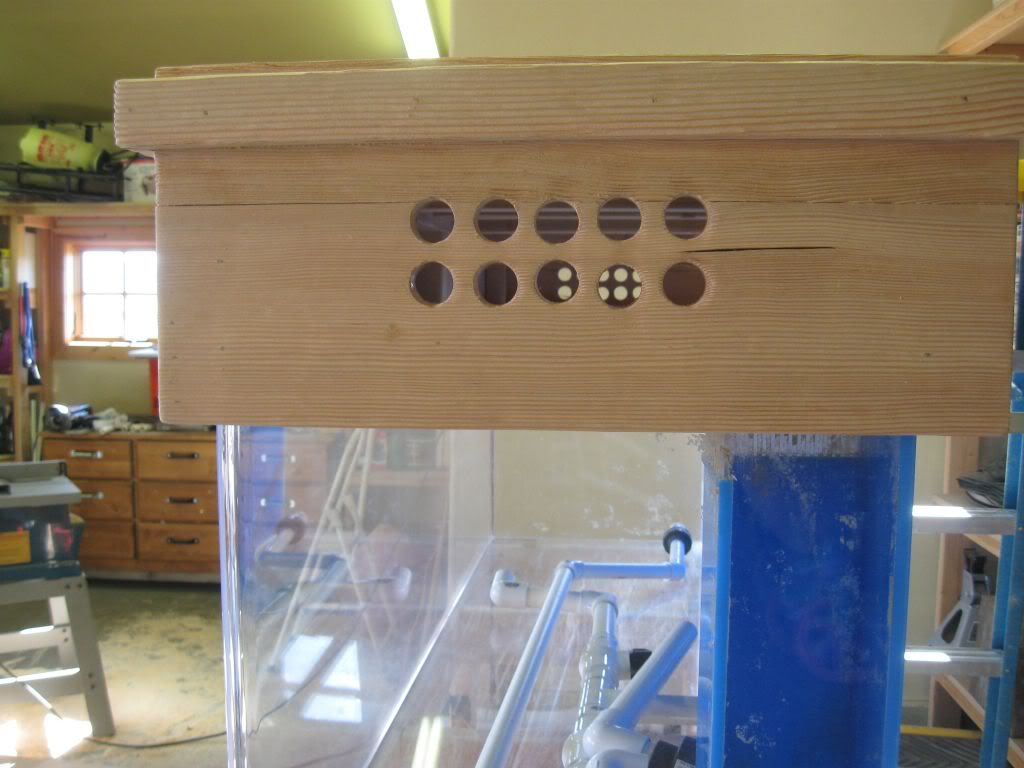
I hated to do it, but had to cut some vent holes into the side where the fans will keep the lights cool.
And it is all done and ready for oil.. I hope to get back to working on the stand tomorrow afternoon.
Here is that handle and how it will look. I will screw it in after I oil and put poly on everything. You can also see the texture of the wood in these photos.
A profile photo taken from the back. I have about a 1 1/8" lip that will overhang the edge of the tank to conceal the water line.
I hated to do it, but had to cut some vent holes into the side where the fans will keep the lights cool.
And it is all done and ready for oil.. I hope to get back to working on the stand tomorrow afternoon.
Jimbo7
Aquarium Advice Addict
Really looks great man. Keep up the good work!
capj64
Aquarium Advice FINatic
It does...great job. I was showing my Dad your thread last night. He'll be helping me with the framing on my build and I was trying to explain what I would need. Your thread and Greens was a big help
OP
OP
Idaho-Tank
Aquarium Advice Activist
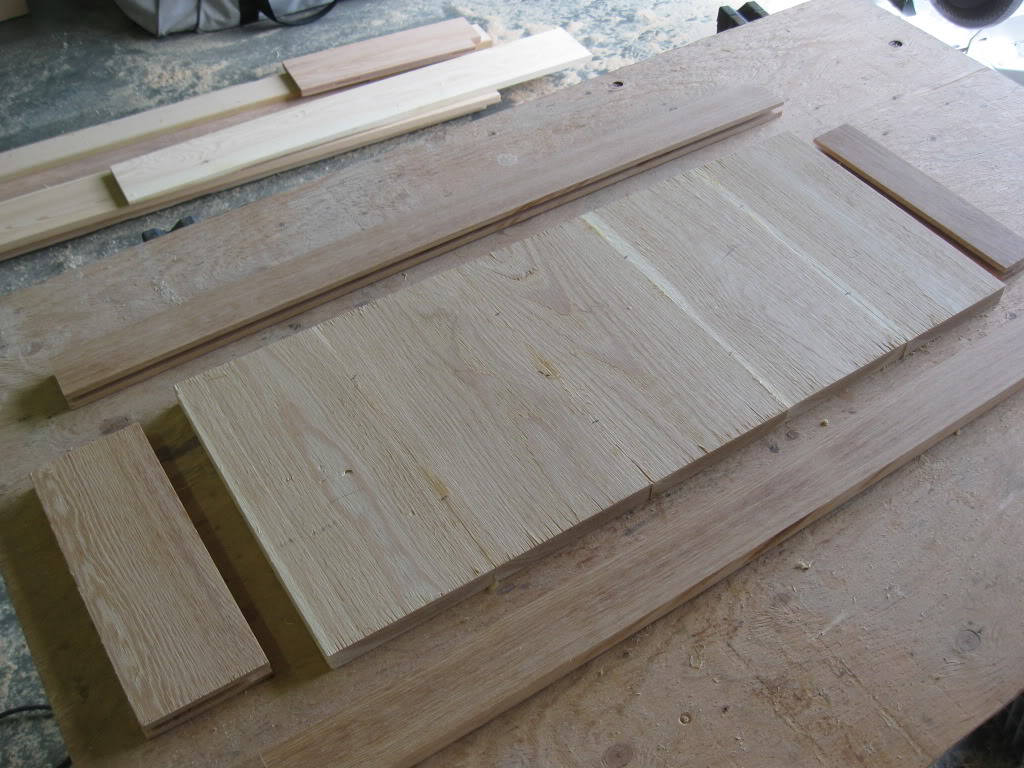
The other fir I was waiting for finally showed up... It was wire brushed but the texture is not heavy enough so I will have to wire brush it some more.
I put the 2x6 top pieces together with 5 biscuits between each, glued and clamped it for 24 hours. I have to texture it and shape the edges still.
Then I cut and put the end panels together glued, biscuited and clamped... I will still need to cut to fit.
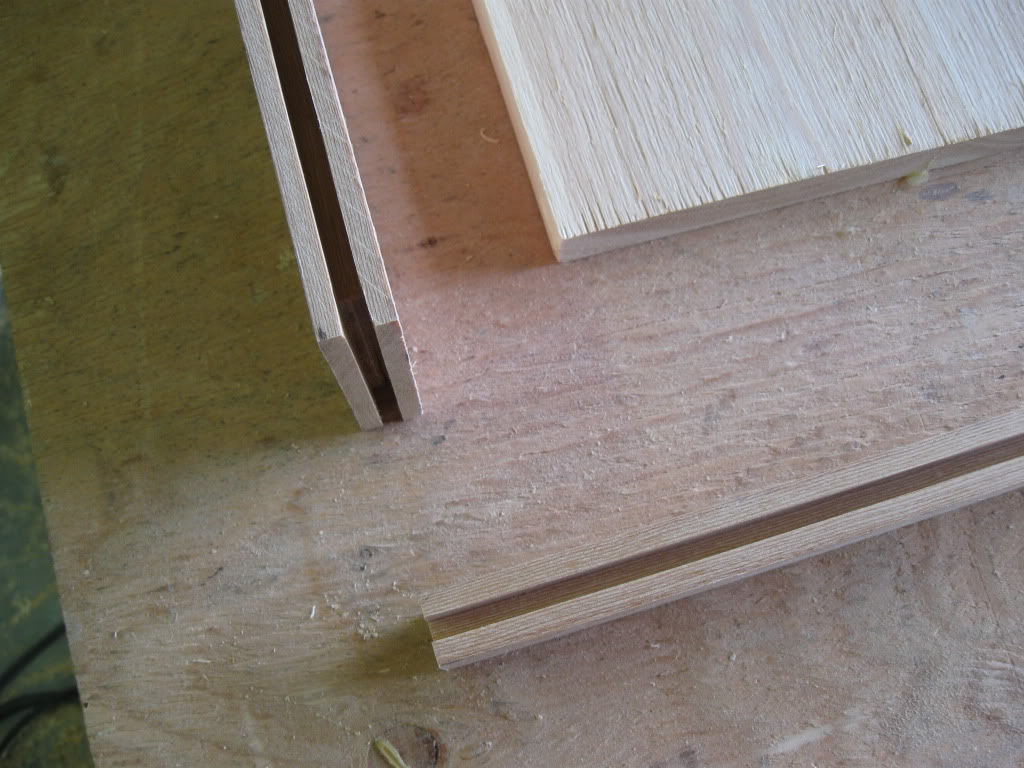
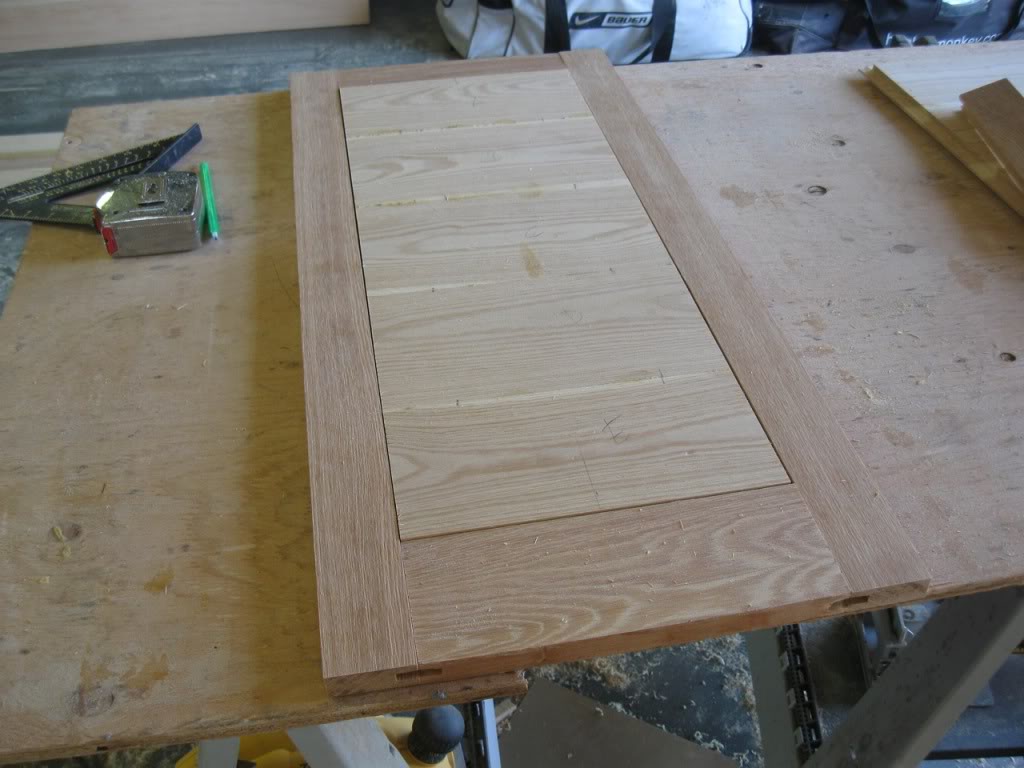
Next I was anxious to start on the doors.. I also wanted to have the doors built before starting the front panels on each side of the doors. I have never built any type of cabinet door before but wanted to copy the doors on our entertainment center so I figured I would give it a try. I don't have a shaper or any tools beyond a table saw, chop saw etc... so....
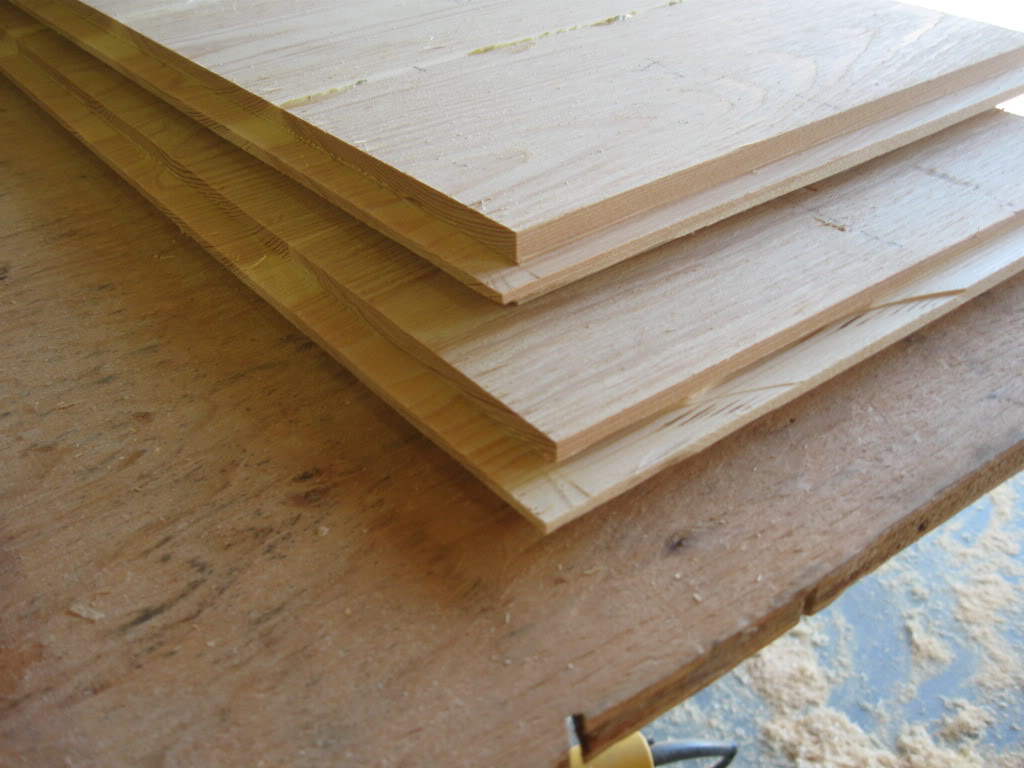
First I cut out the door frame.. then cut a notch or dado into one side of each of the four pieces. Then I put together the panels that will go into the frame. Here are all the pieces.
Here is the notch into the frame.
I put the 2x6 top pieces together with 5 biscuits between each, glued and clamped it for 24 hours. I have to texture it and shape the edges still.
Then I cut and put the end panels together glued, biscuited and clamped... I will still need to cut to fit.
Next I was anxious to start on the doors.. I also wanted to have the doors built before starting the front panels on each side of the doors. I have never built any type of cabinet door before but wanted to copy the doors on our entertainment center so I figured I would give it a try. I don't have a shaper or any tools beyond a table saw, chop saw etc... so....
First I cut out the door frame.. then cut a notch or dado into one side of each of the four pieces. Then I put together the panels that will go into the frame. Here are all the pieces.
Here is the notch into the frame.
OP
OP
Idaho-Tank
Aquarium Advice Activist
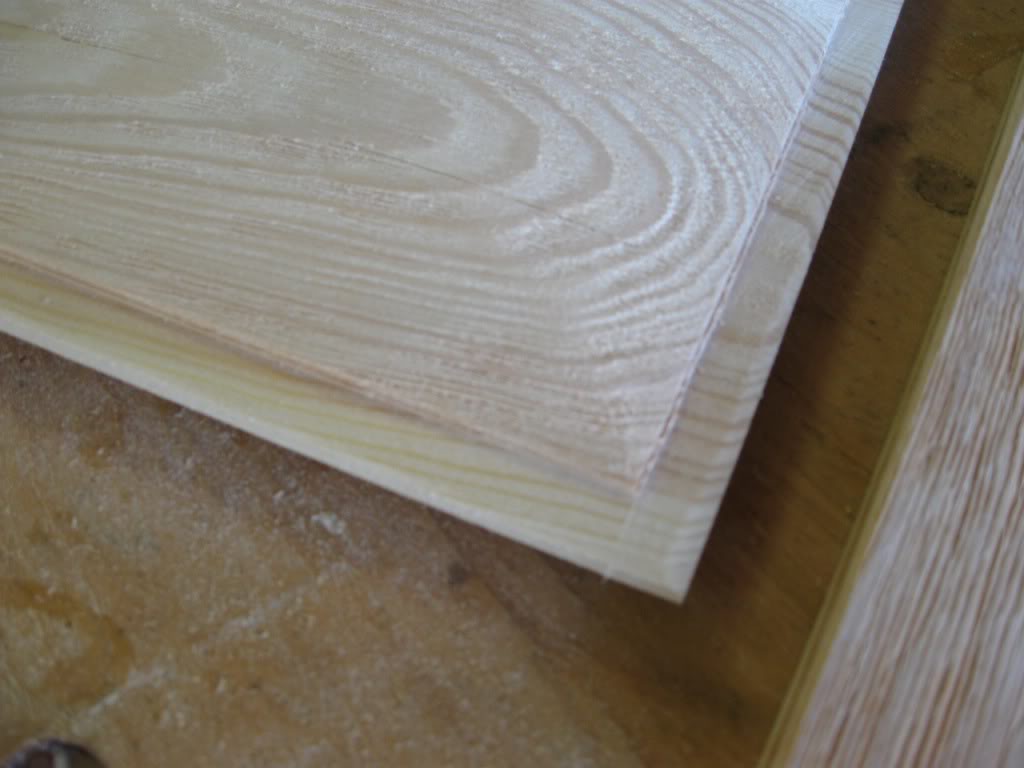
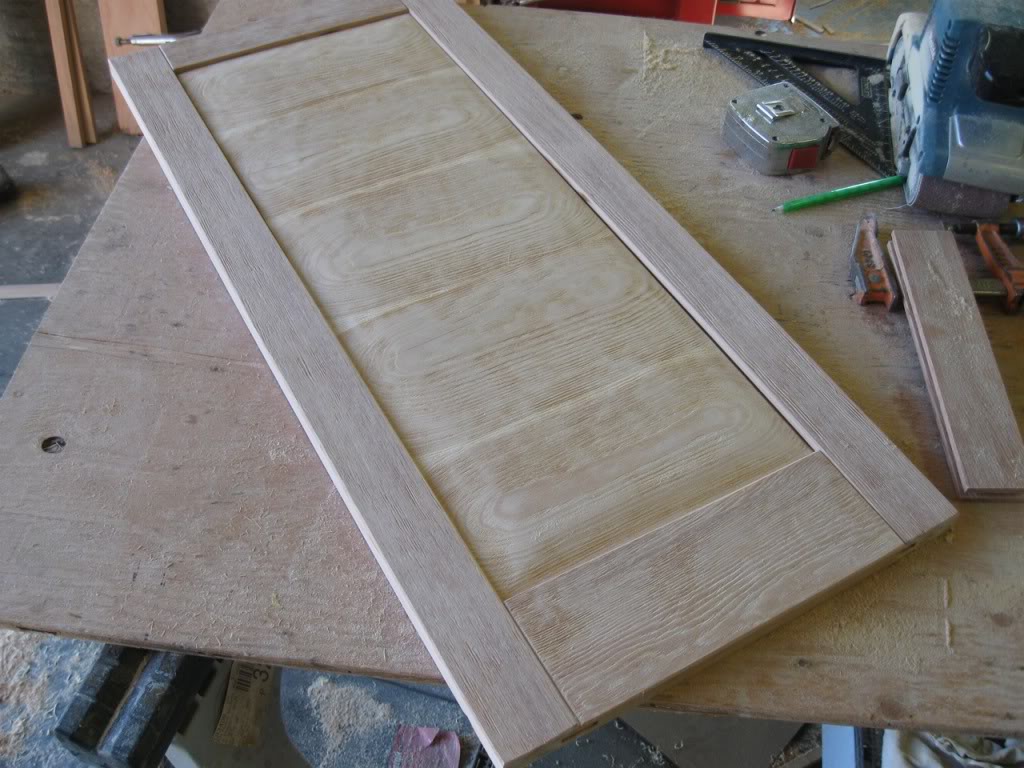
Then I took the panels and cut a tongue into the edges.
Here is the door put together prior to any shaping. If you look close you can see small holes at the bottom of the door where the sides meet the bottom... I ran that dado all the way though and decided to put a spline into that space when I glue it all together.
Then using a belt sander I shaped the edges.
Finished door prior to glueing
Thats it for now... more of a wood working project than anything at the moment... I think I will be adding water next week though!
Aquarium1
Aquarium Advice Addict
WoOt! That's awesome. Can't wait
OP
OP
Idaho-Tank
Aquarium Advice Activist
^ Thanks.
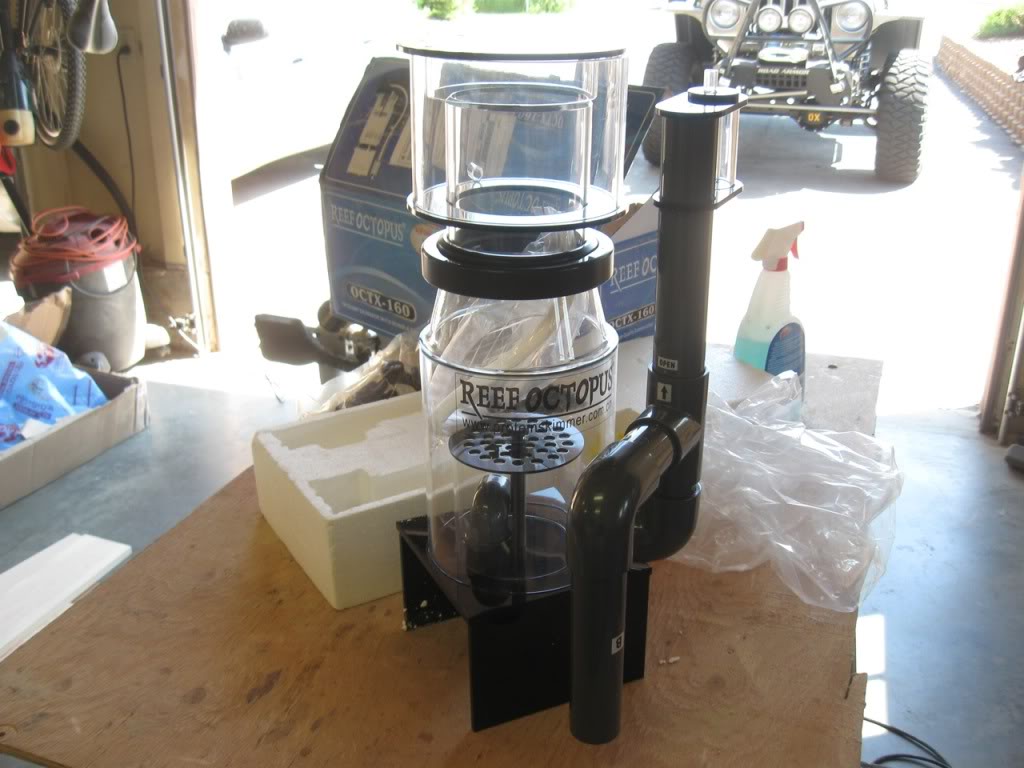
Brown Santa came by today with my lights and skimmer...
Pair of 24" T5 lights for the sump.
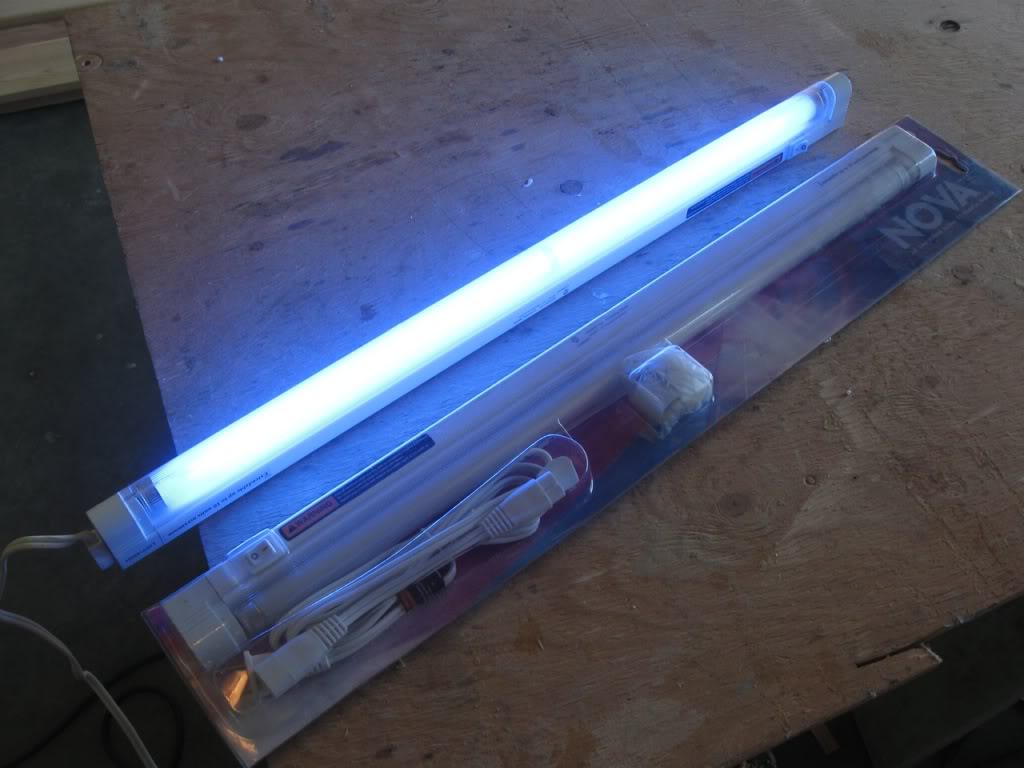
Nova Extreme 48" T5 HO light fixture

Octopus 160 Extreme Skimmer
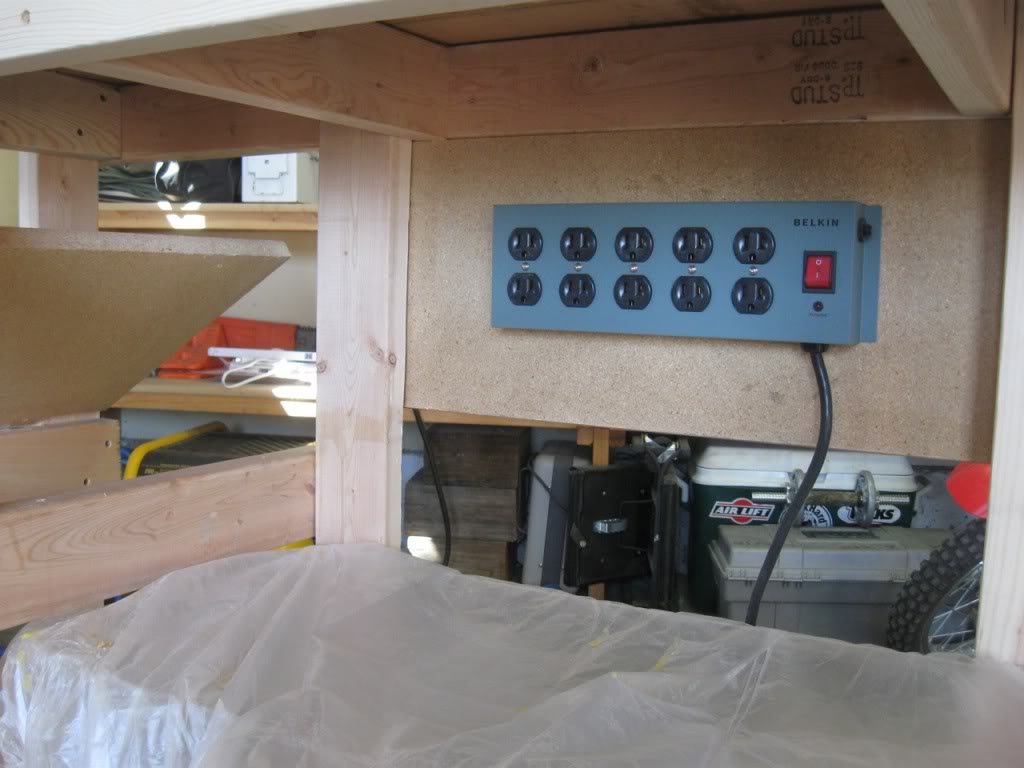
Had a couple hours to work so I mounted a the heavy duty power strip I bought to the back panel.
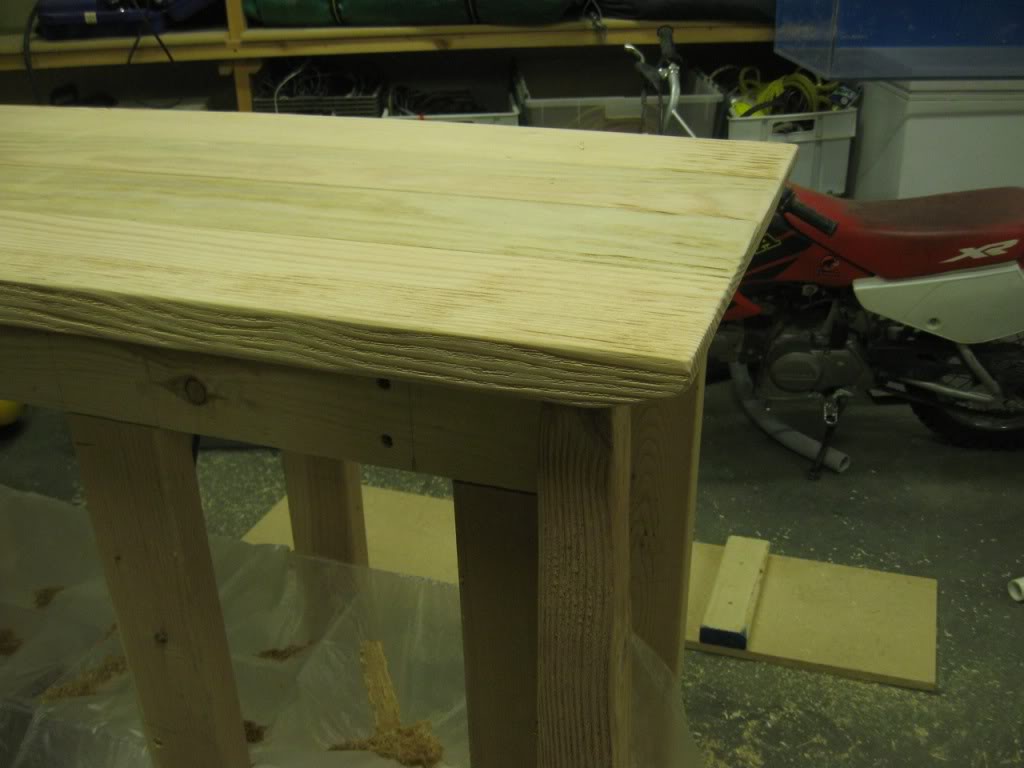
I glued and clamped the doors I made and then textured and sanded the stand top.

Brown Santa came by today with my lights and skimmer...
Pair of 24" T5 lights for the sump.
Nova Extreme 48" T5 HO light fixture
Octopus 160 Extreme Skimmer
Had a couple hours to work so I mounted a the heavy duty power strip I bought to the back panel.
I glued and clamped the doors I made and then textured and sanded the stand top.
Aquarium1
Aquarium Advice Addict
Looking good as always haha. That's a really cool idea with the mounted power strip. Congrats on the lighting
Jimbo7
Aquarium Advice Addict
You should really have a GFCI strip in there, the last thing you want is that beautiful stand to catch on fire. 8 bulb fixture? Verryy nice. Looks amazing, I can't wait to see this tank if the inside looks as good as the outside.
Similar threads
- Replies
- 10
- Views
- 475
- Replies
- 22
- Views
- 1K
- Replies
- 1
- Views
- 261
- Replies
- 1
- Views
- 381