Tank Journal – 125 Reef

The friendliest place on the web for anyone with an interest in aquariums or fish keeping!
If you have answers, please help by responding to the unanswered posts.
img_1225430_0_d5343f48be3ded6eaa6f48fd51c6f72c.jpg


img_1225430_1_699461e5217dc67171ba53ac4383701e.jpg


img_1225430_2_48a5dcafa66d34ef09df420b3860e343.jpg


img_1225430_3_80b6b33b4a6952a892c661250f9137bc.jpg


img_1225430_4_b53fc851ed1376fe151ade6e6ac11945.jpg


img_1225430_5_92d5430f71bb33da2c2b9643b2d95b45.jpg
 
Yeah, trying to get rid of it. Believe it or not, on Friday I fragged off all the Anthelia that was on the rock in the last picture of the first post - the one with all the Zoas on it. It was completely covered, and that's the 3rd time I've done that. The rock next to it (to the left, has some growing on it) was also covered about a month ago and I cleared it off. The rock in the center / bottom with the Red Cap got 1/2 cleared off about 2 months ago. Anthelia = Weed.
 
I haven't done an update in a while. Had an issue with water quality, even with RO/DI. Runoff from winter (salt, farm, etc) makes for big problems here. Something got through my RO/DI as the DI was just running out and even though it was 0 TDS it smelled funny and I didn't notice until they were through 10g of top-off water. A couple corals receded quite a bit, I ended up with a dino outbreak, so I did a PWC and put some carbon in and they're coming back. Phosphates went up and the ATS screen went brown and gooey, but it's coming back. Anyways. Pics.

3/7 Corals receding

img_1259167_0_85de4aa868757a4d80a3b04fe22ad60b.jpg


img_1259167_1_4a9a0b3a12e788e224533f6acbd68497.jpg


img_1259167_2_edcb2ac765ab281aefe8c3097631a18d.jpg


img_1259167_3_8b913b36aff5b7400680d924fd806ad2.jpg


The Frogspawn, GSP, and Birdsnest all took a hit, but are coming back. The Branching hammer might be a goner. More pics in next post
 
Especially the Xenia

img_1259193_0_e43437cb84aa3c00b2cb2168318f2878.jpg


img_1259193_1_346f6d6d82466f014c6f82e4f5203535.jpg


Tomorrow, I replace the plumbing.

img_1259193_2_ba17c6af92b78b9c0848778d8ceb02ff.jpg


Above is what I have to do to adapt the 3/4" return bulkhead and 1" drain for better flow on the Mag 12. Long time coming on this one.

So I'm going to put a 1" durso in to replace the current open 3/4" standpipe (why they put a 3/4" to a 1" bulkhead, I don't know)

Then for the return, I'm replacing all the 3/4" hose with quite a concoction of adapters and hose. From pump to nozzle, it's like this:

Pump

3/4" to 1" bushing
1" ball valve
1" threaded to 1-1/4" tube
1-1/4" tube
1-1/4" tube to 1" tube
1" tube
1" tube to 3/4" threaded

3/4" Bulkhead

3/4" threaded to 1" tube
1" tube
1" tube to 1-1/4" tube
1-1/4" tube
1-1/4" tube to 1" threaded
1" threaded connector
1" threaded elbow
1" to 3/4" bushing

3/4" dual nozzle

I wish I could have found a 3/4" threaded to 1-1/4" tube (or 1-1/2" tube, really), that would have made it a ton easier. I didn't look online. I suppose I could have found something to make it easier.

I did a flow test last weekend and the pump flow when clean on 10/10/10 was 433 GPH (remember, Mag 12, straight vertical 4 to 4.5' shot) and now after 5 months it's about 380 - 15% drop. So the ATS screen isn't getting enough, and it was already low flow to begin with.

Hopefully, this will boost the flow to at least 700 GPH, which would put the screen at the perfect flow rate of 35 GPH/inch.
 
Here's some pics to give you an idea of what NOT to do.

Here's the tube from the bulkhead to the jets.

img_1261143_0_4e7e1c6e8d4c849dd1a9c497e7ba139d.jpg


and the inside of that tube after years of operation

img_1261143_1_93c2174eebfecd26311d4d1b17953fd7.jpg


This tube goes from 3/4" threaded to 3/4" hose barb at the bulkhead end to a combo hose barb-3/4" and 90 to female threaded, which is the major choke point.

img_1261143_2_fe4a93f8acd299ba4f5215093e87082b.jpg


The inside diameter of a 3/4" hose barb insert is about 1/2". Similarly, I had replaced the 3/4" tubing from the pump to bulkhead with the same, 3/4" tubing and hose barb/threaded adapters.

Here's the drain, it actually was 1", I guess my eyes were tricking me into thinking it was 3/4".

img_1261143_3_477e54488ebe8ea7b6a6d86acd02d5ce.jpg


And here's the pump after 5-1/2 months since the last cleaning

img_1261143_4_fc99988b84796f2c092ab7f76603543e.jpg


Next - after...
 
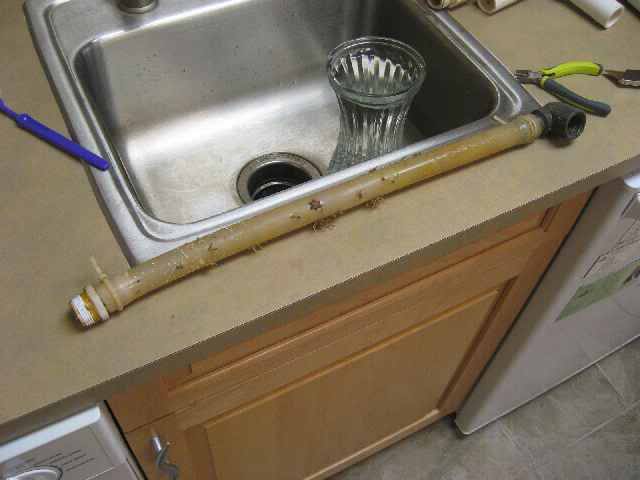
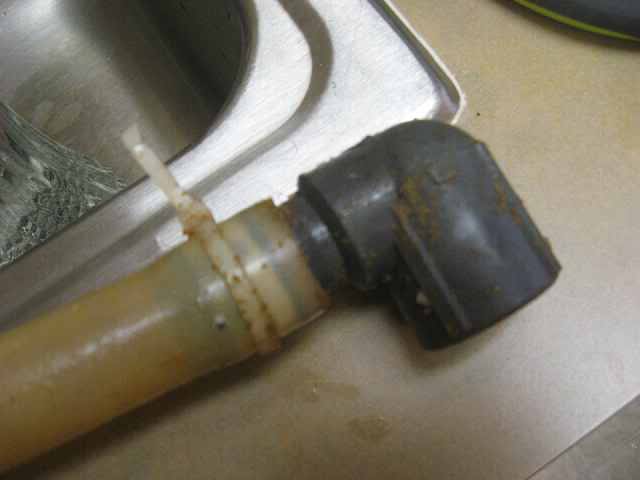
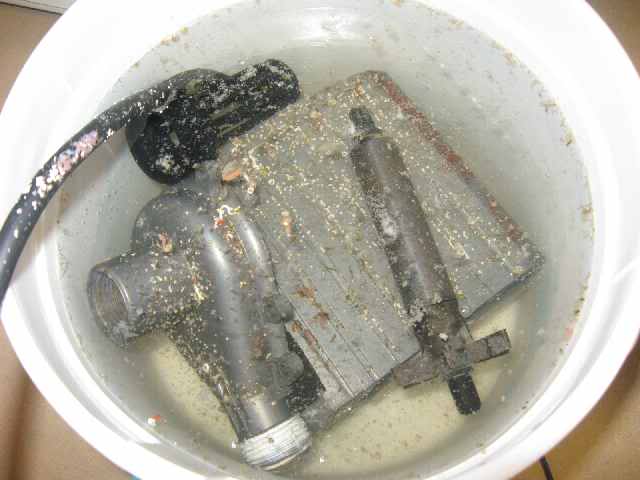
Oh yeah, the pump smelled like a sewer. Not as bad as it did the first time I cleaned it when I took over the tank though. That time made me gag, I seriously thought I was going to hurl.

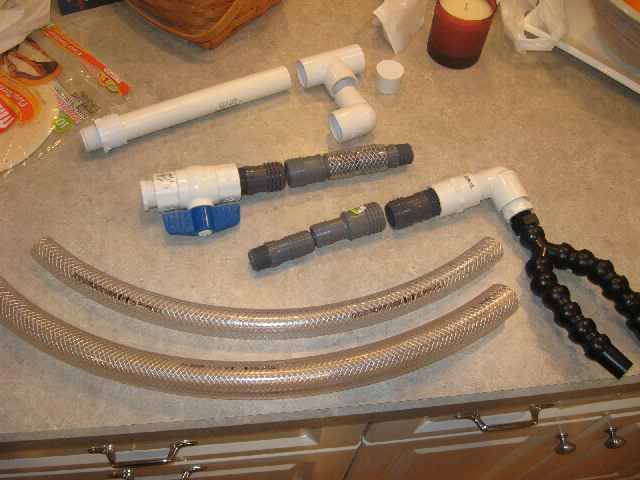
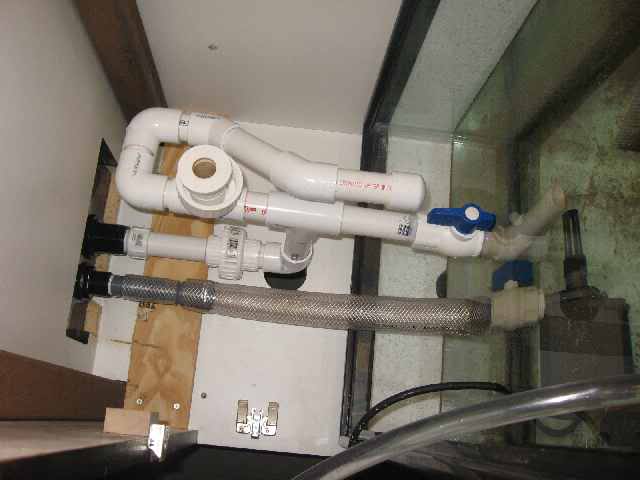
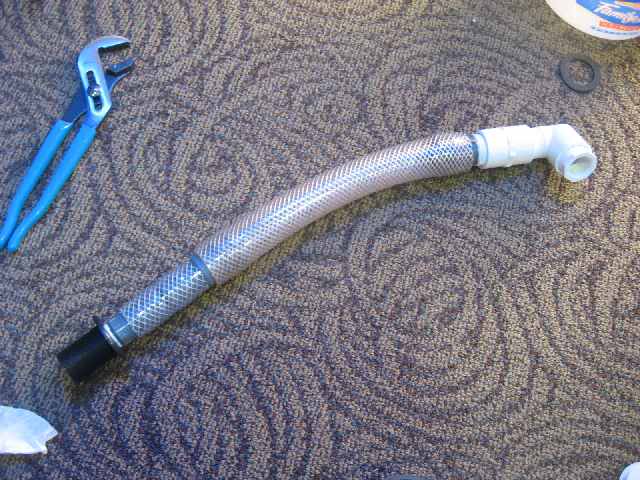
Here's the new tube run from pump to bulkhead

img_1261145_0_a70d8ef67f33469f63b6ef1b09a1c2fe.jpg


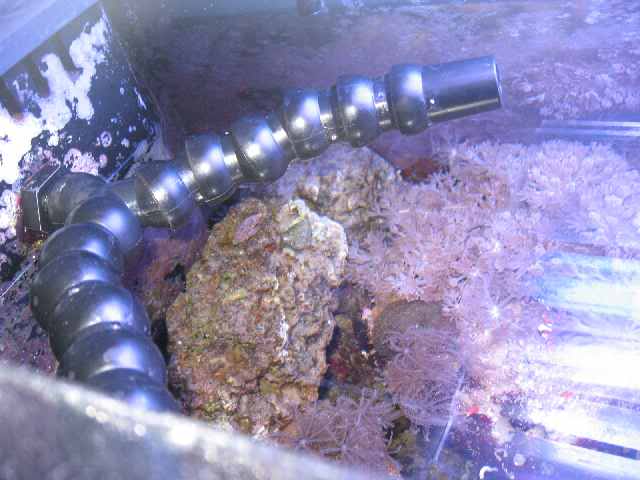
and from bulkhead to jets

img_1261145_1_1046cadd7f09352844a8cfce375c5a60.jpg


Since the 3/4" threaded goes to a 1" hose barb, the inner diameter of that fitting is the same all the way through. Also, the 90 to the jets is a 1" female to 1" male, then a bushing to reduce the female to 3/4" for the jets. That means that the overall minimum ID of this is 3/4" (ID of the 3/4" threaded connector) vs 1/2" (3/4" hose barb connector), which is an increase of (0.75^2)/(0.5^2) = 2.25 or 125% more cross section. The maximum hose diameter went from 3/4" to 1-1/4", so that's (1.25^2)/(0.75^2) = 2.77 or 177% increase.

The Danner Manufacturing pump curve for the Mag12 http://www.dannermfg.com/instructionsheets/ZG100.PDF says that at 6 feet of head, you should get 950 GPH as long as you use 1.5" return piping.

So I would have to say that I'm pretty happy that I'm now getting 760 GPH. I expect that since the piping will 'slime up' over the next year, that the true maximum flow will eventually decrease by about 10%, putting it near 700 GPH, but it's a far cry better than the 433 max I was getting.

Also, here's a few YouTube videos that illustrate the difference

YouTube - 125 Reef - Plumbing Replacement

YouTube - 125 Reef - Plumbing Replacement & ATS Flow Increase

I also replaced the jets, because I had another set on hand...

img_1261145_2_3c8aecb05515538c756f1f65380cf3b0.jpg


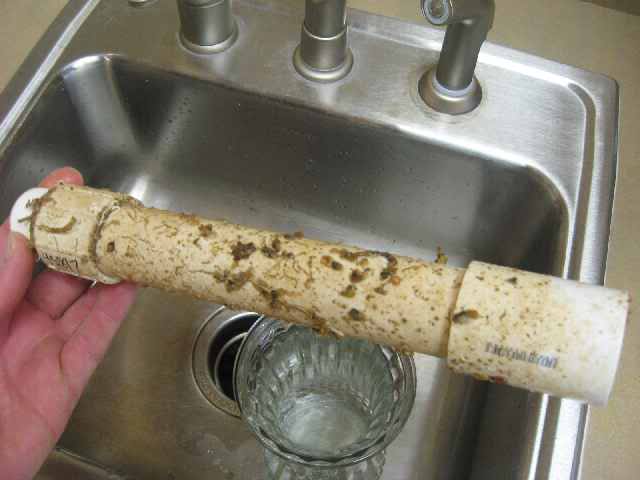
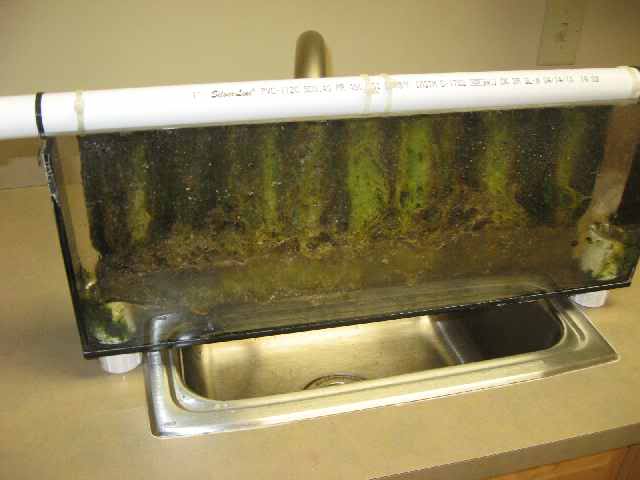
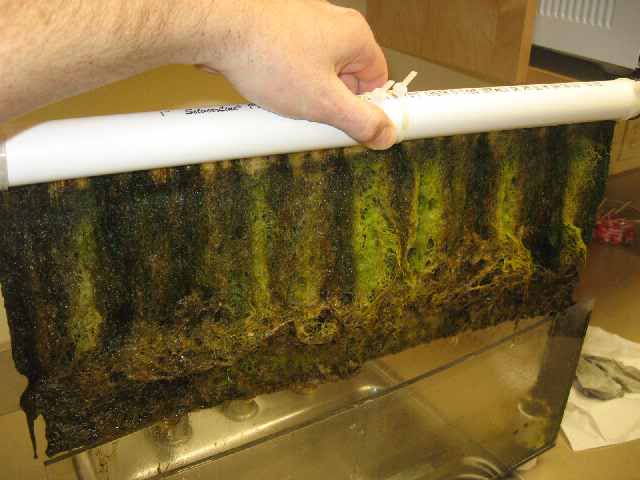
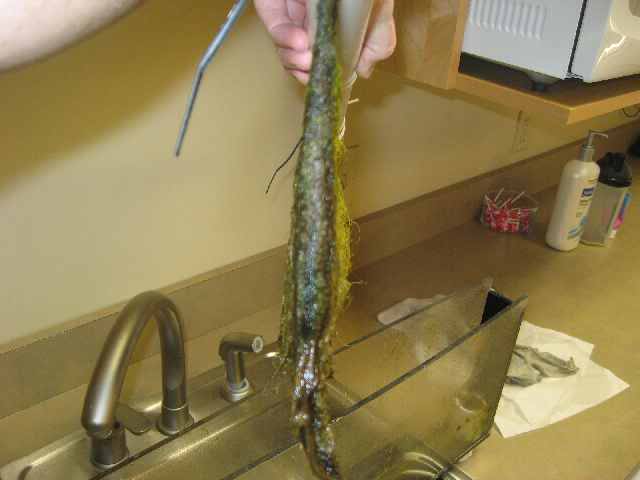
And I almost forgot, here's the screen

img_1261145_3_8fd3bca8230c72ea3a5fa05b1c444120.jpg


img_1261145_4_4c9dd16ab840fe6dbd7447f15ee7b061.jpg


img_1261145_5_a9fd569149a15350cdb93ad2ec64359c.jpg


Getting better, slowly recovering. We'll see what doubling the flow does for growth and for phosphates, which have never been below 0.10 in this tank.
 
I haven't done an update on this tank in a while. Unfortunately, this time my update contains rather dire news.

I found this today:

img_1348493_0_33f6ea019d302c982a8b7a709b8515fa.jpg


img_1348493_1_bac2017d46abf1ce5dc2a89d223f84cd.jpg


img_1348493_2_a8b4c713304245944bdf188f48d564d4.jpg


In case you've never seen a pending seam failure in an acrylic tank, now you can say that you have. From what I can tell, the square tube supports and particle board base of the custom cabinet that was built for this tank are not properly supporting the weight of the tank (the tank also doesn't line up with the beams underneath, and they're probably too small anyways) so the bottom is sagging and this is stressing the front bottom joint to the point there the bottom of the tank is actually fracturing through on the plane of the inside of the front panel. The tank is 3/8" material (60 W x 18 W x 24 H) and the bottom is 1/4". There is about a 2" wide section, right smack in the middle of the front bottom seam (3rd pic) that is fractured through about 2/3 of the way. This means that there is less than 1/8" of material holding back 120 gallons of water and livestock.

So please excuse me while I clean out my shorts.

Luckily, I have an empty 120 glass and I am getting a loaner stand so I can transfer everything.

Right now this is in a dentist's office with lots of kids so this is a disaster waiting to happen. I have no idea if this has gotten worse over time as this is really the first time I've noticed it.

This sucks!
 
I'm not counting my chickens before they're hatched. This thing still has to hold water for a few more days. The CAUTION tape is going up tomorrow. I'm serious.
 
Well 2 days since discovering the fracture, and it hasn't progressed. Building a stand for my 2x2x4 120g and will be transferring everything to my house while I figure out how to fix the issue with the cabinet/stand and get a new tank for them (if they want another one).

In the meantime, I spoke with a rep from Tenecor. They of course only warranty their tanks for life if you put them on one of their stands. But it was an interesting conversation. I had the thought that the fracture might actually break through while I was emptying the tank, the thought being that when the pressure is relieved and the tank tries to go back to the original shape, that the fractured areas would try to push back together and this would actually cause the seam to fail. He verified that this indeed has happened before. The example he gave me was of a 10 foot tank that was having a seam failure, and they got down to the last 6 inches of water in the tank and it popped.

So I guess I will be armed with 2 carpet cleaning machines and crossed fingers...
 
I would have never thought that there would be a problem at the time of taking things out. That was some good questioning. Always good to be prepared and I do wish you luck!
 
I think I'm going to fire up the video camera while I empty it. If this thing does go, even during that process, then that would be considered a loss and might fall under insurance coverage. Having worked in insurance, I know that there is no coverage for preventative efforts, except when you are mitigating further damage after a loss (like putting on a blue roof after a hurricane). Plus I don't want there to be any question about me purposely causing the break, since it's pretty much going to happen I think.
 
Back
Top Bottom