Hello again everyone. I thought I’d take a little bit of time to go over some of the most common live food cultures that are used today in aquaria.
They range from large (think earthworm) to nearly invisible, and are utilized by breeders and home hobbyists worldwide. Lets get started.
Green water algae:

Aka pea soup, this is water that is tinted green due to an algae bloom. This type of culture is good for multiple reasons, the algae can help water quality by filtering nitrogenous waste, and also it serves as a fry food for newborn egg layer fry. Some fry are so small when they are born that they have to eat microorganisms in their first days, and this is where a green water culture shines.
How to make green water: This is the bane of many a fishkeeper, and I think just as many people try to figure out how to get rid of it as there are who seek to culture it. It’s a fairly simple process all in all, you just need a container with water in it (aged/tank water is better), a strong light source, and food.
The easiest way I’ve achieved this is to take a 2 liter bottle, fill it 3/4 with tank water, toss in some grass clippings or chopped up leafy vegetables, and then place in the sun for a few days. It seems to do better on a window sill or in an area where it isn’t getting baked (aka partial sun), if you live in a hot climate.
You can also do this indoors by repeating the process but using a good full spectrum light instead of the sun. Run the light 24/7 and you should have pea soup in a few days. One thing that kick starts the process is to toss in a little bit of fertilizer if you happen to have any on hand. Don’t go crazy with it, though, as you’ll eventually be adding this to a tank with delicate fry.
Feeding: Once your greenwater culture is ready to go, you may add it to your fry tank. At this point it just takes some practice to get an idea of what works and what doesn’t. I remove around 20% of the water from the fry tank and then replace it with green water. I repeat this process every few hours until the fry tank has a noticeable green tinge to the water. Usually, this is good enough for the week or so that the fry need it the most, but if you do a lot of water changes on your fry tank you will need to redose accordingly.
Infusoria:

Infusoria is the name given to a myriad of tiny creatures that are found in aquaria. These include euglenoids and unicellular algae (aka greenwater). Greenwater algae technically IS infusoria and sometimes people classify them the same, but for the sake of this writeup I will focus on the bacteria-eating type of infusoria.
These infusorians eat bacteria and the single celled algae that make the water green. The process for making them is kind of gross, and because it can be kind of tricky I tend to stick with my trusty greenwater cultures.
Anyhow, here’s the process given to me and one that I have used.
Culturing: Fill a 2 liter bottle with tank water, add a few pieces of dry dog or cat food, and place it uncovered somewhere cool and dry for a few days. In the first couple of days the water will become very cloudy, this is bacteria breaking down the food in the water. A few days after that it will clear up, seemingly overnight. What happens is the infusorians eat the bacteria in the water, clearing it up and enlarging their population.
At this point the infusoria is ready to serve to your fry. Since this is somewhat of a gamble, I prefer dosing infusoria with a medicine dropper so that I can add just a small amount at a time.
I will not give an exact dosing regimen as there isn’t one, but I have often added this culture via medicine dropper directly to the area that the fry are in. If all is well you should see them darting around and eating the invisible goodies.
After that complicated explanation I am sure you can understand why I prefer using a healthy greenwater culture.
Vinegar Eels:

Vinegar eels are actually a nematode that feed on organisms that cause fermentation vinegar. They are harmless and the culturing process is very very low maintenance. Their tiny size makes them good for very young fry, but not as a regular feed for fish.
I cannot accurately estimate their size, I have a hard time seeing them unless I put the container up to the light and focus for a minute.
These little guys stay suspended mostly at or near the surface, so they are good for feeding fry that like to sit high in the water column.
Culturing: First, get a starter culture. These can be had from multiple online sources, breeders, fish clubs, or possibly someone who does home brewing.
Once you have the starter culture, you need a container or two. I always do at least 2 cultures in the unlikely event that one crashes.
I use a mixture of 50% apple cider vinegar and 50% dechlorinated water in a quart or liter bottle. To this I add a teaspoon of sugar and a slice of apple.
I puncture the cap on the bottle and put a piece of filter floss in the hole so that the culture can get aeration but also keep bugs out.
Add your starter culture to this and then wait. In a few weeks, if all is well, you will have a booming vinegar eel culture. They tend to gather near the surface in almost a cloud like appearance depending on density.
This culture needs to be redone every 6+ months, sometimes a year or more can go by. Just look at the culture and if the color turns milky or starts looking off then it’s probably time to redo it.
Harvesting: You do not want to add this culture directly to your tank, as the vinegar will wreak havoc on your parameters. The best way to harvest them is to pour a bit of the culture into a coffee filter and then rinse the filter in a container of water.
At that point you can just dump it in the fry tank, spot feed them, or whatever you prefer. Be sure to save the filtered vinegar and return it to the culture.
Microworms:

Panagrellus sp. These are also nematodes, but slightly bigger than vinegar eels at approximately 1/16″ adult size. Still amazingly tiny and work great as a first food for many fry, although some of the small egg layer fry are too small to eat them effectively.
These ‘worms’ sink to the bottom somewhat rapidly, so are best fed sparingly in tanks where they may fall into the cracks of gravel out of reach of hungry fry.
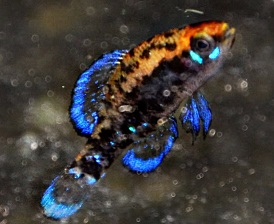
While useful for livebearer and egglayer fry alike, this particular live food culture can also be used as a daily supplement for adult nano fish like Celestial Pearl Danio and Pygmy Sunfish.
It’s easy culturing and harvesting techniques make it a good candidate for daily feedings. Please note that these are a good supplement food but should not be used as a sole diet for any species.
Culturing Method: Culturing microworms is pretty simple. My favorite method is to use a shallow dish with a lid, like a little deli cup or a ziploc sandwich container. Clear containers will let you see how the culture is doing without having to open it up to check on it.
Things you will need:
Oatmeal- I’ve used everything from the basic oats in the big containers to the little packets of peaches and cream, so the type really isn’t important.
Yeast- I use bread machine yeast, but have used the different types available in the grocery store and they all work about the same.
Water- Self explanatory.
Starter culture- You can get one of these online or possibly from a LFS or fish club.
Container to hold the culture as described above.
All you have to do is put a layer of oatmeal in the container and enough water to get it wet.
You don’t want it to be soupy, so if it is very watery then dump off the excess. It should be damp. Once you do this, sprinkle a light layer of yeast across the top of the culture, it doesn’t take a lot, just a light sprinkling. After you do this, take the starter culture and place it on top.
You can mix it around if you want, but it doesn’t really matter. Cover the container and keep somewhere out of the way, it should be ready in a few days.
I poke a few small holes in the lid of my containers to allow gas exchange, but have noticed that they are fine in a sealed container as long as you open it up periodically every day or two.
This culture will smell yeasty and a bit sour as the oatmeal breaks down. A good active worm culture will have worms crawling up the sides of the container, once it slows down you may want to reculture it using the same process that you used to initially start it.
Just remember to save a spoonful of the old culture to add to the new one. I reculture my microworms every 2 weeks or so.
Harvesting: Harvesting is simple as well. When the worms begin to crawl up the sides of the container you can just swipe them with a finger (uhh, wash your hands afterwards) or use a dull knife to scrape them off the sides and then you can add them directly to the feeding tank or to a container of water for spot feeding.
I suggest adding them to a container of water first until you get a good idea of how many worms you are feeding to the tank. It’s very easy to overdo it in a small fry tank, so gauging how much is going in there can be crucial in that instance.
Baby Brine Shrimp:

BBS aka Artemia are a staple in the breeder circles, and rightly so. These are a type of crustacean that are found in inland saltwater lakes. The neat thing about them is that their eggs can go dormant when conditions aren’t right for hatching,so they are easily stored and used as needed.
You can purchase brine shrimp eggs from multiple sources online and possibly at your LFS, although the online sources seem to be a lot cheaper and more reliable.
There are a lot of writeups on hatching bbs found everywhere, so I’ll try to be brief about my setup.
Things you will need:
2 Liter bottle
Air pump and airline tubing
Spring clip, clothespin, or tape
Salt- (note- I use both kosher salt and iodized table salt, both seem to have the same results)
Baking soda
Water
Brine Shrimp Eggs
Culturing: My BBS hatchery works on the K.I.S.S. method, so everything is simplified to the greatest extent.
I use a 2 liter bottle filled about 3/4 with old tank water. To this I add around 3 tablespoons of salt and a pinch of baking soda. note: I have also successfully hatched BBS using baking soda only, in place of salt. The only downside to this is that the baking soda tends to form a buildup in the container so it needs to be cleaned thoroughly in between cultures.
I shake up the bottle to get everything mixed and then stick an airline down into the bottom of the bottle and secure it in place with a spring clip/clothespin.
I crank up the air to give the liquid a good rolling movement similar to water lightly boiling.
At that point I add a 1/4 tsp of brine shrimp eggs and then come check on the bottle 24 hours later.
Harvesting: Once 24 hours has passed, I turn off the air for a few minutes and look in the culture. If I see lots of movement along with a lot of floating cysts (these are empty shells), then I harvest. I either use a turkey baster to suck up the liquid or I use that same piece of airline tubing to siphon out the liquid.
The goal here is to get the liquid out of the center part of the culture, you don’t want to get the stuff near the top or too near the bottom, as they contain unhatched eggs/egg casings.
You will be able to see the bbs swimming around in there, so you can kinda target the mass of them when siphoning. Shining a light on them for a few minutes will make them gravitate towards it.
Once I have a container of siphoned BBS, I strain them through a coffee filter and discard filtered water. I then take the coffee filter, which should be tinged with an orange color at this point, and I dip it into a clean container of tank water.
Now the BBS can be served via pipette or just dumped straight in, whatever your preference may be.
If you have leftover liquid in your hatchery you can use it again but try not to save it for more than a few hours as BBS lose a lot of their nutritious value very quickly.
I do not grow them out at all, so I won’t go into detail on that process but I will say that there’s only one method I’ve seen that looks simple enough to be worth it, and it involves a plastic tub outdoors that you dump your waste hatchery liquid into.
Daphnia:

Daphnia aka water fleas are a type of crustacean found naturally in slow moving/still bodies of fresh water, particularly in areas where there is a lot of greenwater algae available.
They are great feed and a nice step up once BBS become too big for your fish. They are also good staple food for nano fishes.
Fish like scarlet badis and pygmy sunfish are known to be picky eaters so live daphnia make feeding a lot easier in that it gives them a food source to hunt after.
There are multiple daphnia species, and they range in size from moina being barely 1/16″ to magna being nearly 1/4″ full grown.
There are a lot of other technical aspects of daphnia but for the sake of this writeup I’m going to just focus on culturing and feeding them. This is how I do it.
Setups-
Outdoor setup:
Outdoor setups work great if you are in a good climate to do so. Some daphnia species do better in different climates, so you may want to do your homework here before you decide what species to use and whether to culture them outdoors.
You will need:
Daphnia starter culture
Container to keep them in. Bigger the better here, I like using the cheap utility tubs from Walmart, they are approximately 20g and only cost around $4. Alternatively you can use anything even a 2 liter bottle to culture them in, it doesn’t take a massive container to do it.
Aeration- Not absolutely mandatory, but it does seem to help a culture thrive better when light aeration is available. This can be substituted (albeit not as well) by a few floating plants like anacharis or water lettuce. I try to minimize the amount of plants in my daphnia culture because they take away nutrients from the green water in the tank.
Greenwater culture- This can be cultured using the outline earlier in this writeup, or you may find that some daphnia suppliers will also offer a greenwater starter culture to help get things moving along.
Indoor setup:
This is for those of you who don’t have the climate or facility to set up an outdoor tank. The process is basically the same as it is for the outdoor setup, the only difference is that you will need a good light fixture to help facilitate greenwater algae growth.
I suggest maintaining a separate greenwater culture because your daphnia will eat all the greenwater algae in their tank. As they multiply, their demands for this will go up, so it’s best to have a different source for your green water so you can add it as needed.
I like to add green water to my daphnia culture any time it begins to clear up. I like for it to be a nice shade of green, not pea soup thick, but not translucent.
Ideally I’d like to be able to see a few inches into the culture so I can monitor the daphnia colony size.
Alternative foods: There are a few alternatives that people use to feed daphnia, and my experience with them is limited, but I will try them periodically to report results.
Spirulina powder is reported to be a good alternative food, but most fishkeepers do not have this on hand.
Regular bakers yeast is a good alternative, it should be bloomed prior to adding.
Blooming is a process in which you take a small container of warm water, a sprinkle of sugar, and add the yeast. Let this sit for a few minutes and the yeast will begin to activate and foam up. At that point it is ready to add to your daphnia culture.
Be very careful in your dosage of this food. I’ve not seen any basic guidelines on this type of feeding so I err on the side of caution and just say ‘easy does it’. Start out with a few ML, watch the culture, and act accordingly.
If the water begins to get cloudy I’d stop at that point. There are some people who use yeast as their main food source in their cultures so it does work, it’s just not something I am blatantly familiar with, I’ll keep my greenwater. 🙂
Harvesting: Harvesting daphnia is easy, you just need a fine mesh dipnet, brine shrimp nets work great for this. Just swipe it around in the tank and then dump the contents into a clean container of water.
Alternatively you could collect a cup full of the tank water and then run it through a coffee filter, but that sounds like a lot of work compared to the first method.
Daphnia are truly aquatic creatures and can live for days in an aquarium, so there isn’t much fear of overfeeding and nuking the water quality. They are far underutilized in aquaria and anyone with space for a large pickle jar or a small tank to culture them in could make use of this great live food.
Grindal Worms:

Grindal worms are a small (~1/4″) worm that is sometimes found in nature where earthworms are found. These small worms are fairly easy to culture and provide a great food source for most community fish and juveniles of larger species.
These worms are not buoyant at all and fall to the substrate rather quickly. In gravel tanks they may find their way into the cracks and crevices so it’s best not to put too many of them in a tank if this is the case.
Culturing: The process is fairly straightforward and can be done with a few various mediums. I prefer to use potting soil, but the same concept can be achieved using coconut coir, open celled foam, or even the green scrub pads stacked up.
You will need:
A plastic container with a lid
Potting soil
Grindal worm starter culture
Pillow Case
Filter floss (optional)
A small piece of flat plastic
Food- I prefer using dry cat/kitten food, bread and other various things seem to spoil or get moldy fairly quick.
Directions: You may want to boil or bake your potting soil for a few minutes before using it, it seems to help keep any mites in the soil from popping up, I just put it in a big pot with some water and let it soak/boil for 10 minutes or so.
Either way, soak potting soil and then drain excess water until the soil is damp but not soupy.
Place a layer of potting soil, 2″ or so is good, in the container. I leave one section of the container free of soil so that I can monitor how damp the soil is. As long as there’s a small amount of water in that open area then I know that the soil has enough moisture, and conversely if that area is full of water I know that I need to remove some of it.
Once you’ve done this, add your starter culture to the top of the soil and place food directly on top of it if possible. The worms will find the food eventually, but putting them closer will have them eating it faster.
After that, poke a few holes in the lid of your culture and stuff them with filter floss if you have some available. If you don’t have any it’s not a big deal but it just helps keep fruit flies out of the culture.
Place container inside pillowcase and store in a cool dry place. The pillowcase will also help keep flies and other unwanted things out.
Check on your culture’s progress every 24 hours if possible. If all is going well, you should see a white worm mass gathered around their food.
I leave their food in there for 2 days but then I remove it as it starts to go foul. Eventually you’ll be able to gauge how much food to put in there for them so there isn’t much waste.
Once you have a good mass of worms going, take your small piece of flat plastic and lay it directly on top of a piece of food. The following day you should have worms all over the underside of the plastic piece, so harvesting is as simple as dipping it in water and then dumping the worms in the tank.
Soil Acidity: Soil cultures with a lot of peat tend to go acidic in short order, so if you notice a decline in production then add a sprinkling of calcium, crushed coral, aragonite, epsom salt, or dolomite powder (camg(co3)2) and a pinch of baking soda to help correct it.
Grindal Pests: Grindals are notorious for getting pests in them, whether they be fruit flies or mites. Using a pillowcase and filter floss to keep your culture closed up will help avoid them, but sometimes it’s inevitable. There’s a few methods to remedy the situation, you can put some of the culture in a container of water, the mites will float to the top while the grindals sink to the bottom.
I just prefer to rinse the grindals multiple times in water to be sure all mites are gone and then start the culture completely over in a fresh medium. It takes more work to do it this way but it seems to be the most effective.
I’ve *heard* that mites can come in potting soil, so I do suggest baking or boiling your potting soil prior to using it.
Whiteworms:
These guys are the bigger cousin to Grindal worms. They are about twice the size, some getting up to nearly an inch or so fully stretched out. These are a bit trickier to maintain in a culture, so I don’t keep them personally.
They prefer cooler temps, 50s-60s range. I have no area in my house that maintains a temp like that on it’s own, so I don’t keep this species because of that specifically. However, I will go over some methods if you do decide to try them out.
Things you will need:
An ice chest or styrofoam cooler
Whiteworm starter culture
A small lidded container to hold the soil culture in.
Potting soil (other mediums work as well)
Enough water to make the culture damp but not sopping wet
2 liter bottles of ice
Culturing Method:
Same basic method as with grindal worms, put a piece of dry cat/kitten food on top of the culture and they will make their way to it to eat it. Place a piece of flat plastic over the food to harvest.
The big difference here is climate control. You will want to place your culture container in the cooler to keep it cold, but not frozen. The idea here is to take a 2L bottle of frozen water and place it in the cooler next to the culture, but not touching. Every few days as the water thaws, replace it with a new one, and just keep rotating.
I have heard of some people trying this culture in the fridge, but I have not tried it myself.
That’s all for now, but I will eventually update with some information on blackworms, black soldier flies, earthworms, and anything else I’ve missed.