t4runnr
Aquarium Advice Freak
- Joined
- May 5, 2013
- Messages
- 297
Hey everyone, so its been quite a while since I posted. I have a 75g in wall tank that I posted about a few years ago. Here is that post: http://www.aquariumadvice.com/forums/f20/my-in-wall-75-gallon-planted-tank-306629.html
I have since made some major changes and did a display tank overhall. I rehomed all of my fish and started over. I’m now going with a rainbowfish tank. Current stock: boesemani rainbowfish, cherry barbs, otos, guppies (1 is a contstantly pregnant female), albino cories, amano shrimp, and MTS. The guppies are what my daughter wanted to see in the tank. I didn’t realize that my wife and daughter brought home a female and very pregnant guppy and I have no intention of saving the fry. If they find places to hide (which I’m sure they may), then survival of the fittest. I’d like to think that the 12 rainbowfish will go after every fry that is born before they can find a spot to hide.
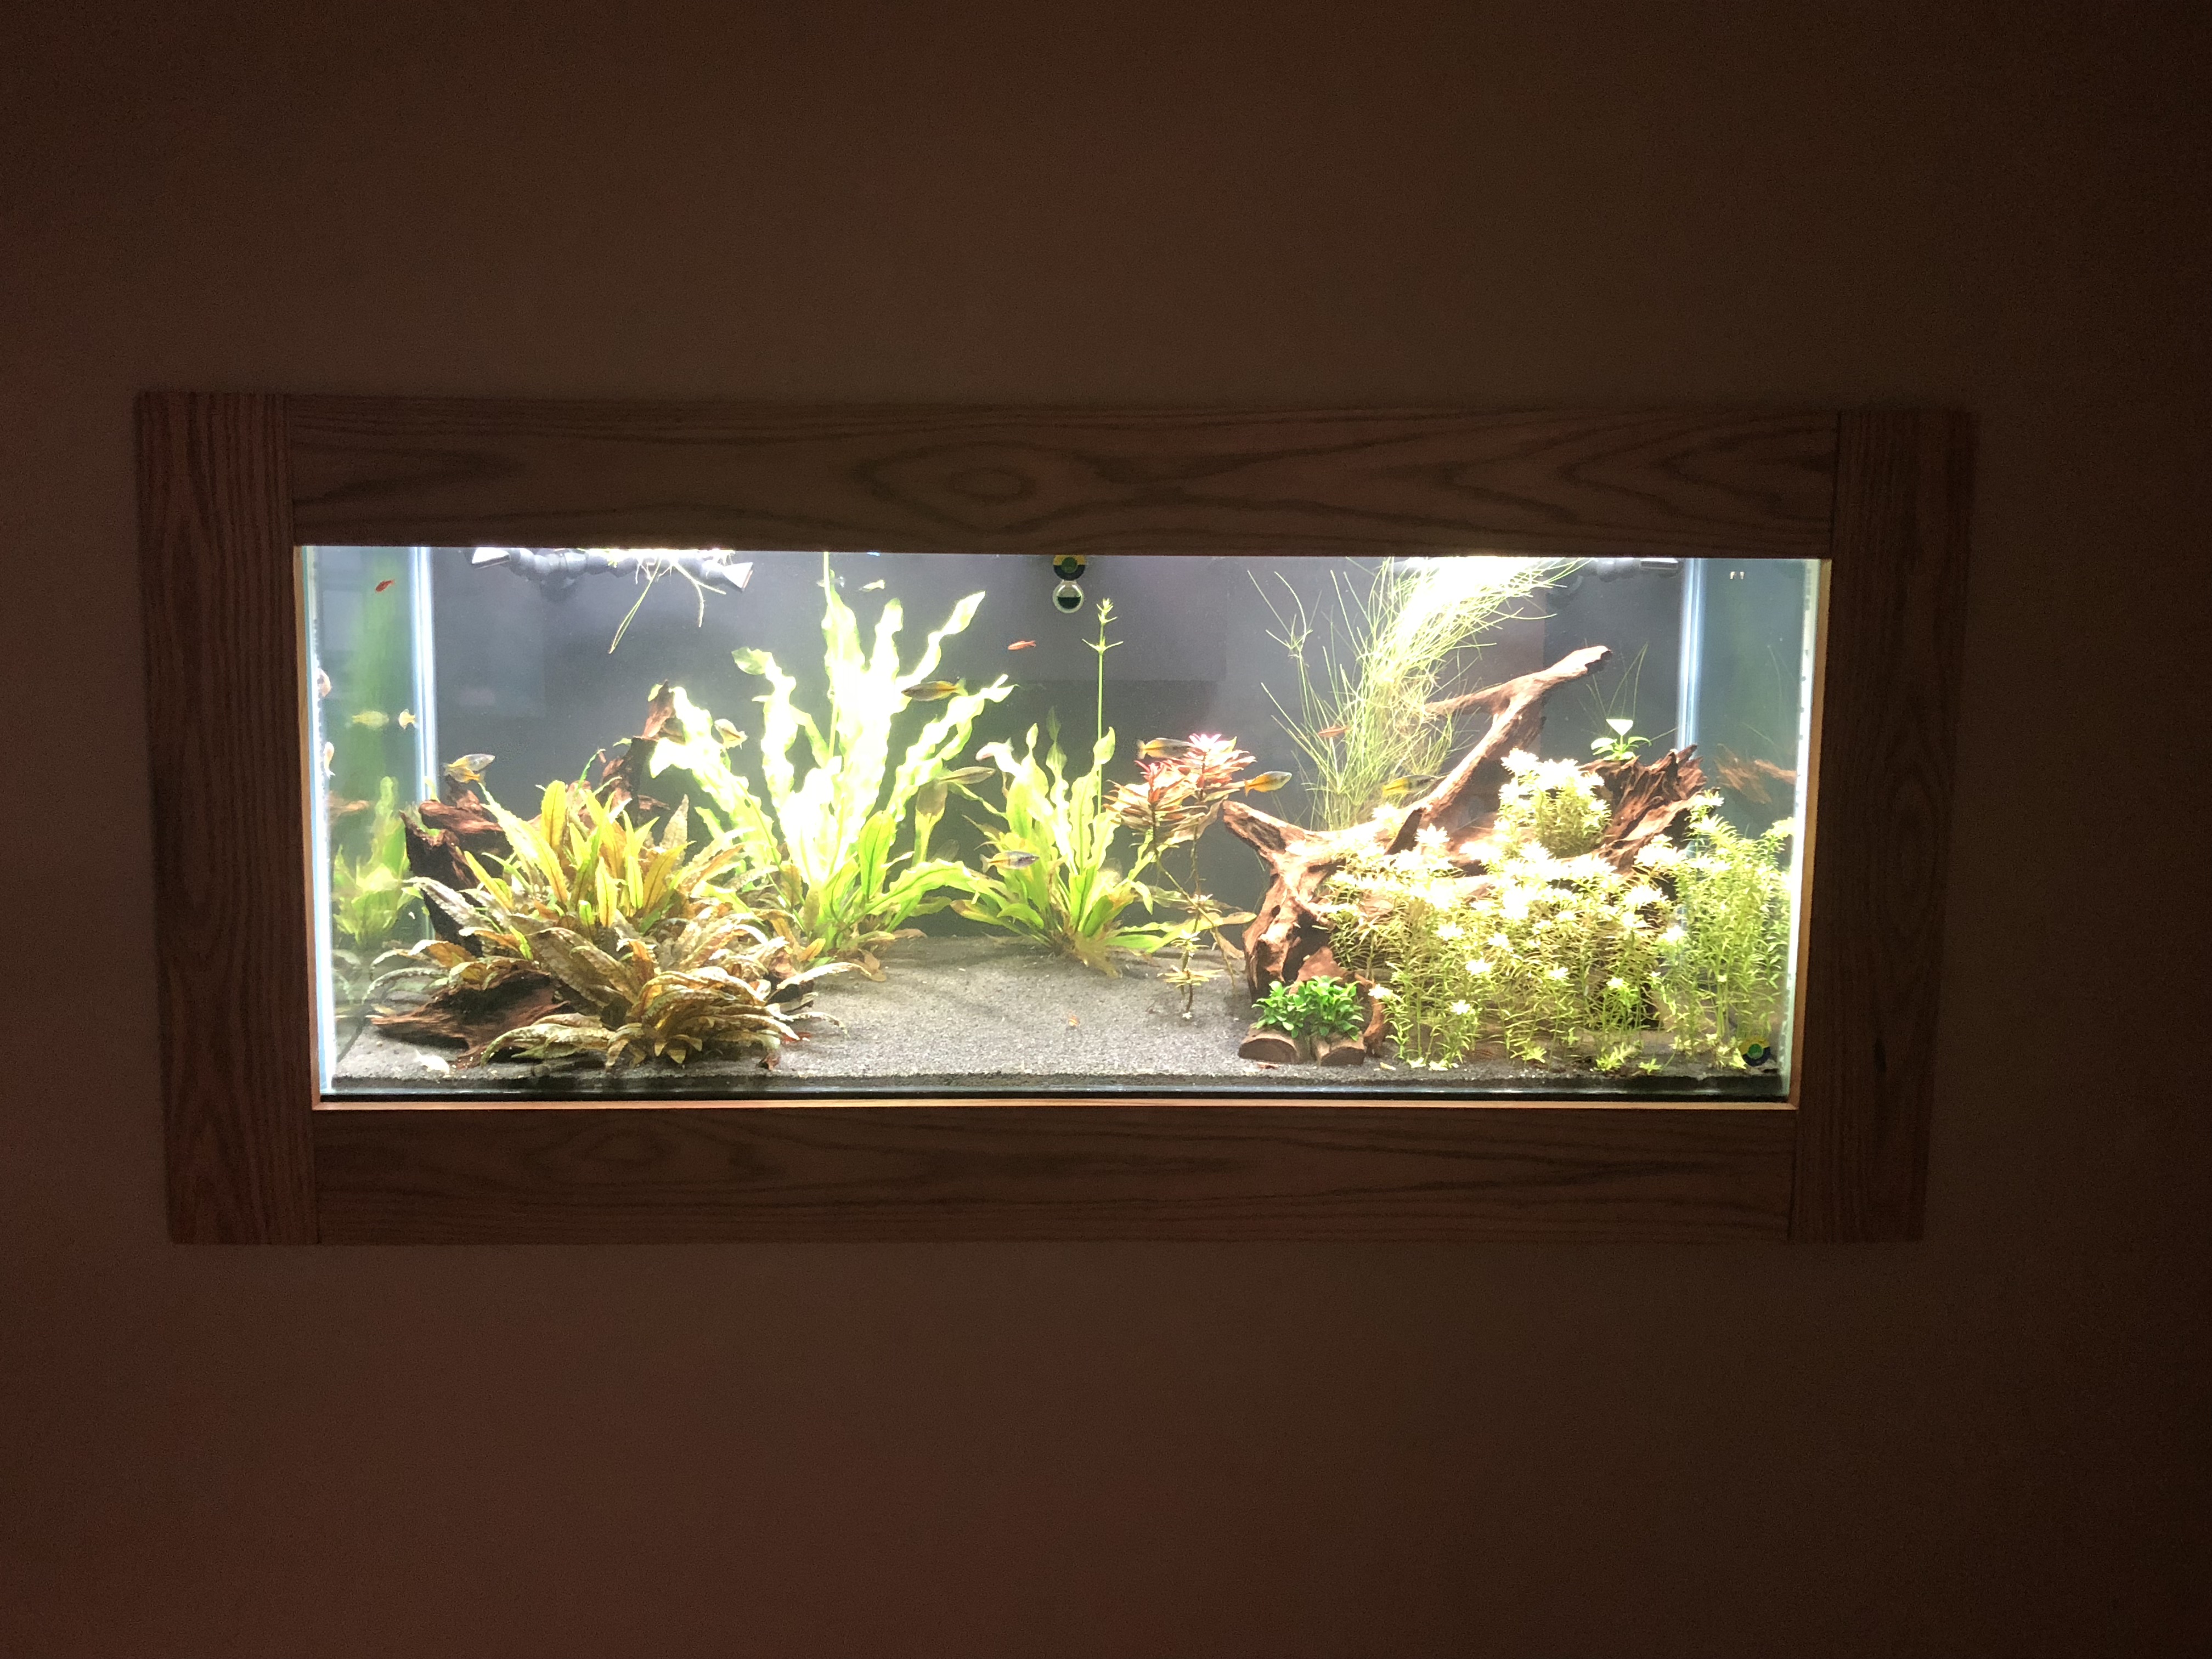
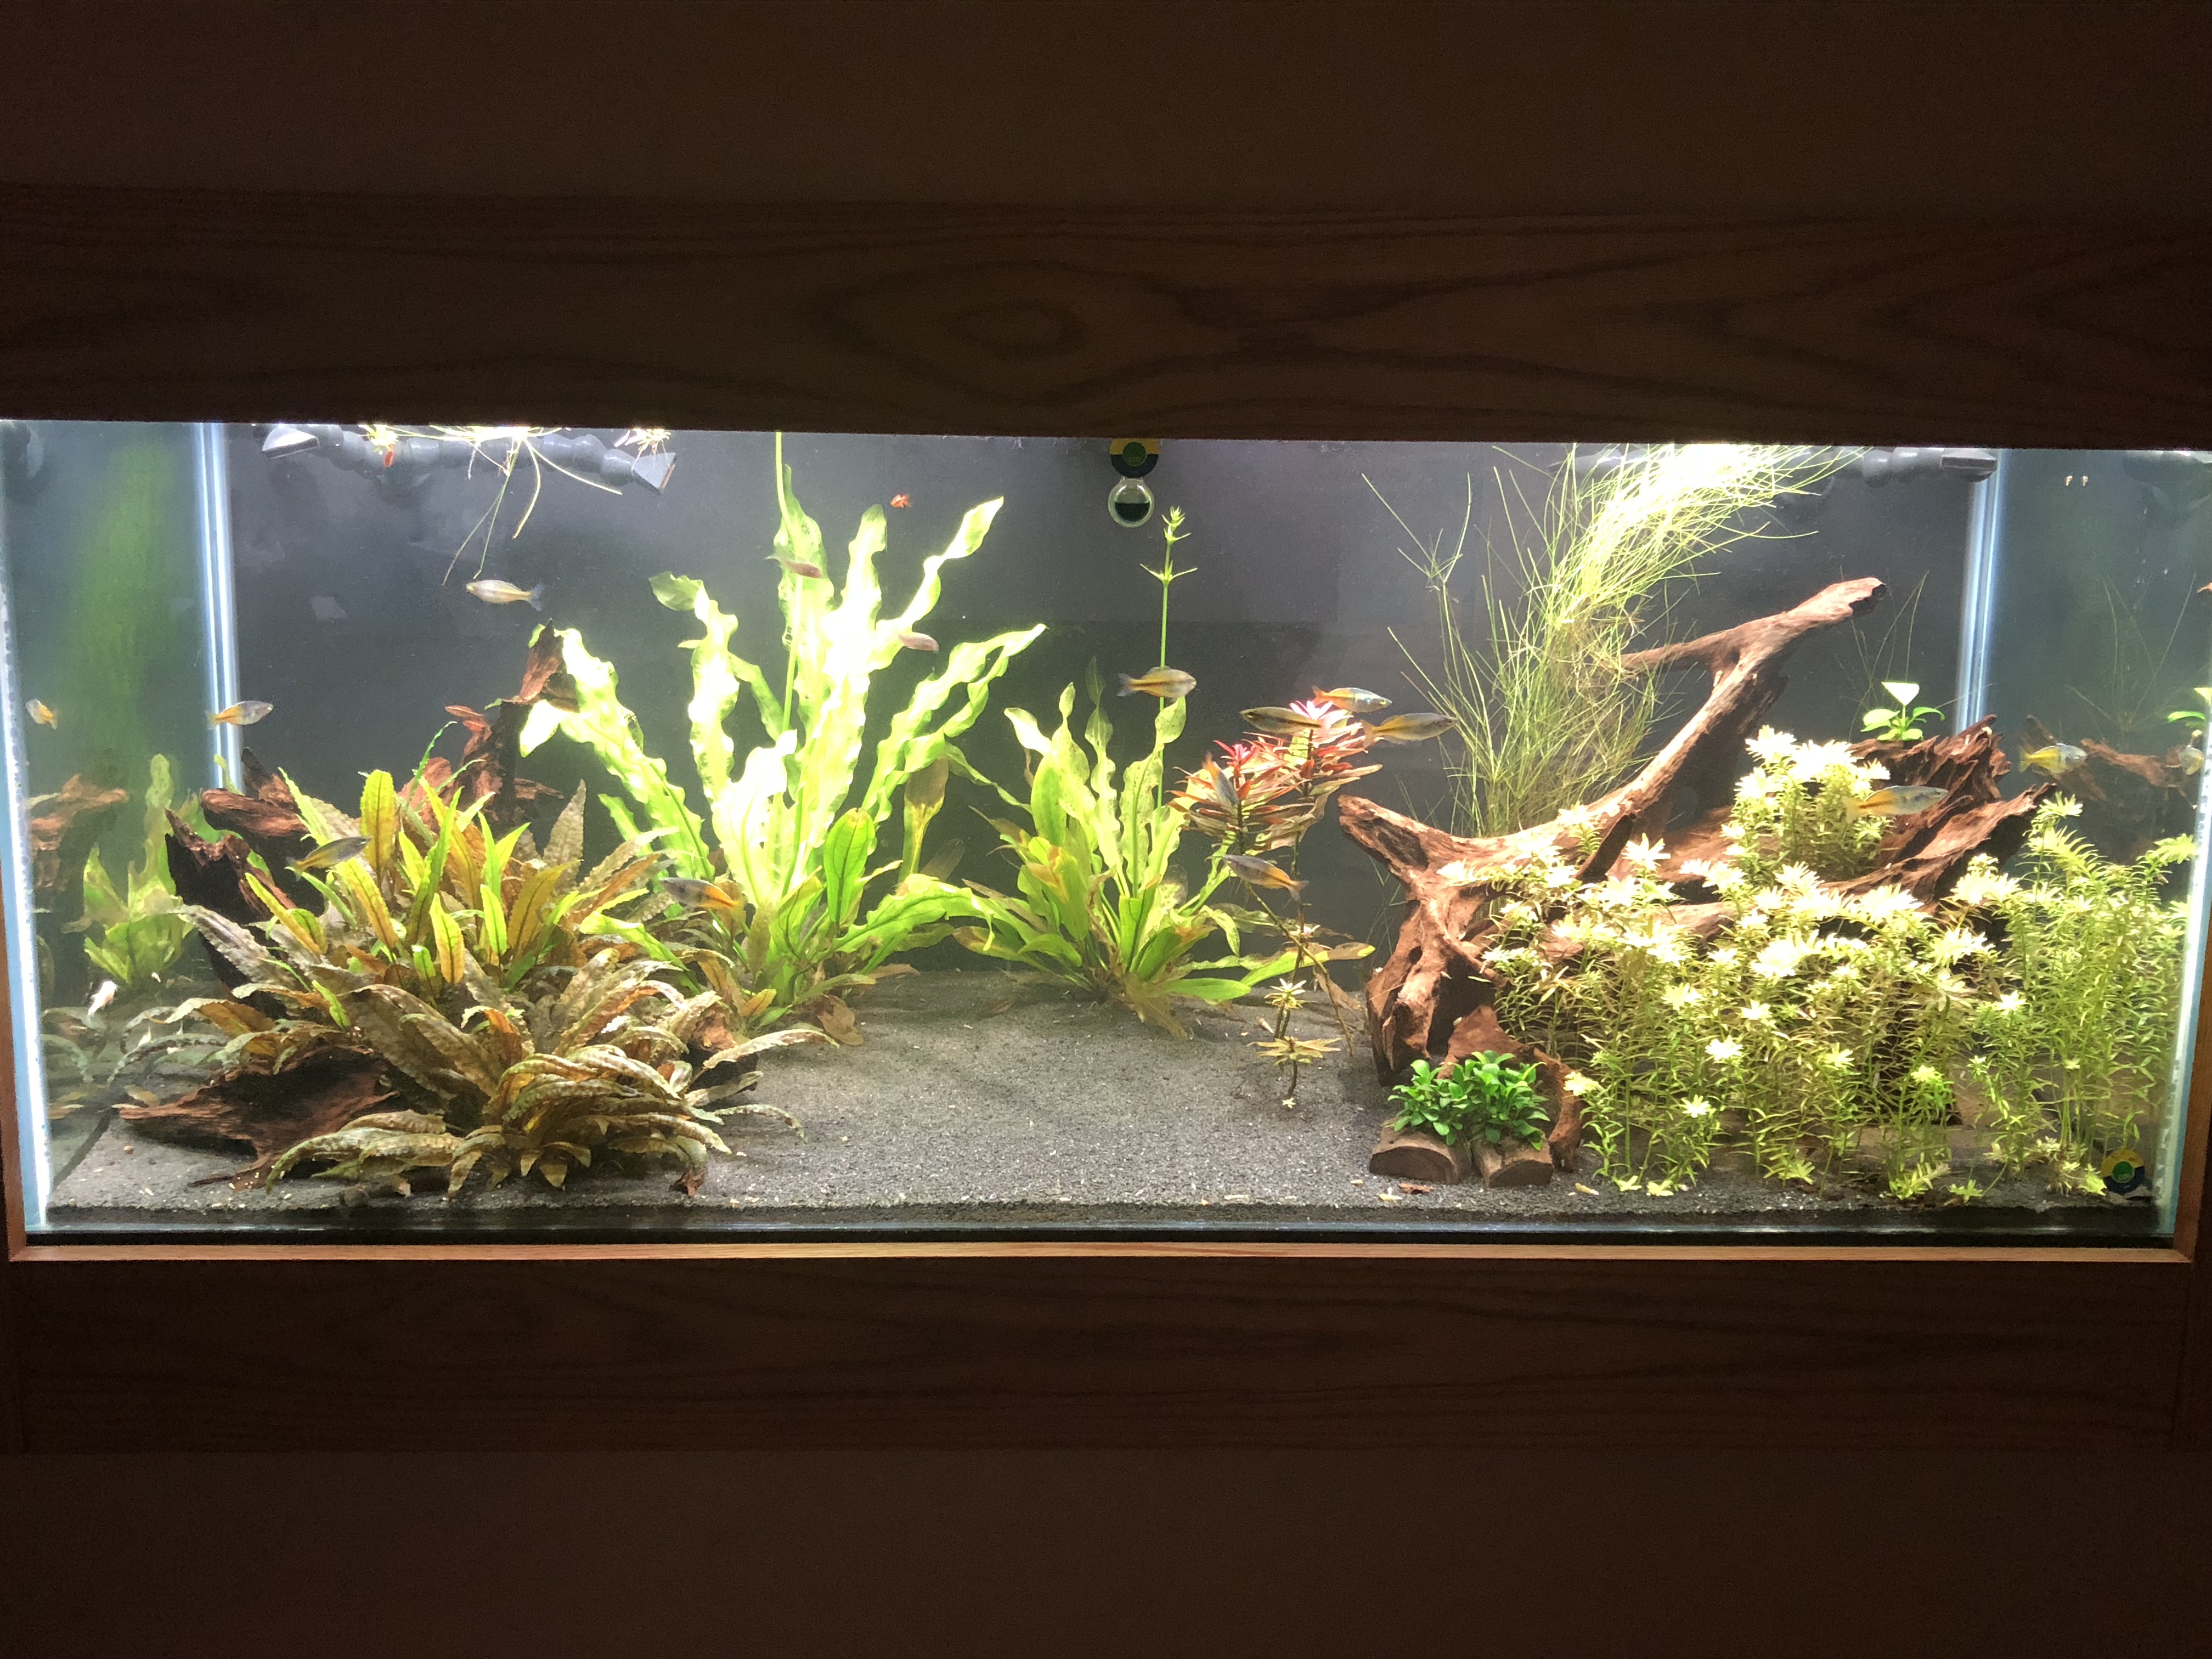
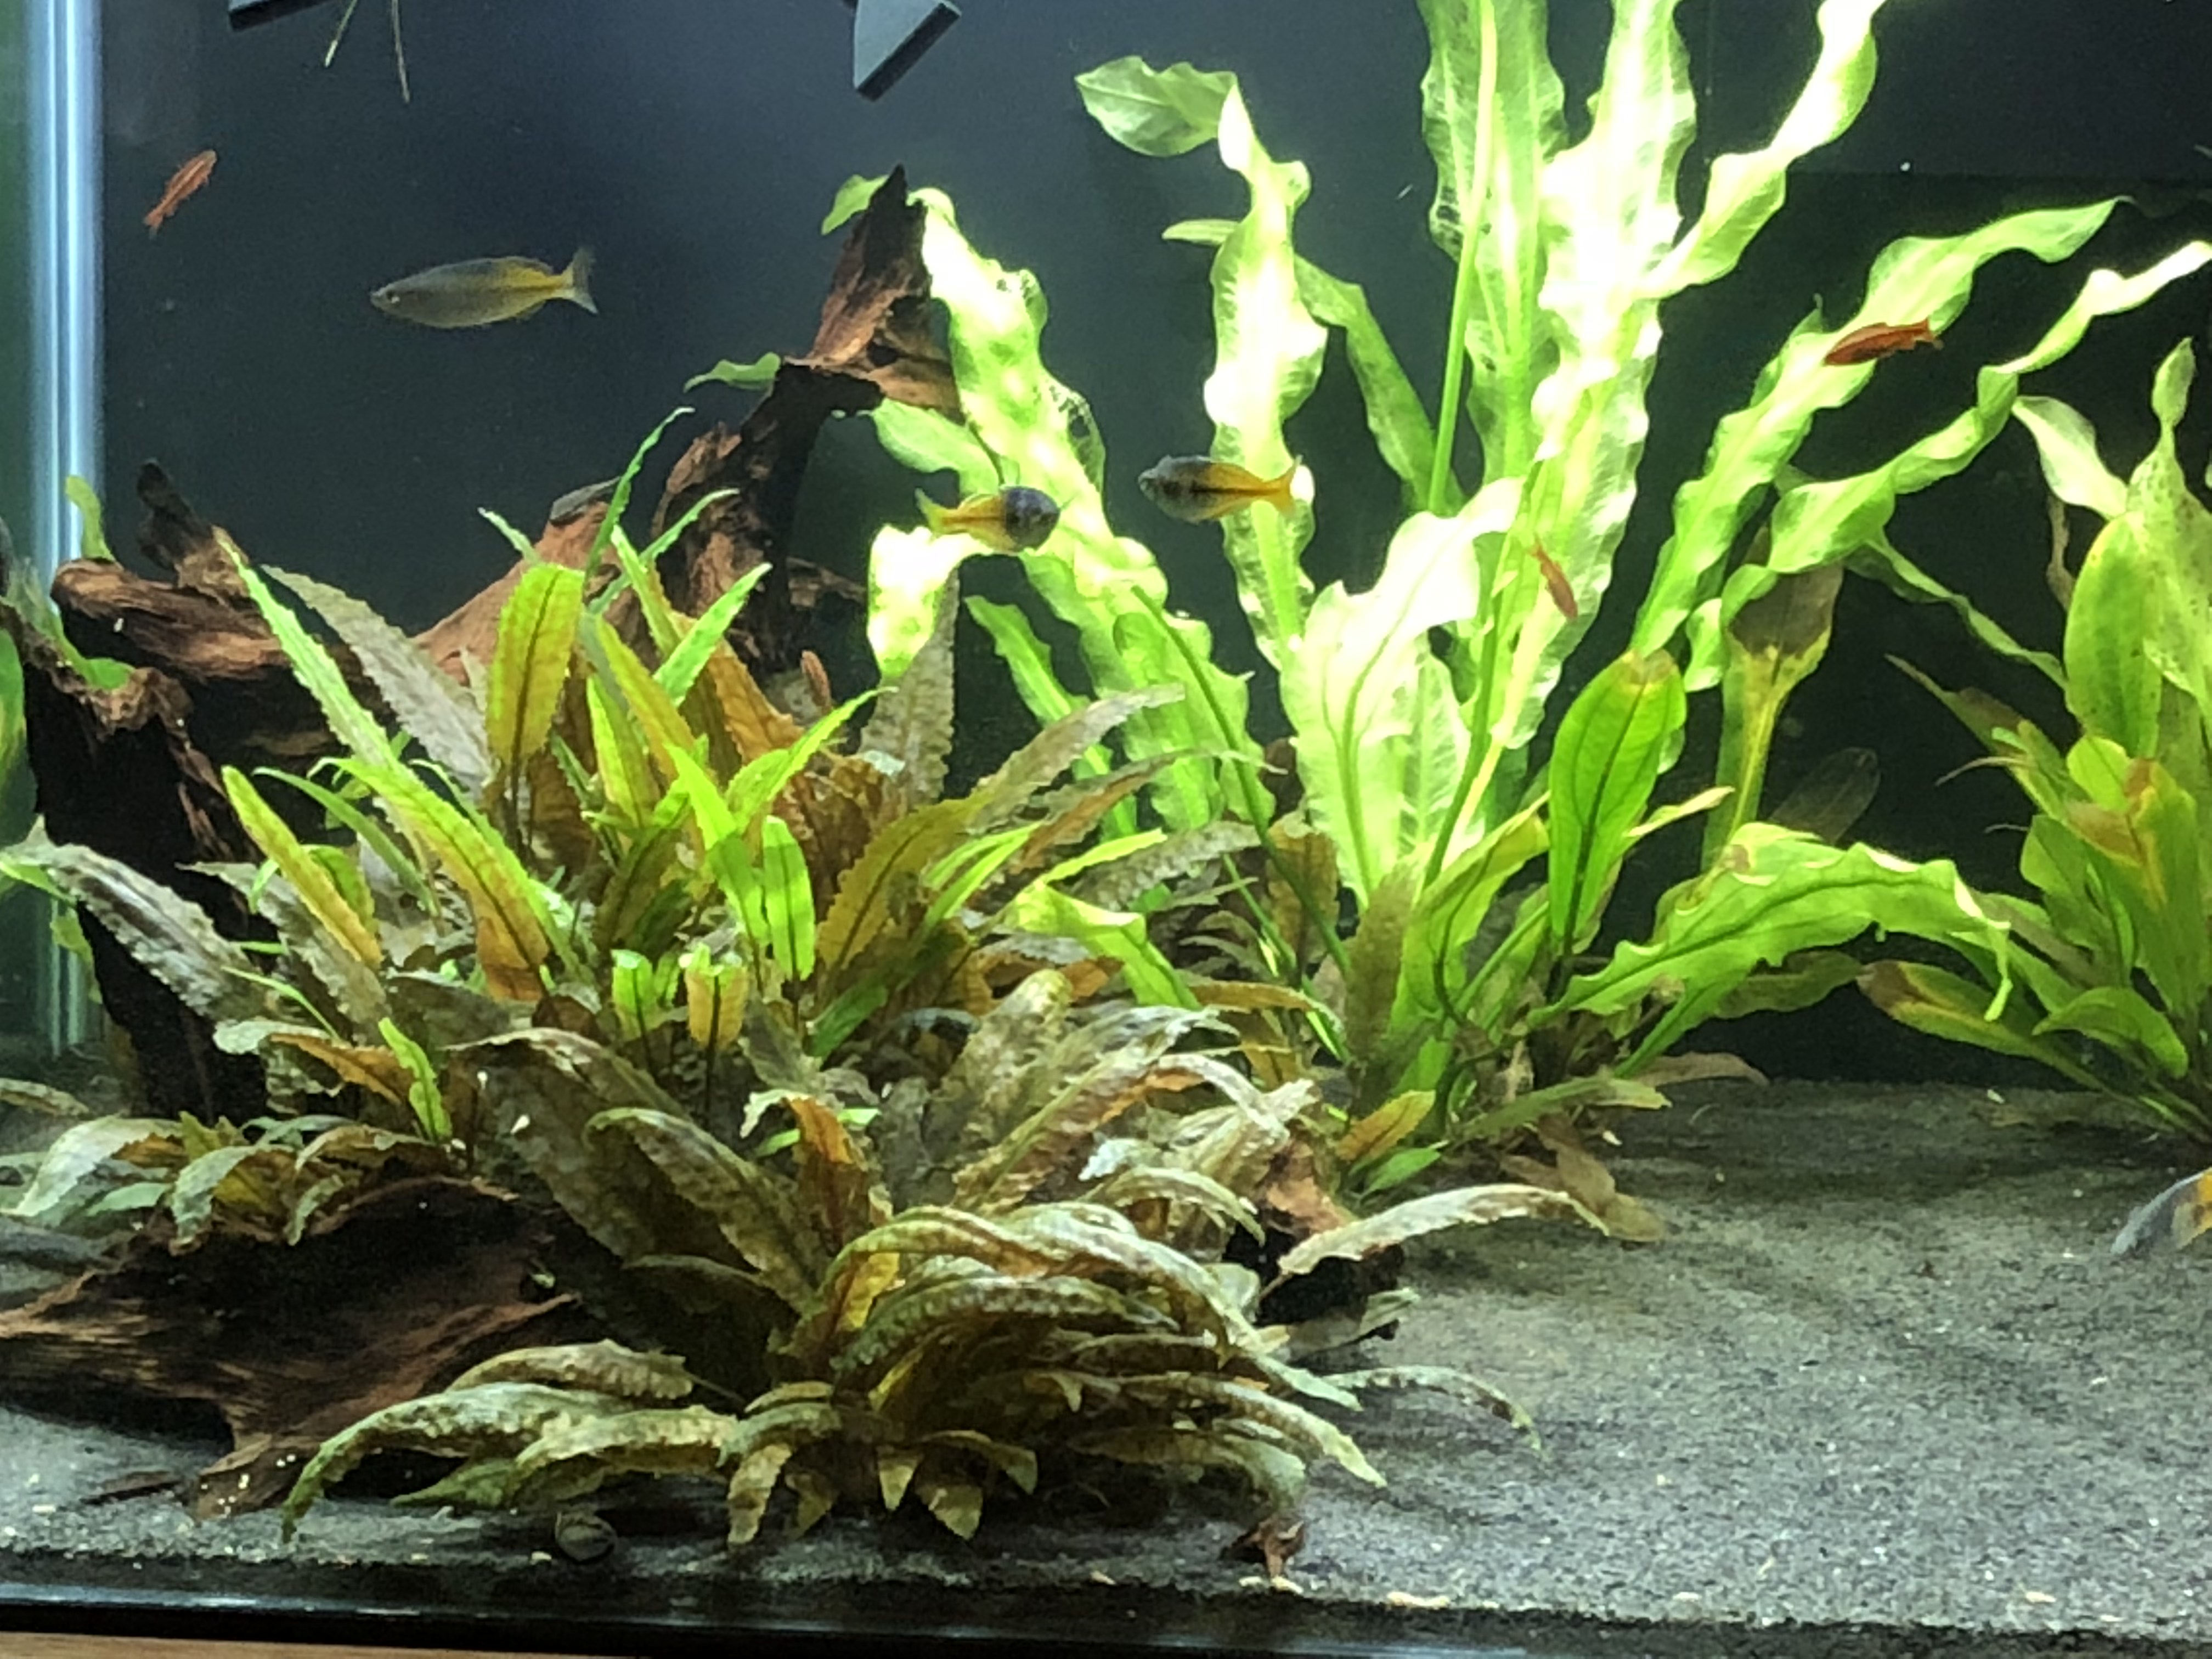
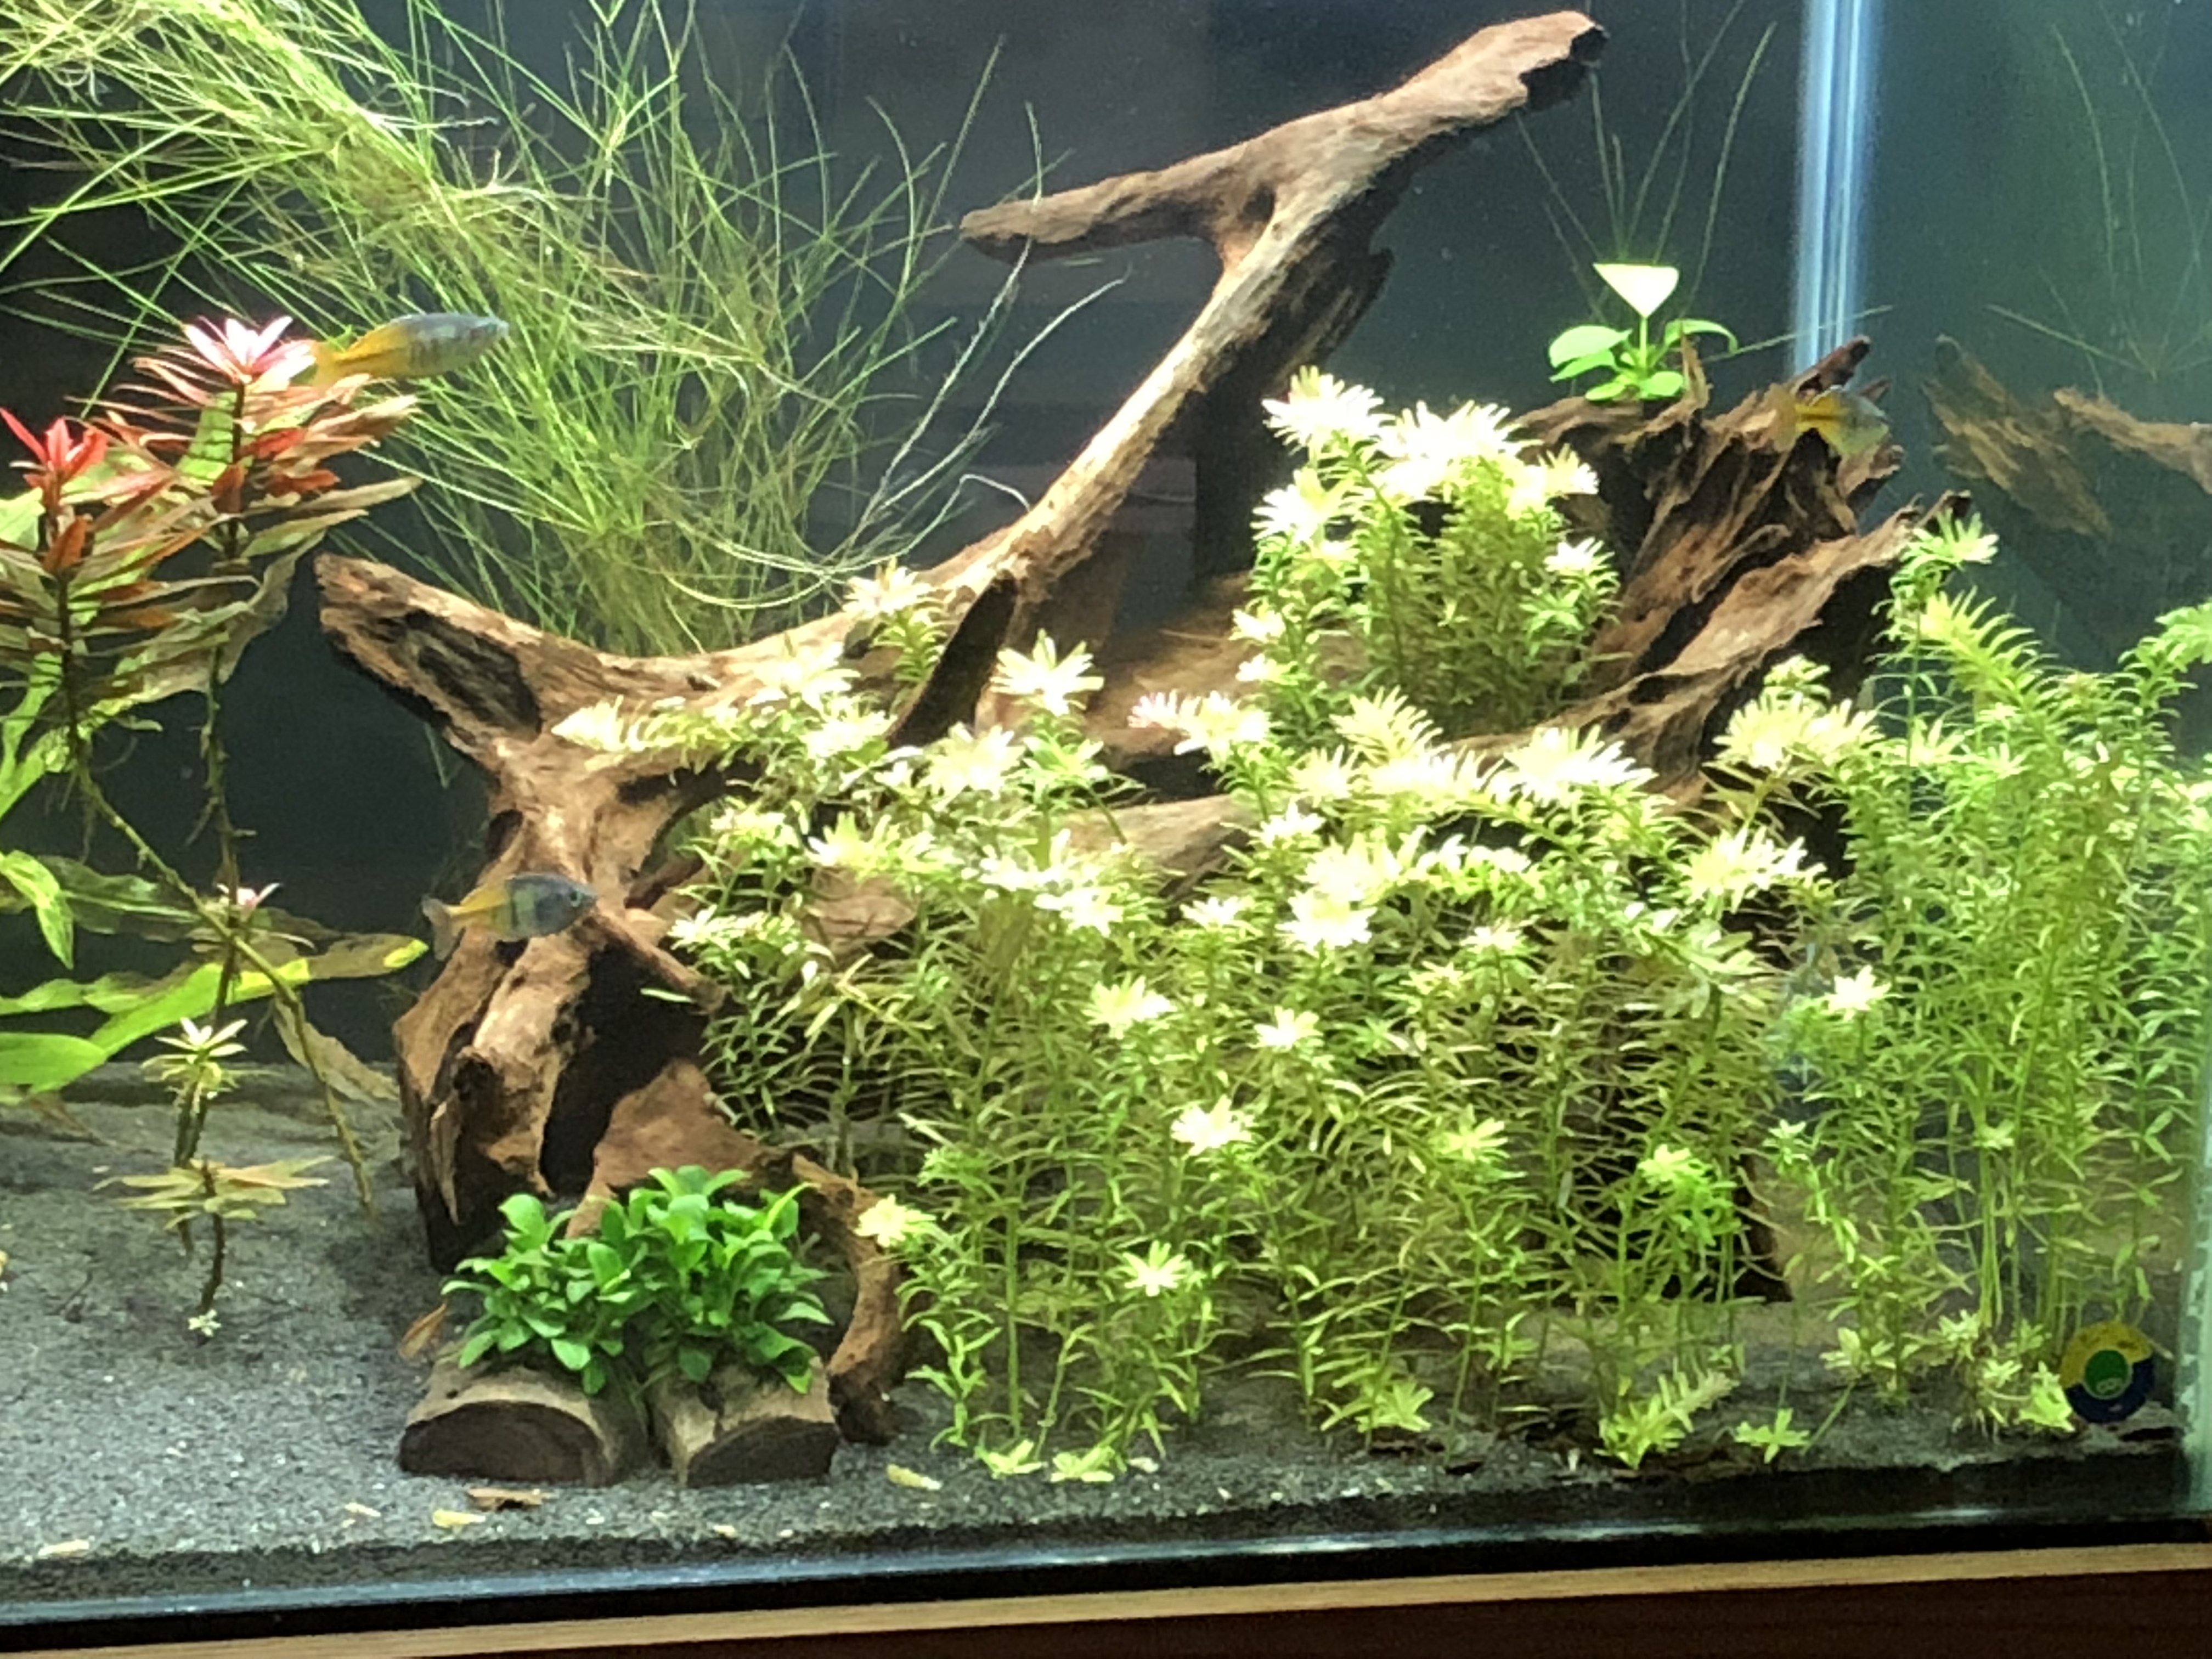
I kept some plants (mostly my crypts and swords) and gave away the rest that I had before. I also changed the sand from inert black sand to flourite black sand. I still intend to add rocks to this tank but haven’t decided how or what I want to do for that yet. The crypts are where I want them and they are growing very well. The swords took a bigger beating sitting in a 5 gallon bucket of sand and water than I’d hope but they have come back. I just recently added the rotala but I don’t know if I want them there. I just have them there to be directly under the lights to settle in. The ludwigia was in so so shape but they were given to me and they are slowly coming back as well. I just need to figure out where to put those as well. I still intend to get more but I haven’t decided what additional plants to get yet. While the display tank is getting an overhaul, the bigger change is behind the wall.
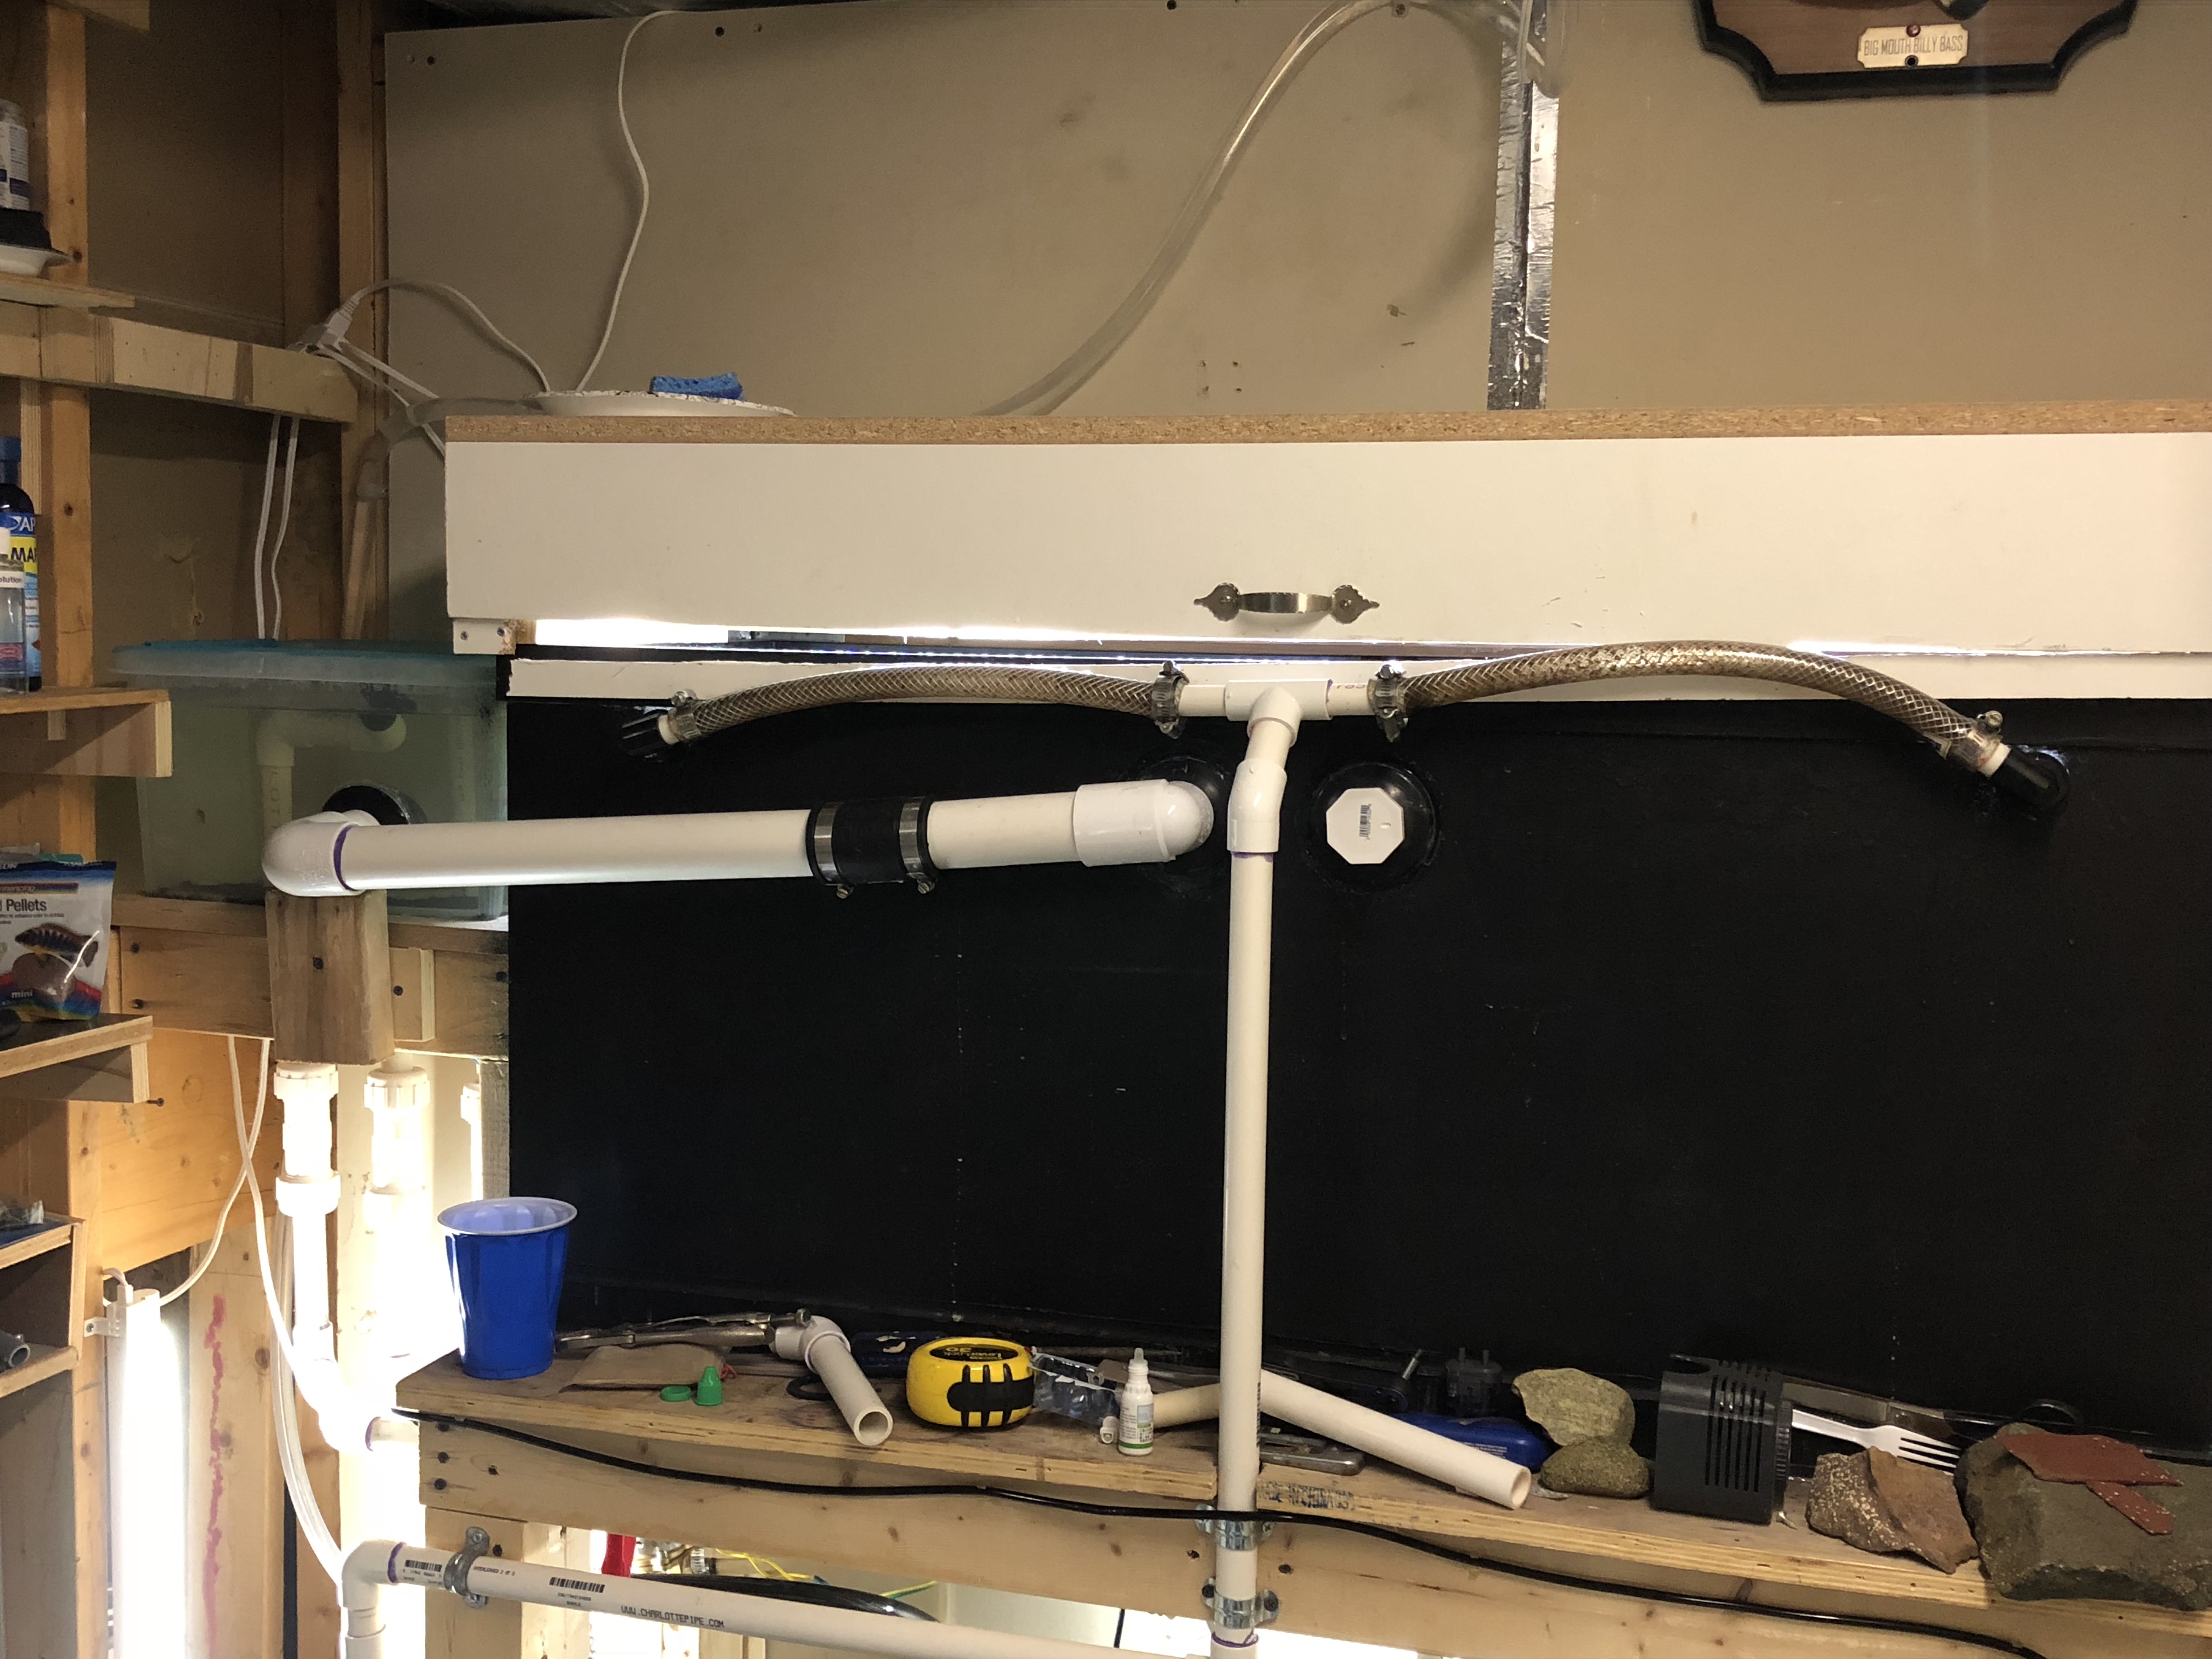
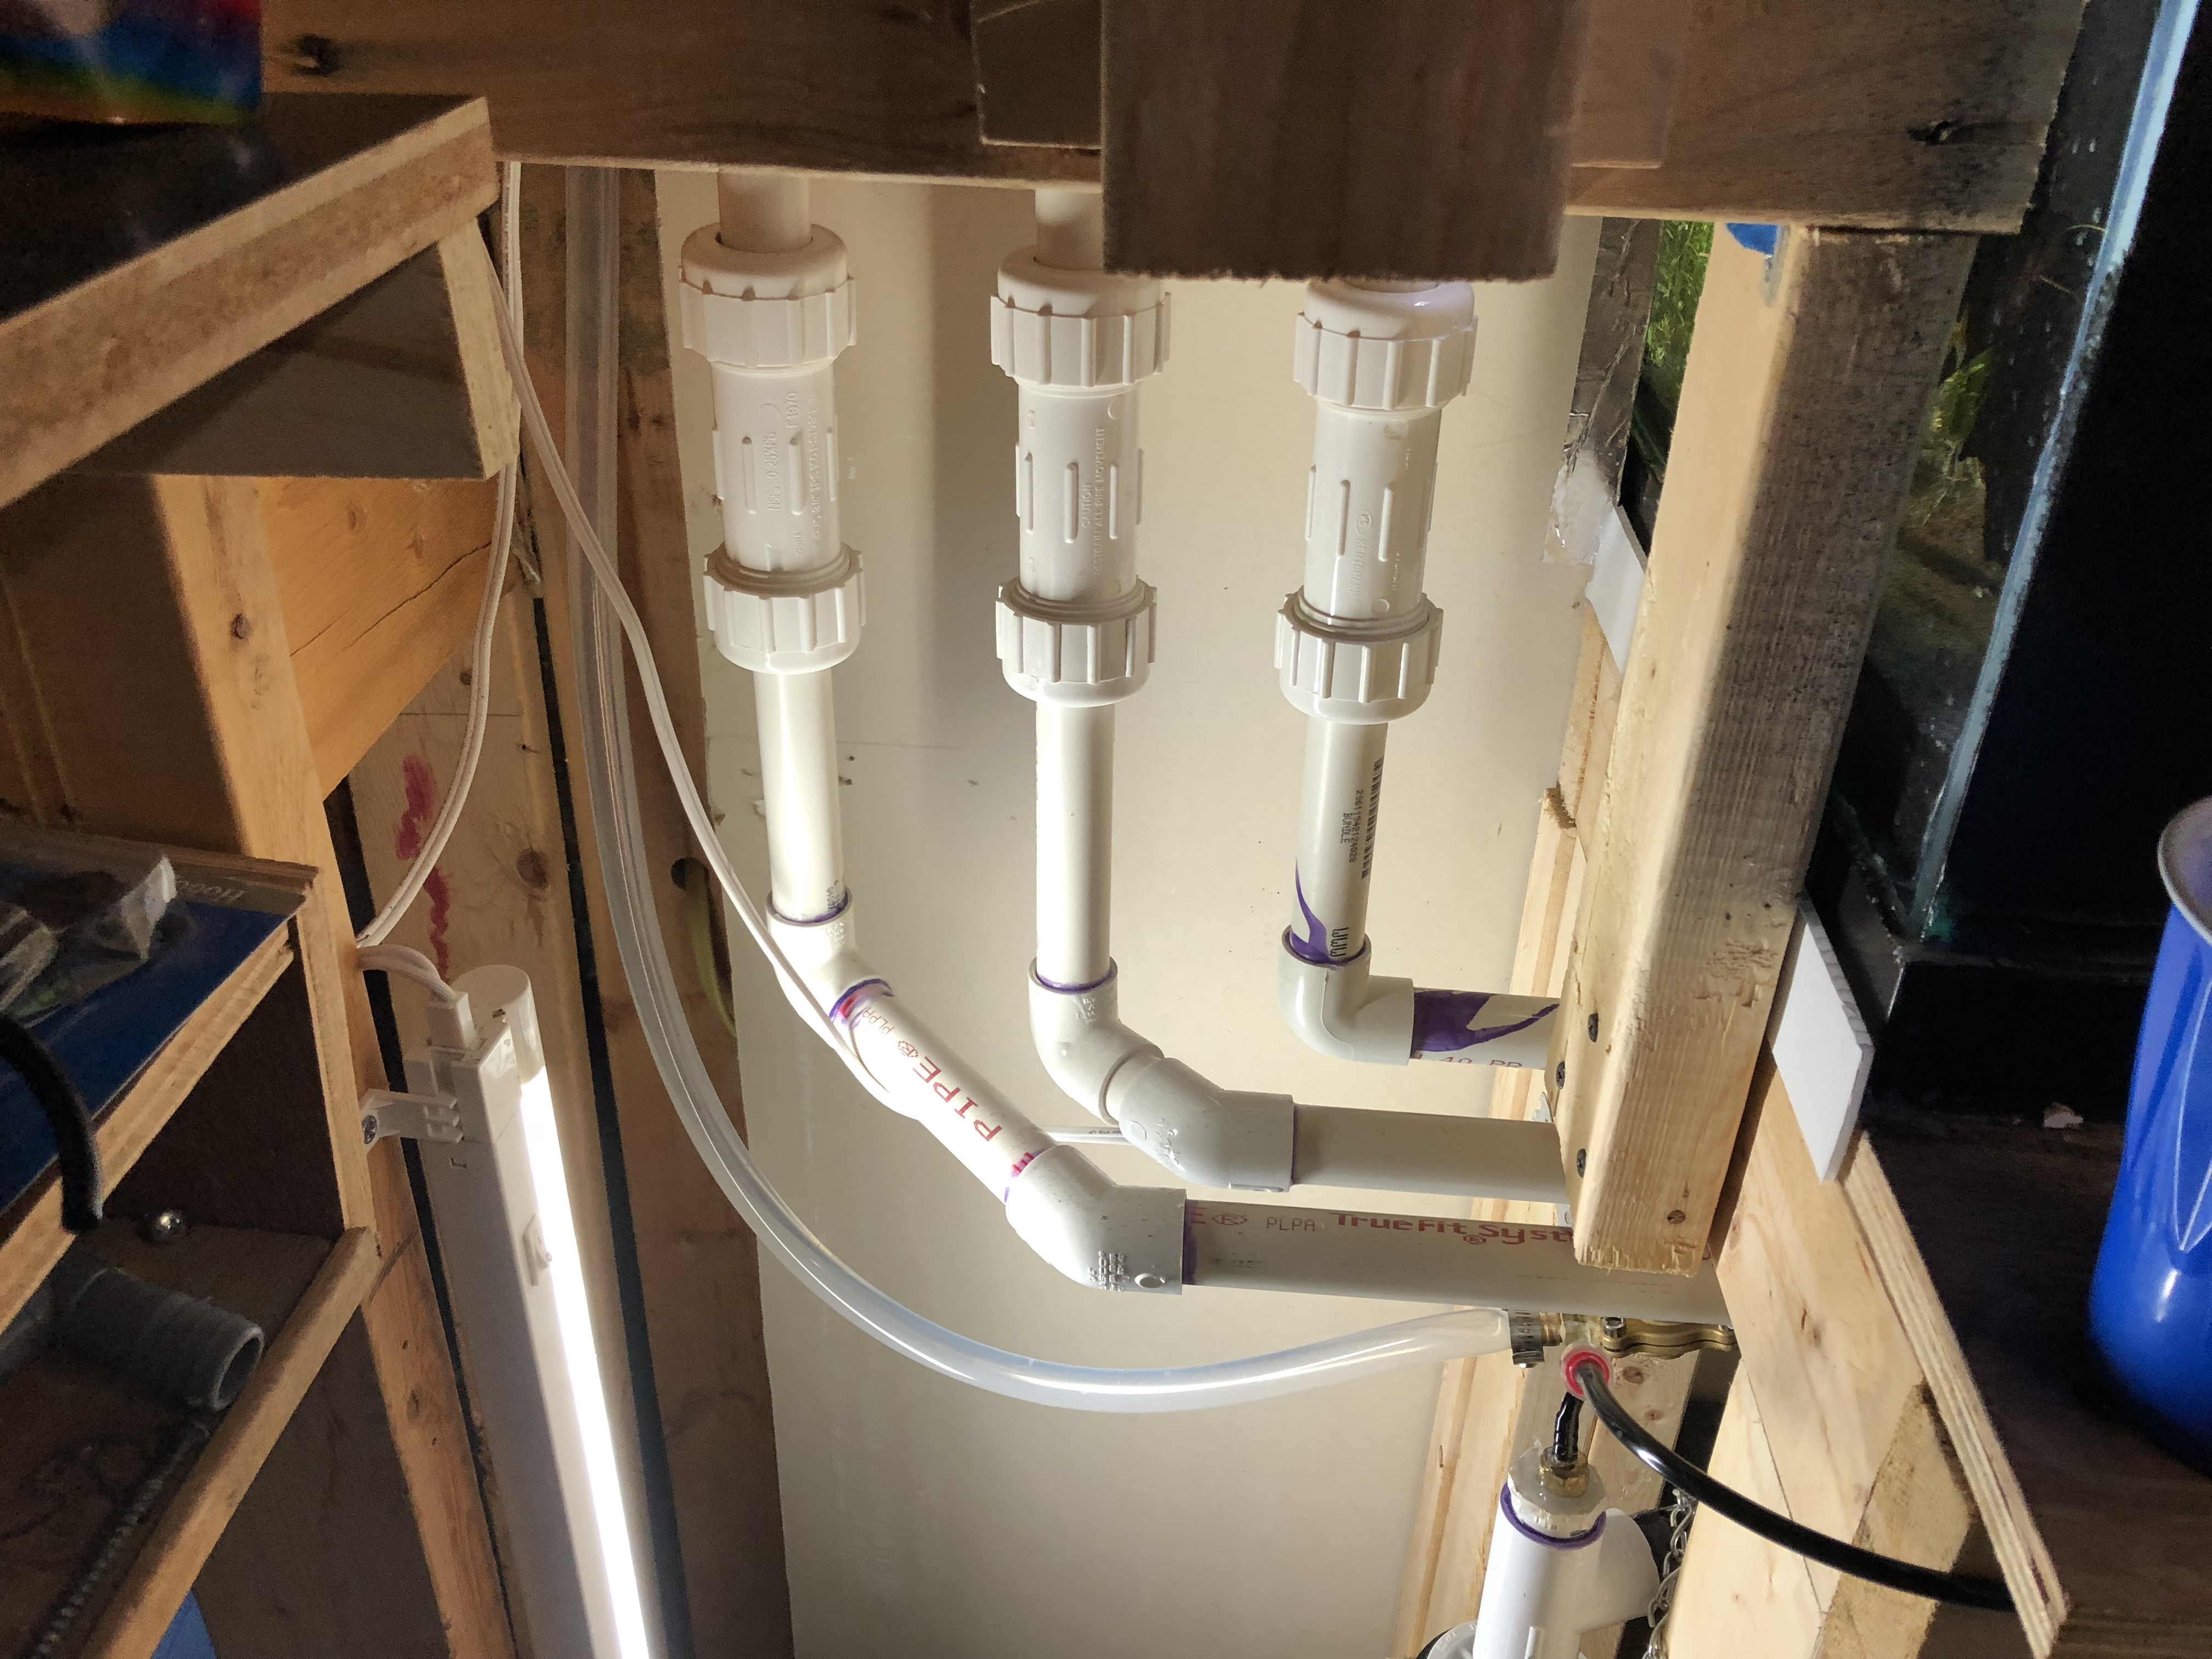
1. The overflow box/bulkheads now feed directly into a 2” PVC pipe that moves to the side of the tank where the drain lines start for the sump below. The 2nd main bulkhead is currently plugged. I just used a small plastic storage bin that I drilled holes into and used bulkheads. Like my old setup, I used 3 drain lines. The main drain line has a ball valve halfway down that is used to control the flow from the bin. The intent is to reduce the flow such that the water in the bin barely rises over the top of the tube to drain into the 2nd drain line. This gives me full flow of water in the drain line with no whooshing sounds. Since the 2nd drain line is more of a trickle, the noise in that pipe is also very very minimal. The 3rd drain line has a tube slightly taller than the 2nd line. This is my emergency line in case drain 1 or 2 becomes clogged. This is pretty much the same type of system I used in my original setup.
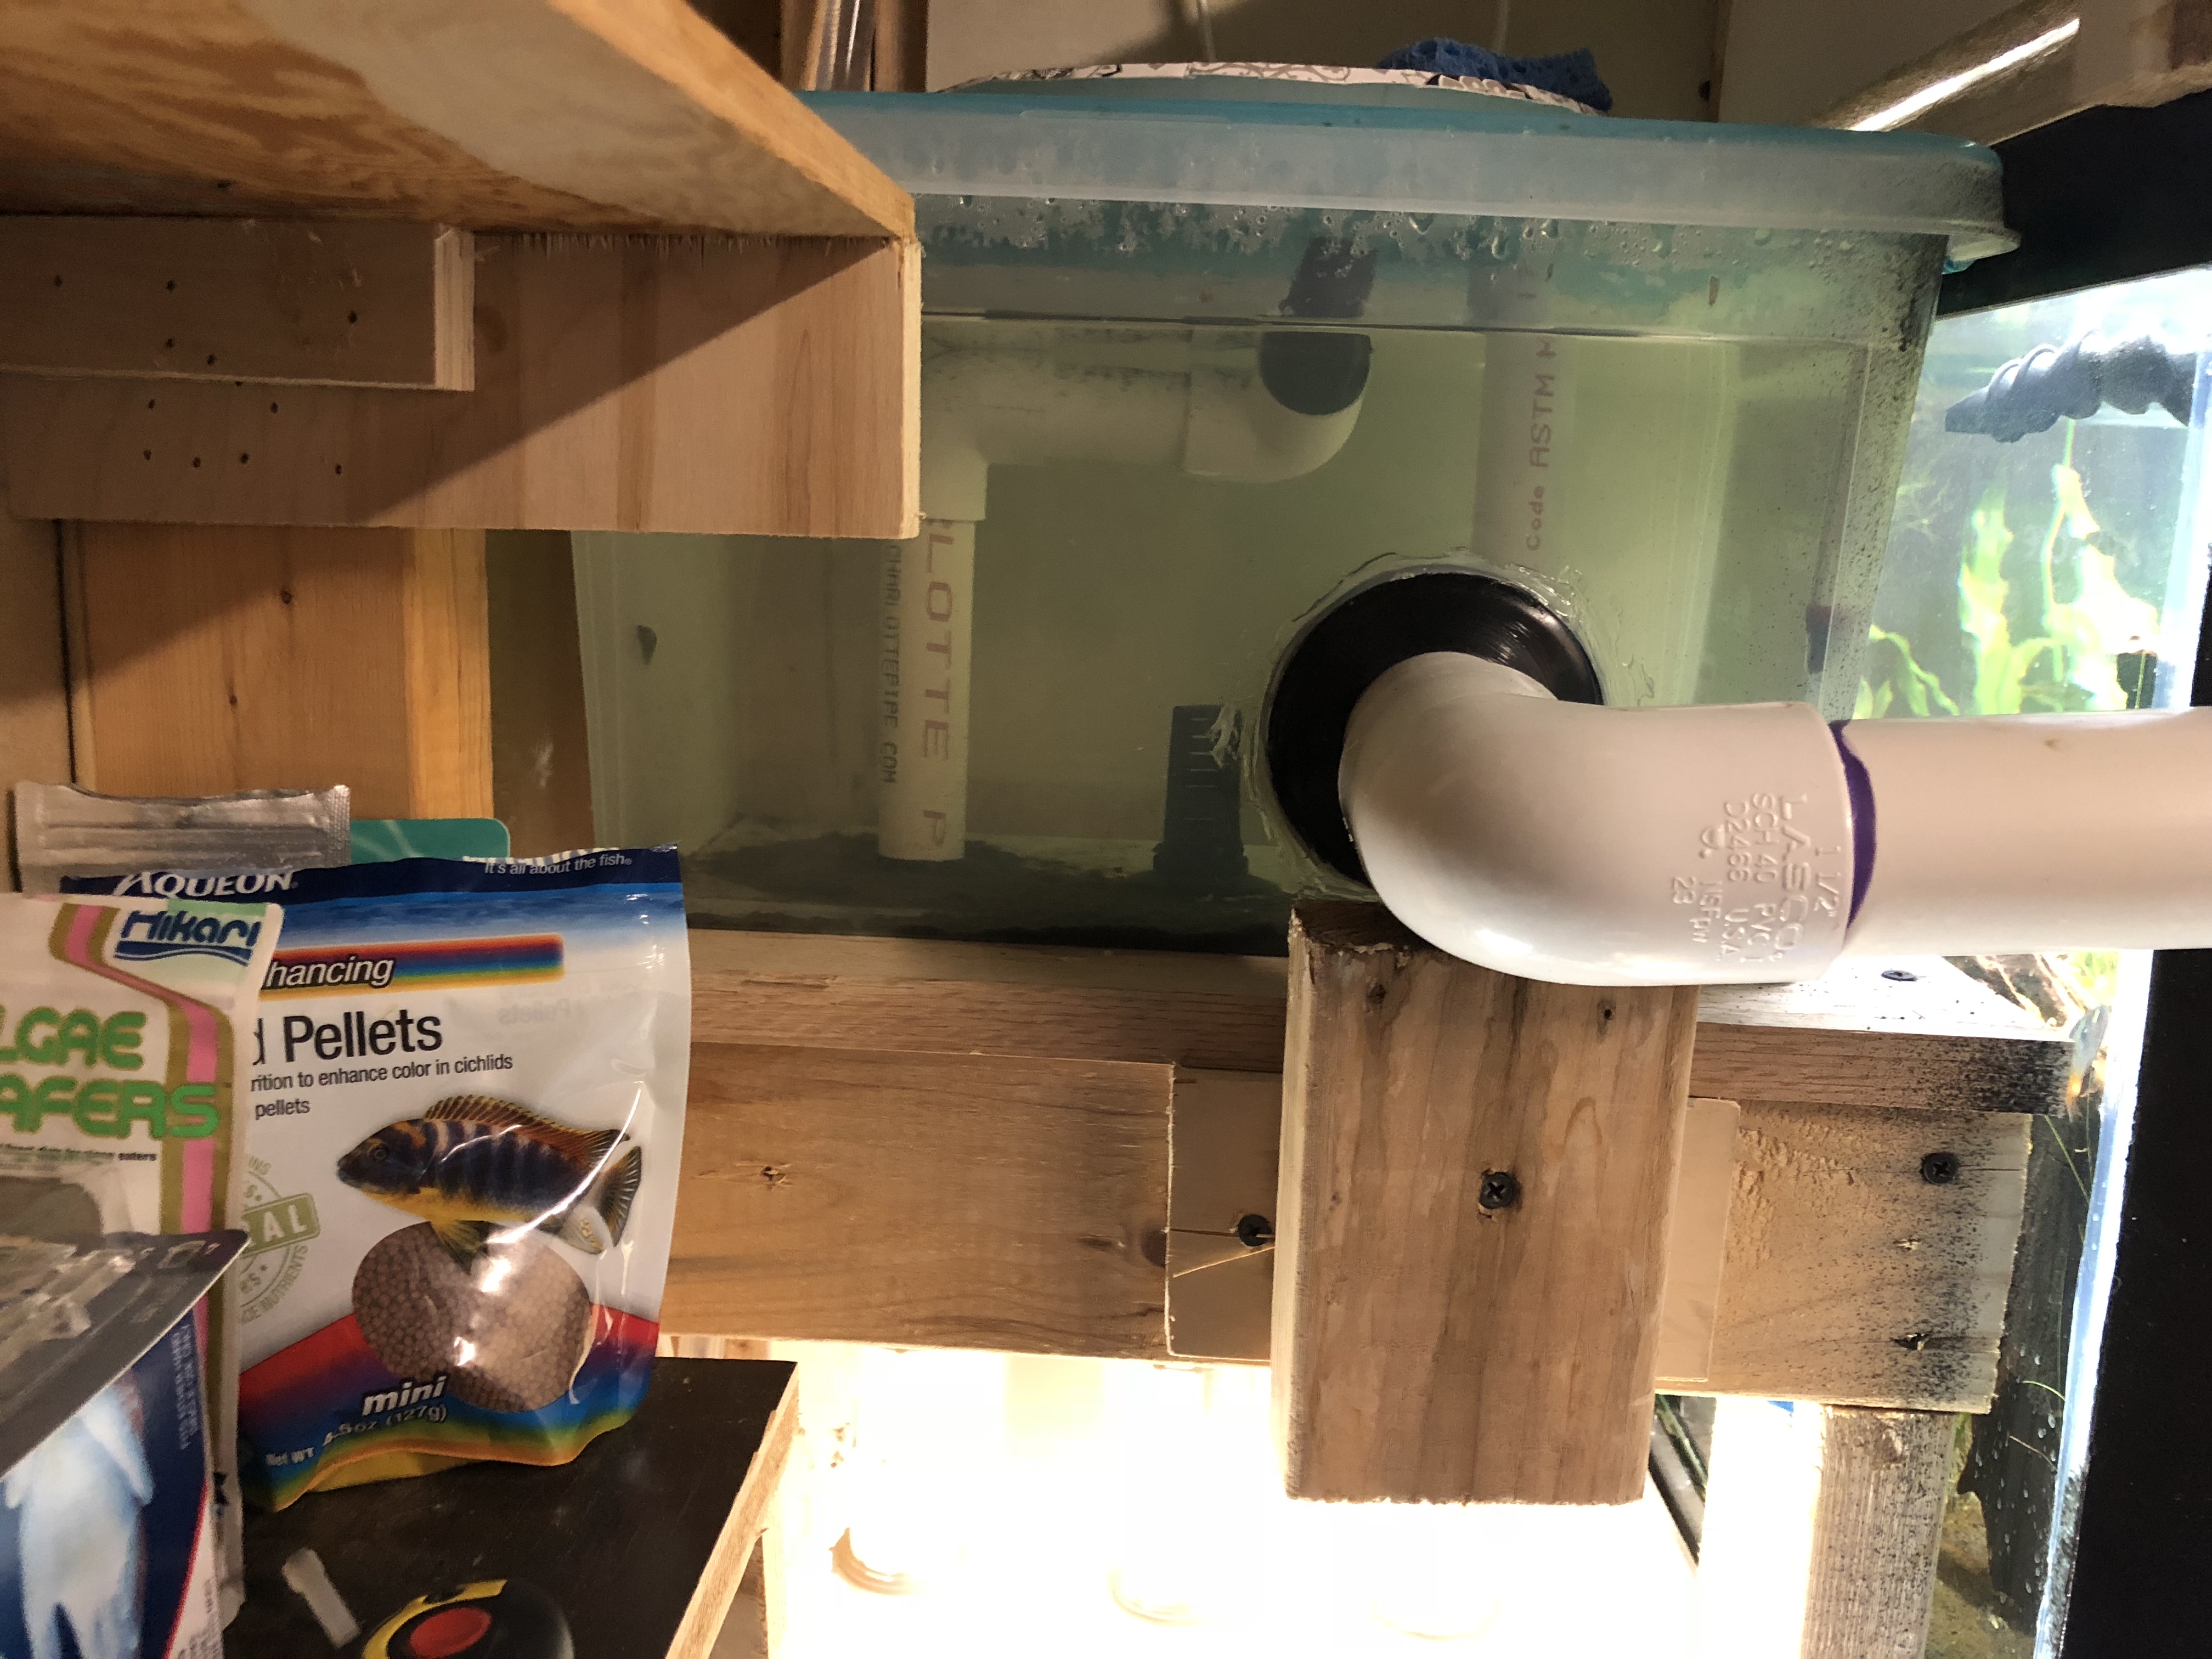
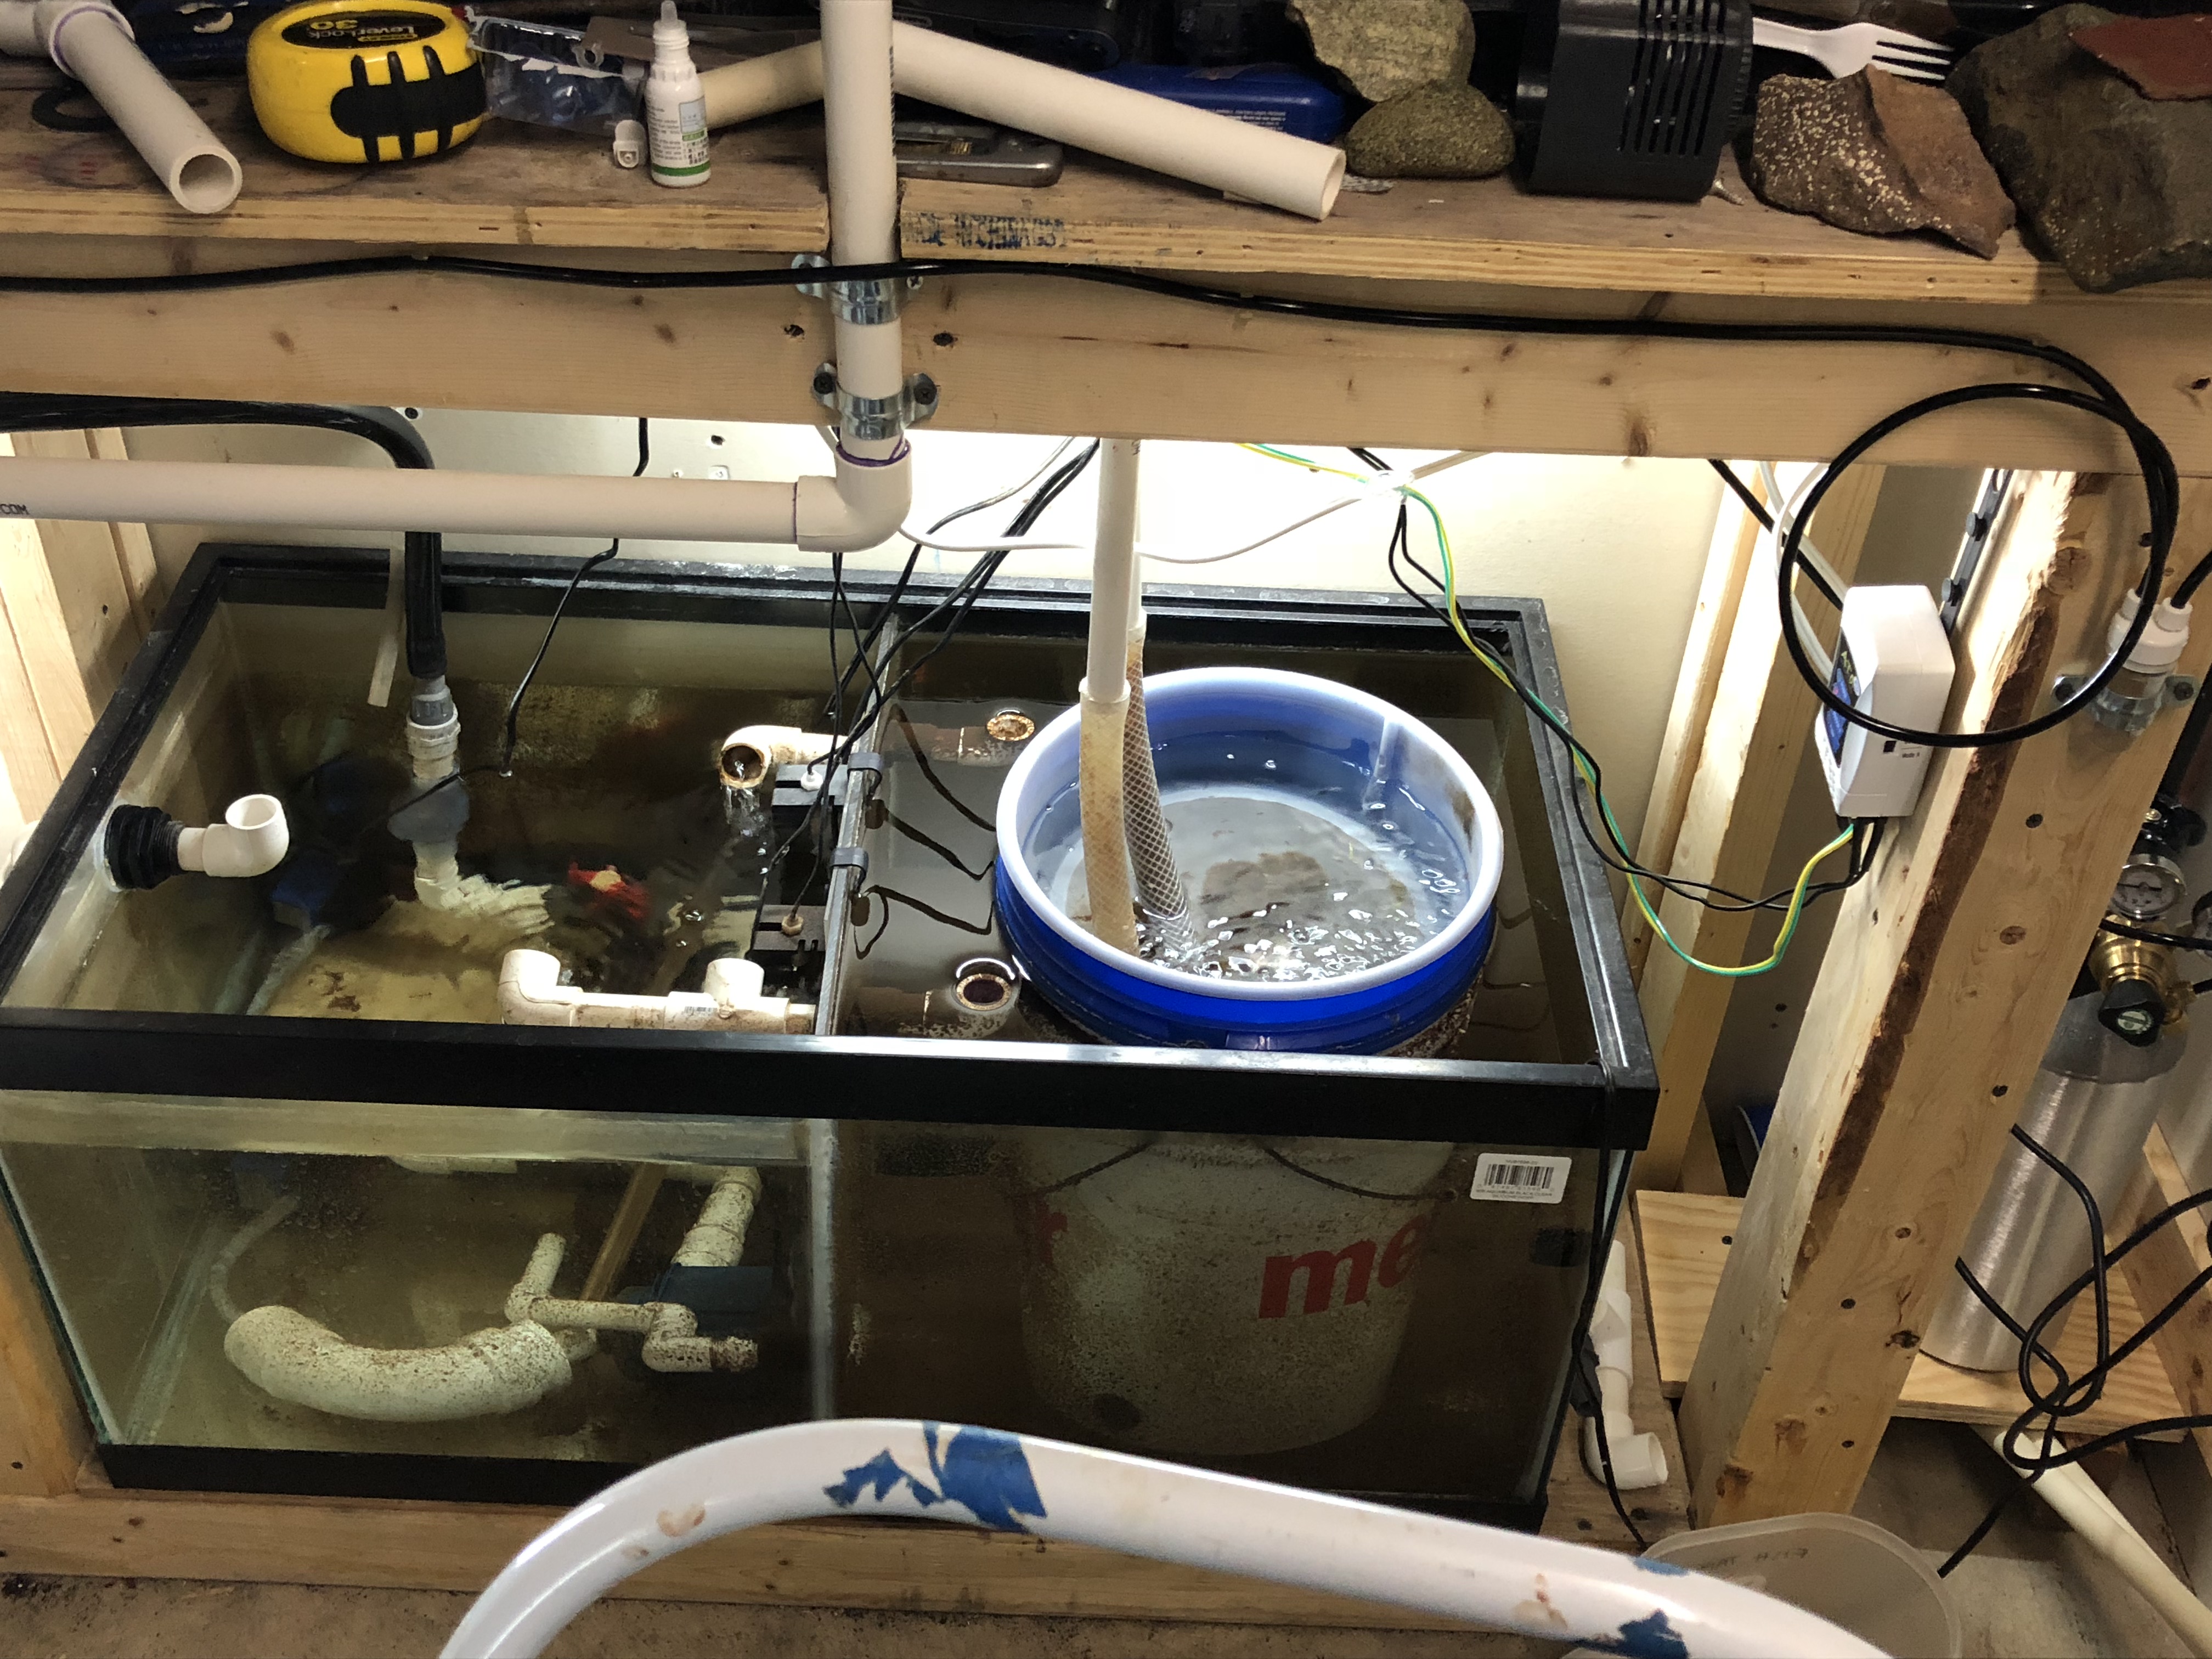
2. The 3 lines lead to my 40 gal breeder sump. I was originally going to use a 29g tank but petco ran out of them during one of their dollar per gallon sales. So instead I got a 40g breeder (cost more but that’s ok). Its divided into 2 halves. The right half has the filter and water heater. The left half contains the return pump. I could have gone without a divider, but I wanted to make sure that if the water level in the sump got low due to evaporation or any other emergency, the bio media would still stay in water. That was the only reason for the divider. In the right half, there is a 5 gallon bucket (white) with holes on the bottom sides. Inside the 5 gallon bucket is a 2-3 gallon bucket (blue). The blue bucket has a bunch of small holes drilled in the bottom and is filled with my bio media. I have a drain pipe in the middle that also allows water to flow directly through in case the small holes under the biomedia get clogged. On top of the blue bucket is a 200 micron paint strainer. This pretty much catches anything that slips through the overflow in the display tank and the bulkhead screens in the bin such as MTS snails and dead/loose plant material. I have a 100 micron paint strainer but that catches EVERYTHING and clogs up within minutes. I only put that in when I'm doing a tank cleaning. Otherwise the 200 micron strainer picks up everything but the smallest particles and those just fall through the bio filter and onto the sump floor of the right compartment where I can vacuum them up later. Because of the slightly shorter height of the 40, I had to make a “raised” cover. This is where the 29 would have been nice as the buckets would have fitted under the rim with no issue.
3. The left side is fed water from 2 bulk heads at the top of the divider. This side contains the water pump as well as a bulkhead on the side of the tank that feeds into a PVC pipe that leads to a floor drain about 10 ft from the tank set up. This is my sump overflow and it works great. The overflow pipe also has an open pipe that I use with an inline pump that I put into the tank about 1/3 from the top to do a water change. This side of the sump also has an auto top-off system. So when the water in that section lowers due to evaporation or when I do a water change, the switches will turn on the water solenoid valve and fresh water is fed into this section of the sump. I also have a pump feeding waterflow into a bent pvc pipe that contains a couple purigen bags. This isn’t on all the time, only when I see that the water doesn’t look clear.
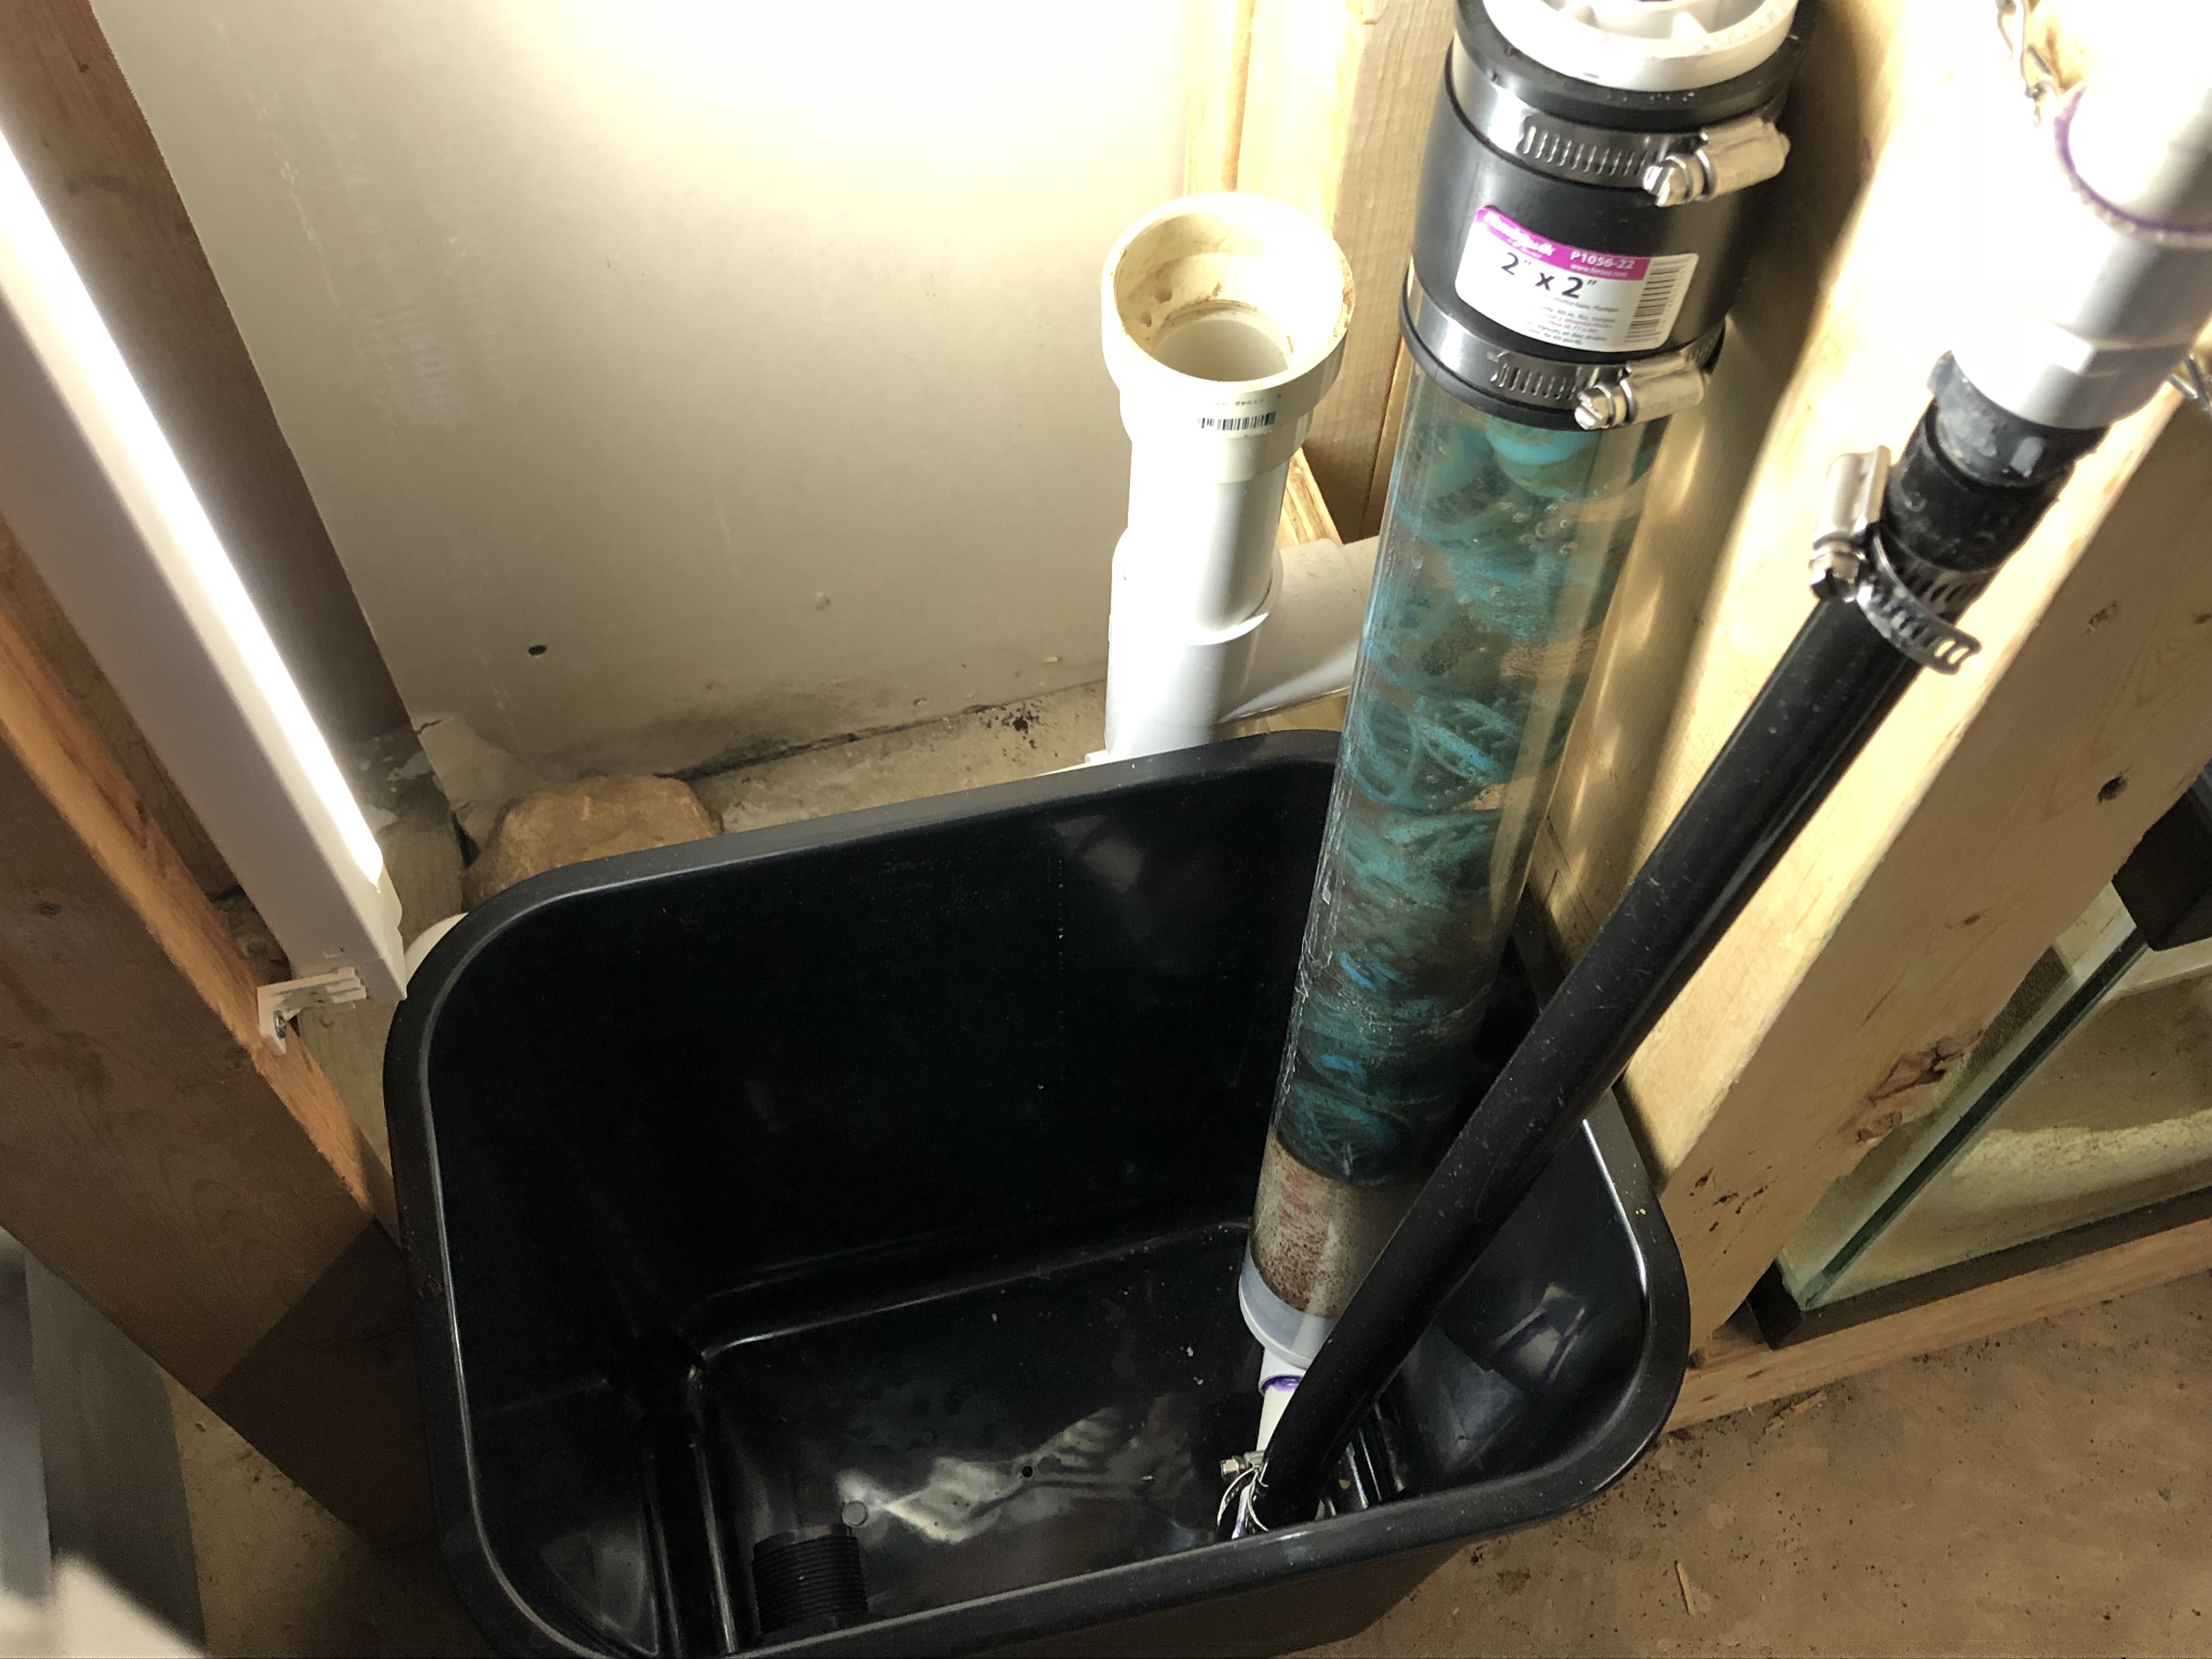
4. For the return line, I added a PVC check valve between my pump and my CO2 reactor. This is nice because if the power goes out or I turn off the pump, water from the display tank does not siphon back into the sump. Should this part fail, I still have the overflow in the sump that feeds to the floor drain anyway. I'm only hosed if for some reason the floor drain is clogged (hoping I don't have a mouse problem). The CO2 reactor is also custom built from clear plastic tubing and PVC fittings. I have a rubber connector at the top of the reactor that allows me to take the top of the reactor off to clean the reactor or the bio balls that is in the reactor. From the CO2 reactor, the return line travels up to a T section where the water is split to feed the left and right return line bulk heads in the display tank. The black modded trash can was a recent add when I had a leak sprung at the bottom of the CO2 reactor. I fixed that leak but now if the CO2 reactor leaks, this bucket will fill up to the level of the bulkhead and empty out into the pipes leading to the floor drain. I originally had a much smaller bucket with no overflow under the reactor but the leak filled that bucket up quickly and spilled water all over the floor.
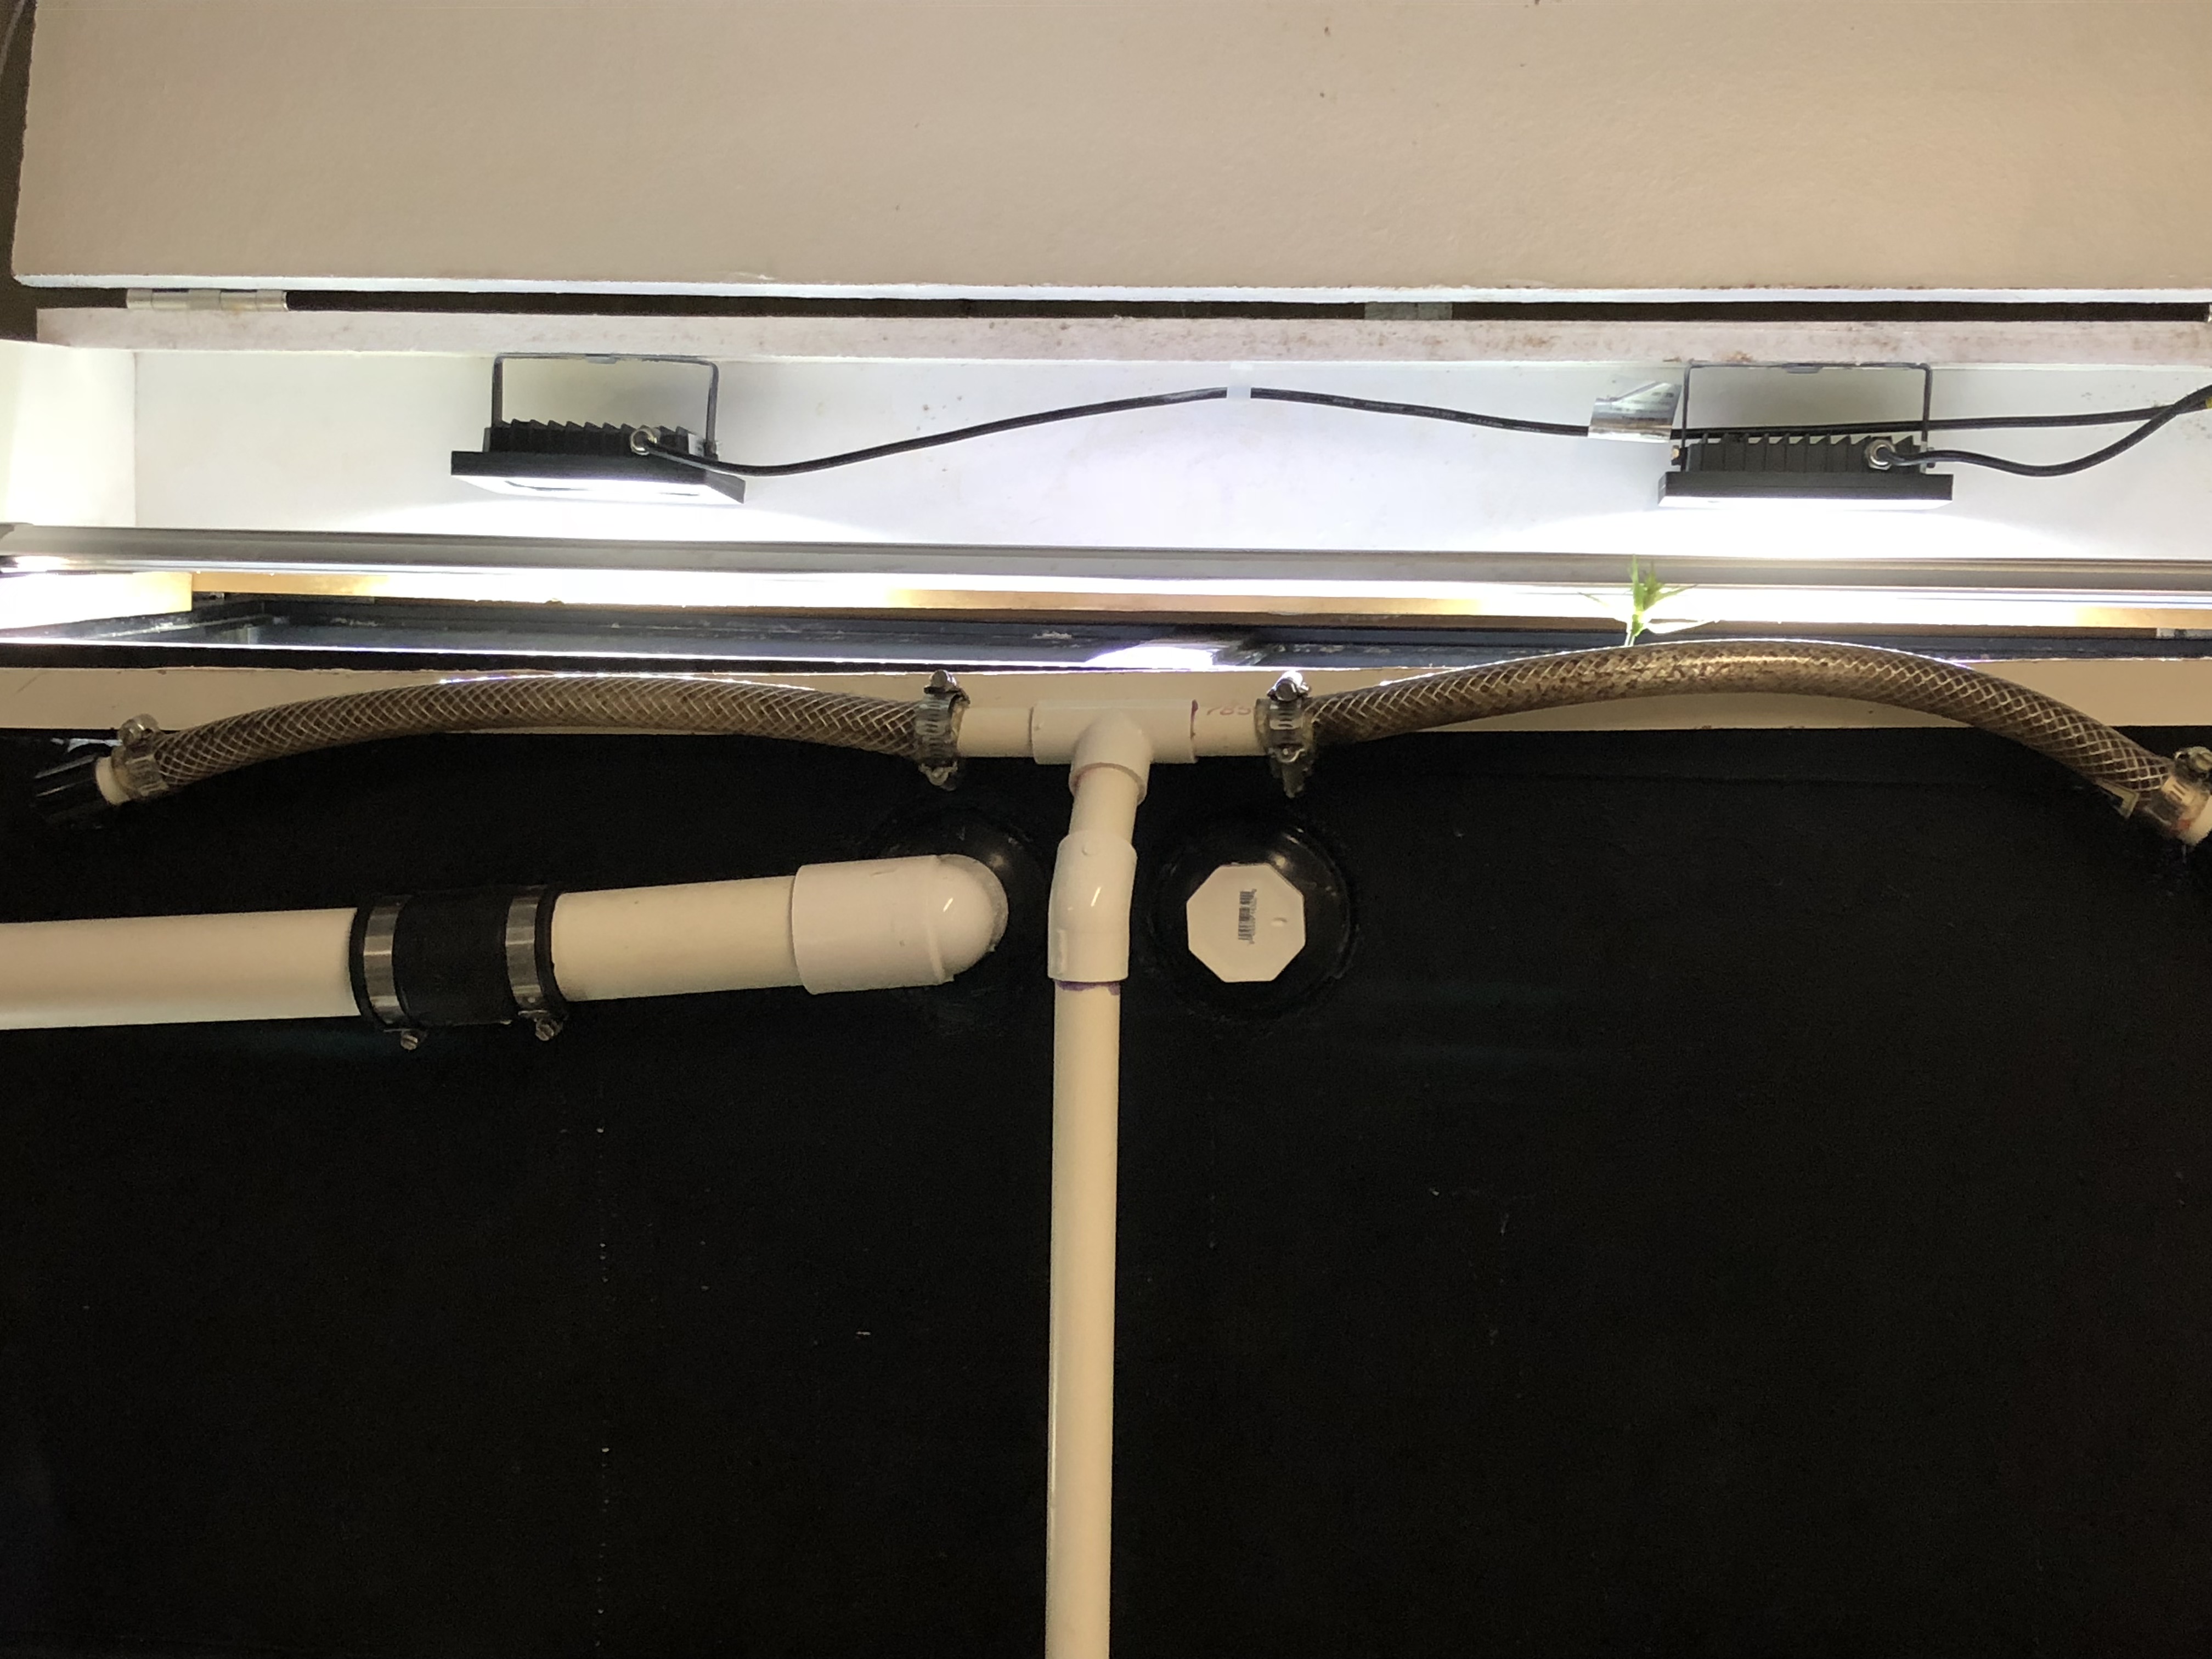
5. For the display tank top, I just built it with leftover 3/4" MDF shelf board that I had laying around. I sealed all around it with epoxy so that the MDF doesn't get moisture saturated. The cover has a pair of 15w LED spotlights that I got from Amazon and I have a Fugeray 48" Planted plus light in there as well. All the lights are controlled by a WEMO light switch that I have next to the basement main light switches. This is nice because the WEMO has a scheduled light timer but also allows me to turn on the lights from the main viewing area without having to go in to the room behind the wall to turn on the lights. I have it also setup that when not in the normal lighting period, if the lights are turned on, they turn off automatically after 15 minutes. My CO2 solenoid is controlled by a different WEMO plug. I can control both the lights and the CO2 using the WEMO app on my phone as well. Notice in the picture below that one of my swords had a stalk break the surface of the water and is now up to the light. I don't know what that is or what to do with it.
So there you have it. If anyone wants to see more detailed pictures or how i did some of this in greater detail, let me know.
Below are some close ups of the display tank.
Thanks for checking this out.
I have since made some major changes and did a display tank overhall. I rehomed all of my fish and started over. I’m now going with a rainbowfish tank. Current stock: boesemani rainbowfish, cherry barbs, otos, guppies (1 is a contstantly pregnant female), albino cories, amano shrimp, and MTS. The guppies are what my daughter wanted to see in the tank. I didn’t realize that my wife and daughter brought home a female and very pregnant guppy and I have no intention of saving the fry. If they find places to hide (which I’m sure they may), then survival of the fittest. I’d like to think that the 12 rainbowfish will go after every fry that is born before they can find a spot to hide.
I kept some plants (mostly my crypts and swords) and gave away the rest that I had before. I also changed the sand from inert black sand to flourite black sand. I still intend to add rocks to this tank but haven’t decided how or what I want to do for that yet. The crypts are where I want them and they are growing very well. The swords took a bigger beating sitting in a 5 gallon bucket of sand and water than I’d hope but they have come back. I just recently added the rotala but I don’t know if I want them there. I just have them there to be directly under the lights to settle in. The ludwigia was in so so shape but they were given to me and they are slowly coming back as well. I just need to figure out where to put those as well. I still intend to get more but I haven’t decided what additional plants to get yet. While the display tank is getting an overhaul, the bigger change is behind the wall.
1. The overflow box/bulkheads now feed directly into a 2” PVC pipe that moves to the side of the tank where the drain lines start for the sump below. The 2nd main bulkhead is currently plugged. I just used a small plastic storage bin that I drilled holes into and used bulkheads. Like my old setup, I used 3 drain lines. The main drain line has a ball valve halfway down that is used to control the flow from the bin. The intent is to reduce the flow such that the water in the bin barely rises over the top of the tube to drain into the 2nd drain line. This gives me full flow of water in the drain line with no whooshing sounds. Since the 2nd drain line is more of a trickle, the noise in that pipe is also very very minimal. The 3rd drain line has a tube slightly taller than the 2nd line. This is my emergency line in case drain 1 or 2 becomes clogged. This is pretty much the same type of system I used in my original setup.
2. The 3 lines lead to my 40 gal breeder sump. I was originally going to use a 29g tank but petco ran out of them during one of their dollar per gallon sales. So instead I got a 40g breeder (cost more but that’s ok). Its divided into 2 halves. The right half has the filter and water heater. The left half contains the return pump. I could have gone without a divider, but I wanted to make sure that if the water level in the sump got low due to evaporation or any other emergency, the bio media would still stay in water. That was the only reason for the divider. In the right half, there is a 5 gallon bucket (white) with holes on the bottom sides. Inside the 5 gallon bucket is a 2-3 gallon bucket (blue). The blue bucket has a bunch of small holes drilled in the bottom and is filled with my bio media. I have a drain pipe in the middle that also allows water to flow directly through in case the small holes under the biomedia get clogged. On top of the blue bucket is a 200 micron paint strainer. This pretty much catches anything that slips through the overflow in the display tank and the bulkhead screens in the bin such as MTS snails and dead/loose plant material. I have a 100 micron paint strainer but that catches EVERYTHING and clogs up within minutes. I only put that in when I'm doing a tank cleaning. Otherwise the 200 micron strainer picks up everything but the smallest particles and those just fall through the bio filter and onto the sump floor of the right compartment where I can vacuum them up later. Because of the slightly shorter height of the 40, I had to make a “raised” cover. This is where the 29 would have been nice as the buckets would have fitted under the rim with no issue.
3. The left side is fed water from 2 bulk heads at the top of the divider. This side contains the water pump as well as a bulkhead on the side of the tank that feeds into a PVC pipe that leads to a floor drain about 10 ft from the tank set up. This is my sump overflow and it works great. The overflow pipe also has an open pipe that I use with an inline pump that I put into the tank about 1/3 from the top to do a water change. This side of the sump also has an auto top-off system. So when the water in that section lowers due to evaporation or when I do a water change, the switches will turn on the water solenoid valve and fresh water is fed into this section of the sump. I also have a pump feeding waterflow into a bent pvc pipe that contains a couple purigen bags. This isn’t on all the time, only when I see that the water doesn’t look clear.
4. For the return line, I added a PVC check valve between my pump and my CO2 reactor. This is nice because if the power goes out or I turn off the pump, water from the display tank does not siphon back into the sump. Should this part fail, I still have the overflow in the sump that feeds to the floor drain anyway. I'm only hosed if for some reason the floor drain is clogged (hoping I don't have a mouse problem). The CO2 reactor is also custom built from clear plastic tubing and PVC fittings. I have a rubber connector at the top of the reactor that allows me to take the top of the reactor off to clean the reactor or the bio balls that is in the reactor. From the CO2 reactor, the return line travels up to a T section where the water is split to feed the left and right return line bulk heads in the display tank. The black modded trash can was a recent add when I had a leak sprung at the bottom of the CO2 reactor. I fixed that leak but now if the CO2 reactor leaks, this bucket will fill up to the level of the bulkhead and empty out into the pipes leading to the floor drain. I originally had a much smaller bucket with no overflow under the reactor but the leak filled that bucket up quickly and spilled water all over the floor.
5. For the display tank top, I just built it with leftover 3/4" MDF shelf board that I had laying around. I sealed all around it with epoxy so that the MDF doesn't get moisture saturated. The cover has a pair of 15w LED spotlights that I got from Amazon and I have a Fugeray 48" Planted plus light in there as well. All the lights are controlled by a WEMO light switch that I have next to the basement main light switches. This is nice because the WEMO has a scheduled light timer but also allows me to turn on the lights from the main viewing area without having to go in to the room behind the wall to turn on the lights. I have it also setup that when not in the normal lighting period, if the lights are turned on, they turn off automatically after 15 minutes. My CO2 solenoid is controlled by a different WEMO plug. I can control both the lights and the CO2 using the WEMO app on my phone as well. Notice in the picture below that one of my swords had a stalk break the surface of the water and is now up to the light. I don't know what that is or what to do with it.
So there you have it. If anyone wants to see more detailed pictures or how i did some of this in greater detail, let me know.
Below are some close ups of the display tank.
Thanks for checking this out.