Custom Built 95 gallon tank.

The friendliest place on the web for anyone with an interest in aquariums or fish keeping!
If you have answers, please help by responding to the unanswered posts.

maj3stic

Aquarium Advice Apprentice
Joined
Jul 26, 2011
Messages
15
Building a custom 95 gallon plexiglas tank, 36" tall

I am new here, new to aquariums and new to keeping fish that I don't eat. With that said, I work with a plastic shop and have access to some scrap 1" thick acrylic.
I am thinking of building a 36"H x 36"L x 20"D tank (internal dimensions would be 36"H x 34" L x 18"D). I am pretty sure the 1" acrylic will be able to support the height and I will be using a 1/2" solid acrylic top to add a bit more support on top. I'll be using Weld On #4 with a 25 gauge needle. All my cuts are being made with a waterjet cutter, so I hopefully won’t have to worry about crazing due to it never heating up.

So here are my questions:
Anything I should be careful about?

For the top, I was thinking of doing two 13 x 13" access holes, but maybe it would be better to do one 26 x 26 instead?

When welding the Plexiglas together, I believe I will have to do the pin head procedure vs capillary due to the thickness. I have read that capillary is only recommended up to 1/2" thick. Any truth? Anyone with a better idea then using pins to raise the acrylic?

Whats a good way for plumbing? I am unsure if I should build an overflow box inside or out, how do I determined where to place it, etc? I am really lost on this plumbing thing, and it seems there’s a million ways to do it. Just wondering what has worked the best for most. Do I even need a overflow box? Or just have the intake close to the top and siphon down to a sump box?

Will a or multiple 96 watt t5's be able to penetrate 3 feet of water? Or will I need to use metal halide? I would like to go to LED but seems way overprice for the amount I would need to penetrate the depth of the water.

Thanks for any help you guys can provide.
 
Acrylic...

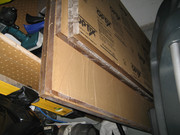
Still no replies? Here is a picture of the rough cut acrylic before it goes to the waterjet cutting place.
IMG_1544.jpg
 
Finally got my plexi cut.

Duplicate post..........
 
Plexiglass Cut Finally

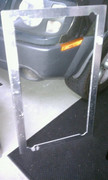
So my original post of this was messed up and now has disappeared. So here it is again... 36" tall x 36" long x 20" deep. I am using 1" thick acrylic for all the sides and bottom. The top will be covered with half inch for added support. All the cuts were performed with a waterjet and will be lightly sanded with 120 grit before using weld on 4. I had my buddy also cut some aluminum scraps for an inner and outer jig to help hold these heavy peaces of acrylic in place.


image hosting
 
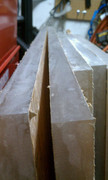
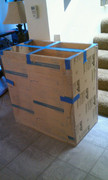
Test fitting the cuts...

So I decided to test fit the cuts of acrylic today. They are pretty much dead on.... Here is what the aquarium will look like

adult image hosting
 
I work for a medical device company and use acrylic to make storage tanks. The adhesive I use I got from McMaster-Carr. I wish I could give you the name of it, but I can't remember. The bond dries quickly and if you do it right, you won't even see it. The bond chemically fuses the plastic so it super strong. In about 24-48 hours the plexiglass will break before the bond does. There may be some minor leaks, so you may want to use some aquarium silcone on the seems just to be safe.
I'm super jealous of you! My company NEVER has scraps that big! Lucky!
Well it was not quite scrap as it was more an accidental order and taking up space. Doubt anyone could tell from the photos, but the sides are actually just shy of 1" they are 15/16" or some metric size... Though we due have tons of 3/4" and smaller sizes, even some metric sizes. I will be collecting some of those for a sump here soon.
 
Here is a video series on youtube that you can watch and may be helpful to you. He made a pretty nice tank and goes into how to glue, cut, scrape and flame polish the tank, may be helpful to ya!


uarujoey's Channel - YouTube

Looking forward to watch this post! Keep us updated!
 
I finally had some free time, so me and my boy put the tank together. Here it is, now I need to just let it cure for the week.


Well I must have done something right, no leaks. Also on another note, there was no flexing either, well at least if there was it was under 1/16" of an inch. I still might go ahead and put a "euro trim" on it.... Other than that, I cleaned up the edges a bit and started sanding. I plan on sanding the edges with 220 up to 3000, then using plastic rouge to bring out the clarity, the go back with Novus 2 and maybe 3 to do the finishing touches. Most likely when I do Novus 2, I will do the entire aquarium with it to give it a finishing touch shine. Still trying to decide on how to build my stand. I kinda like the idea of doing it in aluminum, just have not committed to it yet.


gif upload
 
Any updates on this?

Nothing new...
Just planning...
I've decided to stick with freshwater for the moment. With that being said, I wont be setting up a sump, but instead will be using an inline pump, looking at the ocean clear canisters,2x pentair inline heater housings, 1 inline uv sterilizer (have not decided on brand), and littler giant or iwaki pump. Everything will be plumped with bulkhead connectors. I am also thinking of building the stand at 36" and recess the tank with a 1" lip. So the tank's top height would be 61"

As for the long weekend, I am going to be working on polishing the edges and removing the large scratches. I might even get started on the stand... All depends on how fast I find and repair the vacuum leak on my wifes Xterra.
 
So I finally got around to working a bit more on my build. I framed in the stand using 2x4's. All my joints were pocket drilled front and back and glued. Tank is sitting outside on the stand with water over the weekend. Very stable, even at its height, though I may still come up with some sort of anchor to the wall. Here are some crappy photos what I got.


upload images
 
Back
Top Bottom