DIY 50G Tank Restoration & DIY Stand

The friendliest place on the web for anyone with an interest in aquariums or fish keeping!
If you have answers, please help by responding to the unanswered posts.
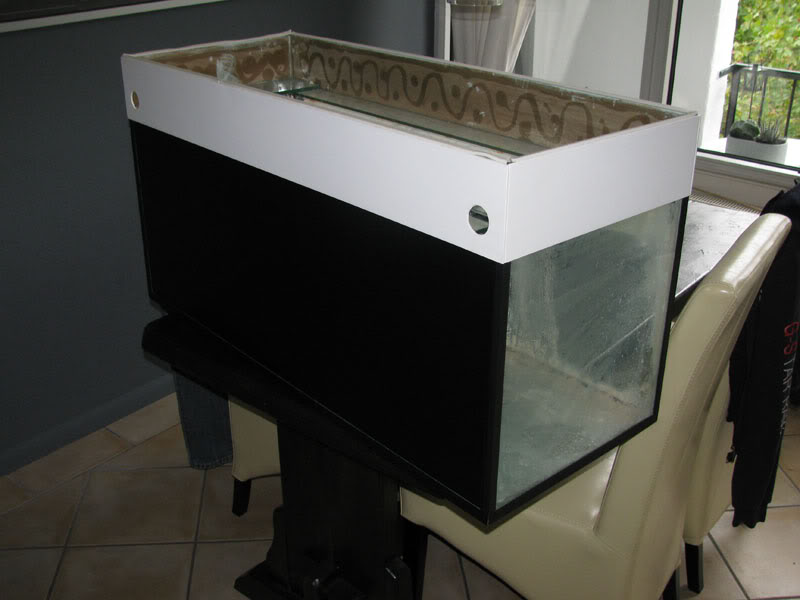
The styrofoam will compress and eventually be touching the glass. Not a good idea IMO....Better to replace the piece of wood on top of the stand with one that is flat, or a piece of slate....etc..

hmm
i read a bit on this on the web after your post

Doesnt seem like a good idea after all..
HOWEVER, my stand is not flat in the middle and something MUST be done..
Replacing the top is not an option

How about this:
Redo the styrofoam base but differently
Stand-->Styrofoam-->wooden plate-->Tank
If i get this right, the styrofoam would compress to level out stand imperfections. The Wood would prevent anything from touching the bottom of the tank, hence reducing risks.

How does that sound? Please let me know about any flaws in the design
The good thing is that using this method i can cover the wood and styrofoam as above with the black cloth. Replacing the panel on the stand would mean: New profiles, more wood, more sanding, more filling, more painting etc etc..Now i love DIY but id rather work it out in another way if i can:)
 
Update!

After realizing that styrofoam by itself would compress and cause problems with the bottom of the tank, i redesigned my "dressinator :D"
I bought 12mm thick hardwood and placed it on top of the styrofoam. Then i covered them with the black cloth.

I also wired the lights and all electrics in the closet and aquarium

I also did a leak testing and so far everything seem to be fine

Black background on the back of the aquarium!
img_1039058_0_40856e9e70b7f0cbdedebe33d38c25f5.jpg


Quick testing of the lights
img_1039058_1_1cb49f42c0ea55d7a1e38c59bbcf8594.jpg

img_1039058_2_daf8642584c8a19c8414cce56a58f3cb.jpg


Reflectors
I would gladly recommend those to anyone. They seem to be doing an amazing job
img_1039058_3_49ff9f93bfa144944e8d2071835297b9.jpg

img_1039058_4_abc8f4d83e39e17ed2bdf326cad5ad9d.jpg


The black background didnt look that good while i was looking through the aquarium. After careful and LONG thinking i decided on the type and color of an internal background

BTN Slimline
img_1039058_5_3c411123d5fbc33ce76ba45d6cd2fc1c.jpg


Cut into size and glued
img_1039058_6_7b61bb711235a4598e0574549c128a13.jpg


More updates soon!
I took some pictures with a nice large piece of driftwood inside so that i can brainstorm on how i will decorate it (during the weekend)
 
we have progress

DIY water jets!
img_1040485_0_b69b4500cb2dfb5e00f3f7dc26578476.jpg


DIY Jet system - Pump A
the lovely thing about this is that it is fully adjustable. The jets can be rotated, raised, etc...Very easy to adjust surface agitation and water movement in the tank
img_1040485_1_5ede900a4b12066cc570f9e95010138f.jpg


Outlet pump B (CO2) - eheim spray bar pointed downwards
img_1040485_2_f444b064195d39d8bf5b2ad1374f9b10.jpg


Picture of the piece of wood!
img_1040485_3_fd17c2976214202f67a7f1f5281376fc.jpg


Making the partitions. Dont mind the glasses! I was thirsty
luckily i was home alone so no1 else got to see that i was using the miss's glasses for my own purposes
img_1040485_4_d579825078c9638b421d4d79526b40b1.jpg


Sand and dennerle deponitmix
img_1040485_5_52adcf3fada19abe0e78918d757267e3.jpg


Finished partitions (ignore the sand on the glass)
Added Dennerle Crystal Diamond Black gravel on top of the deponitmix
img_1040485_6_bf62749556718a2b3635bf7d5dd7cf15.jpg


by the way i will put some stones between the sand/gravel border so that it doesnt get mixed up easily
Tomorrow its planting time!
 
Man, that tank is looking SICK!! I really like the water system! I just got a 55, and I might buy some extended tubing and do something similar.
 
Man, that tank is looking SICK!! I really like the water system! I just got a 55, and I might buy some extended tubing and do something similar.


thanks!

here is some info that you might find helpful;)

-first of all if you make similar jets, know that water will go out at much higher pressure. At first i had one jet but it could shoot water across the whole room. Thats why i made a second one and combined them. by the way, the pressure will also depend on how flat you decide to make those jets

-i used eheim plastic tube (same material as those spray bars)
put it in some boiling water and it will get as soft as an ice cream:cool:
 
Yet another update but one that is worth the wait;D

150euros and a couple of hours of planting =


by the way this is my first shot at a planted tank so be easy on me:p

Front view
img_1040762_0_676e15bd15971a6eed5d816d9756fc6e.jpg


Left view
img_1040762_1_59a499989b77f6d7721318c0feed3d22.jpg


Right view
img_1040762_2_8f437ecf175a7d8e3e11d56d5e4fadb2.jpg


Left partition
img_1040762_3_886add60338bb54e20a583ddf6c3b1a8.jpg


Right partition
img_1040762_4_b65457d927c42a75a7ffdd9bd4e356dc.jpg


Jets in action
img_1040762_5_d40ef940c63c60f421ecf715574d55d3.jpg


By the way the water still needs to clean up and i still need to make a lot of adjustments to the system
I will also add stone (probably with riccia) on the sand/gravel border

i hope you like it
 
Your tank is awesome! I want to build something like that! How much did the whole filter system run you?
 
Back
Top Bottom