RLG2182
Aquarium Advice FINatic
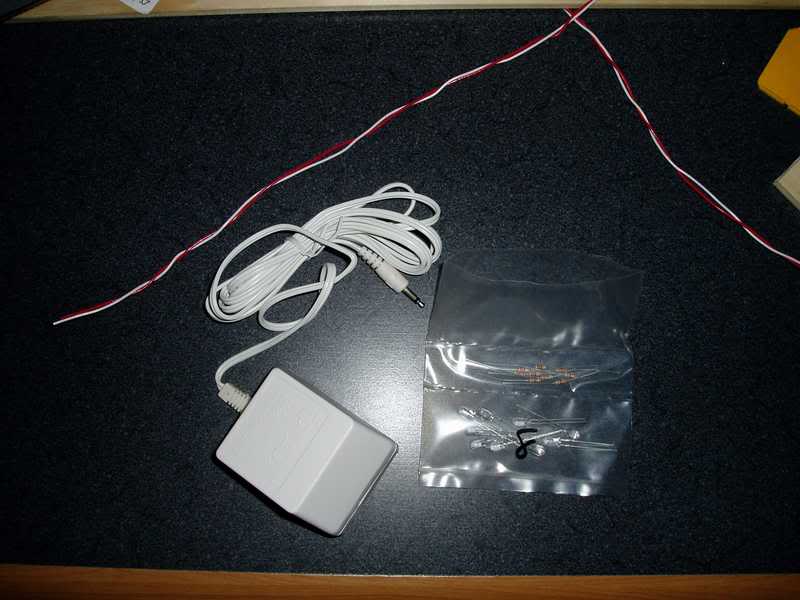
Well... here's the second part to my overhaul.  I purchased an 8 LED diy kit from www.ledwerx.com for $15 total. He has a store on ebay too... but I figured I would just get them direct. The kit comes with 9 LEDs (in case you mess up one), 9 resistors, 6' of wire, and an AC adaptor! Here's how I did this in under an hour:
First, gather your materials and make sure none of the LED's are cracked. Here's what the package looked like out of the shipping box:
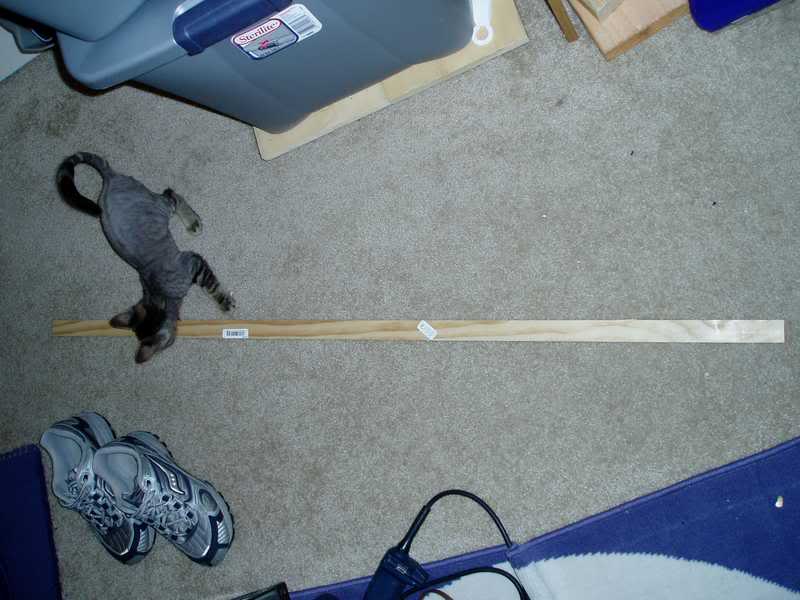
The only thing that you need to get on your own is a piece of material to attach the LEDs to. I chose a piece of wood lattice that was 1.25 inches wide, and 1/4 inch thick. Pine. Cut it to length. My canopy is 48 inches long on the inside, so I made my piece 47 inches for clearance.
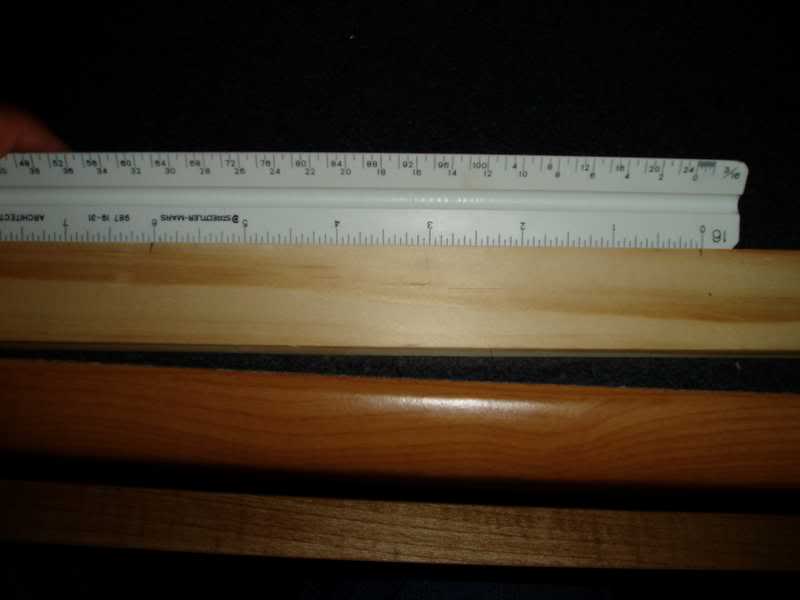
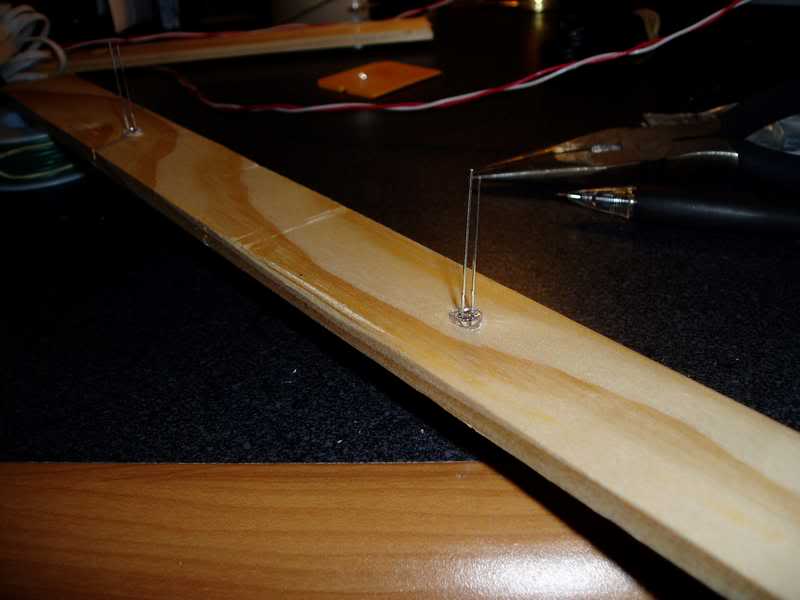
Now, lay out where you want the holes for the LEDs to be. Since I had 48 inches of tank to cover with 8 LEDs, I measured off every 6 inches so that way the tank would be evenly covered. You don't have to do 8... you could do 4, or 6, or 10... but IMO, 8 was just right. Measure them out, mark the holes.
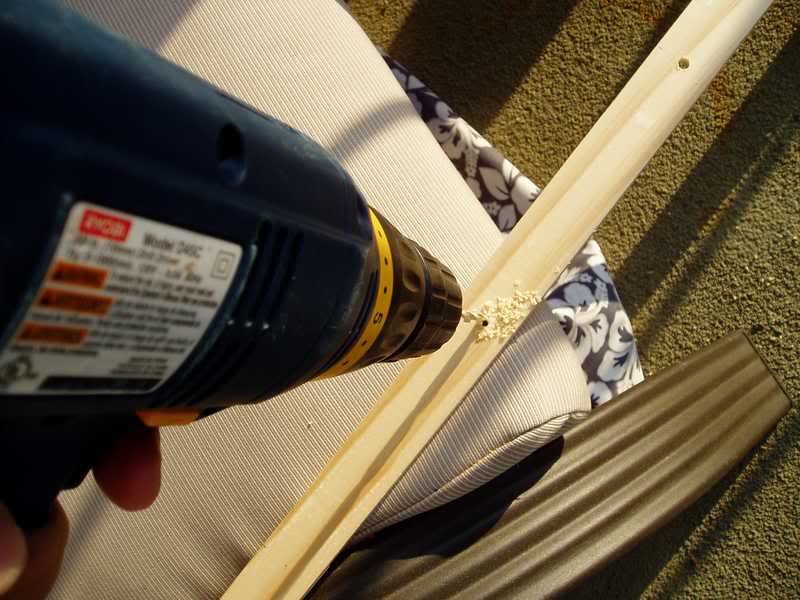
Next, when you're drilling the holes out, make sure to use a 13/64" wood bit. This is standard for LEDs to fit perfectly. If you're using different sized LEDs, obviously use a different sized drill bit Carefully drill all the way through the piece of wood.
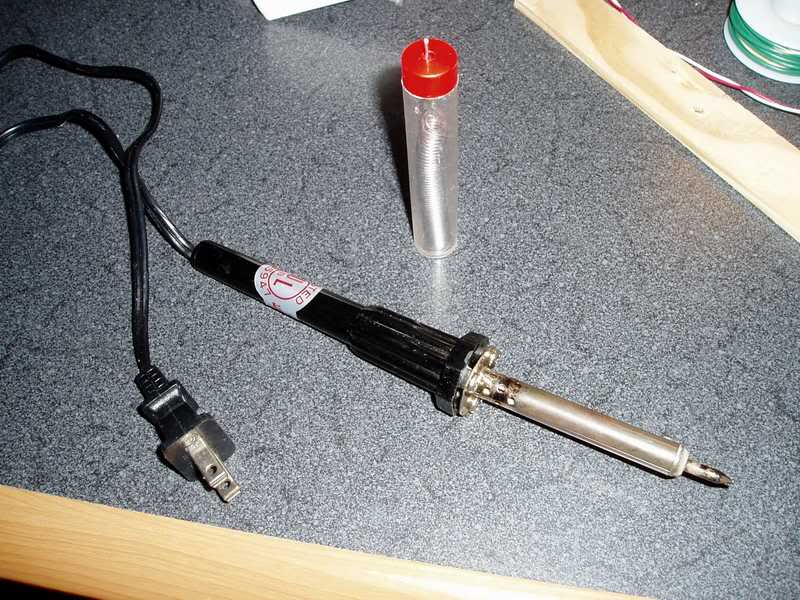
Next... this is the tricky part. Take this part with care, and go slowly. Get out your trusty soldering iron and solder. You want to make sure that you work in a well ventilated area and make sure that you familiarize yourself on how to use the soldering iron before you go to town with your newly bought LEDs.
Stick the LEDs in each hole, and line them up. Each LED has a short end, and a long end. The resistor HAS to be soldered onto the SHORT end of the LED. Line up all of the short ends to one side of the wood piece, and the long ends to the opposite. Hot glue the LEDs so they don't move around. Make sure the glue dries before moving to the solder.
Next, when you solder the resistor directly to the short end of the LED, make sure that you only touch the solder & iron to the metal for 5 seconds MAX... any more, and the LED runs risk of burning out. If you do not successfully solder the two together on the first try, let it cool for a min, and then try again. Never try to keep the iron on there.
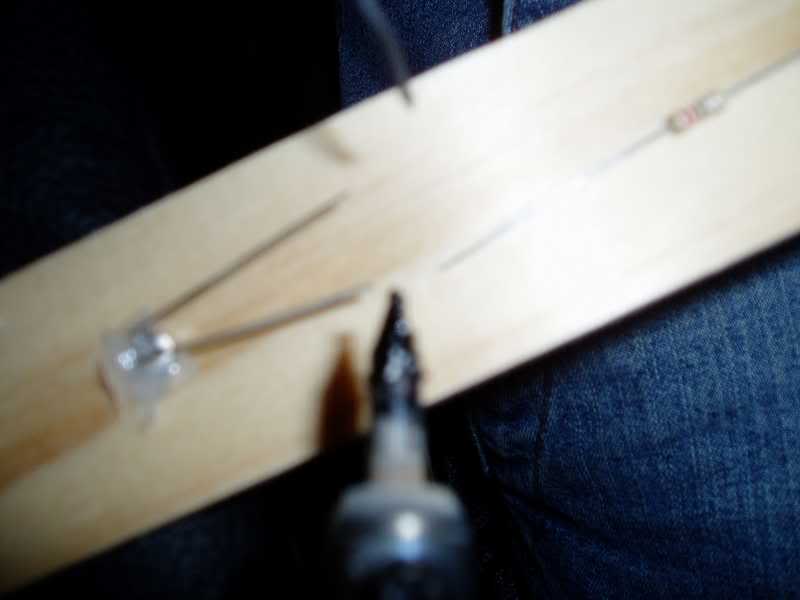
(fuzzy pic... sorry )
After you wire all of the short ends together, this is more or less how it will look:
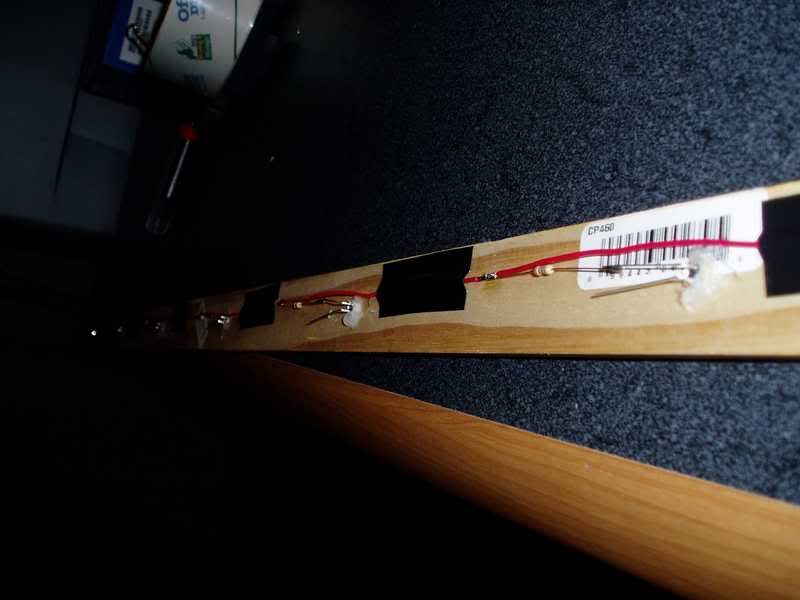
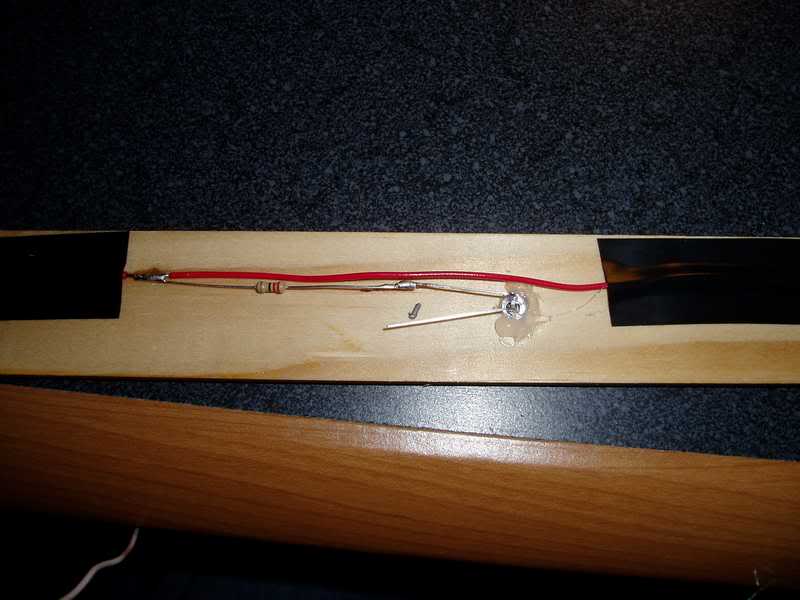
Close-up
The positive (long ends) are done the same way, only differing in the fact that there are no resistors needed on the (+) sides. Wire all of the (-) to (-) and the (+) to (+).
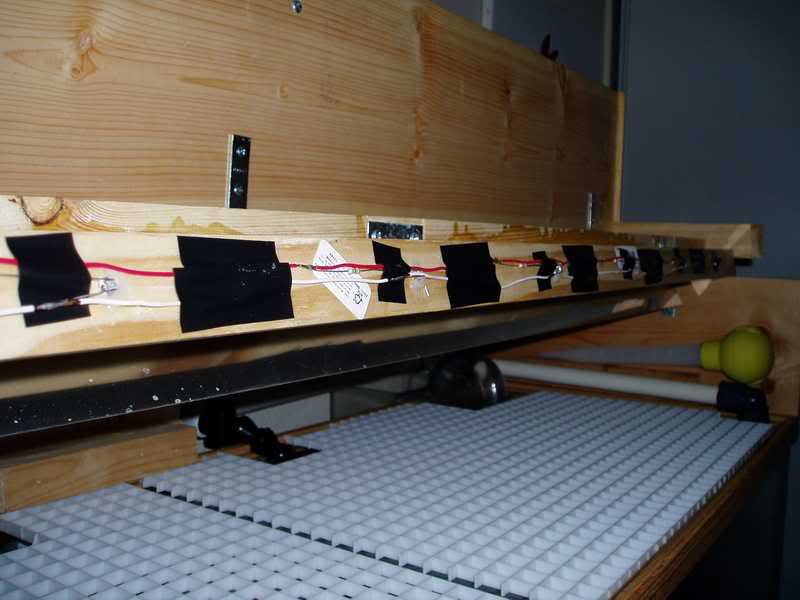
When you get to the end, it should look something like this. **Make SURE you cover/wrap all of the exposed wiring with electrical tape BEFORE you test it out. No (-) wire should be touching a (+) wire at ANY time or else you risk a fire. All connections should be firm with no excess solder poking out or touching other objects.
All you need to do now is to hook up the power supply. Cut off the round endpiece and separate the wires. The ribbed end of the power cord is the positive. Just solder that end to the positive wire of the LEDs, and the (-) to the (-) and you're done! PARTY!!!
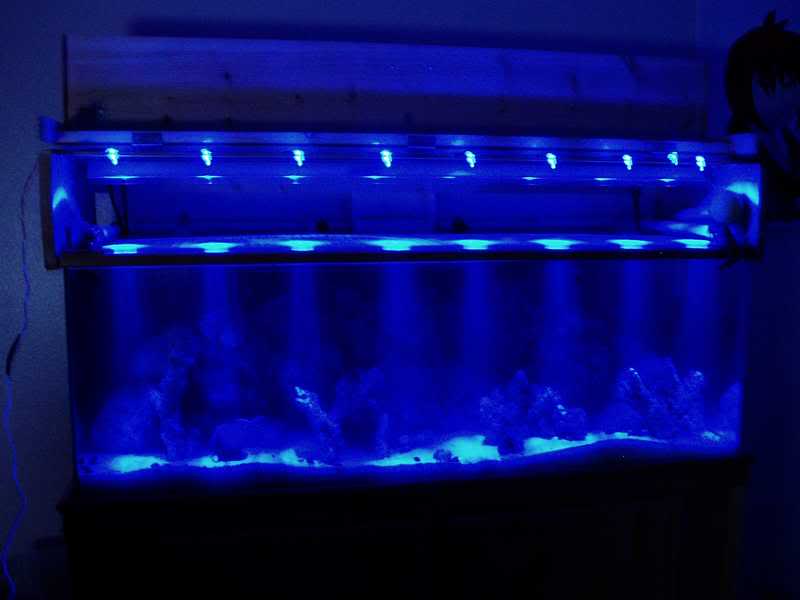
Here's the tank on the first test run:
Just note: the order of the wiring should be: AC adaptor -> length of wire -> resistor -> LED -> length of wire -> resistor -> LED -> wire (and so on). That first resistor needs to be between the AC adaptor and the first LED, or else the first LED will blow out.
When you get it all mounted (I used a few simple screws to my DIY canopy), this is what it should look like (or at least on my end) :
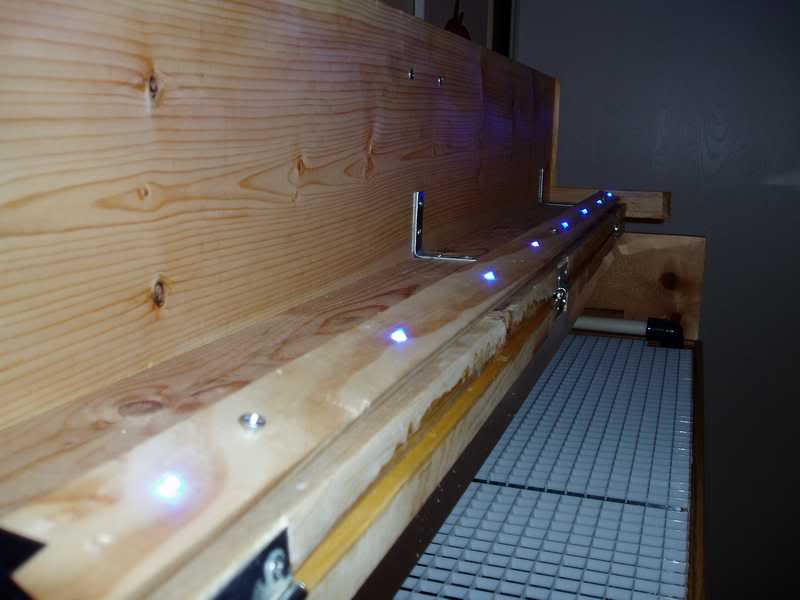
Here is what it looks like when finished:
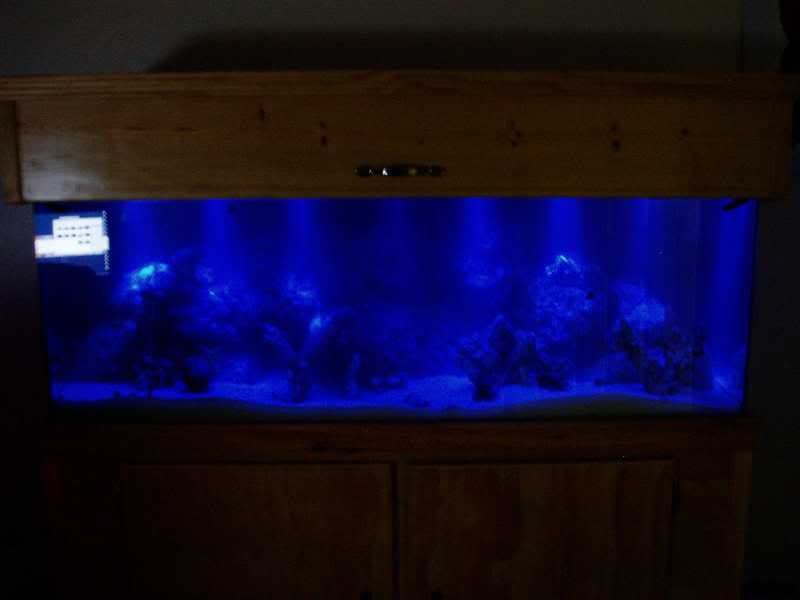
Now don't worry, it doesn't really look this bright! My camera merely didn't use flash, so it looks brighter than normal. This setup was easy to do, and only required a little bit of patience, a steady hand, and a fearless attitude to risk blowing $15 Now I can see my fish at night w/o a flashlight, and can stimulate corals by mimicking the moon.
Total setup: $3 HD wood, $14.99 LED kit shipped. DIY Moonlights for less than a fifth of the price of a retail setup... priceless
I purchased an 8 LED diy kit from www.ledwerx.com for $15 total. He has a store on ebay too... but I figured I would just get them direct. The kit comes with 9 LEDs (in case you mess up one), 9 resistors, 6' of wire, and an AC adaptor! Here's how I did this in under an hour:First, gather your materials and make sure none of the LED's are cracked. Here's what the package looked like out of the shipping box:
The only thing that you need to get on your own is a piece of material to attach the LEDs to. I chose a piece of wood lattice that was 1.25 inches wide, and 1/4 inch thick. Pine. Cut it to length. My canopy is 48 inches long on the inside, so I made my piece 47 inches for clearance.
Now, lay out where you want the holes for the LEDs to be. Since I had 48 inches of tank to cover with 8 LEDs, I measured off every 6 inches so that way the tank would be evenly covered. You don't have to do 8... you could do 4, or 6, or 10... but IMO, 8 was just right. Measure them out, mark the holes.
Next, when you're drilling the holes out, make sure to use a 13/64" wood bit. This is standard for LEDs to fit perfectly. If you're using different sized LEDs, obviously use a different sized drill bit
Next... this is the tricky part. Take this part with care, and go slowly. Get out your trusty soldering iron and solder. You want to make sure that you work in a well ventilated area and make sure that you familiarize yourself on how to use the soldering iron before you go to town with your newly bought LEDs.
Stick the LEDs in each hole, and line them up. Each LED has a short end, and a long end. The resistor HAS to be soldered onto the SHORT end of the LED. Line up all of the short ends to one side of the wood piece, and the long ends to the opposite. Hot glue the LEDs so they don't move around. Make sure the glue dries before moving to the solder.
Next, when you solder the resistor directly to the short end of the LED, make sure that you only touch the solder & iron to the metal for 5 seconds MAX... any more, and the LED runs risk of burning out. If you do not successfully solder the two together on the first try, let it cool for a min, and then try again. Never try to keep the iron on there.
(fuzzy pic... sorry
After you wire all of the short ends together, this is more or less how it will look:
Close-up
The positive (long ends) are done the same way, only differing in the fact that there are no resistors needed on the (+) sides. Wire all of the (-) to (-) and the (+) to (+).
When you get to the end, it should look something like this. **Make SURE you cover/wrap all of the exposed wiring with electrical tape BEFORE you test it out. No (-) wire should be touching a (+) wire at ANY time or else you risk a fire. All connections should be firm with no excess solder poking out or touching other objects.
All you need to do now is to hook up the power supply. Cut off the round endpiece and separate the wires. The ribbed end of the power cord is the positive. Just solder that end to the positive wire of the LEDs, and the (-) to the (-) and you're done! PARTY!!!
Here's the tank on the first test run:
Just note: the order of the wiring should be: AC adaptor -> length of wire -> resistor -> LED -> length of wire -> resistor -> LED -> wire (and so on). That first resistor needs to be between the AC adaptor and the first LED, or else the first LED will blow out.
When you get it all mounted (I used a few simple screws to my DIY canopy), this is what it should look like (or at least on my end) :
Here is what it looks like when finished:
Now don't worry, it doesn't really look this bright! My camera merely didn't use flash, so it looks brighter than normal. This setup was easy to do, and only required a little bit of patience, a steady hand, and a fearless attitude to risk blowing $15
Total setup: $3 HD wood, $14.99 LED kit shipped. DIY Moonlights for less than a fifth of the price of a retail setup... priceless