Algae Turf Scrubber (ATS) DIY build

The friendliest place on the web for anyone with an interest in aquariums or fish keeping!
If you have answers, please help by responding to the unanswered posts.
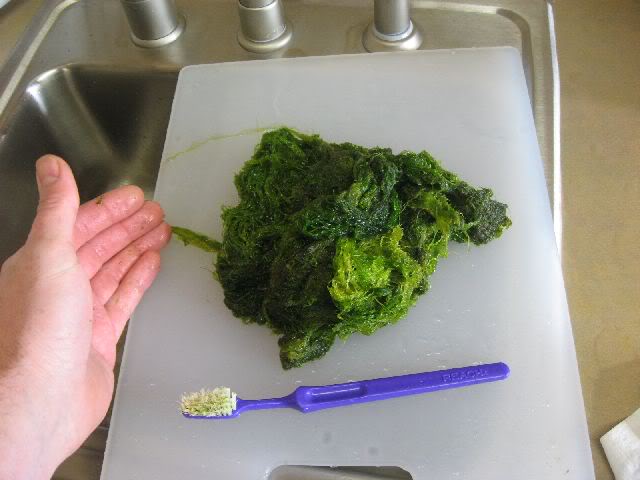
This reminds me of aquaponics. So do you end up cleaning it less often in the future or is it still a weekly task? Now that you are scraping it off, it seems time consuming. What if you took a bristle brush to it?

It only takes me 20-25 minutes from the time I walk in the door to the time I walk out to fully clean the screen. So it is by no means time consuming, especially when you consider that there is no need for maintenance of a skimmer or phosphate/GFO reactor, etc, and no need for PWCs to reduce N and P. I dose the necessary supplements, but will probably still do a small PWC every once in a while to clean out the sump and do other maintenance, but it is far less frequent. If this were a FO or FOWLR, PWCs would be completely unnecessary. I have 2 (possibly 3) more coming online in the next few months that fall into this category.

Cleaning is a weekly task at this point, however the improved design I am working on will allow up to 2 weeks between cleanings. That being said, it still should be cleaned weekly, or at least have RO/DI water ran over it in between cleanings (to kill pods in order to prevent algae detachment).

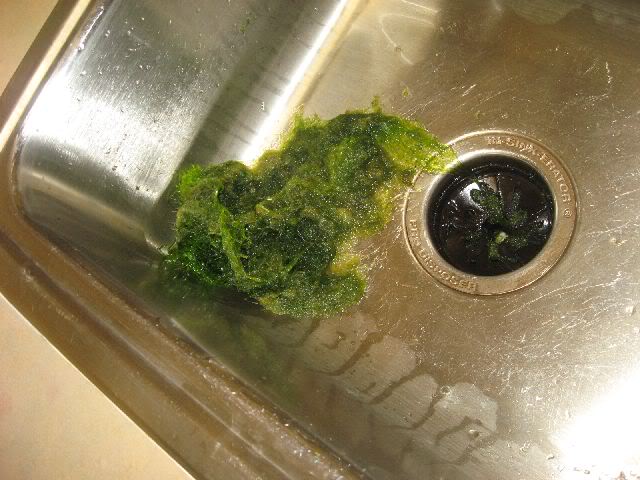
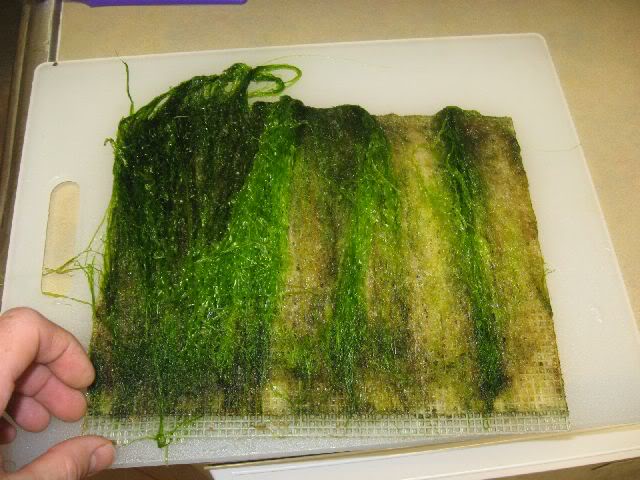
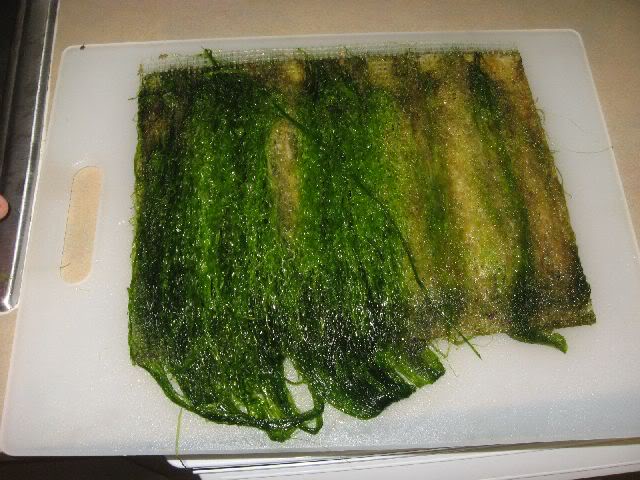
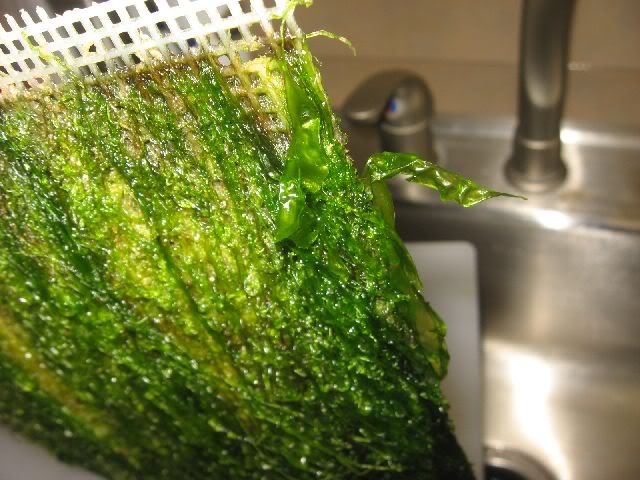
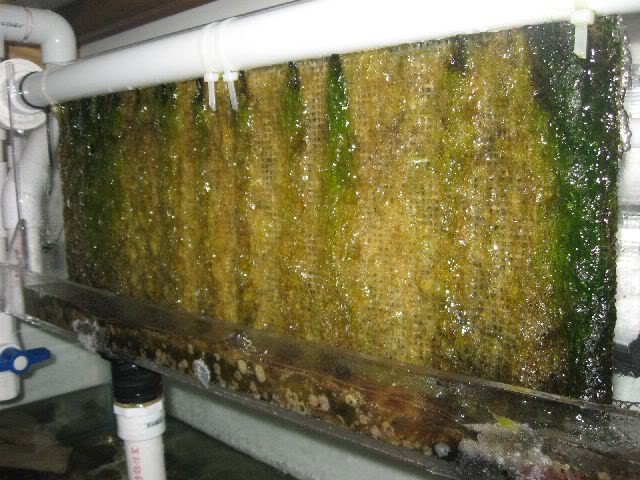
Eventually there will be a thick rough turf - which is more powerful cleaner than what you see above. You'll end up cleaning one side then the other side next time you clean from what I read.

The red turf starts to show up in about a year supposedly, and it is a little tougher to remove. SM removes his with a razor blade. The GHA in this setup is actually the preferred algae to have. The original dump-style ATS used red turf. The modern scrubbers do not have a need for red turf, the GHA does the job extremely well.

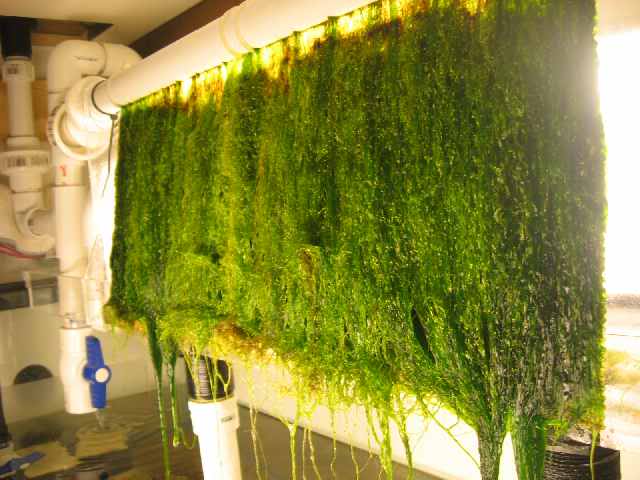
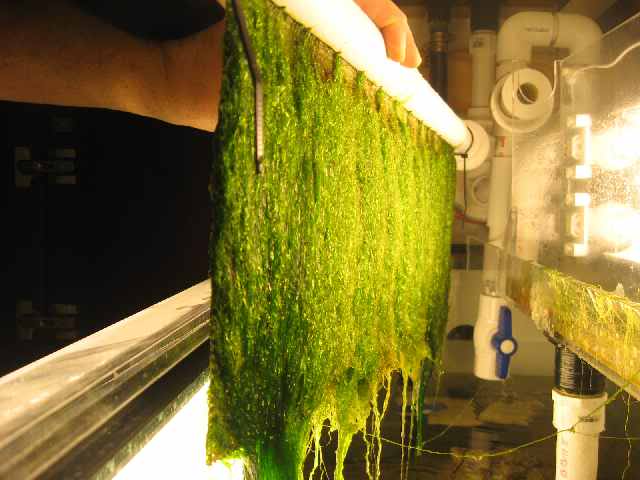
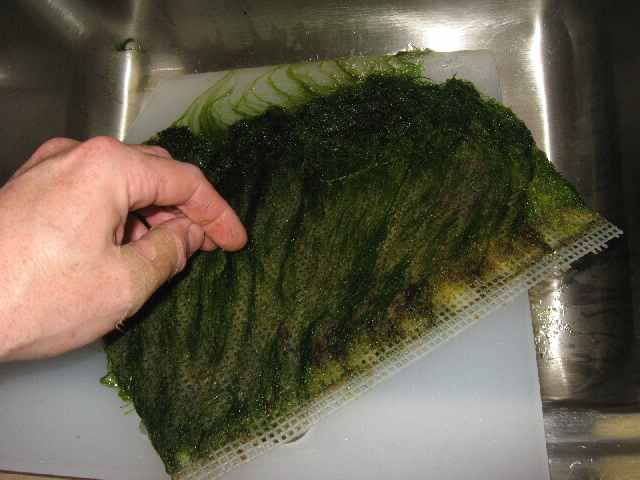
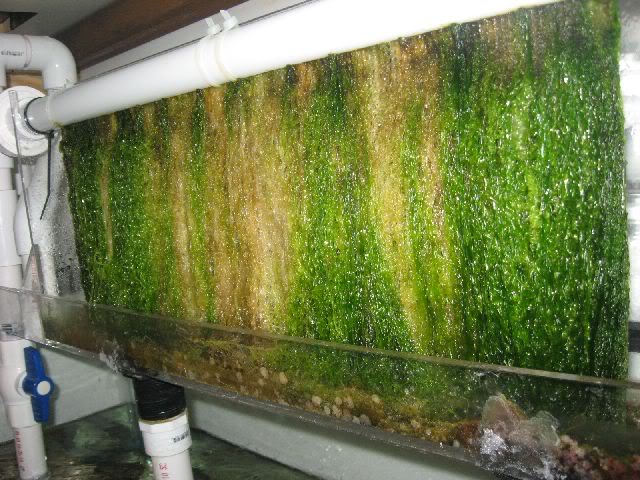
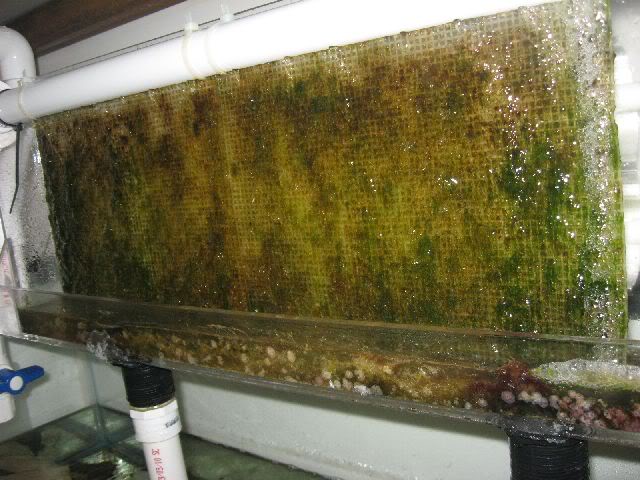
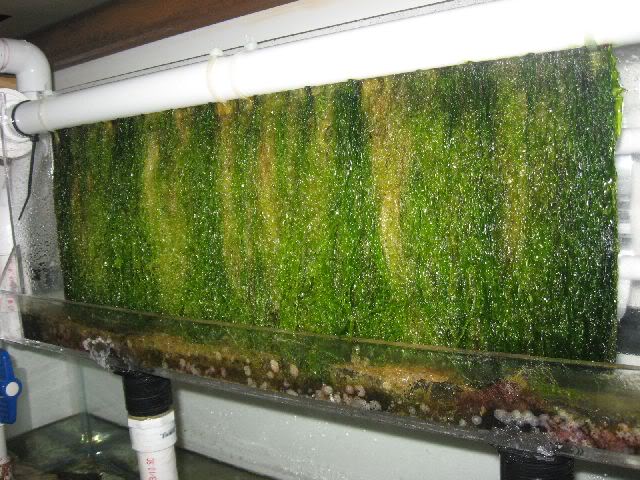
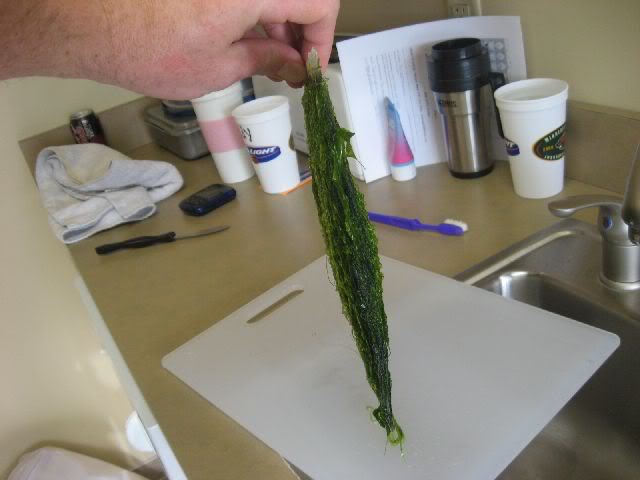
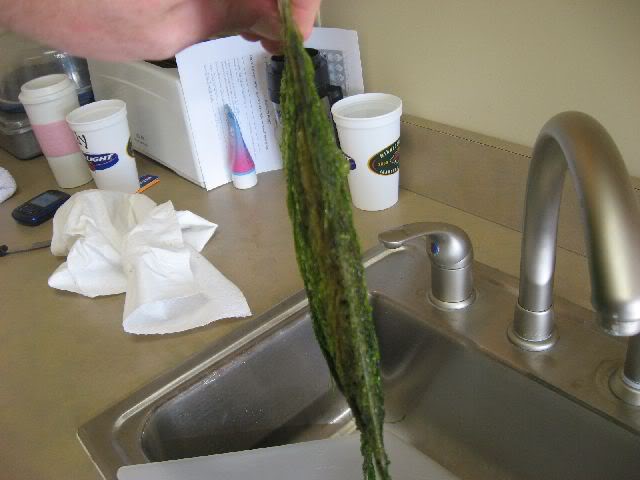
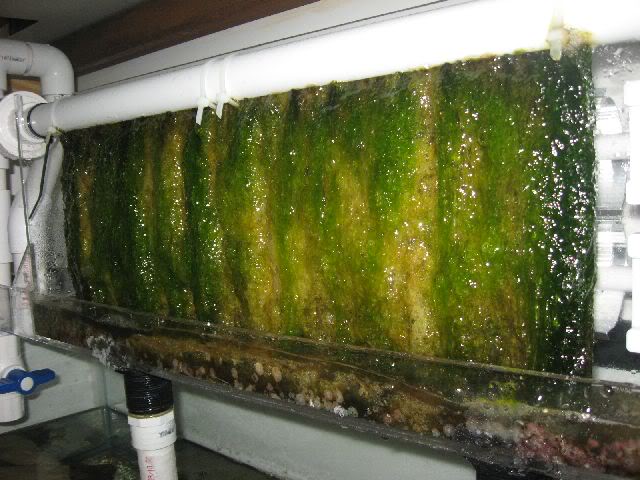
Here's the screen today (middle of day 6, will be cleaning tonight)

img_1179139_0_d21b87001a3fa8fef9df47dc384e3a73.jpg


This is thicker and heavier growth than last week, and a day earlier. The growth is so thick that the water level at the bottom of the ATS box is up to the line where the front cover locks in. This is why I have to re-do my design!
 
Why not have the water just pour over it and not have a bottom? Also, what is that stuff in the bottom of the design? It almost looks like colored gravel.
 
Why not have the water just pour over it and not have a bottom?

that is an option and there are designs exactly like that. The problem is that it is noisy and you get tons of microbubbles (and salt creep) unless your screen is submerged at the bottom. The idea is to have the bottom 1" of screen underwater to eliminate noise and reduce microbubbles.

Also, if you have a screen totally enclosed in an acrylic box, it allows for 3D growth of the algae to the point where most of the algae is submerged, and you get better growth (and no microbubbles)

Also, what is that stuff in the bottom of the design? It almost looks like colored gravel.

Coralline algae
 
Wow that is amazing. I hope mine takes off like that soon. How many watts of light do you have on it? I just upgraded mine to about 140 total watts, so it should take off now.
 
2nd Generation DIY Build

I spent some time on CAD working out a revised design, and along with a couple ideas from others on RC I solidified a re-design last week. Over the weekend, my Dad and I built this new 2-piece ATS box that will replace the old one:

img_1180907_0_2b617f7e45892dcb9108f6d0625dcf8e.jpg


img_1180907_1_55807835e9b9d67bb73dc953de1c4b66.jpg


img_1180907_2_de8bffae5b60e419969826d27d761f0b.jpg


It has a frame for holding the lights made out of black acrylic, and the standoffs will be held in place on the outside versus the inside, that way the screw heads are out of the way. It also has a black strip that acts as a light blocker to keep light from getting around the reflectors better. I left the ends open for ventilation, I will probably add fans on one end of each side. The inner box has black on the bottom and sides, also to block light to the sump and outside of the device.

The inner box will house the screen, it is watertight and has holes drilled in the corners that match up with open sections in the base for drain tube connections.

img_1180907_3_27daa17b3c7cf62b32253d8e06c22cea.jpg


Instead of going with modified (hacksawed) bulkheads like in my original design, I came up with a more compact and flexible design, I used a combination of a male/female screw-on PVC connector (for 1" pipe) and rubber sink faucet o-rings, then used a table router to custom cut the hole so that it tightens down and provides a perfect watertight fit

img_1180907_4_ac5bc87715569d14d21e5def36a324c1.jpg


img_1180907_5_882e60ed0c1384612dbfecfb83a9a92f.jpg


There are 2 of these, one in each corner of the box. The screen will actually hang down to within 1/2" of the bottom of the box, and since the drain is off to the side and 1" above the bottom, the water will not cascade down and directly into the drain.

My idea here is that this will:

1) reduce or drastically eliminate microbubbles

2) reduce the chance of clogging or the pipe (which has not happened, but other have experienced it)

3) allow option of different heights of internal tubing to control the water level in the box.

Allowing the screen to become completely flooded provides for 3D growth of the algae (like I am seeing at the very bottom of the current design) and having a 2nd drain 1/2 way up the box would allow for buildup of algae and a secondary maximum water level. I considered cutting a slot out of one side of the box as an emergency measure, but that can be added later if it seems to be needed. I don't think it will.

I obviously have to add all the light fixtures and wiring, but should have it up and running in the new box by this weekend.
 
Cleaning #6

I cleaned out the sump on Saturday, moved most of the LR in there to the DT, removed the return pump intake foam filter, and stacked the remaining LR around the intake so that I had a place to put the Purigen bags and to also create an area for bubble to get stuck to. It works pretty well. During the cleaning today, I opened the bypass with a pipe extension added, and bubbles were flowing pretty heavily around the sump, but they werent' getting into the DT. I forgot to snap a pic.

During the cleaning, I also fragged some Xenia and Anthelia and got into a conversation with the guy buying them, and the screen was without flow for about an hour. I think it dried out a little too much in a few areas, because there was a little more odor than the last few weeks, and sections of the GHA had turned yellow, strangely enough only on one side of the screen. Anyways, still had excellent growth and the cleaning took 21 minutes from the time I walked in the door to the time I closed the bypass valve after re-installing the screen. Pics:

img_1181172_0_d706a262886bc2735922f358520615af.jpg


One half harvest

img_1181172_1_bbe6fbe11e69cb1e978e8acb8a8c98f5.jpg


second half screen

img_1181172_2_9838a0381bbaee9c1140c98d8ecbf01a.jpg

img_1181172_3_f5a4ee87e88fbc00e00b8f10fce6a2f8.jpg


Harvest

img_1181172_4_ccb3cd35ecf7ae1584ca21e8003565c7.jpg
 
Think you should make some flow protectors. Its growing to a point where it'll clog your system. Seen them on a few setups so far...
 
That usually happens with a bottom drain. The GHA drains down into the pipe and slow the flow. I have seen this. It should not be a problem with the new design (post #86) since one hole will be 1-1/2" above the bottom and then second will have a pipe section inserted so that a second drain will be 3-4" above bottom. Then if needed I can drill a hole in the side of the inside box to allow a cascade overflow towards the top of the box. That way I will have a backup for my backup.
 
Also, the drains are to the side of the screen, not directly under it. This should impede the growth of algae into the tube. GHA would have to get very long and dense to flow sideways into both pipes to the point where both clog up.
 
N was slightly detectable after turning the skimmer on and off for a few weeks, then about 1 week into the screen running it was 0 again. As for P, I am on my second defective Salifert kit in a row so I really don't know, but it is very low.
 
Here was the screen on 12/14 before cleaning

img_1187681_0_7452c1448f09d7cffc63d7f7d9bade8a.jpg


On par with the last couple. However, here is was this week on 12/21 before cleaning

img_1187681_1_ff65d3488a1d33a917b587f2eb8562a0.jpg


The things I noticed were that the water was mainly flowing out at the far end of the tube, and there was a squirting noise from that area. I replaced the zip-ties on 12/14 and probably didn't scrub the top inch of the screen quite as good as I usually do, and I cinched the zip-ties down pretty tight. I think that had something to do with it. You can see that the growth is great at the end of the screen where it gets the most flow.

Also, the feeding probably wasn't as aggressive, as the Arcti-pods and Oyster feast ran out about 2 weeks ago. I have been dosing quite a bit of Kent Iron, to the tune of 15 mL 2x a week. Also, over the last week, I added a 300 mg bottle of Seachem Magnesium, a little bit of Seachem Iodide (only about 10 mL one time), and most of a bottle of Seachem Strontium (it was 0 - now it's MAYBE 3 ppm). That was on top of the normal Alk and Ca additions.

When I cleaned the screen this time, I made sure the top inch was clean, and did some extra scrubbing of the tube slot. I also didn't cinch the zip-ties down quite so hard, thought I fail to see how the tightness of those would make any difference. The flow seemed to be more like it was before. Time will tell. I'll have to pop in over the holiday weekend and feed 'em good.
 
Back
Top Bottom