Documentation: 40 gal sump project ***dial up sensitive***

The friendliest place on the web for anyone with an interest in aquariums or fish keeping!
If you have answers, please help by responding to the unanswered posts.

RLG2182

Aquarium Advice FINatic
Joined
Jan 2, 2005
Messages
819
Location
Rancho Cucamonga, California
Well... so here it is. I figure since this is my second sump, I would document how I went about making it. I noticed that many newcomers to the hobby are curious to see just HOW to make one of these... so here goes. :D

First... I decided on all glass. 40 gal tank (glass) and 3/16" glass cut from a LGS (local glass shop). I just had to measure EXACTLY how wide the baffles should be to fit inside, and decided on a height. Mine came out to 14.5 x 12". Total cost: $30.
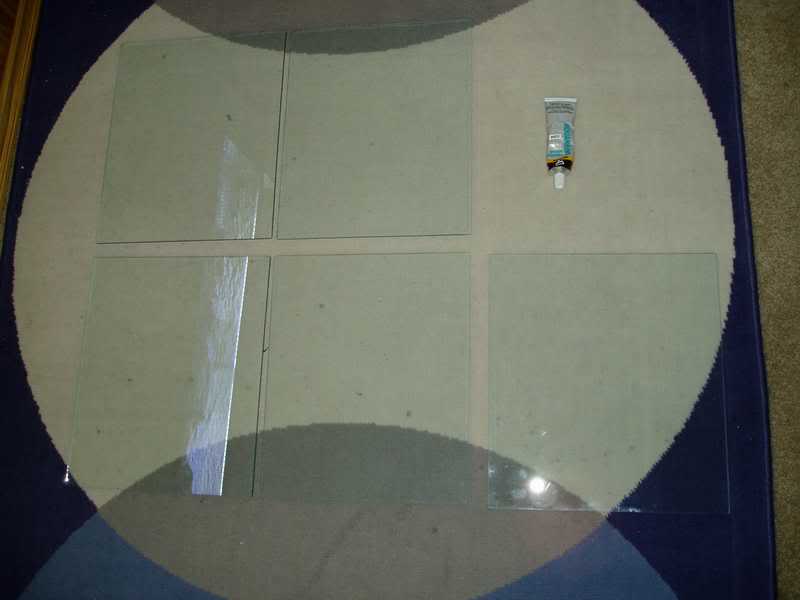
img_414444_0_8ebc6eeb4f2cc04f5e9a9b164ead34dc.jpg


I layed out with a dry erase marker on the outside of the tank where I wanted my baffles to be, making sure that the other side was identical (so I could make sure the baffles were square).
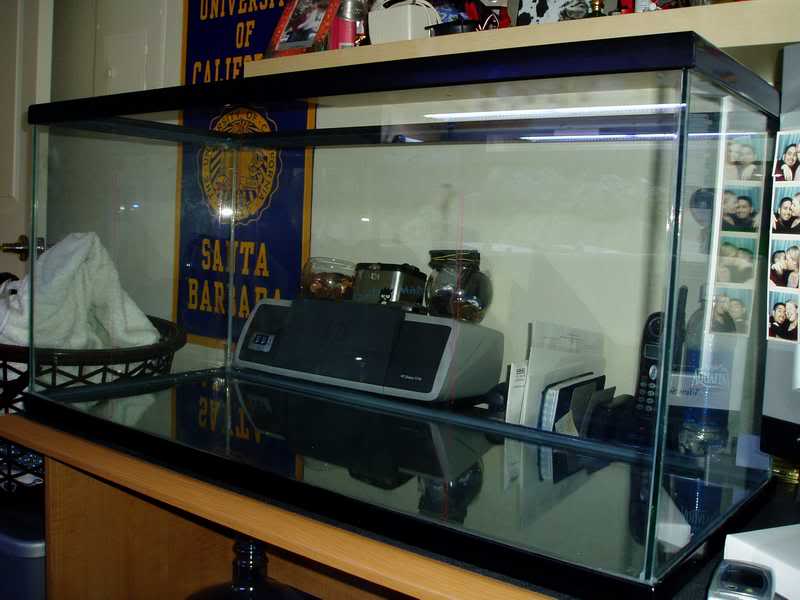
img_414444_1_99d37ee3fdcd2fe6f9885a72a489dcc7.jpg


Next, I took my trusty Aquarium safe silicone made by DAP and went to town. Make sure that you tape the top of the baffle to the tank so that they don't wobble back and forth. 8O Here's with a bead of silicone applied... with the tape as described:
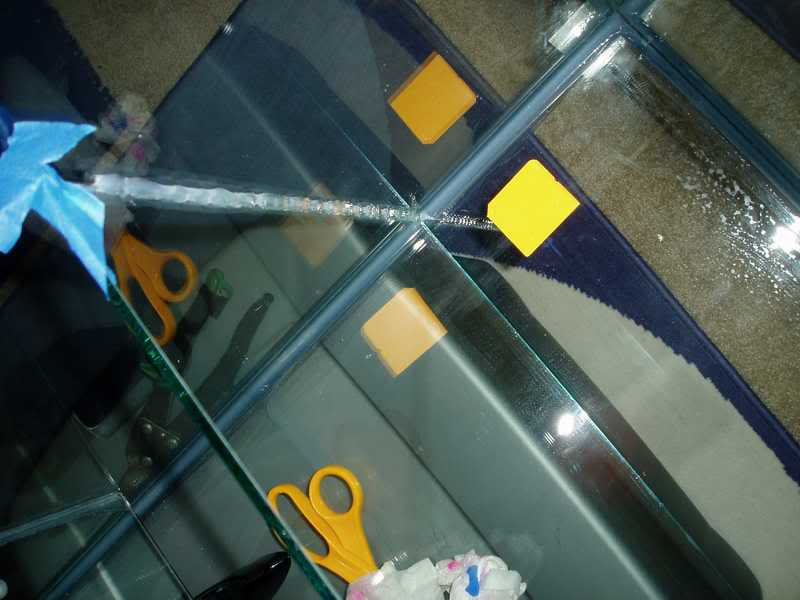
img_414444_2_2782fc2691bb91a2fba21761e7eaba41.jpg


(close up of the piece of plastic I used to smooth the edges)
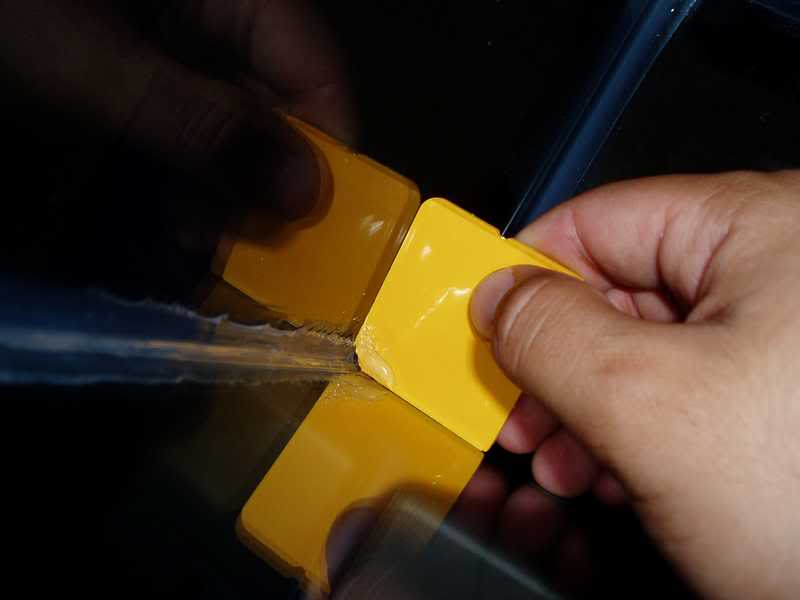
img_414444_3_3266ee1655a479f9c258f8f345252562.jpg


Next... make sure you take the kittens out of the room, because they are bugging the heck out of you. :lol:
img_414444_4_4b65cc6b19755d3cfa3c9957b509d9cb.jpg

(kittens just got neutered... and shaved. :twisted: (not a part of the diy sump project... just needed to provide a break for all you's taking notes).

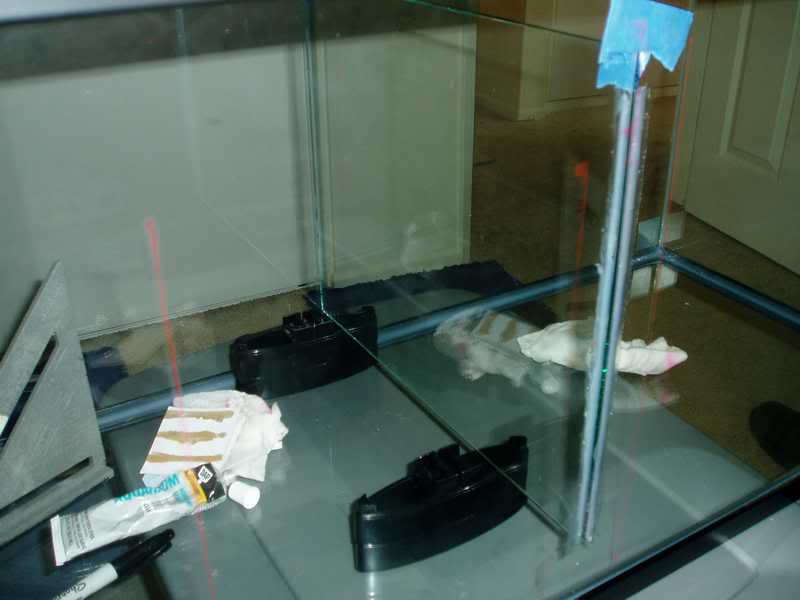
When you get to the baffle portion of the sump, make sure you do the top baffle (the one in the middle) FIRST... or else you won't be able to properly silicone the sides of it. This is important because the only thing holding this one up is the silicone itself... all the others are just merely sitting on the bottom. Prop it up at your desired height with whatever you find. I used pieces of plastic that were used to hold up a monitor. Just make sure that you pick something that can be pulled out from underneath when it is dry.
img_414444_5_278b59edb115a0d57582347adf60bd45.jpg


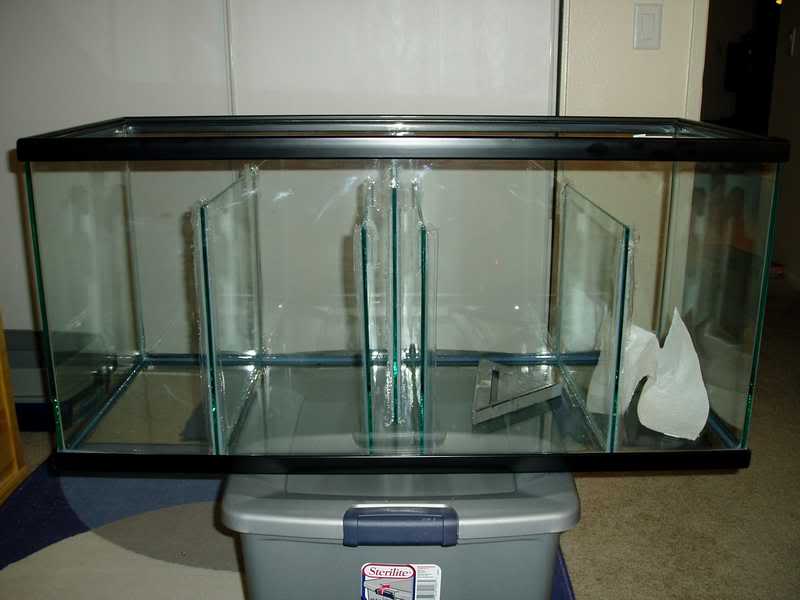
Let the top baffle dry an hour, and then go to town on the side ones. When you're all done applying silicone, it should look something like this:
img_414444_6_622744d62b159887004b6a469c39d24e.jpg


Now, I decided to have a compartment for a fuge. That's the one all the way to the left. My sump is configured to be: (flowing from right to left) LR Rubble compartment, then the skimmer, then the bubble traps, then the pump compartment. I'm going to put a "T" valve on my mag 9.5 to feed the fuge, which I had cut 13" instead of 12" so that there was no way water could get in there that was flowing too fast. I'm also going to add in a strainer so that the surface gets skimmed, and all the good stuff is left in the fuge.

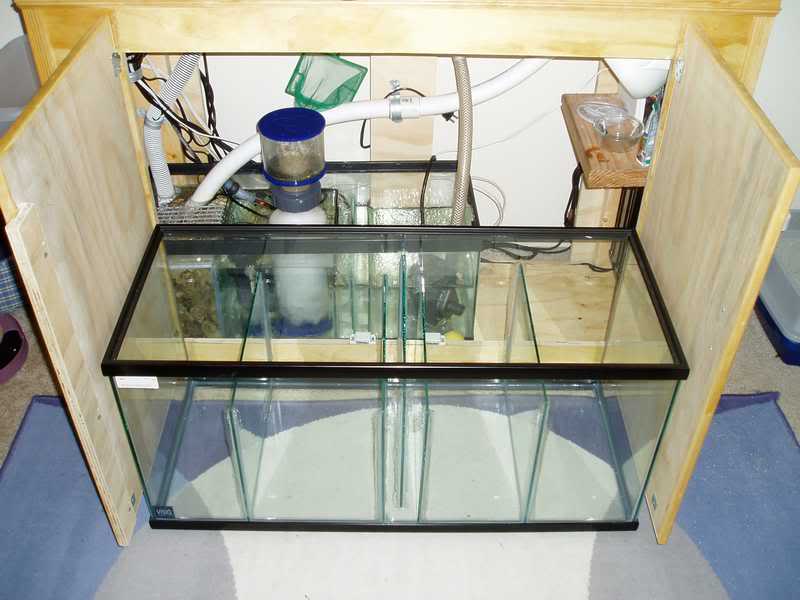
Here is a pic comparing my new 40 to my old 20L:
img_414444_7_b782a3cb13c2866b5ebcefb3bd2dc36c.jpg


8O 8O HUGE improvement! :D

When I get back in from work, I will xfer the LR Rubble, and fix the plumbing for my new fuge. Also, since my skimmer compartment grew in height by 5 inches, I need to compensate by raising my skimmer by 5" as well... I will need to find material to raise it properly. More updates to come!
 
Very cool. Looks great! an easy way to raise a "sit in sump" skimmer is to cut a sheet of egg crate the same size as the bottom of the skimmer and then super glue 4 PVC legs the desired height to it. Thats how I support my EV-120.
 
THIS IS GREAT!! YES I'M SHOUTING!!

I'm such a do-do bird when it comes to DIY - I need something seemingly simple in pictures in front of me to really see how to do it.

So THANK YOU for posting this. I'm actually getting my 20L glass tank today and was going to work on adding baffles...and was, well, baffled. It really is simple, just like everyone says!

:D
 
*waves to everyone in the DIY section* :D

You know... now that you mention it... I will have a 20L sump that I'm just going to dismantle and use as a QT tank. If anyone is in the Southern CA area... I suppose I "could" have a nice diy sump for sale! :lol: (now I might have a posting to do on the classified section)
 
Kay... well it's pretty much finished! Just filled it today, added sand into my fuge, and raised my skimmer. All of the plumbing was glued up and no leaks were found! :D

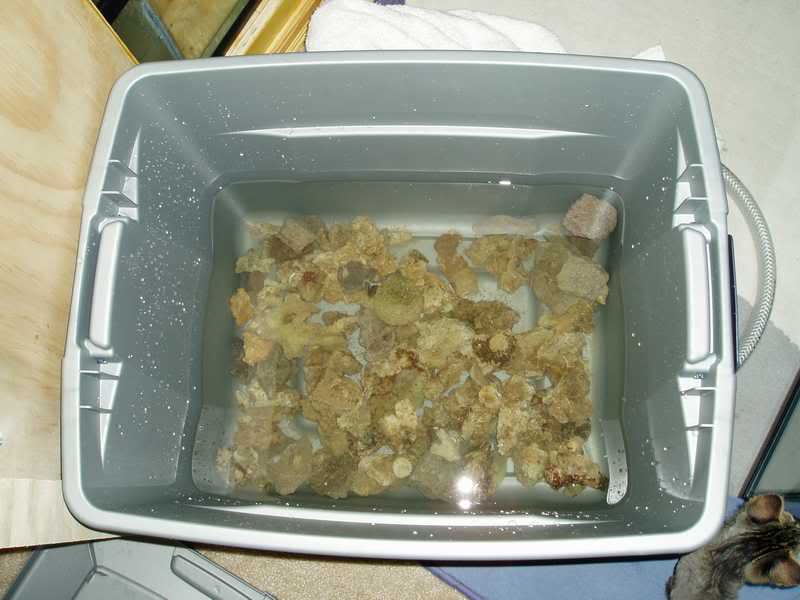
Here's all the rubble that I took out of my sump... about 20 lbs.

img_415283_0_bafb427d448bf56cdc4b541b18326c0a.jpg


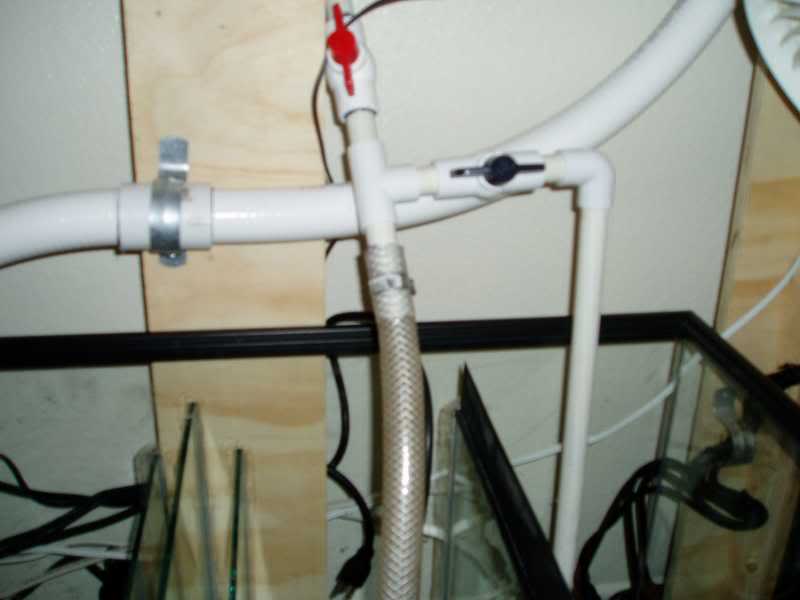
When you're doing this kind of setup with a built in fuge, make sure you put two separate ball valves to control how much flow goes into your main, vs how much goes into the fuge. I drilled several large exit holes on the fuge side to prevent a hole being blown in the sand.

img_415283_1_c879ba5c0e2fb1aa36a7a096f7c35d26.jpg


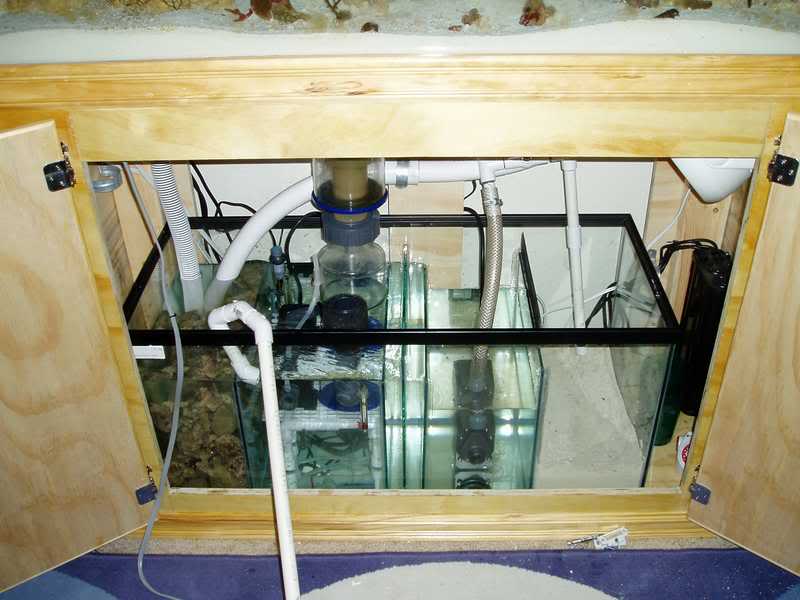
I always like to fill the sump from the beginning compartment to the last... that way, you can check to make sure it is working before you turn the main pump on :wink:

img_415283_2_dfa7686c9c5706d4024c404c43868460.jpg


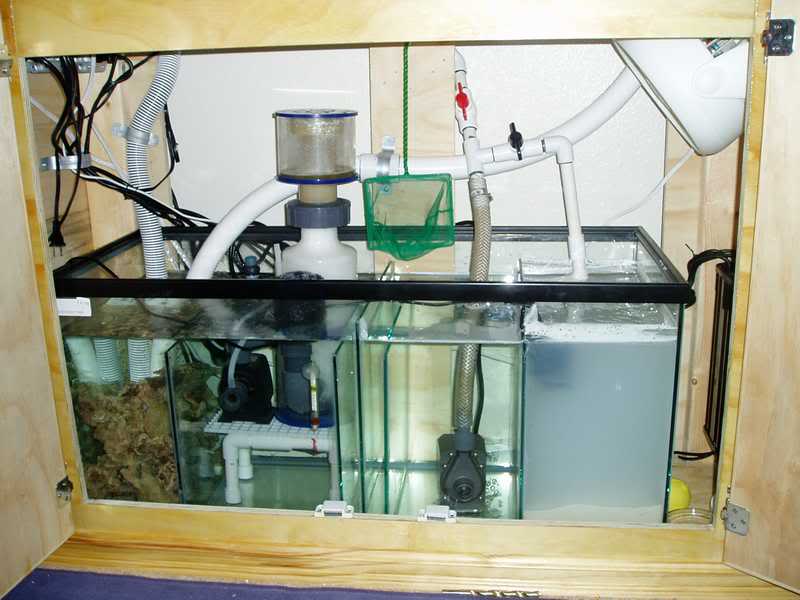
Here is the final product! The water is still a little cloudy... I'm waiting for the sand water to calm and settle before I add it into my main system.

img_415283_3_33537d9098412f1793fdf3626f378399.jpg


Just make sure that before you turn the main pump on, make sure to have a decent supply of ready made saltwater to add to the sump as the pump runs for the first time. The plumbing will take water to fill up, and if you're not careful, you could have your pump running dry. When starting up for the first time, I just let the pump run, and slowly add in enough water to compensate for this factor until the water line in the sump stops dropping.

This project was fun as heck to do, not to mention easy!! Now I can double my LR rubble capacity, and increase the size of future equipment if I choose to upgrade my 60 gal to a 120+ in the future.

Total cost: Tank $50, Glass $30, Sealant $4. Bigger sump to make life easier and incorporate a new fuge - priceless. :D
 
great post! And the sump looks well built to!

One question though. I didn't see any mention of a power off test. Have you turned off the power to see how high your water level rises? if a pump fails or the power goes out all that water in your plumbing will settle back down into the sump. make sure that when that happens you wont get a flood!
 
*finishes getting ready for work* :lol:

Yeah... forgot to mention that. :D I did test it 3 times and all was well. Water only raises one inch on this thing... it used to raise 2.5" on my old 20L. My 4 return lines are verrrrrrry close to the surface to they ripple the water, but not high enough that they sound gurgly with air. It doesn't take more than a few seconds for water to be introduced to the mix, shutting off the backflow siphon.
 
Forgot to mention... make sure that when you plan out your sump, make sure that you leave a lot of room for the main return pump. That's the first compartment that will drain, so if it's on the small side, and you don't have an auto top-off unit, you'll run into problems with running the pump dry.

The bubble traps only need to be wide enough to get a sponge in there to clean it out. I like about an inch wide... but others would suggest different widths as well.

Next sump I make will be out of acrylic with an external pump & built in auto-top off unit... along with a fuge as well. 8) I first need to upgrade my 4' tank to a 6' so that I can fit all the stuff underneath! :lol:
 
Great looking sump! I have a question on the baffles. Could the baffles be cut from acrylic or plexiglass, and then siliconed into a glass tank?
 
do acrylic, plexi will yellow and become brittle with age...

my question has to do with the "t" sectiono and ball valve from your return pump into the fuge area... what purpose does that fill? Just brining it back to the sump due to having a beefy pump?

I was thinking of doing something close to this but have the overflow dump site, baffle, Protein skmmer area, bubble trap section, fuge, baffle return...

My overflow is 2x 1" pipes, with a mag 9.5 I put a ball joint on both the pump return and one of the overflows... i can always adjust the pvc and put in the "t" and ballvalve.

TIA
 
mykpoz said:
do acrylic, plexi will yellow and become brittle with age...

If I use acrylic, will silicone hold it in place? Or would I need some other sealant, for bonding acrylic to glass?
 
you should be able to use the DAP silicone that he used in his project, or another marine safe acrylic bonding agent....

I'd get someone else to answer that for sure...
 
mykpoz said:
the "t" sectiono and ball valve from your return pump into the fuge area... what purpose does that fill? Just brining it back to the sump due to having a beefy pump?

The "T" section is there to feed the fuge area. Since the fuge baffle is the highest, water has to be pumped in there, and then gravity just brings the water back down into the pump area. This way, I can control how much water flow goes to my fuge. The pump can handle everything.

krap101 said:
howd you fit your hand in to silicone the middle baffles?

Just make sure to do the middle part of the baffle first. That's the one that needs the most strength since it's up in the air. The other two on the sides can just be sealed on one side alone, and then as far as your hand can reach on the other. Those just need to be strong enough not to bend back and forth since they're sitting directly on the bottom.

20 20 said:
If I use acrylic, will silicone hold it in place? Or would I need some other sealant, for bonding acrylic to glass?

Nothing can really bond acrylic to glass. All you can really do is to use a lot of silicone to keep the acrylic from moving. Just know that you might have to empty the sump every few months or so to reapply new silicone.

I've wanted to try to make some kind of auxiliary support system for acrylic baffles... like some pieces of small wood or plastic or something that will keep the baffles upright and spaced apart. Think of it like some of the old metal ice cube trays. They used to have a plain water pan, and then a grid that you stuck in to separate the cubes. If you could do that to the sump in some way, you wouldn't really need to smother the baffles in so much silicone. Just some inspiration if someone wants to try something like this.

HTH (y)
 
RLG2182 said:
I've wanted to try to make some kind of auxiliary support system for acrylic baffles... like some pieces of small wood or plastic or something that will keep the baffles upright and spaced apart.

What about designing small supports for the acrylic out of fairly thick glass?
 
sorry for the noob comment....but i see 4 compartments and you only describ 3. If the fuge is the far right compartment, what is the one with the LR rubble in it at the far left? Just a smidge confused about that.
 
I know i am bringin this post back from the dead, but i just had to chime in and say that is one awesome sump/refugium!! i love it so much i had to build one for my 100Gallon system i am building!
IMGP1221.jpg

I know its not as pretty as yours! but i hope it works as good as you designed yours! thanks for such a great design and idea!!!
 
Back
Top Bottom