CHBGator
Aquarium Advice Activist
- Joined
- Jul 28, 2006
- Messages
- 112
Yes another DIY CO2 Reactor.
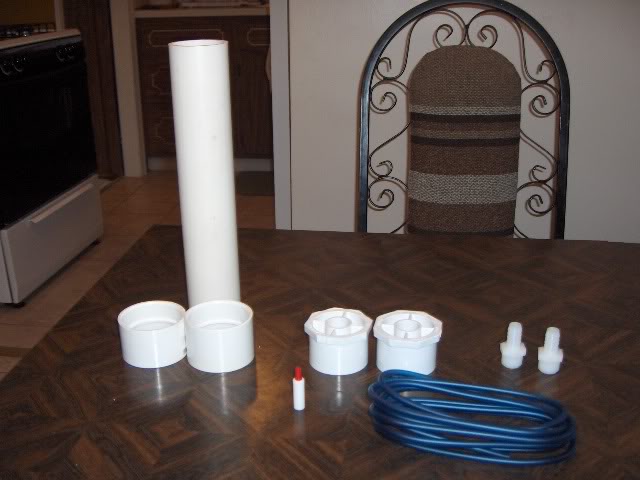
Parts list
12" of 2" PVC Pipe
2x 2" to 1/2 Reducer
2x 1/2" hose barb
2x 2" Couplers
Silicon Tubing
Fine to medium Airstone
Aquarium Safe Silicone Sealer
Check Valve
1) I cleaned all the Pieces! who knows what gets on this stuff from the store.
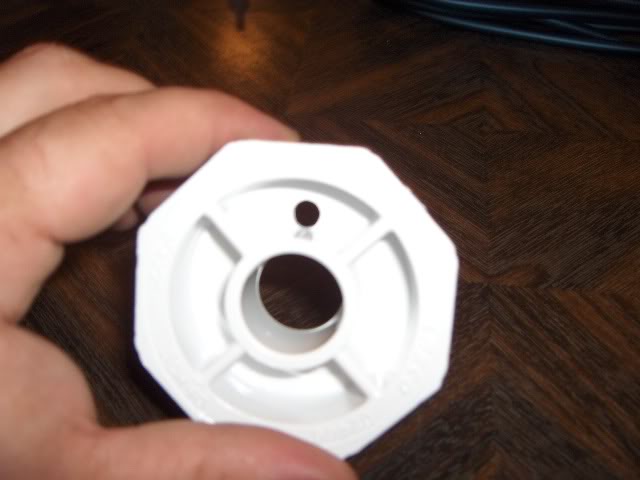
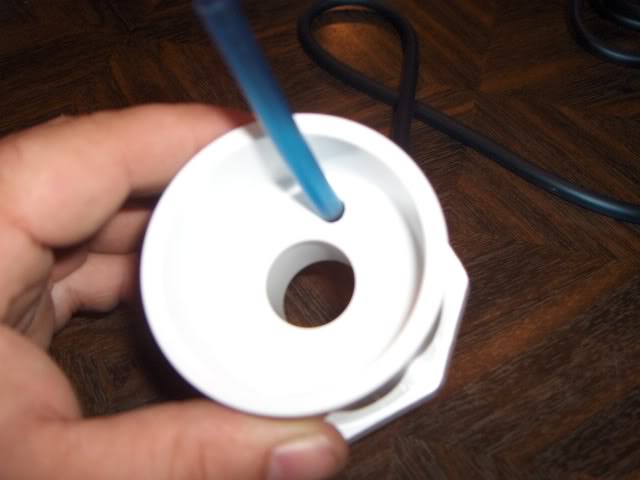
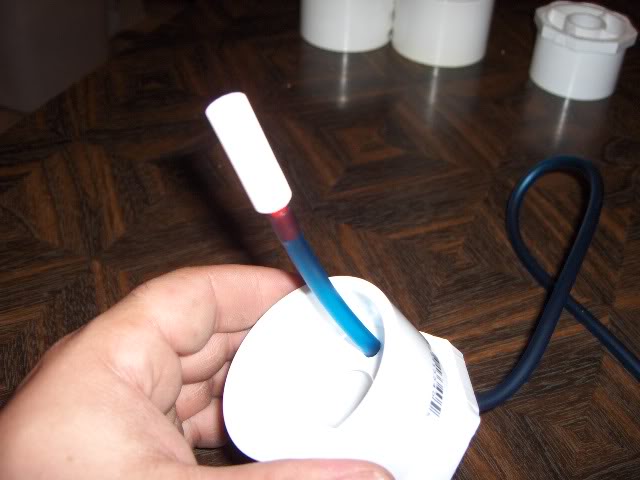
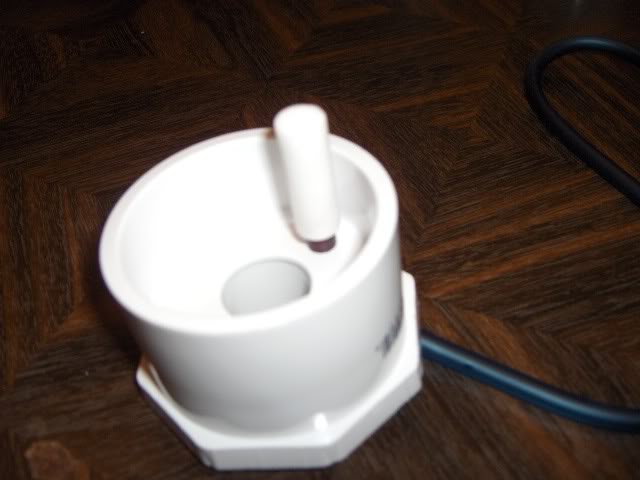
2) I drilled a 1/4" hole in the end of one of the reducers stuck the Silicon tubing into the hole and attached the airstone into the tubing on the other side and pushed it back into the drilled hole. When the fitting for the airstone is pushed into the tubing it obviously expands the tubing so I pulled the tubing as if I were trying to pull it out of the Reducer which made a very tight and snug fit. I then added some silicone sealer to the outside to make sure there were no leaks.
The rest is just as easy.
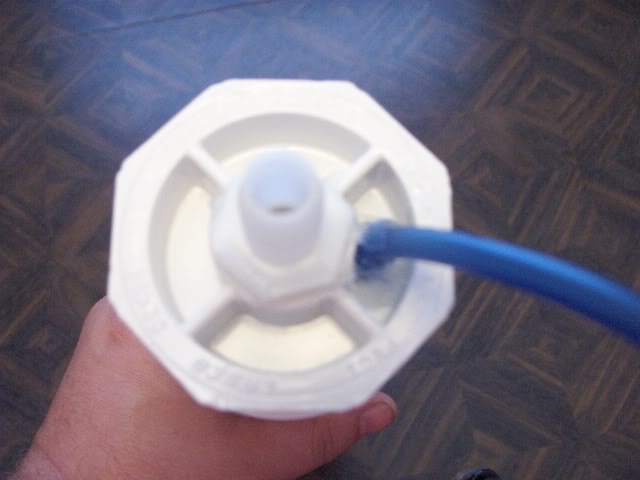
I used silicone sealer rather than buying PVC primer and cement. The pieces already fit together very tight. I made a very generous bead of sealer to the hose barb where it goes into the reducer then put it in place and used my finger to smooth out the excess silicone on the inside and outside of the reducer.
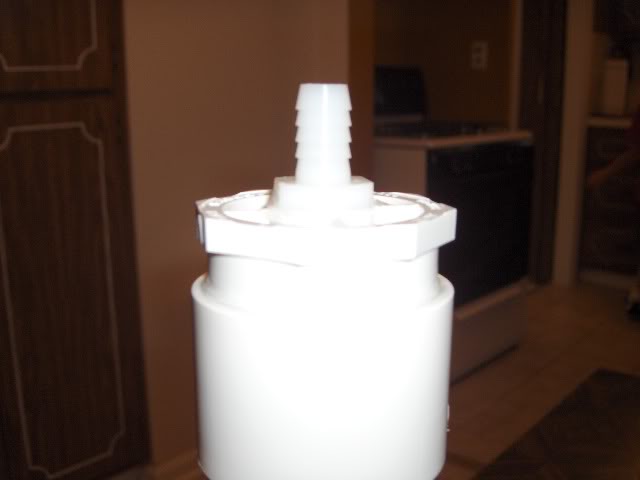
Then I made a good size bead of silicone sealer on the inside of the couplers enough to where when you pushed the coupler and the Reducer together that there would be a good bit squeezed through on the inside. I then used my finger again to smooth out the excess sealer on the inside and added a small bead to the outside where the 2 fit together.
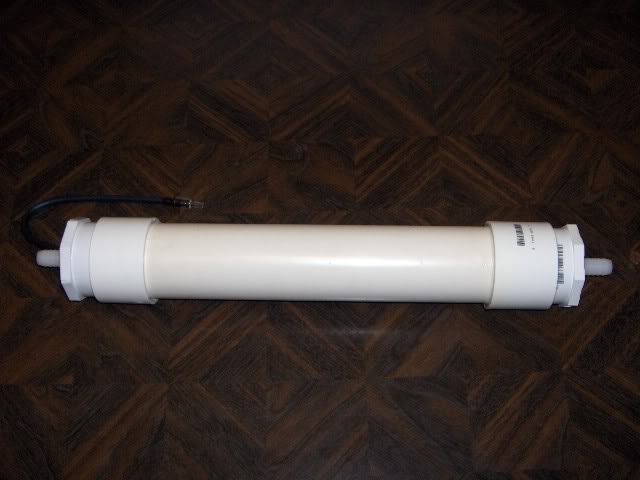
Then I did the same for the 12" piece of pipe.
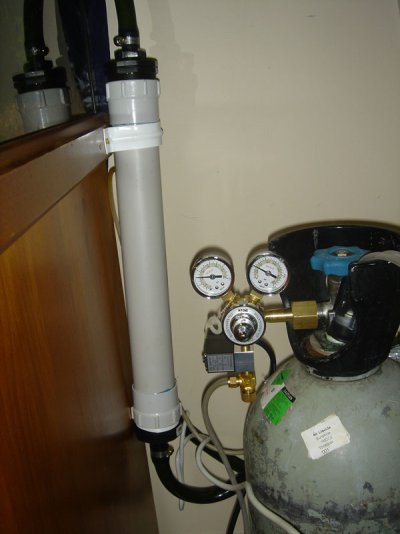
I didnt seal one side because I'm going to get some large bioballs to put on the inside of the reactor to further break up the CO2 bubbles. Here is what it looks like when all fit together.
Parts list
12" of 2" PVC Pipe
2x 2" to 1/2 Reducer
2x 1/2" hose barb
2x 2" Couplers
Silicon Tubing
Fine to medium Airstone
Aquarium Safe Silicone Sealer
Check Valve
1) I cleaned all the Pieces! who knows what gets on this stuff from the store.
2) I drilled a 1/4" hole in the end of one of the reducers stuck the Silicon tubing into the hole and attached the airstone into the tubing on the other side and pushed it back into the drilled hole. When the fitting for the airstone is pushed into the tubing it obviously expands the tubing so I pulled the tubing as if I were trying to pull it out of the Reducer which made a very tight and snug fit. I then added some silicone sealer to the outside to make sure there were no leaks.
The rest is just as easy.
I used silicone sealer rather than buying PVC primer and cement. The pieces already fit together very tight. I made a very generous bead of sealer to the hose barb where it goes into the reducer then put it in place and used my finger to smooth out the excess silicone on the inside and outside of the reducer.
Then I made a good size bead of silicone sealer on the inside of the couplers enough to where when you pushed the coupler and the Reducer together that there would be a good bit squeezed through on the inside. I then used my finger again to smooth out the excess sealer on the inside and added a small bead to the outside where the 2 fit together.
Then I did the same for the 12" piece of pipe.
I didnt seal one side because I'm going to get some large bioballs to put on the inside of the reactor to further break up the CO2 bubbles. Here is what it looks like when all fit together.
 Do you have anything inside yours and how well does OUR (lol) design work?